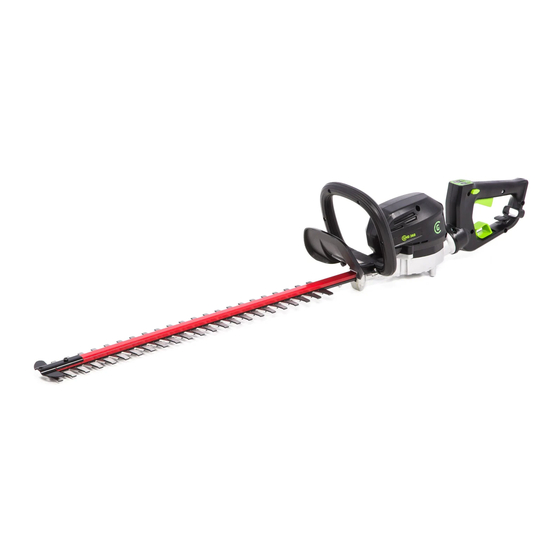
Summary of Contents for GreenWorks Commercial GHD260
- Page 1 82V CORDLESS HEDGE TRIMMER GHD 260 Owner’s Manual TOLL-FREE HELPLINE: 1-855-470-4267 www.GreenWorksTools.com Read all safety rules and instructions carefully before operating this tool.
-
Page 2: Table Of Contents
CONTENTS Contents ..........................2 Specifications ........................2 Important Safety Instructions ....................3 Symbols ..........................6 Know Your Hedge Trimmer ....................8 Assembly ..........................9 Operation ........................... 10 Maintenance ........................12 Environmentally Safe Battery Disposal ................13 Troubleshooting ......................... 14 Limited Warranty ........................ 16 Exploded View ........................ -
Page 3: Important Safety Instructions
IMPORTANT SAFETY INSTRUCTIONS W A R N I N G Read all safety warnings and all instructions. Failure to follow the warnings and instructions may result in electric shock, fire, and/or serious injuries. Save all warnings and instructions for future reference. The term “power tool”... - Page 4 IMPORTANT SAFETY INSTRUCTIONS F. Dress properly. Do not wear loose clothing or jewelry. Keep your hair, clothing and gloves away from moving parts. Loose clothes, jewelry, or long hair can be caught in moving parts. G. If devices are provided for the connection of dust extraction and collection facilities, ensure these are connected and properly used.
- Page 5 IMPORTANT SAFETY INSTRUCTIONS 6. SERVICE A. Have your power tool serviced by a qualified repair person using only identical replacement parts. This will ensure that the safety of the power tool is maintained. HEDGE TRIMMER SAFETY WARNINGS • Use both hands when operating the hedge trimmer. Using one hand could cause loss of control and result in serious personal injury.
-
Page 6: Symbols
SYMBOLS Some of the following symbols may be used on this product. Please study them and learn their meaning. Proper interpretation of these symbols will allow you to operate the product better and safer. SYMBOL NAME DESIGNATION/EXPLANATION Volts Voltage Amperes Current Hertz Frequency (cycles per second) - Page 7 SYMBOLS The following signal words and meanings are intended to explain the levels of risk associated with this product. SYMBOL SIGNAL MEANING Indicates an imminently hazardous situation, which, if not avoided, DANGER will result in death or serious injury. Indicates a potentially hazardous situation, which, if not avoided, WARNING could result in death or serious injury.
-
Page 8: Know Your Hedge Trimmer
KNOW YOUR HEDGE TRIMMER On/off power Auxiliary button Anti-jamming handle button Micro switch Guard Trigger switch Blade Rear handle Socket Blade cover Cord Rotating handle retainer release FIG.1 KNOW YOUR HEDGE TRIMMER (See Figure 1.) The safe use of this product requires an understanding of the information on the product and in this operator’s manual as well as a knowledge of the project you are attempting. -
Page 9: Assembly
ASSEMBLY UNPACKING • This product requires no assembly. • Carefully remove the product and any accessories from the box. Make sure that all items listed in the packing list are included. • Inspect the product carefully to make sure no breakage or damage occurred during shipping. •... -
Page 10: Operation
OPERATION CONNECTING THE BATTERY TO THE HEDGE TRIMMER (See Figure 2.) IMPORTANT! The battery pack is not charged when it is purchased. Before using the hedger for the first time, place the battery pack on the battery charger and charge. Make sure to read all safety precautions, and follow the instructions in the Battery Charger section. - Page 11 OPERATION IMPORTANT! DO NOT remove the blade assembly unless it needs sharpening, straightening, or replacing. Take it to a person for repair. W A R N I N G Follow these instructions in order to avoid injury and to reduce the risk of electric shock or fire: •...
- Page 12 OPERATION USING THE ROTATING REAR HANDLE (See Figure 4.) 1. Place the hedge trimmer on a flat and even surface. 2. Make sure that you released the trigger switch. 3. Pull the rotation lever (1) and begin turning the rear handle. Release the rotation lever and turn the handle 90 degrees to either side until it clicks into place and the lever locks in.
-
Page 13: Maintenance
MAINTENANCE W A R N I N G To avoid risk of fire, electric shock, or electrocution: • Do not use a damp cloth or detergent on the battery or battery charger. • Always remove the battery pack before cleaning, inspecting, or performing any maintenance on the hedge trimmer. -
Page 14: Environmentally Safe Battery Disposal
ENVIRONMENTALLY SAFE BATTERY DISPOSAL The following toxic and corrosive materials are in the batteries used in this hedge trimmer battery pack: Lithium-Ion, a toxic material. W A R N I N G All toxic materials must be disposed of in a specified manner to prevent contamination of the environment. -
Page 15: Troubleshooting
TROUBLESHOOTING PROBLEM POSSIBLE CAUSE SOLUTION Motor fails to start Battery is not secure. To secure the battery pack, make sure when switch trigger is the latches on the top of the battery depressed. pack snap into place. Battery is not charged. Charge the battery pack according to the instructions included with your model. -
Page 16: Limited Warranty
LIMITED WARRANTY GREENWORKS™ hereby warranties this product, to the original purchaser with proof of purchase, for a period of four (4) years against defects in materials, parts or workmanship. GREENWORKS™, at its own discretion will repair or replace any and all parts found to be defective, through normal use, free of charge to the customer. -
Page 17: Exploded View
EXPLODED VIEW... - Page 18 EXPLODED VIEW...
-
Page 19: Parts List
PARTS LIST PART NO. DESCRIPTION 311003126 KIT, ECCENTRIC BLOCK ASSEMBLY 311013126 KIT, TIP GUARD ASSEMBLY 311023126 KIT, PCB ASSEMBLY 311033126 KIT, SCABBARD 311043126 KIT, BLADE ASSEMBLY 311053126 KIT, RIGHT HANDLE ASSEMBLY 311063126 KIT, RIGHT HOUSING ASSEMBLY 311073126 KIT, LEFT HANDLE ASSEMBLY 311083126 KIT, LEFT HOUSING ASSEMBLY 311093126... - Page 20 Greenworks Tools PO Box 1238 Mooresville, NC 28115 TOLL-FREE HELPLINE: 1-855-470-4267 Rev: 00 (02-08-17) Printed in China on 100% Recycled Paper...


Need help?
Do you have a question about the GHD260 and is the answer not in the manual?
Questions and answers