Advertisement
WRONG!
RIGHT!
Note: A switch can be added
between the red lead and the load
to switch off at selected times
after dark.
Line #1
Line #2
Blk. Wht.
Red
Specifications:
Operating Temperature Range: -40˚ to 150˚F (-40˚ to 67˚C).
Voltage: 347 Volts
Frequency: All controls operate on 50 or 60 hertz.
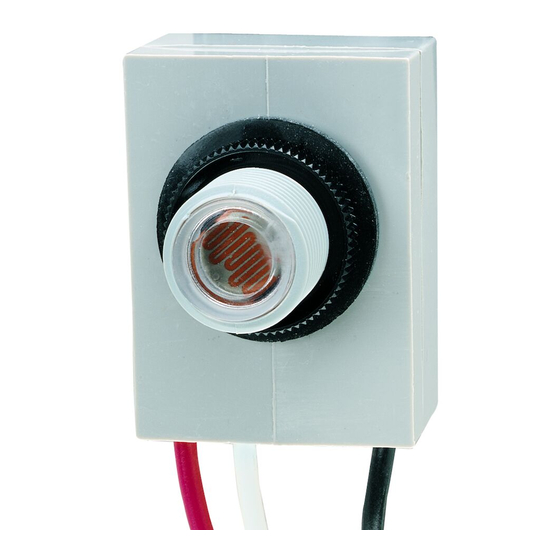
Instructions for installing K4XXX
and LC4XXX series photo controls
Common problems - read first!
1. Do not face the photocell into the midday sun. If installed on
the south side of a building, face east or west or point the photo
control down toward the ground.The best direction to face the
photo control is north.
2. Do not face the photocell whee it can see artificial light.
Light from windows, signs, street lights, etc., will cause the photo
control not to switch on.The photo control should not be
positioned so that it sees the light it is controlling (or reflected
light).These conditions will cause the light to cycle on and off.
3. Do not install the photo control with wires up unless there
is NO POSSIBILITY of water entering the photo control
around the wires. The photo control must be installed in an
approved weatherproof box. Do not attempt to caulk around the
wires.
4. When you are testing the photo control, be sure to turn
on the power (load will come on) and wait up to 5 minutes
for photocell to switch load off. For further testing cover the
photo control completely with black tape or another dark material
to simulate night conditions. If you can't cover the control with
tape, try covering the photo control with the shipping carton to
simulate night conditions.
Installation Instructions:
1. Turn power off.
2. Line voltage must be the same as indicated on the control label. Check it!
3. Select a location or mount the photo control so that artificial light doesn't cause the unit
to turn off. Do not install the photo control so that it directly faces the midday sun. See
Common Problems 1, 2 and 3 above.
4. The photo control can be mounted in any approved outdoor junction box or fixture (see
illustrations on page 2).
5. Wire the photo control according to the illustrations.
6. Switch power on. the controlled load should turn on regardless of whether you are
installing the unit during the day or at night.
7. If it is daylight the control should switch off within a few minutes. See important note
on next page.
Advertisement
Table of Contents

Related Manuals for Intermatic LC4 Series


Summary of Contents for Intermatic LC4 Series
- Page 1 Instructions for installing K4XXX and LC4XXX series photo controls Common problems - read first! 1. Do not face the photocell into the midday sun. If installed on the south side of a building, face east or west or point the photo control down toward the ground.The best direction to face the photo control is north.
- Page 2 LIMITED WARRANTY If within the warranty period specified, this product fails due to a defect in material or workmanship, Intermatic Incorporated will repair or replace it, at its sole option, free of charge. This warranty is extended to the original household purchaser only IMPORTANT NOTE: and is not transferable.
Need help?
Do you have a question about the LC4 Series and is the answer not in the manual?
Questions and answers