JVC CH-X1500RF Service Manual
Hide thumbs
Also See for CH-X1500RF:
- Instructions manual (13 pages) ,
- Instructions manual (19 pages) ,
- Schematic diagrams (9 pages)
Advertisement
Quick Links
SERVICE MANUAL
03
2003
49804
DISP
INT
CD CHANGER CONTROL
BBE/LEVEL
RPT
RND
F.SEL
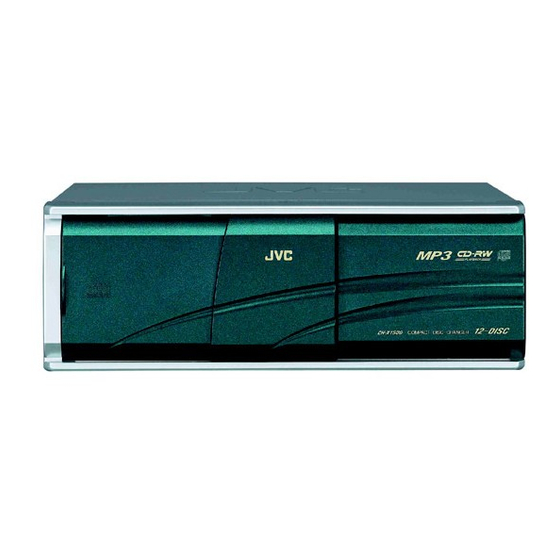
CH-X1500RF is a combination of CH-X1500 and KS-RF150.
KS-RF150 is a combination of Remote control and the RF unit.
1
Important Safety Precautions . . . . . . . . . . . . . . . . . . . . . . . . . . . . . . . . . . . . . . . . . . . . . . . . . . . . . . . . . . . 1-2
2
Disassembly method . . . . . . . . . . . . . . . . . . . . . . . . . . . . . . . . . . . . . . . . . . . . . . . . . . . . . . . . . . . . . . . . . . 1-4
3
Adjustment method. . . . . . . . . . . . . . . . . . . . . . . . . . . . . . . . . . . . . . . . . . . . . . . . . . . . . . . . . . . . . . . . . . . 1-22
4
Description of major ICs . . . . . . . . . . . . . . . . . . . . . . . . . . . . . . . . . . . . . . . . . . . . . . . . . . . . . . . . . . . . . . . 1-30
CD CHANGER
CH-X1500RF
F.SEL
KS-RF150
TABLE OF CONTENTS
COPYRIGHT © 2003 VICTOR COMPANY OF JAPAN, LTD.
CH-X1500
Area Suffix
J
Northern America
CH-X1500RF
No.49804
2003/03
Advertisement

Related Manuals for JVC CH-X1500RF


Summary of Contents for JVC CH-X1500RF
- Page 1 F.SEL Northern America KS-RF150 CH-X1500RF is a combination of CH-X1500 and KS-RF150. KS-RF150 is a combination of Remote control and the RF unit. TABLE OF CONTENTS Important Safety Precautions ............1-2 Disassembly method .
-
Page 2: Important Safety Precautions
Please use enough caution not to see the beam directly or touch it in case of an adjustment or operation check. This unit can only be connected to the JVC car receivers/controllers equipped with MP3-CD changer control functions. If connected to any other receiver/controller, this unit cannot work (even CDs may not play back). - Page 3 CH-X1500RF 1.2 Preventing static electricity Electrostatic discharge (ESD), which occurs when static electricity stored in the body, fabric, etc. is discharged, can destroy the laser diode in the traverse unit (optical pickup). Take care to prevent this when performing repairs.
-
Page 4: Disassembly Method
CH-X1500RF SECTION 2 Disassembly method Perform operations according to the items to be disassembled. 2.1 Replacement of the Pickup (1) After removing the exterior (top and bottom). (2) Proceed to the "2.5.8.Pickup replacement procedure" sec- tion. Bottom cover (3) When applying grease, refer to the Exploded View. Use new grease. - Page 5 CH-X1500RF 2.3.2 Removing the top cover (See fig.5~9) Turn to the top position (at a right (1) Pull out the dampers, being careful not to damage them. angle) ,then the push down to lift off. REFERNCE: When reattaching a damper, insert your finger to push out the center of the damper to mount it on the damper shaft, as shown in Fig.
- Page 6 CH-X1500RF 2.3.3 Removing the fitting (See fig.10) (1) Remove the screw E attaching the fitting. (2) Release the two joints a on the top edge of the fitting, then release the joints b at the left / right bottom edges, and re- move.
- Page 7 CH-X1500RF 2.4 Changer-mechanism section 2.4.1 Remove the sensor assembly unit (See fig.12) Sensor assembly Magazine lock arm (1) Remove the two screws H attaching the sensor assembly unit. (2) Release the springs on the back of the sensor assembly unit from the holes on the chassis.
- Page 8 CH-X1500RF 2.4.4 Remove the rear slider (See fig.15) Can be remove at the stud position (1) Position the unit with the front section facing down. Rotate Rear slider (At the wideness position) the third gear located on the back of the main unit in the di- rection of the arrow (clockwise).
- Page 9 CH-X1500RF 2.4.6 Remove the top plate (See fig.17,18) (1) Remove the nine screws J attaching the top plate. (2) Disconnect the section d attached to the rear of the unit, then lift the top plate slightly. (3) Move the top plate toward the rear of the unit to remove the upper rod from the top plate.
- Page 10 CH-X1500RF 2.4.7 Remove the lifter unit (See fig.19,20) (1) Remove the elevator spring located on the front side of the unit. (Be sure to first remove the spring from the lifter side as shown in the upper part of the diagram.) (2) Lift the lifter unit upward, then remove the lower rod to re- move the lifter unit from the chassis.
- Page 11 CH-X1500RF 2.4.8 Remove the lifter bracket (See fig.21) (1) Remove the two screws K attaching the lifter bracket from the back of the lifter unit. (2) Remove the lower rod. Lifter bracket Fig.21 2.4.9 Remove the side bracket and traverse mechanism assenbly (See fig.22)
- Page 12 CH-X1500RF 2.4.10 Remove the pickup assembly (See fig.23~26) CAUTION: Flexible wire When replacing the flexible wire connected, solder the short- ing round point. Otherwise, the pickup may be damaged. (1) Remove the three screws M attaching the mechanism board on the back of the traverse mechanism assembly.
- Page 13 CH-X1500RF 2.4.11 Removing the tray motor assembly (See fig.27, 28) (1) Remove the two screws R attaching the tray motor assem- bly, and remove. (2) Remove the two screws S attaching the tray motor, and re- move the tray motor assembly from the tray motor holder.
- Page 14 CH-X1500RF 2.5 Precautions reassembling REFERENCE: Mechanism board When reassembling, also refer to the disassembling proce- Flexible wire dures. 2.5.1 Mounting the traverse mechanism assembly (See CN603 fig.30~34) (1) When mounting the pickup assembly, attach the feed slide shaft assembly to the traverse chassis. Apply E-JC-525 grease to the shaft.
- Page 15 CH-X1500RF 2.5.2 Mounting the lifter unit (See fig.35~37) (1) Insert the shafts e of the traverse mechanism assembly into the slide grooves f on the lifter unit. (2) Move the hook of the lifter unit to the edge, and move the sliding lever inside the side bracket unit to the edge as well.
- Page 16 CH-X1500RF 2.5.3 Mounting the chassis (L) assembly and chassis (R) Lifter unit assembly (See fig.38~40) (1) Attach the lower rod to the chassis (R) assembly. While shifting the rod toward the front side, mount the rod on the lifter unit.
- Page 17 CH-X1500RF 2.5.4 Mounting top plate (See fig.41~44) (1) Mount the upper rod on the lifter side and set it on the rear of the top plate, then mount the other end of the upper rod to k . (2) Check that the five points l, m, n, o and p are correctly positioned.
- Page 18 CH-X1500RF 2.5.5 Mounting the front slider and rear slider (See fig.45, 46) (1) Position the unit with the rear side facing down, then rotate Stud the third gear in the direction of the arrow (clockwise) until E-washer the lift arm comes to the position at which the holes are ex- Front slider posed.
- Page 19 CH-X1500RF 2.5.6 Mounting the sensor board assembly (See fig.47) Sensor board assembly (1) Attach the longer spring to the white resin, and attach the shorter spring temporarily to the sensor assembly bracket. (2) Mount the sensor assembly so that the shaft of the lift arm...
- Page 20 CH-X1500RF 2.5.8 Pickup replacement procedure (See fig.49~55) Main board Third gear (1) Remove the bottom cover, front panel and top cover of the exterior section. (2) Remove the card wire from the connector CN604 on the mechanism board. (3) Rotate the rear slider and third gear in the lifter section counterclockwise and then the traverse mechanism as- sembly is move in the lowermost (bottom) position.
- Page 21 CH-X1500RF Flexible wire Pickup Soting round point Fig.52 Shift approx.30mm Pickup Spring Lifter unit lever Fig.55 Feed slide shaft assembly Lack arm Fig.53 Pickup assembly Shaft holder Feed slide shaft assembly Middle gear Traverse chassis Fig.54 (No.49804)1-21...
-
Page 22: Adjustment Method
CH-X1500RF SECTION 3 Adjustment method 3.1 Forced eject procedures Magazine eject does not function. Completed RESET (Press EJECT for 3 sec.) Check that the trays remain no more than 10 mm inside the magazine. Are trays stored in the magazine? Check visually. - Page 23 CH-X1500RF 3.2 Troubleshooting 3.2.1 Servicing procedures for CH-X1500 error displays Error display Servicing procedure E1: Eject error The magazine cannot be ejected until S601 (magazine switch) turns off. Can the magazine be ejected? YES 1, NO 1 The magazine switch (S601) does not turn off even though the magazine is completely ejected.
- Page 24 CH-X1500RF 3.2.2 CH-X1500 Error code The following error codes can be displayed and stored in up to 3 memories when the KD-MX3000 is used with the controller. Refer to the KD-MX3000 service manual regarding error code indication. The error code indication when using the earlier controller is the same as the CH-X99,KD-MK88 and other 12CD changer models.
- Page 25 CH-X1500RF 3.3 Flow of functional operation until TOC read Power ON When the laser diode correctly Set Function to CD When the pickup correctly moves emits to the inner area of the disc Microprocessor $ 84 Microprocessor Disc inserted commands...
- Page 26 CH-X1500RF 3.3.1 General section Turn the power on with no magazine loaded. Reset Move the lifter until it The lifter moves up or Check the linear position comes to the STOP down and stops. sensor (VR601). position (shipping position). The position motor does Check the wiring of the not function.
- Page 27 CH-X1500RF 3.3.2 Feed section Is the voltage output at Is the wiring for IC521 Is 5V present at IC581 Check CD 9V IC521 pin u 5V or 0V? (90) (100) correct? pin 6? and 5V. Check the vicinity of IC521.
- Page 28 CH-X1500RF 3.3.6 Signal processing section Is the sound output from No sound from either Compare the L-ch and both channels (L, R)? channel. R-ch to locate the defective point. Normal Is 9V present at IC101 pin Check the vicinity of the...
- Page 29 CH-X1500RF 3.4 Maintenance of laser pickup 3.5 Replacement of laser pickup (1) Cleaning the pick up lens Before you replace the pick up, please try to clean the lens Turn off the power switch and,disconnect the with a alcohol soaked cotton swab.
-
Page 30: Description Of Major Ics
CH-X1500RF SECTION 4 Description of major ICs 4.1 AK4381VT-X (IC121) : 2ch DAC • Pin layout • Pin functions Pin No Symbol Function MCLK Master clock input pin BICK Audio serial data clock pin SDTI Audio serial data input pin... - Page 31 CH-X1500RF 4.2 DB4833FVE-W (IC502) : Voltage detector • Pin layout • Block diagram VOUT Vref • Pin functions Pin No Symbol Function VOUT Reset output Sub slate (connect to GND) N.C. Non connect Power supply voltage (No.49804)1-31...
- Page 32 CH-X1500RF 4.3 BD7961FM-X (IC681) : Power driver • Pin layout & Block diagram Vcc2 GND3 Vcc3 Vcc1 (REG GND) (POW Vcc BIAS (POW Vcc (POW Vcc CH1~4) CH5/6) REG Vcc) MUTE (CH1~CH4) CONT1 CONT2 REG2 REG1 Level shift Level shift...
- Page 33 CH-X1500RF 4.4 BR24C01AFV-W-X (IC503) : EEPROM • Pin layout • Block diagram 1kbit EEPROM ARRAY 8bit 7bit SLAVE/WORD ADDRESS DATA 7bit DECODER ADDRESS REGISTER REGISTER START STOP CONTROL LOGIC HIGH VOLTAGE GEN. Vcc LEVEL DETECT • Pin function Pin name...
- Page 34 CH-X1500RF 4.5 HD74HCT126T-X : (IC541,IC691) Buffer • Pin arrangement • Pin function Input Output H : High level L : Low level X : Irrelevant Z : Off (Hhigh-impedance)state of a 3-stage output • Block diagram 1-34 (No.49804)
- Page 35 CH-X1500RF 4.6 NJM4565V-X (IC151) : Dual ope amp • Terminal layout & Pin function AOUTPUT A-INPUT A+INPUT B+INPUT B-INPUT B OUTPUT 4.7 NJU7241F25-X (IC653) : Regulator • Pin layout GND 1 5 STB VIN 2 VOUT 3 4 NC • Block diagram...
- Page 36 CH-X1500RF 4.9 TA2157FN-X (IC601) : RF amp • Terminal layout • Block diagram PEAK 50 A BOTTOM PEAK 1.75k 240k 15pF x0.5 240k 15pF x0.5 180k 40pF RFGC (APC SW) (TE BAL) (AGC Gian) (TE BAL) VCTRLPIN Normal mode APC ON...
- Page 37 CH-X1500RF • Pin function Pin No. Symbol Function 3.3V power supply pin Main-beam amp input pin Main-beam amp input pin Sub-beam amp input pin Sub-beam amp input pin Monitor photo diode amp input pin Laser diode amp output pin APC circuit ON/OFF control signal, laser diode (LDO) control signal input or bottom/peak detection frequency change pin.
- Page 38 CH-X1500RF 4.10 TC94A14FA (IC621) : DSP & DAC • Terminal layout & block daiagram Clock generator 1-bit Servo control Digital equalizer Address automatic circuit adjustment circuit Data CLV servo slicer 16 k Synchronous guarantee decoder Audio out Digital circuit output...
- Page 39 CH-X1500RF Symbol I/O Descroption O EFM and PLCK phase difference signal output pin. TMAX O TMAX detection result output pin. TMAX Detection Result TMAX Output Longer than fixed period "PV " Within fixed period "HiZ" Shorter than fixed period "AV "...
- Page 40 CH-X1500RF 4.11 TC94A20F-011 (IC651) : DAC/SRAM built in type D-ROM decoder+ MP3 decoder • Pin layout • Block diagram Switch General Timing inputbport generator 1-40 (No.49804)
- Page 41 CH-X1500RF • Pin functions Pin No Symbol Functions /RESET Hard reset input H:normal L:reset MiMD Micon I/F mode select input /MiCS Micon I/F chip select input /MiLP Micon I/F latch palus input MiDio I/O Micon I/F data input/output /MiCK Micon I/F clock input...
- Page 42 Reset input REMOCON Remocon signal input B.DET Buck up power supply detection P.DET Main power off detection BUS INT JVC BUS communication start interrupu input MP3 REQ CD MP3 request input Non connect EJECT Eject key input VDD0 Connect to 5V...
- Page 43 CH-X1500RF Pin No Symbol Function BUS SO JVC BUS data output BUS SCK I/O JVC BUS colck input/ooutput POSMO+ Position motor control output POSMO- Position motor control output TRAYMO+ Tray motor control output TRAYMO- Tray motor control output 52,53 Non connect...
- Page 44 CH-X1500RF VICTOR COMPANY OF JAPAN, LIMITED AV & MULTIMEDIA COMPANY 10-1,1chome,Ohwatari-machi,Maebashi-city,371-8543,Japan (No.49804) Printed in Japan 200303WPC...
Need help?
Do you have a question about the CH-X1500RF and is the answer not in the manual?
Questions and answers