Bosch Benchmark 800 Series Installation Manual
Built-in combination ovens
Hide thumbs
Also See for Benchmark 800 Series:
- Installation manual (64 pages) ,
- Use and care manual (60 pages) ,
- Installation manual (64 pages)

Related Manuals for Bosch Benchmark 800 Series


Summary of Contents for Bosch Benchmark 800 Series
- Page 1 Built-In Combination Ovens Installation Manual 500/800/Benchmark™ Series HBL5751UC, HBL8751UC, HBLP751UC, HSLP751UC...
-
Page 3: Table Of Contents
Installation ......11 Bosch Combination Ovens ..3 Correctly Lifting the Combination Oven ..12 Preparation . - Page 5 9 IMPORTANT SAFETY INSTRUCTIONS READ AND SAVE THESE INSTRUCTIONS Appliance Handling Safety Safety Definitions Do not lift appliance by door handle. Remove the lower oven door for easier handling and installation. See 9 WARNING “Remove Lower Oven Door Prior to Installation” on page 11.
-
Page 6: Safety Definitions
9 IMPORTANT SAFETY INSTRUCTIONS READ AND SAVE THESE INSTRUCTIONS Appliance Handling Safety Safety Definitions Do not lift appliance by door handle. Remove the lower oven door for easier handling and installation. See 9 WARNING “Remove Lower Oven Door Prior to Installation” on page 11. -
Page 7: Related Equipment Safety
9 IMPORTANT SAFETY INSTRUCTIONS READ AND SAVE THESE INSTRUCTIONS Before installing, turn power OFF at the service panel. Lock service panel to prevent power from being turned ON accidentally. Refer to data plate for more information. See "Data Plate" under "Service" for data plate location. Be sure your appliance is properly installed and grounded by a qualified technician. -
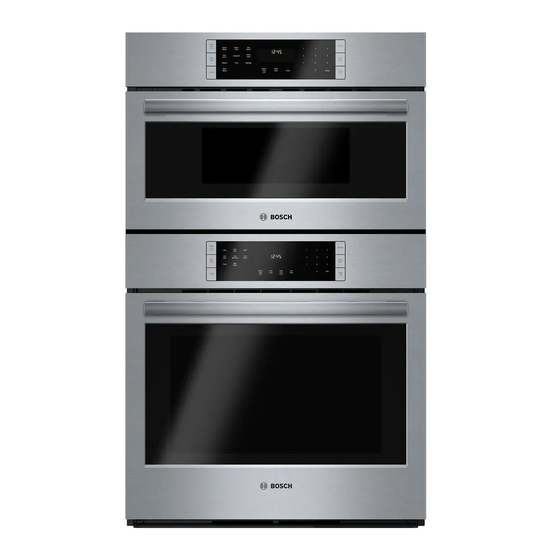
Page 8: Bosch Combination Ovens
The HBL5751UC, HBL8751UC, HBLP751UC, and • The hardware required for mounting the speed HSLP751UC Bosch combination ovens are sold as sets, microwave or steam convection oven on top of the each of which includes two built-in oven components: a traditional oven will be found inside the traditional traditional wall oven (lower oven) and an upper oven that is oven box. -
Page 9: Preparation
Combination Oven Pre-Assembly Checklist Preparation Use this checklist to verify that you have completed each step of the installation process. This can help you avoid Before You Begin mistakes. ___ 1. Before installing the oven, be sure to verify the Tools and Parts Needed cabinet dimensions are correct and the required electrical connections are present. -
Page 10: Cabinet Dimension Requirements
Cabinet Dimension Requirements Combination Oven and Speed Microwave or It is good practice, when an oven is installed at the end of a Steam Convection Oven 30” Flush Mount cabinet run, adjacent to a perpendicular wall, or cabinet Installation door, to allow at least 1/4” (6.4 mm) space between the side of the oven and the wall/door. -
Page 11: Removing Packaging
Combination Oven Pre-Assembly Removing Packaging Preparing Ovens 1. Cut straps on the outside of the boxes. 2. Remove the upper boxed unit of the combination oven. Place ovens in front of the cabinet where it is to be installed 3. Perform the following steps on both units of the so that they are in line with the cabinet cutout. -
Page 12: Installation
Installation Pre-Assembly of the 1. Install both universal connector brackets on top of the lower oven using six of the screws provided. Tighten Combination Oven screws securely, but do not overtighten. Note: The universal connector brackets are interchange- Combination ovens require the units be assembled able for the left and right sides of the oven. -
Page 13: Installation With The Steam Convection Oven
3. Place the speed microwave oven unit on top of the 2. The screw in position A (nearest the inside edge, near universal connector brackets and fasten in place using control panel) must be moved to allow the universal three screws per side. Tighten the screws securely, but bracket to be postioned there. -
Page 14: Connecting The Speed Microwave Oven Or Steam Convection Oven Electrical Conduit To The Lower Oven
Note: The universal connector brackets are interchange- steam convection oven into place on the universal able for the left and right sides of the oven. Be sure the connector brackets, allow these screw heads to slide taller vertical edge of the bracket is positioned to the out- into the slots as shown in the illustration below. -
Page 15: Electrical Installation
2. Remove the cap from the conduit access hole in the All model ovens on the front cover of this installation side of the oven-mounted junction box. instruction manual are dual rated, designed to be connected to either 208 or 240V AC, 60 Hz, 4 wire, single- 3. -
Page 16: Installing The Combination Oven Into The Wall Cabinet
Installing the Combination Three-wire Connection Oven into the Wall Cabinet power supply junction box NOTICE red wires black wires Before installing the combination oven, be sure to white, bare, or verify the cabinet dimensions and electrical green wire UL listed connections. -
Page 17: Correctly Lifting The Combination Oven
4. Holding the door firmly on both sides and using both hands, close the door gently until it stops against the latch levers, about 30º from the closed position. 5. Carefully lift the door up and out of the hinge slots. Hold firmly;... -
Page 18: Installing The Oven Into The Cabinet
Placing the Combination Oven Into the Cabinet Opening 9 CAUTION To avoid damage to the door do not lift, pull or push the unit during installation by using any oven door handle as a gripping point. When lifting the combined unit into place, avoid grasping the upper element to avoid damaging it. -
Page 19: Re-Install The Lower Oven Door
Re-Install the lower oven door: 1. Hold the door firmly in both hands. 2. Hold the door at an angle from the closed position (approximately 7 inches open at the top). Insert the hinges into the slots. You may need to rock the door forward and backward slightly to seat the hinge feet. -
Page 20: Before Calling Service
Before Calling Service Speed Microwave Oven Data Plate See the Use and Care Manual for each unit of the combination oven for troubleshooting information. Refer to the Statement of Limited Warranty in the Use and Care Manuals. To reach a service representative, see the contact information at the front of the Use and Care Manual. - Page 21 Transporte ......2 Instalación del horno combinado en el Hornos combinados de Bosch ..3 gabinete de pared ....12 Preparación .
-
Page 23: Definiciones De Seguridad
9 INSTRUCCIONES DE SEGURIDAD IMPORTANTES LEA Y CONSERVE ESTAS INSTRUCCIONES 9 ADVERTENCIA Definiciones de seguridad No repare ni reemplace ninguna pieza del electrodoméstico, a menos que se recomiende 9 ADVERTENCIA específicamente en los manuales. La instalación, el servicio técnico o el mantenimiento incorrectos Esto indica que pueden producirse la muerte o pueden causar lesiones o daños materiales. -
Page 24: Códigos Y Normas De Seguridad
9 INSTRUCCIONES DE SEGURIDAD IMPORTANTES LEA Y CONSERVE ESTAS INSTRUCCIONES Códigos y normas de Aspectos de seguridad seguridad relacionados al equipo Este electrodoméstico cumple con una o más de las Retire toda la cinta y el embalaje antes de usar el siguientes normas: electrodoméstico. -
Page 25: Hornos Combinados De Bosch
El equipo requerido para montar el horno de Los hornos combinados HBL5751UC, HBL8751UC, microondas rápido o el horno de vapor y HBLP751UC y HSLP751UC de Bosch se venden en convección en la parte superior del horno conjunto; cada uno incluye dos hornos componentes... -
Page 26: Preparación
Preensamblaje de horno combinado ___ 2. Consulte la información adicional que se encuentra Preparación en este manual para obtener información sobre Seguridad, Dimensiones del gabinete, Cómo retirar el embalaje, Instalación eléctrica, Cómo Antes de comenzar probar la instalación y Servicio al cliente. ___ 3. -
Page 27: Requisitos De Dimensiones Del
Requisitos de dimensiones del gabinete Instalación con montaje a ras del horno Cuando se instala un horno al final de una serie de gabinetes, combinado y horno de microondas rápido o adyacente a una pared o puerta de gabinete perpendiculares, es de vapor y convección de 30 pulg. -
Page 28: Gabinete
Preensamblaje de horno combinado Cómo retirar el embalaje Retiro de los soportes del embalaje 1. Corte las correas que se encuentran en la parte exterior de las cajas. (lados izquierdo y derecho) 2. Retire la unidad embalada superior del horno combinado. -
Page 29: Instalación
Instalación Preensamblaje de horno Instale los dos soportes de conexión universales encima del horno inferior utilizando seis de los tornillos combinado proporcionados. Ajuste los tornillos firmemente, pero no los ajuste en exceso. Nota: Los soportes de conexión universales pueden intercam- Los hornos combinados requieren que las unidades se biarse para los lados izquierdo y derecho del horno. -
Page 30: Instalación Con El Horno De Vapor Y
Coloque el horno de microondas rápido encima de los soportes de conexión universales y ajústelo en su lugar utilizando tres tornillos por lado. Ajuste los tornillos firmemente, pero no los ajuste en exceso. Nota: Los tornillos existentes que se encuentran en la base del horno de microondas rápido ayudan con la alineación. - Page 31 Nota: Cuando se utilizan los orificios correctos, la parte delantera del ensamble de corredera se extenderá apenas pasando el borde de la escuadra de soporte. El ensamble de corredera también estará, aproximadamente, a 1/8 pulg. (3 mm) del borde interior de la escuadra de soporte.
-
Page 32: Conexión Del Conducto Eléctrico Del Horno De Microondas Rápido O Del Horno De Vapor Y Convección Al Horno Inferior
Conexión del conducto eléctrico del horno de microondas rápido o del horno de vapor y convección al horno inferior Nota: Al instalar la unidad combinada, el cable de alimentación del horno de microondas rápido o del horno de vapor y convección debe estar conectado adecuadamente a la caja de empalme montada en el horno. -
Page 33: Instalación Eléctrica
Instalación eléctrica Conexión de cuatro cables Fuente de El horno combinado ensamblado debe moverse y alimentación colocarse delante de la abertura del gabinete, y el cable de Caja de empalme Cables negros alimentación del horno inferior debe conectarse a la caja Cables rojos de empalme del gabinete. -
Page 34: Instalación Del Horno Combinado En El Gabinete De Pared
Instalación del horno 1. Asegúrese de leer combinado en el gabinete de todas las advertencias y precauciones del pared manual de instalación respecto del retiro de la puerta antes de AVISO intentar retirarla. Antes de instalar el horno combinado, asegúrese de 2. -
Page 35: Modo Correcto De Levantar El Horno
Modo correcto de levantar el horno para facilitar el levantamiento. Utilice guantes y una camisa combinado de mangas largas, y evite los bordes filosos para reducir el riesgo de que se produzcan cortes o abrasiones en los 9 PRECAUCIÓN brazos o las manos. Se recomienda usar guantes y mangas largas para proteger las manos y los antebrazos de la abrasión y de posibles raspaduras durante el proceso de... -
Page 36: Instalación Del Horno En El Gabinete
Instalación del horno en el gabinete 1. Levante la unidad combinada y colóquela dentro del recorte del gabinete, de modo que evite que la base de la unidad entre en contacto con el piso. 2. Dirija la unidad en forma recta hacia atrás y colóquela dentro del recorte del gabinete. -
Page 37: Cómo Reinstalar La Puerta Del Horno Inferior
Cómo reinstalar la puerta del horno 4. Abra la puerta al inferior: máximo para que se vean las bisagras, las 1. Sujete la puerta palancas de retención firmemente con las y las ranuras. dos manos. 5. Empuje las palancas 2. Sujete la puerta en de retención hacia ángulo respecto de la arriba hasta que se... -
Page 38: Antes De Llamar Al Servicio Técnico
Antes de llamar al servicio técnico Placa de datos del horno de microondas rápido Para obtener información sobre resolución de problemas, consulte el Manual de uso y cuidado de cada unidad del horno combinado. Consulte la Declaración de garantía limitada en los Manuales de uso y cuidado. Para comunicarse con un representante del servicio técnico, consulte la información de contacto que aparece en el frente del Manual de uso y cuidado. - Page 39 1901 Main Street, Suite 600, Irvine, CA 92614 • 800-944-2904 • www.bosch-home.com 9001080875 • Rev. A • 5V0W34 • 03/15 © BSH Home Appliances Corporation, 2015 • All rights reserved...
Need help?
Do you have a question about the Benchmark 800 Series and is the answer not in the manual?
Questions and answers