Table of Contents
Advertisement
Quick Links
Advertisement
Table of Contents

Subscribe to Our Youtube Channel
Related Manuals for CDA HC9606FR


Summary of Contents for CDA HC9606FR
- Page 1 HC9606FR Ceramic hob Installation, use and maintenance www.cda.eu...
-
Page 2: Table Of Contents
Contents: Important Important information Hob layout Using your hob Operating time limiter Triple zone function Dual zone function Auto-heat function Timer/Minute minder Safety key lock Residual heat indicators Efficient use of your hob Care and maintenance Cleaning guide Troubleshooting 20 - 24 Installation Installation - preparation How to install the hob... -
Page 3: Important
Appliance information: Please enter the details on the appliance rating plate below for reference, to assist CDA Customer Care in the event of a fault with your appliance and to register your appliance for guarantee purposes. Appliance Model... -
Page 4: Important Information
(EMC) 2014/30/EU. Parts intended to come into contact with food conform to 1935/2004/EC. IMPORTANT INFORMATION FOR CORRECT DISPOSAL OF THE PRODUCT IN ACCORDANCE WITH EU DIRECTIVE 2012/19/EU. At the end of its working life, the product must be taken to a special local authority waste collection centre or to a dealer providing appliance recycling services. - Page 5 • Do not place hot lids flat on the hob top. A “suction” effect could cause damage to the hob. • Do not drag cookware across the hob top: in the long term, this could cause damage to the hob. •...
-
Page 6: Hob Layout
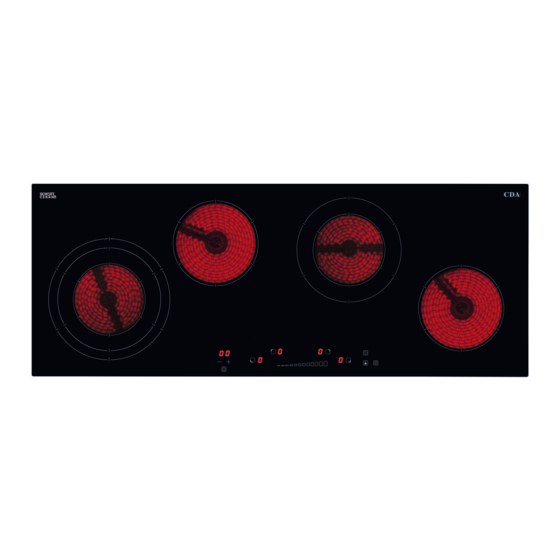
Hob layout Zones: 1. 2.3kW Ø210/175/120 mm 3. 0.7kW/1.7kW Ø 120/180 mm 2. 1.2kW Ø145 mm 4. 1.2kW Ø145 mm Fig. 1 Fig. 2 Control panel: 1. On/off sensor 5. Dual and triple zone sensor 2. Safety key lock sensor with LED 6. -
Page 7: Using Your Hob
Using your hob To switch the hob on • To switch the power on, touch and hold the "On/off sensor" (1) for approximately two seconds. The hob will beep and all displays will show “0”. Please note: If a power level is not set within ten seconds, the hob will switch off automatically. -
Page 8: Operating Time Limiter
sensor (3) and then use the power level slider to return the power level to 0. The cooking zone indicator will display a "0" to confirm that the zone is now inactive. Alternatively you can press the on/off sensor (1). •... -
Page 9: Triple Zone Function
Triple zone function The front-left zone is equipped with a triple zone function that allows you to extend the heating area for the zone. In normal use, the zone functions with just the smaller inner ring until the triple zone function is activated. -
Page 10: Auto-Heat Function
press the dual and triple zone sensor (5) once to extend the zone. The LED above the zone's display will illuminate to show you that the dual zone is active. To deactivate the dual zone function • Simply activate zone adjustment by pressing the relevant zone sensor and then press the dual and triple zone sensor (5). -
Page 11: Timer/Minute Minder
Zone Power Level Maximum Operating Time 1.11 2.44 4.47 5.28 6.29 1.11 2.44 2.44 (minutes) Please note: The auto-heat function is not compatible with heat setting 9 nor the keep-warm function. If a power level (between 1 and 8) is not selected within 10 seconds of preparing the auto-heat function, then the function will be deactivated. - Page 12 until the relevant zone’s LED is flashing. These LEDs are set out in a similar manner to the zones: Central right zone LED Central left zone LED Right zone LED Left zone LED • Set the number of minutes using the power level slider (4). The slider should be used with a swiping motion from left to right using the complete fingertip.
-
Page 13: Safety Key Lock
slider. The minute minder will then begin counting down and you can continue to use the zones as normal. • Once the minute minder has elapsed the hob will emit an acoustic signal. To cancel the acoustic signal simply press any sensor field. To cancel the minute minder •... -
Page 14: Residual Heat Indicators
Please note: The safety key lock may activate when the power supply is activated for the first time or resumed after an interruption. Simply deactivate the safety key lock as per the above step and proceed to use the hob as normal. Residual heat indicators The hob is equipped with residual heat indicators to warn when any of the zones are still hot to the touch after use. - Page 15 Fig.3 Zone Size Minimum Pan Size (mm) Maximum Pan Size (mm) Ø 120mm Ø 145mm Ø 175mm Ø 180mm Ø 210mm Please note: Locating a pan in the centre of the zone markings will ensure optimum efficiency. It is very important that the pans used on the hob are made of a suitable material and have the correct type of base.
-
Page 16: Care And Maintenance
Care and maintenance Always disconnect the appliance from the power supply before undertaking any cleaning or maintenance. Important: • Steam cleaners must not be used when cleaning this appliance. • You should use a non-abrasive cleaner to clean the hob top. Any abrasive cleaner (including Cif) will scratch the surface and could erase the control panel markings. - Page 17 2. Check that the mains supply has not been switched off. 3. Check that the fuse in the spur has not blown. In the event of a fault with the hob please advise CDA Customer Care. Contact CDA Customer Care...
-
Page 18: Troubleshooting
The hob is not working and the The electronics touched too briefly (less again and for longer display shows a non-standard are not functioning Call CDA Customer Care than a second) graphic correctly Sensor fields do not The hob is not working and the... - Page 19 Should any error code show on the zone displays, or the above steps not resolve an issue, please contact CDA Customer Care for assistance. Contact details are on page 17. IMPORTANT - PLEASE NOTE: In the event of any breakage, crack or cracking –...
-
Page 20: Installation - Preparation
Installation - preparation Installation above a cupboard unit Unpacking the hob: Take care not to lose, drop or 25mm mishandle any parts. 35mm Fitting position of the hob: 500 x 10mm This appliance must be, when installed, a minimum of 50mm from any back wall and a minimum of 55mm away from any adjacent vertical 5-10mm... - Page 21 If fitting a cooker hood above the hob: If a CDA cooker hood is to be installed above the hob, the height of the hood above the hob must be at least 600mm (650mm is recommended) (Fig.6). If the instructions supplied with the hood...
-
Page 22: How To Install The Hob
How to install the hob Overall dimensions of the hob: Width: 900 mm Depth: 350 mm Worktop cut-out dimensions: Width: 885 mm Depth: 340 mm 1 - Worktop 1. Make the required hole in the worktop. 2 - Hob seal 3 - Ceramic hob Before doing this, you must check the Fig.7... - Page 23 2. Make sure that the worktop is clean and dust free and insert the hob into the cut-out opening. Press the hob firmly into place so that the seal connects with the worktop (Fig. 7). If fitting the hob into a 28-40mm worktop: The four fixing clips supplied should be used.
-
Page 24: Mains Electrical Connection
Mains electricity connection Warning! This appliance must be earthed. We recommend that the appliance is connected by a qualified electrician, who is a member of the N.I.C.E.I.C. and who will comply with the I.E.T. and local regulations. Live L: BN - brown Neutral N: BU - blue Earth PE: GNYE -green/yellow This appliance is intended to be... - Page 25 • The current rating of the fuse or circuit breaker protecting this appliance should be marked on the socket outlet. • Assembly and electrical connection should be carried out by specialised personnel. • When installing this product we recommend you seek the help of another individual.
- Page 26 Notes:...
-
Page 27: Energy Efficiency Information
Energy E ciency Information Attribute Symbol Value Units CDA model HC9606FR Type of hob Built in Number of cooking zones and/or areas Heating technology (induction cooking Radiant zones and cooking areas, radiant cooking zones cooking zones, solid plates) For circular cooking zones or area: Ø... - Page 28 For more information please contact: The Sales Department on 01949 862 010 or email sales@cda.eu Customer Care Department. The CDA Group Ltd, Harby Road, Langar, Nottinghamshire, NG13 9HY 01949 862 012 F: 01949 862 003 E: customer.care@cda.eu www.cda.eu...
Need help?
Do you have a question about the HC9606FR and is the answer not in the manual?
Questions and answers