Table of Contents
Advertisement
Quick Links
Advertisement
Table of Contents

Related Manuals for Eminent EM4585


Summary of Contents for Eminent EM4585
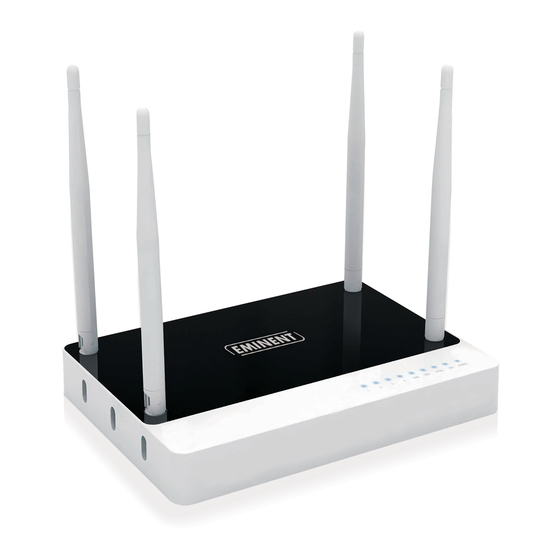
- Page 1 EM4585 Concurrent Dual Band Gigabit Router (UK)
-
Page 2: Table Of Contents
ENGLISH EM4585 Product Title from CMS Table of contents 1.0 Introduction ......................3 1.1 Packing contents ....................3 2.0 Configure your wireless dual band router ............... 3 2.1 Connecting the router ..................4 2.2 Configuring the router for connection with the Internet ........4 2.3 Determining the connection method .............. -
Page 3: Introduction
Congratulations with the purchase of this high-quality Eminent product! This product has undergone extensive testing by Eminent’s technical experts. Should you experience any problems with this product, you are covered by a five-year Eminent warranty. Please keep this manual and the receipt in a safe place. -
Page 4: Connecting The Router
ENGLISH Example of EM4585 as wireless router 2.1 Connecting the router Turn off your computer. Connect the router to a wall outlet using the supplied power adapter. Connect the supplied UTP network cable to the ‘WAN’ port of the router. -
Page 5: Determining The Connection Method
ENGLISH Turn on your computer. Open your Internet browser (e.g. Internet Explorer or Firefox). Type ‘http://192.168.8.1’ in the address bar. Press the enter key or click ‘Go to’. A new screen with three different icons appears. These icons are named ‘Setup Tool’, ‘Internet Wizard’... -
Page 6: Configuring The Router For A Static Internet Connection
ENGLISH Click ‘Next’. Select ‘DHCP Method’. Click ‘Next’. Click ‘Next’. Click ‘Save’ and ‘Close’. The wizard will now save the settings en will close the screen automatically. You now have a working internet connection. In order to prevent losing your password, write down the altered password below: Password:____________________________________________________________ 2.3.2 Configuring the router for a Static Internet connection... -
Page 7: Securing A Wireless Network
ENGLISH 2.4 Securing a wireless network To avoid having uninvited guests probing your wireless network we strongly recommend securing your wireless network. There are several security methods which can secure the network at different levels. To apply a method to your network it is required that all wireless network devices support this method. -
Page 8: Wep Security
ENGLISH 19. Fill out a password in the ‘Network Key’ field (e.g. ‘yourname1’). Do not use any punctuation marks and make sure the password is at least 8 characters long! 20. Write down the network name and the chosen password*. 21. -
Page 9: Setting Up A Secured Connection Using Wps
_____________________________________________________ 3.0 Setting up a secured connection using The EM4585 can be secured using WPS. WPS is a handy feature, which allows you to secure your wireless network by pressing the WPS button on both your Eminent router and your wireless WPS adapter. The Eminent router and your wireless WPS device will then automatically ‘agree’... - Page 10 If correct, Windows will now ask you to fill out your wireless security key. Also, the lower part of the screen shows you to push the WPS button on the router. Press the WPS button on the Eminent router for approximately 1-2 seconds (not longer!).
-
Page 11: Manual Configuration As An Access Point
You will now be able to access the internet. Hint: The WPS button also acts as a reset button. If you press the WPS button too long, (for example: 8~10 seconds), the Eminent router will be set back to factory defaults. -
Page 12: Connecting The Router
12 | ENGLISH Example of EM4585 as an Access Point 4.1 Connecting the router Turn off the computer. Connect the router to a wall outlet using the supplied power adapter. Connect the supplied UTP network cable to the ‘LAN 4’ port of the router. -
Page 13: Configuring The Router As A Signal Booster (Wds)
(2) and of your wireless router / access point (1) must be modified. In the example below we use 2 pieces EM4585. Note: WDS is not a standard protocol and may not work between different brands and models. -
Page 14: Connecting The Signal Booster (2)
14 | ENGLISH EM4585 as signal repeater 5.1 Connecting the signal booster (2) Turn off your computer. Connect the router to a wall outlet using the supplied power adapter. Connect the supplied UTP network cable to the ‘LAN 1’ port of the router. -
Page 15: Securing Your Signal Booster (2) (Wpa2 Aes)
15 | ENGLISH 5.2 Securing your signal booster (2) (WPA2 AES) If you use the router as a signal booster with another device, WPA2 AES security is supported. If you use another type of wireless router, WEP security is recommended. To avoid having uninvited guests probing your wireless network we strongly recommend securing your wireless network. -
Page 16: Configuring The Signal Booster (2)
16 | ENGLISH Key: ____________________________________________________ Channel: ____________________________________________________ 5.3 Configuring the signal booster (2) Turn on your computer. Open your internet browser (e.g. Internet Explorer or Firefox). Type ‘http://192.168.8.1’ in the address bar. Press the ‘Enter key’ or click ‘Go to’. Click ‘Setup Tool’. -
Page 17: Connecting Your Wireless Router With The Signal Booster (2)
17 | ENGLISH Press the ‘Enter’ key or click ‘Go to’. Click ‘Wireless Wizard’. You will now be asked for a ‘Username’ and a ‘Password’. Fill out ‘admin’ in the ‘Username’ field and ‘admin’ in the ‘Password’ field and press the enter key. The wizard appears in a pop-up screen. -
Page 18: Completing The Installation Of The Signal Booster
18 | ENGLISH Type ‘http://192.168.8.1’ in the address bar. Click ‘Setup Tool’.. You will now be asked for a ‘Username’ and a ‘Password’. Fill out ‘admin’ in the ‘Username’ field and ‘admin’ in the ‘Password’ field and press the enter key. Click ‘Advanced Setup’... -
Page 19: Configuring The Router As A Signal Booster (Wireless Multi Bridge)
If your own modem or your other wireless router has no support for WDS, you can setup the EM4585 as a signal booster by using the Wireless Multi Bridge option. Using this option, the Eminent router will connect to your wireless modem or router using the same technique as your computer does. -
Page 20: Configuring The Wireless Multi Bridge Settings
IP-Address ‘192.168.1.1’, you need to make sure the Eminent router is set to this IP-range. You can set the Eminent router to ‘192.168.1.200’. From that moment on, the Eminent router is accessible using this new IP-Address. -
Page 21: Configuring The Wireless Network On Your Computer
21 | ENGLISH 7.0 Configuring the wireless network on your computer Now that the router has been secured you will need to configure the computer itself so it can recognize your secured wireless network and will be able to make a connection. Windows XP, Windows Vista, Windows 7 and Windows 8 are at this moment the most commonly used operating systems. -
Page 22: Firewall Settings
22 | ENGLISH Select ‘Add a network that is in range of this computer’ in the next screen. Select your own network. Click ‘Connect’. Your computer will display the following message: ‘Type the network security key or passphrase for your network’. Enter your security key. Click ‘Connect’. -
Page 23: Url Filtering
The latest Frequently asked questions for your product can be found on the support page of your product. Eminent will update these pages frequently to assure you have the most recent information. Visit www.eminent-online.com for more information about your product. -
Page 24: Warning And Points Of Attention
Warning: In most cases this concerns an electronic device. Wrong/improper use may lead to (severe) injuries! Repairing of the device should be done by qualified Eminent staff. The warranty immediately voids when products have undergone self repair and/or by misuse. For extended warranty conditions, please visit our website at www.eminent-... -
Page 25: Warranty Conditions
Eminent products. Eminent products with an internal hard disk have a limited warranty period of two years on the hard disk. Eminent could not be held responsible for any data lost. Please make sure that if the product stores data on a hard drive or other memory source, you will make a copy before you return the product for repair. -
Page 26: Declaration Of Conformity
I, the undersigned, hereby declare that the equipment Conforms with the essential requirements and other relevant requirements of the R&TTE Directive (1999/5/EC) and to the above standards. Place: Barneveld, The Netherlands Date: 2013-09-26 Name: Marc Pannebakker Signature: EM4585 | 03-2014...
Need help?
Do you have a question about the EM4585 and is the answer not in the manual?
Questions and answers