Fujitsu LifeBook T731 User Manual
Hide thumbs
Also See for LifeBook T731:
- User manual (418 pages) ,
- Operating manual (130 pages) ,
- Repair manual (25 pages)

Related Manuals for Fujitsu LifeBook T731


Summary of Contents for Fujitsu LifeBook T731
- Page 1 User’s Guide Learn how to use your Fujitsu LIFEBOOK T731 Tablet PC Découvrez comment utiliser Guide d’utilisation votre PC Tablette LIFEBOOK Fujitsu T731...
- Page 2 User’s Guide Learn how to use your Fujitsu LIFEBOOK T731 Tablet PC...
- Page 3 All other trademarks mentioned herein are the property of their respective owners. © Copyright 2011 Fujitsu America, Inc. All rights reserved. No part of this publication may be copied, reproduced, or translated, without prior written consent of Fujitsu. No part of this publication may B6FJ-7081-02ENZ0-00...
- Page 4 (408) 746-6000 Declares that product: Base Model Configuration: LIFEBOOK T731 Tablet PC Complies with Part 15 of the FCC Rules. This device complies with Part 15 of the FCC rules. Operations are subject to the following two conditions: (1) This device may not cause harmful interference, (2) This device must accept any interference received, ...
- Page 5 IMPORTANT SAFETY INSTRUCTIONS This unit requires an AC adapter to operate. Use only UL Listed I.T.E. Class II Adapters with an output rating of 19 VDC, with a current of 4.22 A (80 W). AC adapter output polarity: When using your Tablet PC equipment, basic safety precautions should always be followed to reduce the risk of fire, electric shock and injury to persons, including the following: •...
- Page 6 * To order a new battery for your Fujitsu mobile computer, go to the Fujitsu shopping site at www.shopfujitsu.com in the US or www.fujitsu.ca/products/notebooks in Canada. ** RBRC is an independent third party to which Fujitsu provides funding for battery recycling; RBRC is in no way affiliated with Fujitsu.
-
Page 7: Table Of Contents
Fujitsu Contact Information ........14... - Page 8 Display Panel ..........33 Opening the Display Panel .
- Page 9 Fujitsu Driver Update Utility ........76...
- Page 10 ExpressCards..........89 Installing ExpressCards .
- Page 11 Chapter 4 Troubleshooting Your LIFEBOOK Troubleshooting..........106 Identifying the Problem .
- Page 12 Chapter 6 System Specifications Specifications ..........137 Configuration Label .
- Page 13 Appendix A: WLAN User’s Guide Before Using the Optional Wireless LAN ......168 Wireless LAN Device Covered by this Document....168 Characteristics of the WLAN Device .
-
Page 14: Preface
Preface About This Guide The LIFEBOOK T731 Tablet PC from Fujitsu America is a powerful convertible computer. It can be used either as a standard notebook using keyboard input, or in tablet configuration using pen input. It is powered by the new 2nd Generation Intel® Core™ Processor, has a built-in color display with either an active digitizer or optional dual digitizer, and brings the computing power of desktop personal computers to a portable and versatile environment. -
Page 15: Fujitsu Contact Information
LEASE READ ALL WARNING INFORMATION CAREFULLY Fujitsu Contact Information Service and Support You can contact Fujitsu Service and Support in the following ways: • Toll free: 1-800-8Fujitsu (1-800-838-5487) • Website: http://www.computers.us.fujitsu.com/support Before you place the call, you should have the following information ready so that the customer support representative can provide you with the fastest possible solution: •... - Page 16 LINKS Limited Warranty Your LIFEBOOK T731 Tablet PC is backed by a Fujitsu International Limited Warranty. Check the service kit that came with your Tablet PC for the Limited Warranty period and terms and conditions. 15 - About This Guide...
-
Page 17: Getting To Know Your Lifebook
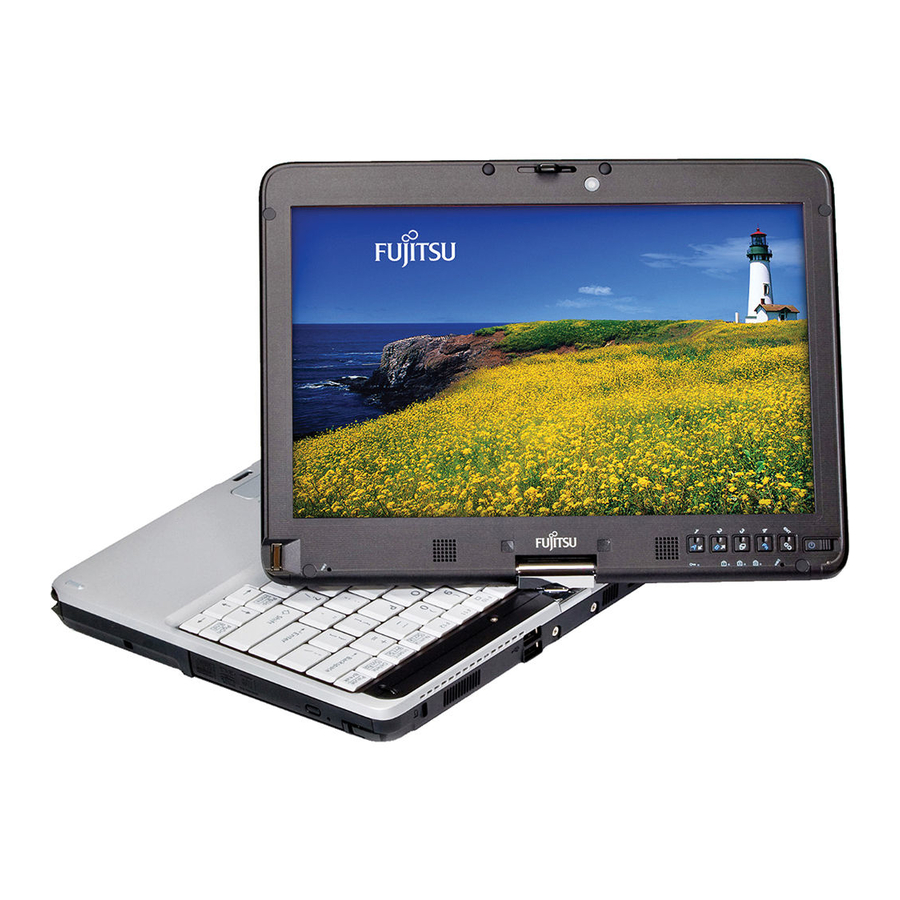
This section describes the components of your Fujitsu LIFEBOOK T731 Tablet PC. We strongly recommend that you read it before using your Tablet PC – even if you are already familiar with Tablet PC computers. Figure 1. Fujitsu LIFEBOOK T731 Tablet PC... -
Page 18: Locating The Controls And Connectors
Specific locations are illustrated in Figures 2 through 6. The table below provides a short description of each icon on the LIFEBOOK T731 Tablet PC and/or optional port replicator. Each of the icons is either molded into or printed on the Tablet PC or port replicator chassis. - Page 19 Connection Tablet PC Purpose Icon SD Card/ The Secure Digital (SD) card/Memory Stick slot allows you to insert a flash Memory Stick Slot memory card for data storage. Flash memory cards allow you to transfer data to and from a variety of different digital devices. Dock port Connect the Tablet PC port replicator or other approved docking device.
- Page 20 Display Latch Optional Web Cam Built-in Microphone Stereo Speaker Display Panel Fingerprint Sensor Stereo Speaker LIFEBOOK Security/ Touchpad Tablet PC Buttons Cursor Control Power/Suspend/ Resume Switch Status Indicator Panel Ambient Light Sensor Headphone Jack Built-in Microphone Microphone Jack Status Indicator Panel IEEE 1394 Jack Wireless LAN/Bluetooth/ Memory Stick/...
-
Page 21: Top Components
Top Components The following is a brief description of your LIFEBOOK Tablet PC’s top components. Display Latch The display latch is used to secure the tablet PC display when it is closed. Web Camera The optional 2.0 megapixel web cam can be used to take pictures of yourself to send over the internet. Display Panel The display panel is a color LED panel with backlighting for the display of text and graphics. - Page 22 Status Indicator Panels The Status Indicator Panels display symbols that correspond to specific components of your Tablet PC. Status indicators are located in two locations: on the left front edge of the system (system status indicators) and below the application buttons (button status indicators). See “Status Indicator Panel” on page 30. Keyboard A full-size keyboard with dedicated Windows keys.
- Page 23 Headphone Jack The headphone jack allows you to connect headphones. See “Headphone Jack” on page 103. Touchpad Pointing Device The Touchpad pointing device is a mouse-like cursor control with a left and right button. See “Touchpad/Active Digitizer/Touchscreen” on page 42. Fingerprint Sensor The fingerprint sensor device allows you to log onto your system and password-protected websites and applications by swiping your finger over the sensor.
-
Page 24: Left-Side Panel Components
ExpressCard Slot Air Vents ExpressCard Eject Button DC Power Jack USB 3.0 Port (with Anytime USB Charge functionality) Figure 3. LIFEBOOK Tablet PC left-side panel Left-Side Panel Components The following is a brief description of your LIFEBOOK Tablet PC’s left-side components. DC Power Jack The DC power jack allows you to plug in the AC adapter to power your LIFEBOOK Tablet PC and charge the internal Lithium ion battery. - Page 25 Air Vents The air vents are used to cool the system to prevent overheating O PROTECT YOUR ABLET FROM DAMAGE AND TO OPTIMIZE PERFORMANCE BE SURE TO KEEP ALL AIR VENTS UNOBSTRUCTED CLEAN AND CLEAR OF DEBRIS HIS MAY REQUIRE PERIODIC CLEANING DEPENDING UPON THE ENVIRONMENT IN WHICH THE SYSTEM IS USED O NOT OPERATE THE ABLET...
-
Page 26: Right-Side Panel Components
Pen Garage Pen Tether Attachment Point Modular Bay Modular Bay Release Latch Figure 4. LIFEBOOK Tablet PC right-side panel Right-Side Panel Components The following is a brief description of your LIFEBOOK Tablet PC’s right-side components. Pen Garage The pen garage is used to store the pen (also called a “stylus”) when not in use.The pen is used as the interface with the active digitizer display. -
Page 27: Back Panel Components
Anti-Theft Lock Slot Air Vents Gigabit LAN (RJ-45) Jack HDMI Port External Video Port USB 2.0 Ports Figure 5. LIFEBOOK Tablet PC back panel Back Panel Components Following is a brief description of your LIFEBOOK Tablet PC’s back panel components. Anti-theft Lock Slot The anti-theft lock slot allows you to attach an optional physical lock down device. - Page 28 O PROTECT YOUR ABLET FROM DAMAGE AND TO OPTIMIZE PERFORMANCE BE SURE TO KEEP ALL AIR VENTS UNOBSTRUCTED CLEAN AND CLEAR OF DEBRIS HIS MAY REQUIRE PERIODIC CLEANING DEPENDING UPON THE ENVIRONMENT IN WHICH THE SYSTEM IS USED O NOT OPERATE THE ABLET IN AREAS WHERE THE AIR VENTS CAN BE OBSTRUCTED SUCH AS IN...
-
Page 29: Bottom Components
Port Replicator Connector Memory Upgrade Dust Filter Compartment Battery Latch Battery Latch Air Vents Lithium ion Battery Bay Figure 6. LIFEBOOK Tablet PC bottom panel Bottom Components The following is a brief description of your LIFEBOOK Tablet PC’s bottom panel components. Memory Upgrade Compartment Your Tablet PC comes with high speed Double Data Rate 3 Synchronous Dynamic RAM (DDR3 1333 MHz SDRAM). - Page 30 Port Replicator Connector This connector allows you to connect the optional Port Replicator to your Tablet PC. Dust Filter The dust filter is used to help remove dust and dirt from your system. See “Cleaning the dust filter” on page 132. Air Vents The air vents allow air to circulate through the system to cool down the components.
-
Page 31: Status Indicator Panel
CapsLk Security NumLk ScrLk Optical/Hard Power Batt 1 Level Batt 2 Level Drive Access External Power Batt 1 Charging Batt 2 Charging Figure 7. Status Indicator Panel Status Indicator Panel The Status Indicator Panel displays symbols and associated LEDs that correspond to specific components of your Tablet PC. -
Page 32: External Power Indicator
• Steady Off: This means that your system is either in Hibernate mode, or that your Tablet PC has been turned off. If you are charging your battery, the Power indicator symbol will remain on even if your LIFEBOOK Tablet PC is shut off. External Power Indicator The external power indicator shows whether your tablet is operating from the AC adapter, the auto/airline adapter or the batteries. - Page 33 • Red, solid: Battery is between 0% and 12% charged. • Orange, blinking: Blinks during battery status measurement (Four seconds after the battery is installed). • Red, blinking: There is a problem with the battery. • Off: There is no battery installed. •...
-
Page 34: Display Panel
Figure 8. Opening the Display Panel Display Panel Your LIFEBOOK T731 Tablet PC contains an LED display panel that is backlit for easier viewing in bright environments. The convertible design of your Tablet PC allows you to open the display fully, rotate it in either direction 180 degrees, and lay it face up on the keyboard. -
Page 35: Using The System As A Tablet
Using the System as a Tablet If you would like to use the system as a tablet, perform the following step • The display can be rotated in either direction, but when returning the system to notebook mode, be sure to turn it back to its original position (i.e., the reverse of how you turned it when you opened it. - Page 36 Figure 12. Tablet Mode Holding the Tablet PC Your LIFEBOOK T731 Tablet PC can be held in any of four orientations, depending upon how you would like to use it. There are primary and secondary landscape orientations and primary and secondary portrait orientations.
-
Page 37: Adjusting Display Panel Brightness
Once you have turned on your Tablet PC, you may want to adjust the brightness level of the screen to a more comfortable viewing level. There are three ways to adjust the brightness: keyboard, power management utility, and Fujitsu Menu. Using Keyboard to Adjust Brightness Adjusting the brightness using the keyboard changes the system setting (i.e., the settings you make via the... -
Page 38: Enabling/Disabling Ambient Light Sensor (Windows 7 Only)
Using the Fujitsu Menu to Adjust Brightness To adjust brightness using the Fujitsu menu, click on the Fujitsu Menu icon in the system tray in the lower right corner of the screen. Double-click Windows Mobility Center, then double-click the icon adjacent to Display brightness. - Page 39 For more information about the light sensor, click on Light Sensor icon in the Sensor column to the right of the light sensor icon to open the Sensor Properties window. From the Sensor Properties window, you can change the sensor’s description, uninstall the sensor, or enable or disable selected users.
-
Page 40: Keyboard
Cursor Keys Figure 14. Keyboard Using the Keyboard Your Fujitsu LIFEBOOK Tablet PC has an integral anti-microbial 84-key keyboard. The keys perform all the standard functions of a 101-key keyboard, including the Windows keys and other special function keys. The anti-microbial keyboard used in select models of the Fujitsu LIFEBOOK contains an inorganic silver ion agent that is highly effective in attacking microbes and bacteria and inhibiting their growth. - Page 41 This section describes the following keys (Figure 14): • Numeric keypad: Your Tablet PC allows certain keys to serve dual purposes, both as standard characters and as numeric and mathematical keys. The ability to toggle between the standard character and numerical keys is controlled through the [NumLk] key. •...
- Page 42 Function Keys Your LIFEBOOK Tablet PC has 12 function keys, F1 through F12. Functions assigned to these keys differ for each application. You should refer to your software documentation to find out how these keys are used. • The [Fn] key provides extended functions for the Tablet PC and is always used in conjunction with another key.
-
Page 43: Touchpad/Active Digitizer/Touchscreen
Touchpad/Active Digitizer/Touchscreen Scroll Sensor Figure 15. Touchpad pointing device Using the Touchpad The touchpad is built into your LIFEBOOK Tablet PC. It is used to control the movement of the cursor to select items on your display panel. The touchpad is composed of a cursor control below the center of the keyboard, two buttons below it, and a scroll sensor on the right edge of the cursor control. - Page 44 Clicking Clicking means pushing and releasing a button. To left-click, move the cursor to the item you wish to select, press the left button once, and then immediately release it. To right-click, move the mouse cursor to the item you wish to select, press the right button once, and then immediately release it.
- Page 45 Double-Clicking Double-clicking means pushing and releasing the left button twice in rapid succession. This procedure does not function with the right button. To double-click, move the cursor to the item you wish to select, press the left button twice, and immediately release it. You can also perform the double-click operation by tapping lightly on the Touchpad twice.
- Page 46 Dragging Dragging means pressing and holding the left button, while moving the cursor. To drag, move the cursor to the item you wish to move. Press and hold the left button while moving the item to its new location and then release it.
- Page 47 Scrolling Using the scrolling strip allows you to navigate through a document quickly without using the window’s scroll bars. This is particularly useful when you are navigating through on-line pages. To scroll, slide your finger up and down the scroll strip on the right side of the cursor control pad.
-
Page 48: Active Digitizer Display
Active Digitizer Display NOTE: Depending upon your system configuration, in addition to the active digitizer, you may also have a capacitive touch panel that responds to finger touch and touch gestures. (This configuration is called a “Dual Digitizer”.) For more information about the touchscreen, refer to “Using the Optional Capacitive Touchscreen”... - Page 49 Clicking on Active Digitizer Display To left-click, touch the object you wish to select and then lift the stylus tip immediately. Figure 26. Right-clicking Active Digitizer Right-Clicking on Active Digitizer Right-click can be accomplished by holding the front of the toggle button down while tapping on the screen.
- Page 50 Double-Clicking To double-click, touch the item twice, and then immediately remove the stylus tip. Figure 27. Double-clicking the Display Dragging Dragging means moving an item with the stylus by touching the screen, moving and then lifting the stylus. To drag, touch the Active Digitizer Display with your stylus on the item you wish to move.
- Page 51 Calibrating the Active Digitizer Display In order to ensure accurate tracking between the stylus and cursor, you must run the Calibration Utility before you use the system for the first time, or after you change the display resolution. To run the calibration utility in Windows 7: Go to Start ->...
-
Page 52: Using The Optional Capacitive Touchscreen
Using the Optional Capacitive Touchscreen Certain configurations of this Tablet PC have an optional dual digitizer that allows you to use either the stylus or your finger(s) as a pointing device. This type of display also allows you to use “gestures” to perform such actions as scroll, zoom, and rotate. -
Page 53: Installing A Pen Tether
Installing a Pen Tether To prevent dropping or losing your pen, you should attach it to your system using the pen tether that is included with the system. To attach the pen tether to your Tablet PC, perform the following steps: Attach the end of the pen tether with the smaller loop to your pen. -
Page 54: Volume Control
Volume Control Your Fujitsu LIFEBOOK Tablet PC has multiple volume controls which interact with each other. NY SOFTWARE THAT CONTAINS AUDIO FILES WILL ALSO CONTAIN A VOLUME CONTROL OF ITS OWN YOU INSTALL AN EXTERNAL AUDIO DEVICE THAT HAS AN INDEPENDENT VOLUME CONTROL... -
Page 55: Modular Bay Devices
Figure 30. Modular Bay Modular Bay Devices Your Fujitsu LIFEBOOK Tablet PC contains a Modular Bay. The Modular Bay can house an optical drive, a Lithium ion battery, a modular second hard disk drive and a weight saver. Your Modular Bay may have one of the following devices installed. -
Page 56: Removing And Installing Modular Devices
• Weight Saver: This is used to fill the bay when no device is needed. OU SHOULD NEVER LEAVE YOUR ODULAR AY EMPTY WHEN THE ABLET IS IN OPERATION LEFT EMPTY DUST OR FOREIGN MATTER MAY ACCUMULATE INSIDE THE ABLET Removing and Installing Modular Devices There are two ways to remove and install modular devices in the Modular Bay: •... - Page 57 • Hot-swapping: swapping devices while your system is active using the Safely Remove Hardware icon from your system tray. Cold-swapping To cold-swap modular devices in your Modular Bay follow these easy steps: Close any open files. Shut down your LIFEBOOK Tablet PC. Press the Modular Bay release latch in the direction shown in Figure 31.
-
Page 58: Lifebook Security/Tablet Pc Buttons
Figure 32. LIFEBOOK T731 Tablet PC Security/Tablet PC Buttons LIFEBOOK Security/Tablet PC Buttons A unique feature of your LIFEBOOK T731 Tablet PC is the array of Security and Tablet PC buttons. These buttons allow you to secure your Tablet PC from unauthorized use and to launch specific applications and functions with the touch of a button. -
Page 59: Pre-Logon Button Functions
All five buttons are used when implementing security functions. Four of the buttons are used to enter the password, and the fifth is used as an Enter button. See Table 1 for information about each of the buttons. Button Icon System State Security Panel Function System is pre-boot or resuming... - Page 60 <Enter>/<Escape> When you press the [Page Up] button when the system is pre-logon, each press of the button will act as if you had pressed the [Enter] key. Button Secondary Functions System State Tablet PC Function Icon (Fn + Button) System is pre- <Tab>...
-
Page 61: Post-Logon Button Functions
When you press the [Screen Rotation] button when the system is in pre-boot, the system screen orientation changes from portrait (vertical) to landscape (horizontal) or from landscape to portrait. Function / Fujitsu Menu Utility Button The [Function] button works in conjunction with the other application buttons to provide additional functionality for the buttons. - Page 62 Display Switching: 1. Internal Display only 2. CRT only 3. Dual Display Secondary Function Selection Fujitsu Menu Utility Ctl+Alt+Del Button None Table 3. Post-logon Tablet PC Button Functions Screen Rotation /Display Switching Button The screen rotation feature would normally be used only when the system is configured as a tablet. If you would like to use the tablet as an eBook, for example, you would use portrait orientation;...
-
Page 63: Changing Tablet Pc Button Functions
The [Function] button works in conjunction with the other application buttons to provide additional functionality for the buttons. Refer to specific details above. Pressing the [Fn] button twice in succession causes the Fujitsu Menu Utility to appear on your screen, allowing you to modify certain system settings. -
Page 64: Setting Up Lifebook Security Panel
Select the Buttons tab and select the button you would like to change from the list. Click [Change] and open the drop down list in the Press: field. Select the action you would like the button to perform. If you want to launch a program, click on Launch an Application then browse to the location of the program. - Page 65 You must have set a supervisor password before setting any user passwords. The supervisor password can bypass the user password. Go to the Start menu. Click on Run. Type in: C:\Program Files\Fujitsu\Security Panel Application\Supervisor\ FJSECS.EXE, then press [Enter] Follow the on-screen instructions to set the Supervisor password. Setting User Password Go to the Start menu.
-
Page 66: Using Your Lifebook Security Panel
OU MAY CHANGE OR REMOVE THE SUPERVISOR OR USER PASSWORD BY REPEATING THE STEPS DEFINED ABOVE Using Your LIFEBOOK Security Panel The security lock feature is in effect both when the system resumes from Off, Sleep, or Hibernation state. You always need to push the Security Panel buttons to input the user password. Your system will not begin the boot sequence until you enter your supervisor/user password. -
Page 67: Precautions
EMEMBER THE USER PASSWORD YOU SPECIFIED ON THE ECURITY ANEL PPLICATION F YOU FORGET THE PASSWORD YOU WILL NOT BE ABLE TO USE YOUR COMPUTER HE SUPERVISOR PASSWORD CAN OVERRIDE THE USER PASSWORD Precautions Opening and Closing the Cover By default, closing the cover automatically places your system into Sleep mode. To change the default when the cover is closed: Open the system Control Panel and select Power Options. - Page 68 Uninstalling the Security Panel Application Software Remove passwords when User wants no password protection whatsoever and doesn’t want to give anybody the utility to set a password on their computer. In this case, if passwords (supervisor, user, or both) are set, the passwords must first be cleared BEFORE removing the application. To clear passwords, follow same procedure in SETTING PASSWORD CODES except this time, select REMOVE, enter current password then click Next.
- Page 69 You need to run FJSECS.exe first to set the supervisor password. Follow instructions under Setting Passwords on page 64. If you forget both passwords, please contact Fujitsu America Service and Support at 1-800-8FUJITSU (1- 800-838-5487). Fujitsu America charges a service fee for unlocking a password-restricted Tablet PC.
-
Page 70: Getting Started With Your Lifebook
Chapter 2 Getting Started with Your LIFEBOOK Power Sources Your Fujitsu LIFEBOOK Tablet PC has three possible power sources: a primary Lithium ion battery, an AC adapter or an optional Auto/Airline adapter. Connecting the Power Adapters The AC adapter or optional Auto/Airline adapter provides power for operating your Tablet PC and charging the batteries. - Page 71 AC Adapter DC Power Jack Figure 33. Connecting the AC Adapter Switching from AC Adapter Power or the Auto/Airline Adapter to Battery Power Be sure that you have at least one charged battery installed. Remove the AC adapter or the Auto/Airline adapter. ITHIUM ION BATTERY IS NOT CHARGED UPON PURCHASE NITIALLY YOU WILL NEED TO CONNECT...
-
Page 72: Starting Your Lifebook Tablet Pc
Starting Your LIFEBOOK Tablet PC Power On Power/Suspend/Resume Switch The Power/Suspend/Resume switch is used to turn on your LIFEBOOK Tablet PC from its off state. Once you have connected your AC adapter or charged the internal Lithium ion battery, you can power on your LIFEBOOK Tablet PC. -
Page 73: Boot Sequence
Tablet PC. This information is in the BIOS program. Each time you power up or restart your Tablet PC, it goes through a boot sequence which displays a Fujitsu logo until your operating system is loaded. -
Page 74: Hard Disk Drive Passwords
Turn on or restart your LIFEBOOK Tablet PC. To enter the BIOS Setup Utility, press the [F2] key once the Fujitsu logo appears on the screen. This will open the main menu of the BIOS Setup Utility with the current settings displayed. -
Page 75: Booting The System
When you turn on your Tablet PC for the first time, it will display a Fujitsu logo on the screen. If you do nothing the system will load the operating system, and then the Windows Welcome will begin. - Page 76 First of all, you will need to read and accept the End User License Agreements (EULAs). • F YOU REJECT THE TERMS OF THE LICENSE AGREEMENTS YOU WILL BE ASKED TO REVIEW THE LICENSE AGREEMENTS FOR INFORMATION ON RETURNING INDOWS OR TO SHUT DOWN YOUR LIFEBOOK T ABLET •...
-
Page 77: Registering Your Lifebook Tablet Pc With Fujitsu
Fujitsu Driver Update Utility Your system has a tool called the Fujitsu Driver Update (FDU) utility. With FDU, you can choose to automatically or manually go to the Fujitsu site to check for new updates for your system. For more information about the FDU utility, refer to “Automatically Downloading Driver Updates”... -
Page 78: Power Management
Power Management Your Fujitsu LIFEBOOK Tablet PC has many options and features for conserving battery power. Some of these features are automatic and need no user intervention. However, others depend on the parameters you set to best suit your operating conditions, such as those for the display brightness. Internal power management for your Tablet PC may be controlled from settings made in your operating system, pre- bundled power management application, or from settings made in BIOS setup utility. - Page 79 • Selecting “Sleep” after clicking [Start] then clicking the small arrow at the bottom right of the window. • Timing out from lack of activity. • Allowing the battery to reach the Dead Battery Warning condition. Your Tablet PC’s system memory typically stores the file on which you are working, open application information, and any other data required to support operations in progress.
-
Page 80: Hibernation (Save-To-Disk) Feature
Hibernation (Save-to-Disk) Feature The Hibernation feature saves the contents of your Tablet PC’s system memory to the hard drive as a part of the Suspend/Resume mode. You can enable or disable this feature. Enable or Disable the Hibernation Feature The default settings are not enabled. To enable or disable the Hibernation feature follow these steps: From the Start menu, select Control Panel, then select the Power Options icon. -
Page 81: Powering Off
If you are going to store your Tablet PC for a month or more, see Care and Maintenance Section. ENERGY STAR® Compliance Your Fujitsu system is an ENERGY STAR® qualified mobile PC. By choosing a computer with the latest energy-saving technology, you’re helping to preserve our environment for future generations. - Page 82 Sleep mode, press the Suspend/Resume Button. Energy saving benefits: Fujitsu ENERGY STAR qualified mobile PCs use about half as much electricity as standard equipment – saving half in utility costs. But more than that, ENERGY STAR also makes a difference for the environment.
-
Page 83: User-Installable Features
Chapter 3 User-Installable Features Lithium ion Battery Your LIFEBOOK Tablet PC has a Lithium ion battery that provides power for operating your Tablet PC when no external power source is available. The battery is durable and long lasting, but should not be exposed to extreme temperatures, high voltages, chemicals or other hazards. -
Page 84: Recharging The Batteries
• CTUAL BATTERY LIFE WILL VARY BASED ON SCREEN BRIGHTNESS APPLICATIONS FEATURES POWER MANAGEMENT SETTINGS BATTERY CONDITION AND OTHER CUSTOMER PREFERENCES PTICAL DRIVE OR HARD DRIVE USAGE MAY ALSO HAVE A SIGNIFICANT IMPACT ON BATTERY LIFE HE BATTERY CHARGING CAPACITY IS REDUCED AS THE BATTERY AGES F YOUR BATTERY IS RUNNING LOW QUICKLY YOU SHOULD REPLACE IT WITH A NEW ONE •... - Page 85 SING HEAVY CURRENT DEVICES OR FREQUENT EXTERNAL OPTICAL DRIVE ACCESSES MAY PREVENT CHARGING COMPLETELY Low Battery State When the battery is running low, a low battery notification message will appear. If you do not respond to the low battery message, the batteries will continue to discharge until they are too low to operate. When this happens, your Tablet PC will go into Sleep mode.
-
Page 86: Replacing The Battery
Shorted Batteries The Status Indicator panel indicator associated with the Battery Level indicator displays the operating level available in that battery. If this display shows a flashing red LED, it means the battery is damaged and must be replaced so it does not damage other parts of your LIFEBOOK Tablet PC. Replacing the Battery With the purchase of an additional battery, you can have a fully charged spare to swap with one that is not charged. - Page 87 Battery Bay Release Latches Battery Pack Figure 35. Removing a Battery Follow steps 3 through 5 in “Cold Swapping Batteries”. F THE ITHIUM ION BATTERY CONNECTOR IS NOT FULLY SEATED YOU MAY NOT BE ABLE TO USE YOUR ABLET OR CHARGE YOUR BATTERY 86 - Lithium ion Battery...
-
Page 88: Memory Stick/Secure Digital Cards
SD/Memory Stick Card Slot SD Card Memory Stick Figure 36. Installing a Memory Stick or SD Card Memory Stick/Secure Digital Cards Your LIFEBOOK Tablet PC supports Memory Sticks and Secure Digital (SD) cards, on which you can store and transfer data to and from a variety of digital devices. These cards use flash memory architecture, which means they don’t need a power source to retain data. -
Page 89: Installing Memory Stick/Sd Cards
Installing Memory Stick/SD Cards Memory Stick and SD Cards are installed in the Memory Stick/SD Card slot. To install a Memory Stick or SD Card, follow these steps SD C LIFEBOOK T PC’ NSTALLING OR REMOVING A EMORY TICK OR ARD DURING YOUR ABLET LIFEBOOK T... -
Page 90: Expresscards
ExpressCard Eject Button ExpressCard (54 mm) ExpressCard (34 mm) ExpressCard Slot Figure 37. Installing/Removing an ExpressCard ExpressCards Your LIFEBOOK supports ExpressCards which can perform a variety of functions depending on which type of card you install. There are two different width ExpressCards: 34 mm and 54 mm. The connector inside the slot is located on the left-hand side of the slot. -
Page 91: Removing Expresscards
’ OU MAY BE REQUIRED TO LOG ON AS DMINISTRATOR OR A MEMBER OF THE DMINISTRATOR ROUP TO COMPLETE THIS PROCEDURE F YOUR COMPUTER IS CONNECTED TO A NETWORK NETWORK POLICY SETTINGS MAY ALSO PREVENT YOU FROM COMPLETING THIS PROCEDURE See your ExpressCard manual for instructions on the installation of your card. -
Page 92: Memory Upgrade Module
Memory Upgrade Module Your Fujitsu LIFEBOOK Tablet PC comes with a minimum of 1 GB of high speed Double Data Rate Synchronous Dynamic RAM (DDR3-1333 SDRAM) factory installed. To increase your Tablet PC’s memory capacity, you may install an additional memory upgrade module. The memory upgrade must be a dual-in-line (DIMM) SDRAM module. - Page 93 Retaining Clip Figure 38. Opening Memory Compartment Figure 39. Installing a Second Memory Module Insert the memory upgrade module at a 45° angle. Press the connector edge of the module firmly down and into the connector until it lodges under the retaining clip. You’ll hear a click when it is properly in place. Replace the cover and reinstall the screws.
-
Page 94: Removing A Memory Upgrade Module
Removing a Memory Upgrade Module Perform steps 1 through 4 of Installing a Memory Upgrade Module. Pull the clips sideways away from each side of the memory upgrade module at the same time. While holding the clips out, remove the module by lifting it up and pulling it away from your Tablet PC. Store the memory upgrade module in a static guarded sleeve. -
Page 95: Optical Drive
Media Holder Tray Emergency Tray Release Media Tray Eject Button Figure 40. Optical Drive Optical Drive There is a variety of media available to use with your Multi-Format DVD Writer or Blu-ray Triple Writer, also known as “optical drives”. Your system may contain one of the following optical drives: Dual-Layer Multi-Format DVD Writer: This drive allows you to access movies, software, and audio DVD/CDs as well as to read and write to CD-R, CD-RW, DVD-R, DVD+R, DVD-RW, DVD+RW, and DVD RAM discs. -
Page 96: Media Player Software
LIFEBOOK Tablet PC a short distance. Gently pull the tray out until a media disc can easily be placed in the tray. • OU SHOULD PERIODICALLY CHECK THE UJITSU WEBSITE AT US FUJITSU COMPUTERS FOR THE MOST CURRENT DRIVERS • LIFEBOOK DVD... - Page 97 Place the media into the tray, label side up, with the hole in the center of the disc. Snap the disc onto the raised circle in the center of the tray, and then gently push the holder tray back in until you hear a click F YOU HAVE DISABLED THE NSERT OTIFICATION...
-
Page 98: Removing Media
Removing Media Push and release the eject button on the front of the optical drive. This will stop the drive and the holder tray will come out of the LIFEBOOK a short distance. Gently pull the tray out until the disc can easily be removed from the tray. Carefully remove the media disc from the holder tray. - Page 99 Starting a DVD or Blu-ray Movie Insert the disc into the optical drive of the Tablet PC. If the CD AutoRun feature activates, skip Step 2. The first time you insert a movie into the media tray, you will be prompted to select what you want the system to do when discs are inserted (e.g., start automatically or wait for a prompt).
-
Page 100: Using Media Player On Battery Power
YOU MAY PURCHASE ONE 1-877-372-3473. EITHER ONLINE AT HTTP COMPUTERS FUJITSU COM OR BY CALLING To Watch a Movie on Battery Power: Have an additional full-charged battery or your AC adapter ready for use. Start watching your movie. When the low battery warning occurs, immediately stop the movie and exit the media player. -
Page 101: Device Ports
Device Ports Your Fujitsu LIFEBOOK Tablet PC and the optional Port Replicator come equipped with multiple ports to which you can connect external devices including: disk drives, keyboards, printers, etc. Internal LAN (RJ-45) Jack The internal LAN (RJ-45) jack is used for a Gigabit (10Base-T/100Base-Tx/1000Base-T) Ethernet LAN connection. -
Page 102: Universal Serial Bus Ports
Universal Serial Bus Ports The Universal Serial Bus (USB) ports allow you to connect USB devices such as external game pads, pointing devices, keyboards and/or speakers. There are two USB 2.0 ports and one USB 3.0 port on your Tablet PC: the USB 3.0 port is on the left side and the two USB 2.0 ports are on he rear. Note that the USB 3.0 port is also an Anytime USB Charge port. -
Page 103: Ieee 1394 Port
IEEE 1394 Port The 4-pin 1394 port allows you to connect digital devices that are compliant with IEEE 1394 standard. The IEEE 1394 standard is easy to use, connect, and disconnect. This port can allow up to 400 Mbps transfer rate. A third-party application may be required to operate your device with the 1394 port 1394 PORT USED IN THIS SYSTEM USES A FOUR PIN CONFIGURATION... -
Page 104: Headphone Jack
Headphone Jack The headphone jack allows you to connect headphones or powered external speakers to your Tablet PC. Your headphones or speakers must be equipped with a 1/8” (3.5 mm) stereo mini-plug. In order to connect headphones or speakers follow these easy steps: Align the connector with the port opening. -
Page 105: Hdmi Port
HDMI Port The High-Definition Multimedia Interface (HDMI) port is a digital audio/video interface over which uncompressed streams can be transmitted. HDMI is used to connect compatible digital devices with your computer (such as big-screen TVs and video recorders). See the note on the next HDMI page regarding the steps for selecting the Connector... - Page 106 ] + [F10] RESSING THE KEYS ALLOWS YOU TO CHANGE YOUR SELECTION OF WHERE TO SEND YOUR DISPLAY VIDEO HE ORDER IS DETERMINED BY WHICH TYPE OF EXTERNAL VIDEO DEVICE CONNECTED ACH TIME YOU PRESS THE KEY COMBINATION YOU WILL STEP TO THE NEXT CHOICE ->...
-
Page 107: Chapter 4 Troubleshooting Your Lifebook
Chapter 4 Troubleshooting Your LIFEBOOK Troubleshooting There may be occasions when you encounter simple setup or operating problems that you can solve on the spot, or problems with peripheral devices that can be solved by replacing the device. The information in this section helps you isolate and resolve some of these straightforward issues and identify failures that require service. - Page 108 If you have tried the solutions suggested in the Troubleshooting Table without success, contact your support representative: Toll free: 1-800-8Fujitsu (1-800-838-5487) E-mail: 8fujitsu@us.fujitsu.com Web site: http://www.computers.us.fujitsu.com/support. Before you place the call, you should have the following information ready so that the customer support representative can provide you with the fastest possible solution: •...
-
Page 109: Specific Problems
Specific Problems Using the Troubleshooting Table When you have problems with your LIFEBOOK Tablet PC, try to find the symptoms under the Problem column of the troubleshooting table for the feature giving you difficulty. You will find a description of common causes for that symptom under the column Possible Cause and what, if anything, you can do to correct the condition under Possible Solutions. -
Page 110: Audio Problems
Software driver is not The audio driver may be installed or reinstalled using the configured correctly. Drivers and Applications CD that came with your Fujitsu LIFEBOOK. Refer to your application and operating system documentation for help. The speakers have been... -
Page 111: Port Replicator Problems
Problem Possible Cause Possible Solutions LIFEBOOK Tablet PC fails Optical drive tray is not Push on the front of the optical drive tray until it latches. If to recognize DVD/CD- latched shut. that doesn’t work, pull out the modular drive latch to remove RW/CD-ROM’s. -
Page 112: Keyboard Or Mouse Problems
Problem Possible Cause Possible Solutions You cannot access your Security is set so your operat- Verify your password and security settings. hard drive. ing system cannot be started (continued) without a password. Keyboard or Mouse Problems The built-in keyboard does The Tablet PC has gone into Push the Power/Suspend/Resume switch. -
Page 113: Expresscard Problems
Problem Possible Cause Possible Solutions Your system does not rec- The device may have been Close the application and restart your Tablet PC. ognize a USB device you installed while an application have installed, or the was running, so your system device does not seem to is not aware of its installation. - Page 114 Problem Possible Cause Possible Solutions You turn on your LIFE- The power adapter (AC or Verify that your adapter is connected correctly. See “Power BOOK Tablet PC and noth- auto/airline) is not plugged in Sources” on page 69. ing seems to happen. properly.
-
Page 115: Shutdown And Startup Problems
Problem Possible Cause Possible Solutions Your Tablet PC will not Your installed battery is faulty. Verify the condition of the battery using the Status Indicator work on battery alone. panel and replace or remove any batteries that are shorted. (continued) See “Status Indicator Panel”... -
Page 116: Video Problems
Set the operating source by pressing the [ESC] key while the and displays power on of the setup utility are not Fujitsu logo is on screen or use the [F2] key and enter the information, but fails to compatible with your configu- setup utility and adjust the source settings from the Boot load the operating system. - Page 117 Problem Possible Cause Possible Solutions The built-in display is blank The Tablet PC is set for an Pressing [F10] while holding down the [Fn] key allows you to when you turn on your external monitor only. change your selection of where to send your display video. LIFEBOOK Tablet PC.
-
Page 118: Miscellaneous Problems
Problem Possible Cause Possible Solutions The display has bright or If the spots are very tiny and This is normal; do nothing. dark spots. few in number, this is normal for a large LCD display. If the spots are numerous or Display is faulty;... -
Page 119: Power On Self Test Messages
*Real time clock error - Check date and time settings Real-time clock fails BIOS test. May require board repair. Contact your support representative. *Fan error, system shutdown in 30s. Contact Fujitsu tech support Fan error occurred. Please contact your sales representative. -
Page 120: Restoring Your Pre-Installed Software
Restoring Your Pre-installed Software It is very important that you create DVD copies of your Factory Image before beginning to use your system. To do so, follow the instructions below in the “Saving Your Factory Image” section. Along with instructions on saving your Factory Image, this document outlines several other important procedures, such as making a system image, restoring your Factory Image and system images, managing your images, and restoring the partitions on a hard drive. -
Page 121: Creating Backup Images Of Factory Image, Dar, And Discs
After you launch the ClickMe! utility when you first start up your system, you should make a copy of the Factory Image to DVD discs. You will need several blank discs (DVD-R or DVD+R discs are recommended) in order to create the copy. After creating the copy, be sure to label the discs and keep them in a safe place to ensure they do not get damaged. -
Page 122: Recovering Your Factory Image
Repeat the process for the remaining three images on disc (Bootable Disc, Drivers and Applications Restore Disc, and Application Disc). The number of images available may vary depending on your system model; some models do not have the applications loaded on the hard drive. Recovering Your Factory Image In the event you need to restore your original Factory Image, perform the following steps. - Page 123 After rebooting, the “Creating of the backup image” window appears, in which you can either click [Create the image on D drive] or [Select the drive] if you want to save to an external hard disk drive. An image appears showing you graphically how the image will be stored. Click the [Next] button. Click [Execute] to start the backup.
-
Page 124: Managing Your Backup Images
Recovery and Utility Tools, but you will still be able to boot from the disc. Determining whether Recovery and Utility is pre-loaded Turn on or reboot your system. When the Fujitsu logo appears, press [F12] key. 123 - Restoring Your Pre-installed Software... - Page 125 HE BOOTABLE DISC CAN ONLY BE USED WITH THE SYSTEM WITH WHICH IT WAS PURCHASED Power on your system. When the Fujitsu logo appears on the screen. press the [F12] key. Select the Boot Menu from the menu that appears.
- Page 126 When the System Recovery Options dialog opens, select a new keyboard layout, if necessary, then click [Next]. When the Operating System dialog appears, click [Next]. If necessary, enter your password, then click [OK]. When System Recovery Options window appears, click on Recovery and Utility. When the Recovery and Utility screen appears, three tabs will be present: Diagnostics, Recovery, and Utility.
-
Page 127: Recovering Your Factory Image Using Recovery And Utility
Factory Image: Power on your system. When the Fujitsu logo appears on the screen. press the [F12] key. Select the Boot Menu from the menu that appears. - Page 128 “3. Restoring Factory Image to hidden partition” will be in bold with the message “Please insert the Recovery Disk#1 into the optical drive”. Click [Next] to proceed. After completion, the tool will automatically go back to "3.Restoring Factory Image to hidden partition" but will include the note "Please insert your Application Disc(s) starting with #1, then click [OK].
-
Page 129: Automatically Downloading Driver Updates
Your system has a convenient tool called the Fujitsu Driver Update (FDU) utility. With FDU, you can choose to automatically or manually go to the Fujitsu site to check for new updates for your system. The FDU icon should appear in the system tray at the bottom right of your screen (roll the cursor over the icons to find the correct one). -
Page 130: Chapter 5 Care And Maintenance
Care and Maintenance Caring for your LIFEBOOK Tablet PC If you use your Fujitsu LIFEBOOK Tablet PC carefully, you will increase its life and reliability. This section provides some tips for looking after the Tablet PC and its devices. HE SYSTEM CONTAINS COMPONENTS THAT CAN BE SEVERELY DAMAGED BY ELECTROSTATIC DISCHARGE (ESD). - Page 131 Let it dry out for 24 hours, or longer if needed. If your Tablet PC will not boot after it has dried out, call your support representative. • Do not use your Fujitsu LIFEBOOK Tablet PC in a wet environment (near a bathtub, swimming pool).
-
Page 132: Cleaning Your Lifebook Tablet Pc
Cleaning your LIFEBOOK Tablet PC • Always disconnect the power plug. (Pull the plug, not the cord.) • Clean your LIFEBOOK Tablet PC with a damp, lint-free cloth. Do not use abrasives or solvents. • Use a soft cloth to remove dust from the screen. Never use glass cleaners. •... -
Page 133: Cleaning The Dust Filter
• If storing your Tablet PC for a month or longer, turn your LIFEBOOK Tablet PC off, fully charge the battery, then remove and store all Lithium ion batteries. • Store your Fujitsu LIFEBOOK in a cool, dry location. Temperatures should remain between 13ºF (-25ºC) and 140ºF (60ºC). -
Page 134: Traveling With Your Lifebook Tablet Pc
• Store your Tablet PC and batteries separately. If you store your LIFEBOOK with a battery installed, the battery will discharge, and battery life will be reduced. In addition, a faulty battery might damage your LIFEBOOK. • LWAYS POWER OFF THE COMPUTER BEFORE TRANSPORTING AND OR PACKAGING IT FTER SHUTTING DOWN THE SYSTEM... -
Page 135: Batteries
• Take the necessary plug adapters if you're traveling overseas. Check the following diagram to determine which plug adapter you'll need or ask your travel agent. Outlet Type Location Outlet Type Location United Kingdom, United States, Canada, parts of Latin Ireland, Malaysia, America, Mexico, Japan, Korea, Singapore, parts of...