Advertisement
uincy
ab
SPECIFICATIONS
INTERIOR DIMENSIONS
INCHES W x H x D
(CM) W x H x D
EXTERIOR DIMENSIONS
INCHES W x H x D
(CM) W x H x D
TEMPERATURE RANGE
CONTROL STABILITY
@ 100C
@ 200C
STANDARD ELECTRICAL
VOLTS/AMPS
PLUG/NEMA
WEIGHT
SHIPPING
STAND ALONE
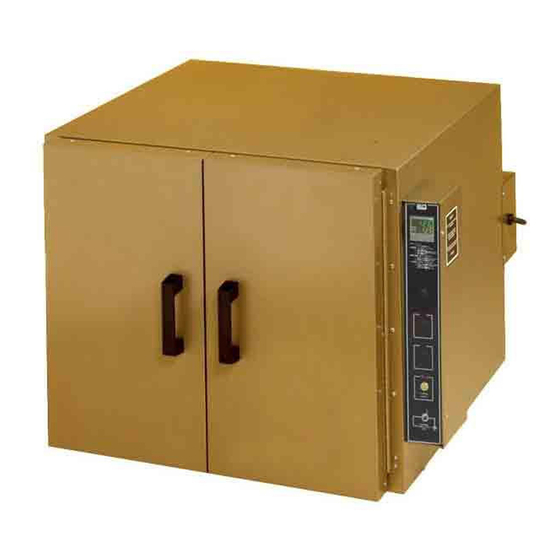
Common Unit Construc�on
Exterior:
Insula�on:
Thermo-control:
Issue Rev B01.21
Copyright Quincy Lab Inc. 2022
Bench Series Ovens Operating Manual
MODEL
21-250ER
25.5x19.7x24
64x49.5x60
33x24x35.5
83x60x90
300 F/150 C
o
+/- 0.2
C
NA
120/8.75*
WATTS
1050
5-15P*
*
Standard models voltage only, optional 230 voltage available. Check label on back of unit.
185
165
Powder Coated Steel
Fiberglass
Digital Microprocessor
Quincy Lab Inc. 109 Shore Dr.
ER Models 21 /31 /51
MODEL
MODEL
21-350ER
31-250ER
25.5x19.7x24
25.5x29.7x24
64x49.5x60
64x75.5x60
33x24x35.5
33x34x35.5
83x60x90
83x86x90
450 F/232 C
300°F/150°C
o
o
+/- 0.5
+/- 0.3
C
o
o
+/- 0.5
+/- 0.5
C
120/16*
120/16*
1920
1920
5-20P*
5-15P*
185
225
165
200
Interior:
Aluminized Steel (SS op�onal)
Motor:
Sealed Ball Bearing
Heater:
Resis�ve - Tubular Incoloy
Burr Ridge, Illinois 60527
Standard Contents
(1) Bench ER Series Oven
(2) Adjustable nickel-plated shelf
(4) Shelf brackets
Approvals:
UL / cUL, United States/Canadian
for laboratory equipment.
Compliance: UL Standard 61010-1
IEC 61010-1.
NOT FOR USE WITH FLAMMABLE
LIQUIDS OR GASES
MODEL
31-350ER
25.5x29.7x24
25.5x19.7x22.5
64x75.5x60
33x34x35.5
83x86x90
450 F/232 C
550 F/287 C
o
C
+/- 0.5
C
o
C
+/- 0.5
C
120/16*
1920
5-20P*
225
200
1800-482-4328
MODEL
51-550ER
64x49.5x57
33x24x35.5
83x60x90
o
+/- 0.5
C
o
+/- 0.5
C
230/12.5
2850
6-20P
195
170
PAGE 1
Advertisement
Table of Contents

Related Manuals for Quincy lab 21-250ER


Summary of Contents for Quincy lab 21-250ER
- Page 1 Interior: Aluminized Steel (SS op�onal) Insula�on: Fiberglass Motor: Sealed Ball Bearing Thermo-control: Heater: Digital Microprocessor Resis�ve - Tubular Incoloy Issue Rev B01.21 Quincy Lab Inc. 109 Shore Dr. Burr Ridge, Illinois 60527 1800-482-4328 PAGE 1 Copyright Quincy Lab Inc. 2022...
-
Page 2: Setup And Installation
WARNING IMPORTANT WARNING Refers to an important note in the usage of the unit. Warns of a possible electrical shock Warns of a possible risk of fire CAUTION WARNING Cautions of HOT exterior surface during operation. Warns of possible injury or muscle strains, use assistance when moving or liftiing. Safety Precautions Read Operating Instructions Thoroughly Prior to Operation Read Operating Instructions thoroughly prior to operation and observe the following safety precautions:... -
Page 3: General Operation
HEATER SWITCH ADJUSTING DIGITAL CONTROLLER UPON START-UP Upon start-up, all Quincy Lab Bench Ovens will display the current chamber FIG. 4 temperature (white LEDs) and begin the heating process to the factory default temperature set-point (green LEDs). The initial temperature set-point varies depending on your oven’s model. - Page 4 Shelf Installation and Use Install adjustable shelf by first placing the shelf bracket rivets into the corresponding keyhole supports located on each inner side of the oven. Orient the bracket in the "down" or " L" position. This position guides the shelf in and out and protects the sidewall from being scratched.
-
Page 5: Controller Functions
Controller Functions Your oven’s controller parameter values have been set at the factory to work with your model accordingly and is ready for immediate use. Once the oven’s power switch and fan switch are turned to ON, your oven will begin to heat to the pre-set temperature setpoint shown on the controller’s lower right hand corner. - Page 6 OPERATION CYCLE (MENU 1) SET-POINT CHANGE TEMPERATURE OFFSET / CALIBRATION To change the temperature set-point of your oven, use the Your oven has been calibrated at our factory using a indicated arrow keys to increase or decrease temperature. NIST-certified temperature instrument. Over time a temperature adjustment (offset) may be neces- Press to sary to maintain the oven’s controller temperature reading...
-
Page 7: Calibration Example
Basic Count Down Timer Function (Menu 3) Your oven’s controller is equipped Step 3 Step 6 with a timer feature that allows Using the keys and select a desired Using the key select what happens time base to apply to the timer. at the end of the timer. -
Page 8: How To Start A Program
RAMP AND SOAK PROGRAMMING (MENU 2) The Ramp and Soak Controller provides the opportunity to control applications needing set-point changes overtime. Exam- ples of this are RAMP changes where a gradual rate of temperature change can be set. These can be separated by SOAK periods during which the process is held at a constant value. -
Page 9: Technical Support
Burr Ridge, Illinois 60527 Limited Warranty Quincy Lab, Inc. warrants to the original purchaser that this product will be free from defects in material and workmanship under normal use throughout the warranty period. The standard warranty period for this is instru- ment is eighteen months from date of shipment.
Need help?
Do you have a question about the 21-250ER and is the answer not in the manual?
Questions and answers