Table of Contents
Advertisement
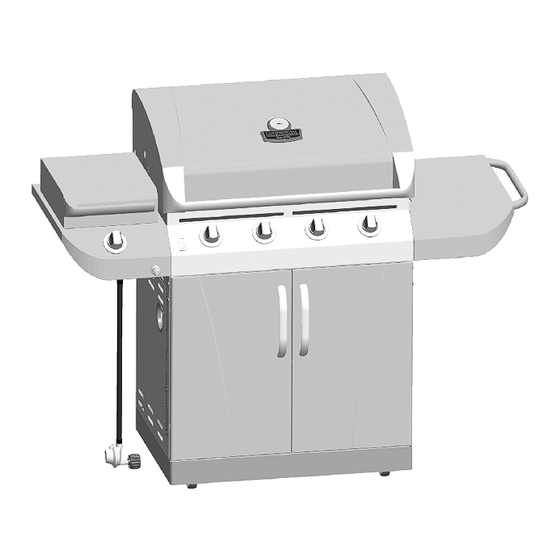
MODEL 463248208 • PRODUCT GUIDE
THIS GRILL IS FOR OUTDOOR USE ONLY.
CAUTION:
Read and follow all safety statements, assembly
instructions, and use and care directions before
attempting to assemble and cook.
INSTALLER/ASSEMBLER:
Leave this manual with consumer.
CONSUMER:
Keep this manual for future reference.
If you have questions or need assistance during assembly, please call
To insure your satisfaction and for follow-up service, register your grill online at www.grillregistration.com
WARNING:
Failure to follow all manufacturer's instructions could
result in serious personal injury and/or property
damage.
CAUTION:
Some parts may contain sharp edges – especially as
noted in the manual! Wear protective gloves if
necessary.
1-888-430-7870
.
463248208 • 80065464 • 04-02-08
Advertisement
Table of Contents
Troubleshooting

Subscribe to Our Youtube Channel
Related Manuals for Char-Broil Commercial 463248208


Summary of Contents for Char-Broil Commercial 463248208
- Page 1 MODEL 463248208 • PRODUCT GUIDE THIS GRILL IS FOR OUTDOOR USE ONLY. CAUTION: Read and follow all safety statements, assembly instructions, and use and care directions before attempting to assemble and cook. INSTALLER/ASSEMBLER: Leave this manual with consumer. CONSUMER: Keep this manual for future reference.
-
Page 2: Grill Service Center
See rating label on grill for serial number. Date Purchased CAUTION For residential use only. Do not use for commercial cooking. 2 • 463248208 WARNING CALIFORNIA PROPOSITION 65 1. Combustion by-products produced when using this product contain chemicals known to the State of California to cause cancer, birth defects, and other reproductive harm. -
Page 3: Table Of Contents
Do not attempt to repair or alter the hose/valve/regulator for any “assumed” defect. Any modification to this assembly will void your warranty and create the risk of a gas leak and fire. Use only authorized replacement parts supplied by manufacturer. 463248208 • 3... -
Page 4: For Your Safety
• Do not store an LP cylinder in an area where children play. 4 • 463248208 LP Cylinder • The LP cylinder used with your grill must meet the following requirements: •... -
Page 5: Connecting Regulator To Lp Cylinder
LP cylinder valve so as not to cross-thread the connection. Nipple has to be centered into the LP cylinder valve. OPD Hand Wheel Type 1 outlet with thread on outside 463248208 • 5... - Page 6 • If you cannot stop a gas leak, immediately close LPcylinder valve and call LP gas supplier or your fire department! 6 • 463248208 Leak Testing Valves, Hose and Regulator 1. Turn all grill control knobs to OFF. 2. Be sure regulator is tightly connected to LP cylinder.
- Page 7 , wait 5 minutes, and repeat lighting procedure. 7. Ignite remaining burners by turning to burners closest to the IGNITION BURNER first. If ignition still does not occur, follow match-lighting instructions. Lighting instructions continued on next page. , starting with the 463248208 • 7...
-
Page 8: Match-Lighting
4. Turn sideburner knob to HIGH .Be sure burner lights and stays lit. 8 • 463248208 Burner Flame Check • Remove cooking grates and flame tamers. Light burners, rotate knobs from HIGH flame in LOW position than seen on HIGH. Perform burner flame check on sideburner, also. -
Page 9: Spider Alert
10. Attach electrode to burner. 11. Carefully replace burners. 12. Attach burners to brackets on firebox. 13. Reposition carryover tubes and attach to burners. Replace flame tamers and cooking grates. Correct burner-to-valve engagement Firebox Electrode burner bracket 463248208 • 9... -
Page 10: Food Safety
For more information call: USDA Meat and Poultry Hotline at 1-800-535-4555 In Washington, DC (202) 720-3333, 10:00 am- 4:00 pm EST. 10 • 463248208 How To Tell If Meat Is Grilled Thoroughly • Meat and poultry cooked on a grill often browns very fast on the outside. -
Page 11: Routine Care
The methods below are suggestions for cleaning stainless steel surfaces. Choose a cleaning method appropriate for your needs. It is recommended that you use a Char-Broil® grill cover to help prolong the life and prevent discoloration of your grill. - Page 12 This Page Intentionally Blank. 12 • 463248208...
-
Page 13: Parts List
PARTS LIST – Model No. 463248208 Key Qty Description Bottom Shelf..... 80013297 Locking Caster ....80000268 Fixed Caster. -
Page 14: Parts Diagram
PARTS DIAGRAM – Model No. 463248208 14 • 463248208 JJ 3 JJ 1 JJ 2... -
Page 15: Assembly
ASSEMBLY – Model No. 463248208 Attach the two locking casters at the rear of the bottom shelf and the two fixed casters at the front. Use the provided caster wrench to fully tighten casters. Locking caster Bottom shelf Attach side panels to bottom shelf using three 1/4-20x1/2”... - Page 16 Make sure the regulator hose is hanging outside the cart. Grill head must face open side of cart. Grill head Regulator hose 16 • 463248208 7mm lock washer 7mm flat washer 1/4-20x1/2” screw Lower back panel...
- Page 17 Do not fully tighten screws until side shelf installation is complete in later steps. 1/4-20x1½” screw 7mm lock 7mm flat washer washer 1/4-20x1½” 7mm lock 7mm flat screw washer washer Upper back panel 463248208 • 17...
- Page 18 7mm lock washers and 7mm flat washers (C).Remove the screw shown (E), then add one large flat washer, and re-install the screw shown (F). Remove This Screw View Behind Right Fascia 18 • 463248208 Tabs into holes Right side shelf...
- Page 19 View Behind Left Fascia Left sideburner shelf Fascia, left sideburner shelf Tabs into holes Large Flat Washer Some components are not shown for the clarity of illustration View Behind Left Fascia 463248208 • 19...
- Page 20 Note: Use left and right removed from valve bracket holes on fascia to attach valve bracket Sideburner fascia Valve stem 20 • 463248208 left fascia, secure with the plastic nut. Main Burner Wire Install bezel with “OFF” at top. Control knob Control knob bezel...
- Page 21 5mm flat washers, 5mm lock washers, and #10-24 hex nuts. Handle appearance may differ from actual part. #10-24x3/8” screw Sideburner burner NOTE: Fully secure one hinge with screws, washers and nuts, then secure remaining hinge. Sideburner lid #10-24 hex nut 5mm lock washer 5mm flat washer 463248208 • 21...
- Page 22 #8x3/8” self-tapping screws. Insert left and right grease tray rails into slots beneath grease tray opening in rear upper panel. Attach rails to brace, with #8x3/8” self-tapping screws. Some components not shown for illustration purposes. Tank heat shield 22 • 463248208 Sideburner griddle Sideburner cooking grate Burner cap #8-32x3/8”...
- Page 23 Insert wire ends into lower back panel (A). Attach front right side of wire shelf to the right side panel with one #8-32x3/8” screw, 4mm flat washer and 4mm lock washer (B). Leg attaches to bottom shelf with 4mm flat washer and 4mm lock washer and a #8-32x3/8" screw (C). Door Brace Tank Exclusion Wire Frame 463248208 • 23...
- Page 24 Install flame tamers by sliding one end of each flame tamer into slots at front of firebox and resting opposite end on pins in back of firebox. Note: Some parts not shown for illustration purpose Front of firebox Flame tamer Back of firebox 24 • 463248208...
- Page 25 Cylinder screw at rear of cart Always keep LP cylinders in upright position during use, transport, and storage. Warming rack Cooking grate Regulator LP Cylinder (not included) Assembled warming rack 463248208 • 25...
- Page 26 On back of grill, slide grease tray into opening in upper back panel. CAUTION Failure to install grease tray will cause hot grease to drip from bottom of grill with risk of fire or property damage. Grease tray 26 • 463248208...
-
Page 27: Troubleshooting
1/8” to 3/16”. Adjust if necessary. • Clean wire and/or electrode with rubbing alcohol and clean swab. • Reconnect wires or replace electrode/wire assembly. • Replace ignitor wire/electrode assembly. • Replace with a new AA-size alkaline battery. 463248208 • 27... -
Page 28: Troubleshooting
• Grease buildup or food particles in light from other end(s) of carryover tube(s). burner(s). 28 • 463248208 Prevention/Solution • See Section I of Electronic Ignition System. • See Section II of Electronic Ignition System. • See Section III of Electronic Ignition System. -
Page 29: Troubleshooting - Electronic Ignition
Bradley Company. Thermos® is a registered trademark of the Thermos Company and its affiliates. Artisan Collection by Char-Broil ™, C3 and Design™, Char-Broil and Design™, Flame Design™, FlavorTents™, Grill 2 Go™, Grillin’ Stick™, Keeper of the Flame™, Keepers of the Flame™, Natural Grip™, Outdoor Cooking Collection and Design™, Patio Bistro™, PrecisionFlame™, Pro-Check™, QuickSet Grills and Design™, SmokerTents™, The Big Easy™, The Minute Grill™, The Edge™, The Tuscan Collection™, and The Urban Grill™... -
Page 30: Limited Warranty
Consumer returns will not be accepted unless a valid Return Authorization is first acquired by calling 1-888-430-7870 and then clearly marked on the outside of the package and the package is shipped freight/postage pre-paid to the address above. 30 • 463248208 Char-Broil Consumer Relations P. -
Page 31: Registration Card
Consumer Warranty Service P. O. Box 1240 Columbus, GA 31902-1240 Apt Number/N de apart./N d’appt. Zip Code/Código zip/Code postal Date of Purchase/Fecha de compra/Date de l’achat Store Name/Nombre de la tienda/Nom du magasin Purchase Price/Precio de compra/Prix d’achat Female/Femenino/Féminin 463248208 • 31... - Page 32 Always ensure control knobs are in OFF position and regulator is attached to tank BEFORE opening tank valve to avoid low flames. Perform leak test regularly. Thank You for Your Purchase! Char-Broil, LLC • Columbus, GA 31902 • Printed in China...
Need help?
Do you have a question about the Commercial 463248208 and is the answer not in the manual?
Questions and answers