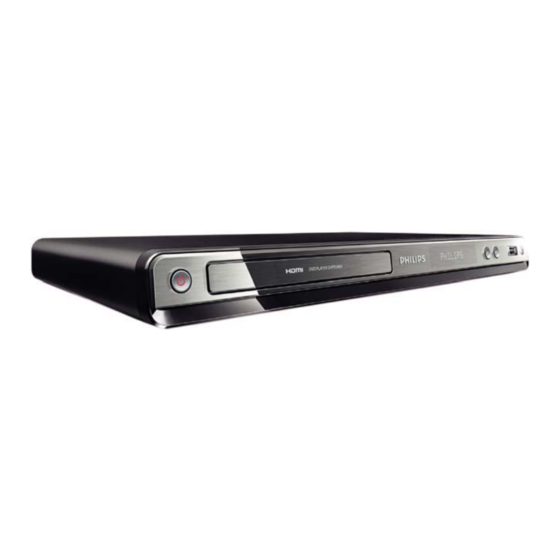
Summary of Contents for Philips DVP3588K/73
- Page 1 Register your product and get support at www.philips.com/welcome DVP3588K User manual MS-MY Manual pengguna...
-
Page 2: Table Of Contents
Connect power Get started Prepare the remote control Find the TV input channel Select menu display language Turn on progressive scan Use Philips EasyLink Play Play a disc Play video Play music Play photo Play from a USB fl ash drive... -
Page 3: Important
DivX Video-on-Demand (VOD) content. To Please visit www.recycle.philips.com for additional generate the registration code, locate the DivX information on a recycling center in your area. VOD section in the device setup menu. Go to vod. -
Page 4: Your Dvd Player
HDMI licensing LLC. Remote control 2 Your DVD player Congratulations on your purchase, and welcome to Philips! To fully benefi t from the support that Philips offers, register your product at www.philips.com/ welcome. Playable media This product can play: •... -
Page 5: Connect
If the device supports HDMI CEC, you can control compliant devices with a single remote control (see “Get • Access the menu of creating MP3 fi les. started” > “Use Philips EasyLink”). • Stop play. • Start, pause or resume disc play. -
Page 6: Optional Audio Connections
Option 2: Connect to the component Connect multi channel receiver video jacks COMPONENT VIDEO OUT FRONT L REAR L CENTER Connect the component video cables FRONT R REAR R SUBWOOFER (not supplied) to: MULTICHANNEL AUDIO IN • Y Pb Pr jacks on this product. •... -
Page 7: Connect Usb Fl Ash Drive
Connect USB fl ash drive Note DVD PLAYER DVP3588K • If you are not going to use the remote control for a long time, remove the batteries. • Do not mix batteries (old and new or carbon and alkaline, etc.). •... -
Page 8: Use Philips Easylink
Select [Progressive] > [On], and then press OK. » A warning message is displayed. • Philips does not guarantee 100% interoperability with all To proceed, select [Ok] and then press OK. HDMI CEC devices. » The progressive setup is complete. - Page 9 Control video play Display the contents menu via one of the following ways: Play a title. • If PBC is on, load in a VCD/SVCD. Use the remote control to control the play. • During play with PBC on, press BACK.
-
Page 10: Play Music
Repeat play for a specifi c section Quick skip play During play, press INFO. During play, press INFO repeatedly to select an option. Press to select [REPEAT AB]. Press OK to set the start point. Display Action Press OK to set the end point. »... -
Page 11: Play Photo
Play photo Play musical slideshow Create a musical slideshow to play MP3/WMA music Play photo as slideshow fi les and JPEG photo fi les simultaneously. You can play JPEG photos (fi les with .jpeg or .jpg extensions). Note Insert a disc or USB fl ash drive that contains the JPEG photos. -
Page 12: Create Mp3 Fi Les
Option Description 00:00/00:00 005/030 \MP3 [Speed] Select a copying speed. [Bitrate] Select a quality level. Previous Higher bitrate for better sound Track 1 quality and bigger fi le size. Track 2 Do you want [CRT ID3] Copy track information into the to copy this file Track 3 MP3 fi... -
Page 13: Adjust Settings
• To return to the previous menu, press At the fi rst time when you record to a USB fl ash BACK. drive, a folder named “PHILIPS” is automatically • To exit the menu, press SETUP. created to save the recorded fi les. -
Page 14: Audio Setup
[Sleep Timer] • [Stereo] - For the stereo output. Switch automatically to standby at the preset time. • [Multi Channel] - For multi-channel output. • [Off] - Disable sleep mode. [Digital Audio] • [15 Mins], [30 Mins], [45 Mins], [60 Mins] - Select a digital setting based on the digital amplifi... -
Page 15: Video Setup
OK. [My Wallpaper] Select a picture as the wallpaper. • [Default picture] - The default wallpaper preset as the Philips logo. • [Saved picture] - A captured video image or JPEG photo. Press SETUP. •... -
Page 16: Preferences
EasyLink controls. See 1. Press OK. the TV/devices manual for details. • Philips does not guarantee 100% interoperability with all 2. Select a rating level, then press OK. HDMI CEC compliant devices. 3. Press the numeric buttons to enter the password. -
Page 17: Additional Information
• This information is required when you want to fi nd out if a a disc for play. newest software version is available at the Philips website • [Off] - Skip the menu and start play from the that you may download and install on this product. -
Page 18: Specifi Cations
Specifi cations support at www.philips.com/welcome. If you contact Philips, you will be asked for the model and serial number of your product. The model Note number and serial number are on the back of your product. -
Page 19: Glossary
No sound on HDMI connection. • You may not hear any sound from the HDMI HDMI output if the connected device is non-HDCP High-Defi nition Multimedia Interface is a high-speed compliant or only DVI-compatible. digital interface that can transmit uncompressed •... - Page 20 Language Code Abkhazian 6566 Inupiaq 7375 Pushto 8083 Irish 7165 Russian 8285 Afar 6565 Afrikaans 6570 Íslenska 7383 Quechua 8185 Amharic 6577 Italiano 7384 Raeto-Romance 8277 Ivrit 7269 Romanian 8279 Arabic 6582 Armenian 7289 Japanese 7465 Rundi 8278 Assamese 6583 Javanese 7486 Samoan...
- Page 21 © 2010 Koninklijke Philips Electronics N.V. All rights reserved. DVP3588K_73_UM_V2.0_1025...


Need help?
Do you have a question about the DVP3588K/73 and is the answer not in the manual?
Questions and answers