
Related Manuals for Makita XFD11


Summary of Contents for Makita XFD11
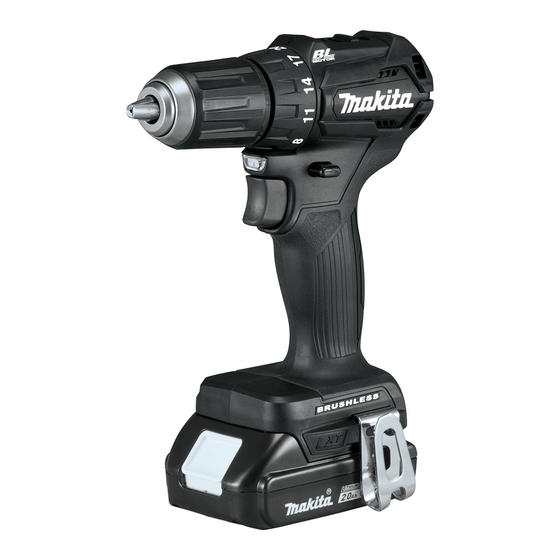
- Page 1 INSTRUCTION MANUAL MANUAL DE INSTRUCCIONES Cordless Driver Drill Atornillador Taladro Inalámbrico XFD11 IMPORTANT: Read Before Using. IMPORTANTE: Lea antes de usar.
-
Page 2: Specifications
ENGLISH (Original instructions) SPECIFICATIONS Model: XFD11 Drilling capacities Steel 13 mm (1/2") Wood 36 mm (1-7/16") Fastening capacities Wood screw 6 mm x 75 mm (1/4" x 2-15/16") Machine screw M6 (1/4") No load speed (RPM) High (2) 0 - 1,700 /min... -
Page 3: Cordless Driver Drill Safety Warnings
Dress properly. Do not wear loose clothing or Service jewellery. Keep your hair, clothing, and gloves Have your power tool serviced by a qualified away from moving parts. Loose clothes, jewel- repair person using only identical replacement lery or long hair can be caught in moving parts. parts. This will ensure that the safety of the power If devices are provided for the connection of tool is maintained. -
Page 4: Tips For Maintaining Maximum Battery Life
Insert it all the way until it locks in place causing fires, personal injury and damage. It will with a little click. If you can see the red indicator on the also void the Makita warranty for the Makita tool and upper side of the button, it is not locked completely. charger. -
Page 5: Overdischarge Protection
This tool is equipped with an electric brake. If the tool caused the tool to become overloaded. Then turn the consistently fails to quickly stop after the switch trigger tool on to restart. is released, have the tool serviced at a Makita service center. Overheat protection When the tool/battery is overheated, the tool stops automatically. In this situation, let the tool/battery cool before turning the tool on again. -
Page 6: Speed Change
This tool has a reversing switch to change the direction Lighting up the front lamp of rotation. Depress the reversing switch lever from the A side for clockwise rotation or from the B side for coun- terclockwise rotation. When the reversing switch lever is in the neutral posi- tion, the switch trigger cannot be pulled. Speed change ► 1 . Lamp CAUTION: Do not look in the light or see the source of light directly. -
Page 7: Adjusting The Fastening Torque
Adjusting the fastening torque ► 1 . Adjusting ring 2. Graduation 3. Arrow The fastening torque can be adjusted in 21 levels by turning the adjusting ring. Align the graduations with the arrow on the tool body. You can get the minimum fastening torque at 1 and maximum torque at marking. The clutch will slip at various torque levels when set at the number 1 to 20. The clutch does not work at marking. Before actual operation, drive a trial screw into your material or a piece of duplicate material to determine which torque level is required for a particular application. -
Page 8: Screwdriving Operation
Installing driver bit holder Screwdriving operation Optional accessory CAUTION: Adjust the adjusting ring to the proper torque level for your work. CAUTION: Make sure that the driver bit is inserted straight in the screw head, or the screw and/or driver bit may be damaged. Place the point of the driver bit in the screw head and apply pressure to the tool. -
Page 9: Maintenance
Turn the tool. of Makita’s Factory or Authorized Service Centers. If inspection shows the trouble is caused by defective NOTE: This use is convenient for checking the workmanship or material, Makita will repair (or at our screwdriving. option, replace) without charge. NOTE: Do not use the tool for work requiring exces- This Warranty does not apply where: sive force, such as tightening bolt or removing rusted •... -
Page 10: Especificaciones
ESPAÑOL (Instrucciones originales) ESPECIFICACIONES Modelo: XFD11 Capacidades de taladrado Acero 13 mm (1/2") Madera 36 mm (1-7/16") Capacidades de apriete Tornillo para madera 6 mm x 75 mm (1/4" x 2-15/16") Tornillo de máquina 6 mm (1/4") Velocidad sin carga (rpm) Alta (2) 0 - 1 700 r/min... - Page 11 cansado o bajo la influencia de drogas, alco- Realice el mantenimiento a las herramientas hol o medicamentos. Un momento de distracción eléctricas. Compruebe que no haya partes móvi- mientras opera las herramientas eléctricas puede les desalineadas o estancadas, piezas rotas y terminar en una lesión grave. cualquier otra condición que pueda afectar al funcionamiento de la herramienta eléctrica.
- Page 12 INSTRUCCIONES. velocidad sin carga PRECAUCIÓN: Utilice únicamente baterías originales de Makita. El uso de baterías no origina- revoluciones o alternaciones por minuto, les de Makita, o de baterías alteradas, puede ocasio- frecuencia de rotación nar que las baterías exploten causando un incendio, lesiones personales y daños. Asimismo, esto inva- Instrucciones importantes de lidará la garantía de Makita para la herramienta y el cargador Makita.
-
Page 13: Descripción Del Funcionamiento
No cargue nunca un cartucho de batería que PRECAUCIÓN: Introduzca siempre com- esté completamente cargado. La sobrecarga pletamente el cartucho de batería hasta que acortará la vida de servicio de la batería. el indicador rojo no pueda verse. Si no, podría Cargue el cartucho de batería a una tempera- accidentalmente salirse de la herramienta y caer al tura ambiente de 10 °C - 40 °C (50 °F - 104 °F). -
Page 14: Protección Contra Sobrecarga
La herramienta está equipada con un freno eléctrico. Si Protección en caso de la herramienta falla constantemente en detenerse tras sobredescarga soltar el gatillo interruptor, lleve la herramienta a mante- nimiento a un centro de servicio Makita. Cuando la capacidad de la batería no es suficiente, la Iluminación de la luz delantera herramienta se detiene automáticamente. En este caso, retire la batería de la herramienta y cárguela. NOTA: La protección contra sobrecalentamiento (para la batería) funcionará únicamente con baterías... -
Page 15: Cambio De Velocidad
Accionamiento del conmutador de Cambio de velocidad inversión de giro ► 1 . Palanca de cambio de velocidad ► 1 . Palanca del interruptor de inversión PRECAUCIÓN: Coloque siempre la palanca de cambio de velocidad exactamente en la posi- PRECAUCIÓN: Confirme siempre la direc- ción correcta. Si usted utiliza la herramienta con la ción de rotación antes de la operación. -
Page 16: Montaje
La torsión de apriete puede ajustarse en 21 niveles girando el anillo de ajuste. Alinee las graduaciones con la flecha en el cuerpo de la herramienta. Puede conseguir una fijación de torsión mínima en 1 y una torsión máxima en la marca El embrague se deslizará entre los diferentes niveles de torsión cuando esté ajustado en los números 1 a 20. El embrague no funciona en la marca Antes de iniciar la operación, coloque un tornillo de prueba en su material o en un pedazo del mismo material para determinar qué nivel de torsión se requiere para una aplicación en particular. La siguiente es una guía aproximada de la relación entre el tamaño del tornillo y la graduación. Graduación Tornillo de máquina 4 mm 5 mm 6 mm Tornillo Madera – ɸ3,5 mm x 22 mm ɸ4,1 mm x 38 mm – para blanda madera (p. ej., pino) Madera –... -
Page 17: Operación
Coloque el portabrocas en la protuberancia en la base Operación de taladrado de la herramienta o ya sea del lado derecho o izquierdo y asegúrelo con un tornillo. Primero, gire el anillo de ajuste de tal forma que la Cuando no utilice la punta de destornillador, mantén- flecha apunte hacia la marca . Después proceda gala dentro del portabrocas. -
Page 18: Mantenimiento
GARANTÍA LIMITADA DE UN AÑO DE MAKITA Ésta Garantía no aplica para México Política de garantía Apague la herramienta. Mueva la palanca del interruptor de inversión a la posi- Cada herramienta Makita es inspeccionada y probada ción neutral. exhaustivamente antes de salir de la fábrica. Se garan- Gire el anillo de ajuste de forma que la flecha quede tiza que está libre de defectos de mano de obra y mate- apuntando hacia la marca. riales por el período de UN AÑO a partir de la fecha ori- Gire la herramienta. - Page 20 Para reducir la exposición a estos productos químicos: trabaje en un área bien ventilada y póngase el equipo de seguridad indicado, tal como las máscaras contra polvo que están especialmente diseñadas para filtrar partículas microscópicas. Makita Corporation 3-11-8, Sumiyoshi-cho, Anjo, Aichi 446-8502 Japan 885507-942...
Need help?
Do you have a question about the XFD11 and is the answer not in the manual?
Questions and answers