
Related Manuals for Makita XFD06


Summary of Contents for Makita XFD06
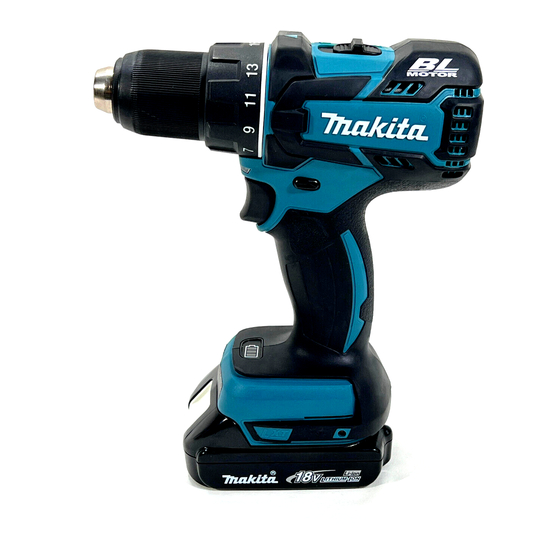
- Page 1 INSTRUCTION MANUAL MANUAL DE INSTRUCCIONES Cordless Driver Drill Atornillador Taladro Inalámbrico XFD06 014003 IMPORTANT: Read Before Using. IMPORTANTE: Leer antes de usar.
-
Page 2: Specifications
ENGLISH (Original instructions) SPECIFICATIONS Model XFD06 Steel 13 mm (1/2") Wood 38 mm (1-1/2") Capacities Wood screw 10 mm x 90 mm (3/8" X 3-1/2") Machine screw M6 (1/4") High (2) 0 - 1,550 /min No load speed (RPM) Low (1) -
Page 3: Cordless Driver Drill Safety Warnings
13. Remove any adjusting key or wrench before Battery tool use and care turning the power tool on. A wrench or a key 24. Recharge only with the charger specified by left attached to a rotating part of the power tool the manufacturer. - Page 4 ・ volts causing fires, personal injury and damage. It will also void the Makita warranty for the Makita tool and charger. ・ direct current Tips for maintaining maximum battery life Charge...
-
Page 5: Functional Description
Battery protection system FUNCTIONAL DESCRIPTION (Lithium-ion battery with star marking) CAUTION: 1. Star marking Always be sure that the tool is switched off and the • battery cartridge is removed before adjusting or checking function on the tool. Installing or removing battery cartridge 1. - Page 6 • not work even with a recharged battery cartridge, 50% to 75% cool down the tool fully. If the condition does not change, have the tool repaired by a Makita local 25% to 50% service center. Switch action 0% to 25% Charge the 1.
- Page 7 Use a dry cloth to wipe the dirt off the lens of the • lamp. Be careful not to scratch the lens of lamp, or Position of speed Speed Torque it may lower the illumination. Applicable operation adjusting lever Reversing switch action 1.
-
Page 8: Operation
Guideline of fastening torque Adjusting graduations Machine screw Soft wood 3.5 x 22 4.1x 38 (e.g. pine) Wood screw Hard wood 3.5 x 22 4.1x 38 (e.g. lauan) 013981 Installing bit holder (Optional accessory) ASSEMBLY 1. Bit holder 2. Bit CAUTION: Always be sure that the tool is switched off and the •... -
Page 9: Maintenance
The guide If you need any assistance for more details regarding screw makes drilling easier by pulling the bit into the these accessories, ask your local Makita Service Center. workpiece. Drill bits •... - Page 10 COMPLETE tool, freight prepaid, to one of Makita’s Factory or Authorized Service Centers. If inspection shows the trouble is caused by defective workmanship or material, Makita will repair (or at our option, replace) without charge. This Warranty does not apply where:...
-
Page 11: Especificaciones
ESPAÑOL (Instrucciones originales) ESPECIFICACIONES Modelo XFD06 Acero 13 mm (1/2") Madera 38 mm (1-1/2") Capacidades Tornillo para madera 10 mm x 90 mm (3/8" x 3-1/2") Tornillo de máquina 6 mm (1/4") Alta (2) 0 - 1 550 r/min Velocidad sin carga (RPM) - Page 12 Si no es posible evitar usar una herramienta 18. No utilice la herramienta eléctrica si el eléctrica en condiciones húmedas, utilice un interruptor no la enciende y apaga. Cualquier alimentador protegido con interruptor de herramienta eléctrica pueda circuito de falla en tierra (ICFT). El uso de un controlada con el interruptor es peligrosa y debe ICFT reduce el riesgo de descarga eléctrica.
- Page 13 monedas, llaves, clavos, tornillos u otros No deje la herramienta en marcha. Tenga en objetos pequeños de metal los cuales pueden marcha la herramienta solamente cuando la actuar creando una conexión entre las tenga en la mano. terminales de la batería. Cerrar el circuito de las No toque la broca o la pieza de trabajo terminales batería...
-
Page 14: Descripción Del Funcionamiento
PRECAUCIÓN: Use solo baterías auténticas de Makita. resultando en daños a la herramienta y al El uso de baterías no auténticas de Makita, o baterías cartucho, así como lesiones a la persona. que hayan sido alteradas, puede que resulte en la Para quitar el cartucho de batería, deslícelo de la... - Page 15 Sistema de protección de batería Luces indicadoras (batería de ión de litio con marca de estrella) Capacidad restante 1. Marca de Encendido APAGADO Intermitencia estrella 75% a 100% 50 % a 75 % 25% a 50% 0 % a 25 % 012128 Las baterías de ión de litio con una marca de estrella están Recargue la...
- Page 16 Utilice un paño seco para quitar la suciedad de la • reparación por un centro de servicio Makita en su lente de la linterna. Tenga cuidado de no rayar la región. lente de la linterna, porque podrá disminuir la Accionamiento del interruptor iluminación.
- Page 17 Esta herramienta tiene un conmutador de inversión para Para cambiar velocidad, apague primero cambiar la dirección de giro. Presione hacia dentro la herramienta. Seleccione el lado “2” para velocidad alta palanca del conmutador de inversión del lado A para o “1” para velocidad baja pero mayor torsión. Asegúrese giro hacia la derecha o del lado B para giro hacia la de que la palanca de cambio de velocidad esté...
-
Page 18: Operación
Instalación del portabrocas ENSAMBLE (accesorio opcional) PRECAUCIÓN: 1. Portapuntas 2. Punta de atornillar Asegúrese siempre de que la herramienta esté • apagada y el cartucho de batería extraído antes de realizar cualquier trabajo en la misma. Instalación o desmontaje de la punta de atornillar o la broca 1. -
Page 19: Mantenimiento
Operación de taladrado mantenimiento o ajuste deberán ser realizadas en Primero, gire el anillo de ajuste de forma que el puntero Centros de Servicio Autorizados por Makita, empleando quede apuntando a la marca . Después proceda de siempre repuestos Makita. - Page 20 COMPLETA, porte pagado con antelación, a una de las fábricas o centros de servicio autorizados Makita. Si la inspección muestra que el problema ha sido causado por mano de obra o material defectuoso, Makita la reparará (o a nuestra opción, reemplazará) sin cobrar.
- Page 24 Para reducir la exposición a estos productos químicos: trabaje en un área bien ventilada y póngase el equipo de seguridad indicado, tal como las máscaras contra polvo que están especialmente diseñadas para filtrar partículas microscópicas. Makita Corporation 3-11-8, Sumiyoshi-cho, Anjo, Aichi 446-8502 Japan www.makita.com...
Need help?
Do you have a question about the XFD06 and is the answer not in the manual?
Questions and answers