Table of Contents
Advertisement
Advertisement
Table of Contents

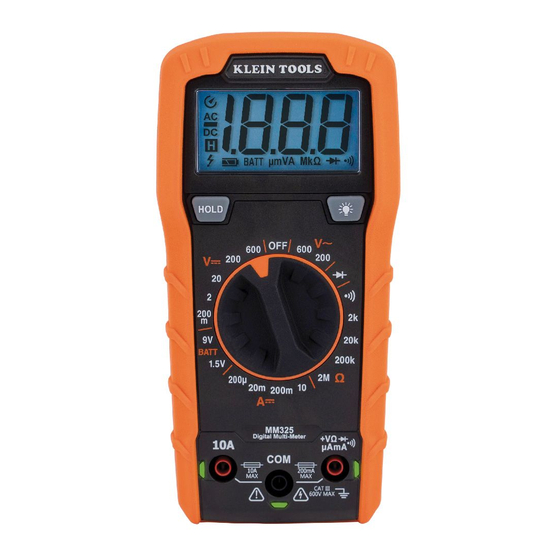
Summary of Contents for Klein Tools MM325
- Page 1 MM325 ENGLISH INSTRUCTION MANUAL Manual-Ranging Digital Multimeter • LEAD ALERT PROTECTION • DATA HOLD • AUDIBLE CONTINUITY • BATTERY TEST • DIODE TEST • AUTO POWER-OFF 600V 5000573 CAT III 600V GlobalTestSupply www. .com Find Quality Products Online at: sales@GlobalTestSupply.com...
-
Page 2: General Specifications
ENGLISH GENERAL SPECIFICATIONS Klein Tools MM325 is a manual-ranging multimeter that measures AC/DC voltage, DC current, and resistance. It can also test batteries, diodes, and continuity. • Environment: Indoors. DO NOT expose to moisture, rain, or snow. • Operating Altitude: 6562 ft. (2000m) •... -
Page 3: Electrical Specifications
ELECTRICAL SPECIFICATIONS Function Range Resolution Accuracy 200.0mV 0.1mV 2000mV ±(0.5% + 3 digits) DC Voltage 20.00V 0.01V (V DC) 200.0V 0.1V ±(0.8% + 3 digits) 600V AC Voltage 200.0V 0.1V ±(1.0% + 3 digits) (V AC) 600V ±(1.2% + 5 digits) 50 to 60Hz 200.0 A 0.1 A... -
Page 4: Symbols On Meter
ENGLISH WARNINGS To ensure safe operation and service of the meter, follow these instructions. Failure to observe these warnings can result in severe injury or death. • Before each use verify meter operation by measuring a known voltage or current. •... -
Page 5: Feature Details
FEATURE DETAILS NOTE: There are no user-serviceable parts inside meter. 2000 count LCD display Function selector switch "10A" jack "COM" jack "V " jack "HOLD" (Data Hold) button Backlight button Lead Alert LEDs GlobalTestSupply www. .com Find Quality Products Online at: sales@GlobalTestSupply.com... -
Page 6: Function Buttons
ENGLISH FUNCTION BUTTONS ON/OFF Power-ON: Rotate the Function Selector switch from the OFF setting to any measurement setting. Power-OFF: Rotate the Function Selector switch to the OFF setting. Auto Power-OFF: By default, the meter will automatically Power- OFF after 15 minutes of inactivity. Reactivate meter by pressing any button. - Page 7 OPERATING INSTRUCTIONS TESTING IN CAT III / CAT IV MEASUREMENT LOCATIONS Ensure the test lead shield is pressed firmly in place. Failure to use the CAT III / CAT IV shield increases arc-flash risk. 5/32" 5/32 (4 mm) (4 mm) TESTING IN CAT II MEASUREMENT LOCATIONS CAT III / CAT IV shields may be removed for CAT II locations.
- Page 8 ENGLISH DC VOLTAGE (LESS THAN 600V) 1. Insert RED test lead into V jack , and BLACK test lead into COM jack , and rotate Function Selector Switch to the highest V DC ( ) setting (600V). 2. Measure voltage and rotate the Function Selector Switch to successively lower V DC ( ) settings to obtain higher resolution measurements.
-
Page 9: Resistance Measurements
OPERATING INSTRUCTIONS DC CURRENT LESS THAN 200mA 1. For mA DC currents less than 200mA, insert RED test lead into V jack , and BLACK test lead into COM jack , and rotate Function Selector Switch to the highest mA DC setting (200mA). Black lead Red lead 2. -
Page 10: Diode Test
ENGLISH OPERATING INSTRUCTIONS CONTINUITY 1. Insert RED test lead into V jack and BLACK test lead into COM jack , and rotate Function Selector Switch to the setting. 2. Remove power from circuit. 3. Test for continuity by connecting conductor or circuit with test leads. -
Page 11: Maintenance
MAINTENANCE BATTERY REPLACEMENT When the indicator is displayed, the batteries must be replaced. 1. Remove screw from battery door. 2. Replace 2 x AAA batteries (note proper polarity). 3. Replace battery door and fasten securely with screw. To avoid risk of electric shock, disconnect leads from any voltage source before removing battery door. -
Page 12: Fcc & Ic Compliance
ENGLISH CLEANING Be sure meter is turned off and wipe with a clean, dry lint-free cloth. Do not use abrasive cleaners or solvents. STORAGE Remove the batteries when meter is not in use for a prolonged period of time. Do not expose to high temperatures or humidity.


Need help?
Do you have a question about the MM325 and is the answer not in the manual?
Questions and answers