Advertisement

Quick Links

User Manual
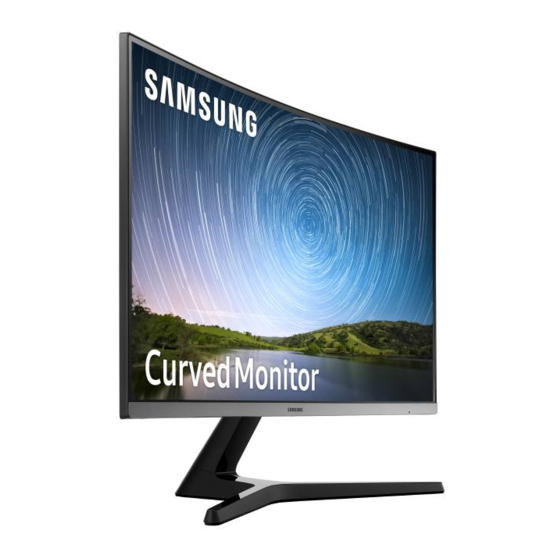
C27R50* C32R50*
The color and the appearance may differ depending on the product, and the peci cations are subject to change without
prior notice to improve the performance.
The contents of this manual are subject to change without notice to improve quality.
© Samsung Electronics
Samsung Electronics owns the copyright for this manual.
Use or reproduction of this manual in parts or entirety without the authorization of Samsung Electronics is prohibited.
Trademarks other than that of Samsung Electronics are owned by their respective owners.
(For India Only)
This product is RoHS compliant.
For more information on safe disposal and recycling visit our
website www.samsung.com/in or contact our Helpline numbers-
1800 40 SAMSUNG (1800 40 7267864) (Toll-Free)

Advertisement

Table of Contents
loading

Summary of Contents for Samsung C27R50 Sereis

  • Page 1 Samsung Electronics owns the copyright for this manual. 1800 40 SAMSUNG (1800 40 7267864) (Toll-Free) Use or reproduction of this manual in parts or entirety without the authorization of Samsung Electronics is prohibited. Trademarks other than that of Samsung Electronics are owned by their respective owners.
  • Page 2: Table Of Contents

    Before Using the Product Connecting and Using a Source Device Screen Setup Securing the Installation Space Read below before installing the monitor. SAMSUNG MAGIC Bright Precautions for storage Connecting and Using a PC Safety Precautions Connection Using the HDMI or HDMI-DVI Cable 21...
  • Page 3 Table of contents Setup and Reset Adjusting OSD (On Screen Troubleshooting Guide Display) settings Self Diagnosis Requirements Before Contacting Samsung Customer Service Center Transparency FreeSync Testing the Product Position Checking the Resolution and Frequency Eco Saving Plus Check the following.
  • Page 4: Before Using The Product

    Caution. Consult instructions for use: Class II product: This symbol indicates Contact your nearest Samsung Customer Service Center if you want to clean the inside of the product This symbol instructs the user to that a safety connection to electrical (Service fee will be charged.)
  • Page 5: Electricity And Safety

    Caution Do not disconnect the power cord while the product is being used. Only use the power cord provided with your product by Samsung. Do not use the power cord with other products. Keep the power socket where the power cord is connected unobstructed.
  • Page 6 Do not expose the product to direct sunlight, heat, or a hot object such as a stove. Be sure to consult Samsung Customer Service Center if you want to install the product at such a The product lifespan may be reduced or a fire may result.
  • Page 7 Be sure to power off the product and disconnect the power cord when water or other foreign yourself. substances have entered the product. Then contact Samsung Customer Service Center. Contact Samsung Customer Service Center for repairs. Do not place objects containing liquid (vases, pots, bottles, etc) or metallic objects on top of the To move the product, first disconnect all the cables from it, including the power cable.
  • Page 8 Caution Leaving the screen fixed on a stationary image for an extended period of time may cause Insert the power plug into the AC/DC adapter until a click sound is heard. afterimage burn-in or defective pixels. Do not insert only the power plug into the power outlet. Activate power-saving mode or a moving-picture screen saver if you will not be using the Do not use an AC/DC adapter other than the provided one.
  • Page 9 Do not hold the product upside-down or move it by holding the stand. The product may fall and become damaged or cause an injury. Looking at the screen too close for an extended period of time can deteriorate your eyesight. Do not use humidifiers or stoves around the product.
  • Page 10: Preparations

    Chapter 02 Preparations Parts Icons Description Multi directional button that helps navigate. JOG Button The JOG button is located on the rear left side of the product. The button can be used to move up, down, left or right, or as Enter. Control Panel This LED is power status indicator and works as Power On (Power button): Off...
  • Page 11 Direct Key guide The shortcut button screen (OSD menu) shown below is displayed only when the monitor screen is turned on, the computer resolution changes, or the input source changes. The function buttons page shows if Eye Saver Mode is enabled. Analog mode HDMI...
  • Page 12 Function Key Guide To enter the main menu or to use other items, press the JOG button to display the Function Key Guide. You can exit by pressing the JOG button again. UP/DOWN/LEFT/RIGHT: Move to the item you want. The description for each item will appear when the focus changes. PRESS(ENTER): The selected item will be applied.
  • Page 13 When the monitor displays nothing (i.e. Power saving mode or Non-signal mode), 2 direct keys for control source and power could be used as below. JOG Button Power saving/Non-signal mode Source Change Down PRESS(ENTER) for 2 seconds Power Off When the monitor displays the Main menu the JOG Button could be used as below. JOG Button Action UP/DOWN...
  • Page 14: Changing Brightness, Contrast And

    Changing Brightness, Contrast and Sharpness settings Changing the Volume setting You can adjust Brightness, Contrast Sharpness by moving the JOG button up or down, if no OSD You can adjust Volume by moving the JOG button left or right, if no OSD menu is displayed. menu is displayed.
  • Page 15 Types of Ports The functions available may vary depending on the product model. The color and shape of parts may differ from what is shown. Speci cations are subject to change without notice to improve quality. Refer to the actual product.
  • Page 16 Adjusting the Product Tilt Anti-theft Lock The color and shape of parts may differ from what is shown. Speci cations are subject to change without An anti-theft lock allows you to use the product securely even in public places. notice to improve quality. The locking device shape and locking method depend on the manufacturer.
  • Page 17: Precautions For Moving The Monitor

    Precautions for moving the monitor Do not directly apply pressure on the screen. Do not hold the product upside down only by the stand. Do not hold the screen when moving the monitor. Hold the lower corners or edges of the monitor when moving it.
  • Page 18: Installing A Wall-Mount Kit Or Desktop Stand

    Samsung shall not be held liable for any product damage or personal injury caused by using a wall-mount kit other than the one speci ed or from an attempt to install the wall-mount kit on your own.
  • Page 19 Installation Attaching the Stand Before assembling the product, place the product down on a at and stable surface so that the screen is facing downwards. at surface may damage the product. When the product is on the ground facing up or down, do not put pressure on it. The exterior may differ depending on the product.
  • Page 20 Removing the Stand Before assembling the product, place the product down on a at and stable surface so that the screen is facing downwards. at surface may damage the product. When the product is on the ground facing up or down, do not put pressure on it. The exterior may differ depending on the product.
  • Page 21: Connecting And Using A Source Device

    When connecting an HDMI cable, use the cable that came with the components of the monitor. If you use an HDMI cable other than provided by Samsung, the image quality may be degraded. The audio function is not supported if the source device is connected using the HDMI-DVI cable.
  • Page 22: Connection Using The D-Sub Cable

    Connection Using the D-SUB Cable (Analog Type) Connecting to Headphones Check to make sure that the power cables for the monitor and external devices, such as computers and set-top boxes, are not connected to the power outlet. D-SUB IN Use headphones when activating sound with an HDMI-HDMI. The earphone jack supports only the 3 conductor tip-ring-sleeve (TRS) type.
  • Page 23 Connecting the Power Optional C27R50* Optional Connect the power plug to the AC/DC adapter. (Optional) Connect the power cable to the AC/DC adapter. Then, connect the AC/DC adapter to the DC 14V port on the back of the product. Connect the AC/DC adapter cable to the DC 14V port on the back of the monitor. Next, connect the power cable to the power outlet.
  • Page 24: Correct Posture To Use The Product

    Correct posture to use the product Driver Installation You can set the optimum resolution and frequency for this product by installing the corresponding drivers. To install the latest version of the product driver, download it from the Samsung Electronics website at http://www.samsung.com. Setting Optimum Resolution An information message about setting optimum resolution will appear if you power on the product for the first time after purchase.
  • Page 25: Screen Setup

    Screen Setup Con gure the screen settings such as brightness. A detailed description of each function is provided. Refer to your product for details. SAMSUNG MAGIC Bright In PC mode Custom: Customize the contrast and brightness as required. Standard: Obtain a picture quality suitable for editing documents or using Internet.
  • Page 26 Brightness Color You can adjust the general brightness of the picture. (Range: 0~100) Adjust the tint of the screen. A higher value will make the picture appear brighter. This menu is not available when Bright is set to Cinema Dynamic Contrast mode.
  • Page 27: Hdmi Black Level

    HDMI Black Level Eye Saver Mode If a DVD player or set-top box is connected to the product via HDMI, image quality degradation (contrast/ Set to an optimum picture quality suitable for eye relaxation. color degradation, black level, etc.) may occur, depending on the connected source device. In such case, TÜV Rheinland “Low Blue Light Content”...
  • Page 28: Picture Size

    Picture Size Screen Adjustment Change the picture size. This menu is available in Analog mode only. This option is not available when FreeSync is enabled. This menu is only available when Picture Size is set to Screen Fit Mode. When a 480P or 576P or 720P or 1080P signal is input in mode and the monitor can display normally, In PC mode select...
  • Page 29: Adjusting Osd (On Screen Display) Settings

    Chapter 05 Adjusting OSD (On Screen Display) settings A detailed description of each function is provided. Refer to your product for details. Language The functions available may vary depending on the product model. The color and shape of parts may differ from what is shown.
  • Page 30: Setup And Reset

    Chapter 06 Setup and Reset A detailed description of each function is provided. Refer to your product for details. ― The functions available may vary depending on the product model. The colour and shape of parts may Select when the following screen is prompted. differ from what is shown.
  • Page 31 Show Again • You will see the following screen when you select Yes. Self Diagnosis Complete Contact the Samsung Call Center for assistance. Please have the following information ready: ‐ Model Code: ************** ‐ S/N: ************** • You will see the following screen when you select Self Diagnosis Complete If the test screen is okay during Self Diagnosis, your monitor may not have a problem.
  • Page 32: Freesync

    The response rate during the game may uctuate depending on the resolution. A higher resolution generally decreases the response rate. The sound quality of the monitor may be degraded. If you encounter any issues when using the function, contact the Samsung Service Center. When the resolution is changed while setting FreeSync...
  • Page 33 The models in the Graphic Cards list supports FreeSync FreeSync can only be used with speci c AMD graphics card models. Refer to the following list for supported graphics cards: Make sure to install the latest of cial graphics drivers from AMD that support FreeSync. For additional AMD graphics card models that support the FreeSync feature, visit the of cial AMD website.
  • Page 34: Eco Saving Plus

    Off Timer the monitor panel. Timer: Turn on Off Timer mode. This option is not available when SAMSUNG Bright is in Dynamic Contrast mode. MAGIC This menu is not available when Game Mode is enabled.
  • Page 35: Pc/Av Mode

    PC/AV Mode Key Repeat Time PC/AV Mode to AV. The picture size will be enlarged. Control the response rate of a button when the button is pressed. This option is useful when you view a movie. Acceleration, sec, or 2 sec can be selected.
  • Page 36: Information

    Information View the current input source, frequency and resolution. Information Picture LC************ S/N:*************** OnScreen Display HDMI System **kHz **Hz ** ****x**** Information Optimal Mode ****x**** **Hz Exit The displayed image may differ depending on the model.
  • Page 37: Installing The Software

    Easy Setting Box enables users to use the monitor by partitioning multiple sections. Windows 10 32Bit/64Bit To install the latest version of Easy Setting Box, download it from the Samsung Electronics website at http://www.samsung.com. The software may not work properly if you do not restart the computer after the installation.
  • Page 38: Troubleshooting Guide

    Check the following. Customer Service Center Installation issue (PC mode) Before calling Samsung Customer Service Center, test your product as follows. If the problem persists, contact Samsung Customer Service Center. The screen keeps switching on and off. Check the cable connection between the product and PC, and ensure the connectors are locked.
  • Page 39 Not Optimum Mode is displayed. Video playback is choppy. This message appears when the signal from the graphics card exceeds the maximum resolution or Playback of high-de nition large video les can be choppy. This may be because the video player is frequency for the product.
  • Page 40: Q & A

    Q & A Refer to the user manual for your PC or graphics card for further instructions on adjustment. How can I change the frequency? Set the frequency on your graphics card. Windows 7: Go to Control Panel Appearance and Personalization Display Screen Resolution Advanced settings...
  • Page 41: General

    Due to the nature of the manufacturing of this product, approximately 1 pixel per million (1ppm) may be brighter or darker on the LCD panel. This does not affect product performance. ― The above specifications are subject to change without notice to improve quality. ― This device is a Class B digital apparatus. ― For detailed device specifications, visit the Samsung Electronics website.
  • Page 42: Standard Signal Mode Table

    Standard Signal Mode Table Standard Signal Mode Table Model Name C27R50* Horizontal Frequency Synchronization 30 – 81 kHz Vertical Frequency 56 – 72 Hz Resolution Optimum Resolution 1920 x 1080 @ 60 Hz Maximum Resolution 1920 x 1080 @ 60 Hz If a signal that belongs to the following standard signal modes is transmitted from your PC, the screen will automatically be adjusted.
  • Page 43 Model Name C32R50* 30 – 81 kHz Synchronization Horizontal Frequency 56 – 75 Hz (D-SUB) Vertical Frequency 50 – 75 Hz (HDMI) Optimum Resolution 1920 x 1080 @ 60 Hz Resolution 1920 x 1080 @ 60 Hz (D-SUB) Maximum Resolution 1920 x 1080 @ 75 Hz (HDMI) If a signal that belongs to the following standard signal modes is transmitted from your PC, the screen will automatically be adjusted.
  • Page 44 Resolution Horizontal Frequency (kHz) Vertical Frequency (Hz) Pixel Clock (MHz) Sync Polarity (H/V) VESA, 1600 x 900 60.000 60.000 108.000 VESA, 1680 x 1050 65.290 59.954 146.250 VESA, 1920 x 1080 67.500 60.000 148.500 HDMI Resolution Horizontal Frequency (kHz) Vertical Frequency (Hz) Pixel Clock (MHz) Sync Polarity (H/V) IBM, 720 x 400...
  • Page 45 Horizontal Frequency The time required to scan a single line from the left to the right side of the screen is called a horizontal cycle. The reciprocal number of a horizontal cycle is called horizontal frequency. Horizontal frequency is measured in kHz.
  • Page 46: Appendix

    When the service is requested, in spite of in warranty, we may charge you for a visit from a service technician in the following cases. Use of supplies or separatly sold product unspeci ed by Samsung. Repair from a person besides an engineer of outsourcing service company or partner of Samsung Not a product defect Electronics Co., Ltd.

This manual is also suitable for:

C32r50 seriesC27r500C27r502fhuC27r504fhuLc27r500fhuxen

Table of Contents