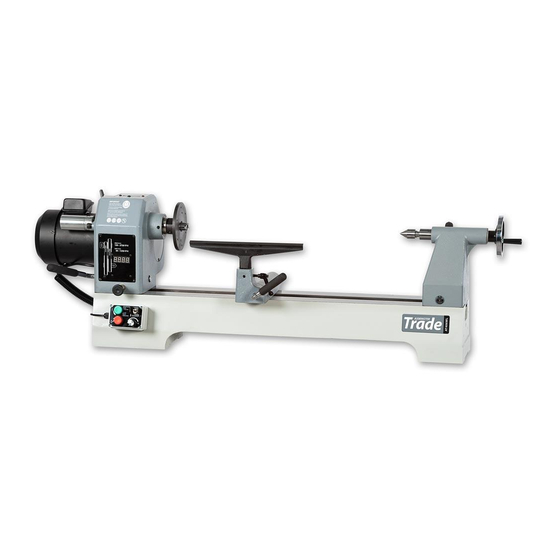
Summary of Contents for Axminster Trade AT406WL
- Page 1 Bench Mounted Lathe Code 502703 Floor Standing Lathe Code 720759 Original Instructions AT406WL Bench Mounted Woodturning Lathe Code 502703 Code 720759 Code 502704 AT: 08/06/2021 BOOK REF: APT008110 BOOK VERSION: 5...
-
Page 2: Eu Declaration Of Conformity
EN ISO 12100: 2010 EN 60204-1:2006/AC: 2010 Type Wood Lathe Model AT406WL and conforms to the machinery example for which the EC Type-Examination Certificate No RD/2019/C0012C has been issued by KINGCRAFT MACHINERY COMPANY LIMITED Signed at: No. 26, Gongye 12th Rd., Dail Dist., Taichung City, 412 Taiwan and complies with the relevant essential health and safety requirements. -
Page 3: What's Included
What’s Included Quantity Item Part Model Number AT406WL 1 No Bench Mounted Woodturning Lathe 1 No Spanner 1 No Push Rod 1 No Spindle Lock Pin 1 No Motor Plate Handle 1 No Instruction Manual Optional Accessories Quantity Item Part... -
Page 4: General Instructions For 230V Machines
General Instructions for 230V Machines It is good practice to leave the machine unplugged Good Working Practices/Safety until work is about to commence, also make sure The following suggestions will enable you to observe to unplug the machine when it is not in use, or good working practices, keep yourself and fellow unattended. -
Page 5: Specification
7. If your lathe has the facility to run in reverse, you must ensure that the mounting accessories (chucks, Specification Code 502703 Model AT406WL Rating Trade Power 230V 50Hz 1.5kW Speed Low 0-1,600rpm High 300-3,750rpm... - Page 6 Assembly Instructions Please take some time to read the section entitled be cleaned from the lathe, its components and “Illustration and Description” to identify the accessories prior to it being set up. various parts of your machine so that you are familiar Use degreaser to remove the barrier grease.
- Page 7 Assembly Instructions Figure 04 Figure 07 Figure 05 Figure 08 Figure 06 Figure 09 3. Lift the lathe bed from the pallet onto a work bench, see figs 7 then refit the headstock, tool rest and tailstock as described in steps 1 and 2, see figure 8.
- Page 8 Assembly Instructions Figure 13 Remove the headstock, tool rest assembly and tailstock from the lathe bed as before to make it easier to assemble the stands 2. After removing the above lift the lathe bed using a scissor lift, lifting host or seeking help. 3.
- Page 9 Assembly Instructions Figure 15 Assembly 2 1. Line up the holes in the lathe extension (H) with the threaded holes in lathe stand (F) and secure using the 3/8” Hex bolts and washers (d), see figure Figure 18 Remove the tailstock stop “ROD” and place safely aside Figure 16-17 Using the 3/8”...
- Page 10 Illustration and Description Motor locking handle Headstock Tailstock Faceplate Live centre Tool rest Banjo lock Tool rest lock Headstock pivot lock Headstock locking handle Control box Spindle speed LED Tailstock wheel Motor plate handle Tailstock barrel lock Access panel Lathe bed Tailstock lock stop Tailstock lock Banjo...
- Page 11 Illustration and Description The control box has a magnetic base enabling it to be ON (Green) and OFF (Red) buttons positioned anywhere on the lathe Forward and Reverse switch The Speed Control Knob, enables you to increase or decrease the speed of the spindle Indexing ring Index lock Headstock Pivot Lock, pull this knob to rotate the headstock to...
- Page 12 Operating Instructions Figure 20 Rotating the Headstock The Headstock can be swivelled in any position by lifting up the Headstock locking handle (a) and pulling the Headstock pivot lock (b) out, swivel the Headstock to the desired position is reached, lock in place by pushing down the headstock locking handle (a).
- Page 13 Operating Instructions Figure 25 Indexing facility DISCONNECT THE LATHE FROM THE Drive centre MAINS SUPPLY The Indexing ring is situated to the left side of the headstock which incorporates 36 positions at (10˚) segments. To the side of index ring is the index locking pin to lock the spindle in position.
-
Page 14: Maintenance
Operating Instructions Reposition the belt, making sure the groves in the Figure 27 belt slot into the groves in the pulleys. Pull/push the motor assembly until the belt is under tension, retighten the motor locking handle (a). (See figure Close the pulley access panel and replace the Hex screw. - Page 15 Exploded Diagrams/Lists Headstock Assembly A...
- Page 16 Exploded Diagrams/Lists Headstock Assembly A...
- Page 17 Exploded Diagrams/Lists Headstock Assembly A...
- Page 18 Exploded Diagrams/Lists Body Assembly B...
- Page 19 Exploded Diagrams/Lists Body Assembly B...
- Page 20 Exploded Diagrams/Lists Stand Assembly C (Optional)
- Page 21 Exploded Diagrams/Lists...
-
Page 22: Wiring Diagram
Wiring Diagram... - Page 23 Notes...
- Page 24 The Axminster guarantee Buy with confidence from Axminster! So sure are we of the quality, we cover all parts and labour free of charge for three years! For more information visit axminstertools.com/3years The packaging is suitable for recycling. Please dispose of it in a responsible manner. EU Countries Only Do not dispose of electric tools together with household waste material.


Need help?
Do you have a question about the AT406WL and is the answer not in the manual?
Questions and answers