Table of Contents
Advertisement
Advertisement
Table of Contents

Summary of Contents for Franke FCE90M10B
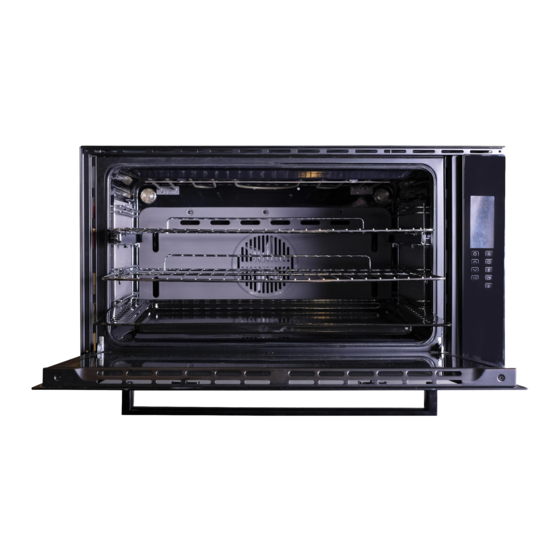
- Page 1 Built-in Oven User Manual Model: FCE90M10B...
-
Page 2: Safety Is A Good Habit To Get Into
We recommend that you read the instructions in this owner’s manual carefully before use for the best performance and to extend the life of your appliance, as it will provide you with all the instructions you require to A ensure its safe installation, use and maintenance. -
Page 3: Close-Up View
When in doubt about operating the appliance; Replacing the electrical socket when it is not compatible with the appliance plug. The temperature probe is a part of thermostat, if damaged; they shall be replaced overall by authorized service person. Service Centers authorized by the manufacturer must be contacted in the following cases: If in doubt about the soundness of the appliance after removing it from its packaging;... -
Page 4: How To Use Your Oven
How to use your oven This multi-function oven combines the advantages of traditional convection ovens with those of the more modern fan assisted models in a single appliance. It is an extremely versatile appliance that allows you to choose easily and safely between different cooking modes. Notice: The first time you use your appliance, we recommend that set the thermostat to the highest setting and leave the oven on for about half an hour with nothing in it, with the oven door shut. -
Page 5: Memory Function
General instructions · Always switch the appliance on first by pressing the On/Off button. · When the selected function is lit, the oven begins to heat up or the time set begins to count down. · The oven light is switched on as long as an oven function is started. The oven light is goes off when the appliance switched off automatically. - Page 6 To set when the oven is to switch off again. Time To set, change or check the time(See also section “Before Using for the First Time”) General instructions · After a clock function has been selected, the corresponding symbol flashes for approx. 5 seconds. During this time, the desired times can be set or modified using the button.
- Page 7 Other Functions Switching off the display You can save energy by switching off the display. Switching off the display 1. If required, Switch off the appliance using the On/Off button. 2. press the Clock Functions button and the button at the same time until the display goes out. As soon as the appliance is switched on again, the display comes on automatically.
- Page 8 mode ,you can also cook various dishes at the same time ,as long as their respective cooking temperatures are the same .A maximum of 2 racks can be used at the same time ,following the instructions in the section entitled:“Cooking On More Than One Rack ”. This cooking mode is particularly recommended for dishes requiring a gratin finish or for those requiring considerably prolonged cooking times, such as for example: lasagne, pasta backs, roast chicken and potatoes, etc..Moreover the excellent heat distribution makes it possible to use lower temperatures when cooking roasts.
-
Page 9: How To Keep Your Oven In Shape
The turnspit (only available on certain models) To start the turnspit, proceed as follows: · Insert the rotisserie rod “A” into the drive unit and groove “B” into bend “C”; · Turn the plastiv handle “D” anti clockwise and slide the rack into the oven runners ensuring that the rod “E” slots into the hole “F”;... -
Page 10: Practical Cooking Advice
· Lift up and turn the small levers situated on the two hinges; · Grip the door on the two external sides, shut it slowly but not Completely; · Pull the door towards you , pulling it out of its seat ; Reassemble the door by following the above procedures backwards. - Page 11 adjusting the thermostat knob to the desired temperature. Setting “fan assisted grill ”, is extremely useful for grilling foods rapidly ,as the distribution of heat makes it possible not only to brown the surface ,but also to cook the bottom part . Moreover, it can also be used for browning foods at the end of the cooking process, such as adding that gratin finish to pasta bakes, for example.
- Page 12 2Multi-Cooking Pizza (on 2 racks) 15-20 Lasagna 30-35 Lamb 50-60 Roast chicken +potatoes 60-75 Mackerel 30-35 Plum-cake 40-50 Cream puffs (on 2 racks) 20-25 Biscuits (on 2 racks) 10-15 Sponge cake (on 1 rack) 15-20 Sponge cake (on 2 racks) 20-25 Savory pies 25-30...
- Page 13 NB: cooking times are approximate and may vary according to personal taste .When cooking using the grill or fan assisted grill ,the dripping pan must always be placed on the 1st oven rack from the bottom . Installation Only a qualified person in compliance with the instructions provided must install the appliance. Appliance are fully assembled as in normal operation without any parts removed .The manufacturer declines all responsibility for improper installation, which may harm persons and animals and damage property.
-
Page 14: Technical Specifications
.In these cases, never exceed the maximum current capacity indicated on the single adapter or extension and the maximum power indicated on the multiple adapter .The plug and socket must be easily accessible. Technical Specifications FCE90M10B Model Power Source 220-240V ~50/60Hz...


Need help?
Do you have a question about the FCE90M10B and is the answer not in the manual?
Questions and answers