Table of Contents
Advertisement
Quick Links
Advertisement
Table of Contents

Related Manuals for AEG SANTO S70398DT


Summary of Contents for AEG SANTO S70398DT
- Page 1 SANTO 70398-DT Refrigerator/Freezer Operating Instructions...
- Page 2 In the event of a malfunction, these operating instructions contain infor- mation on how to rectify faults yourself, see the “Something Not Working” section. For further assistance contact your local AEG Service Force Centre, see the chapter “Service and Spare Parts. Printed on paper manufactured with environmentally sound processes.
-
Page 3: Table Of Contents
Contents Safety ..........4 Disposal . -
Page 4: Safety
Safety The safety aspects of our refrigerator/freezers comply with accepted tech- nical standards and the German Appliance Safety Law. Nevertheless, we consider it our obligation to make you aware of the following safety infor- mation: Intended use • The refrigerator is intended for use in the home. It is suitable for the coo- ling, freezing and storing of frozen food, as well as for making ice. -
Page 5: Disposal
Service • Under no circumstances should you attempt to repair the appliance your- self. Repairs carried out by inexperienced persons may cause injury or serious malfunctioning. Contact your local AEG Service Force Centre. Disposal Appliance Packaging Information All materials are environmentally sound! The plastics can be recycled and are identified as follows: >PE<... -
Page 6: Remove Transport Packaging
Warning! Before disposing of old appliances make them inoperable. Remo- ve plug from mains, sever the power cable, remove or destroy any snap or latch closures, to prevent small children being trapped inside. • Use an authorised disposal site. Contact your local Council or Enviromental Health Office to see if there are facilities in your area to recycle the appliance;... -
Page 7: Prior To Initial Start Up
Prior to Initial Start-Up Before connecting the appliance to the mains and putting it into ope- ration for the first time, leave the appliance to stand for 30 minutes if it was transported upright. After transporting on its side, the appliance must be left to stand for 4 hours before switching it on.This is necessary to allow the oil to flow back into the compressor. -
Page 8: Switching The Appliance Off
The following effects are of significance in respect of the interior tem- perature: – Ambient temperature; – Quantity and temperature of the food stored; – Frequency with which the door is opened and how long it is left open. Switching the Appliance Off Refrigerator and freezer compartments can not be switched off inde- pendently of one another. -
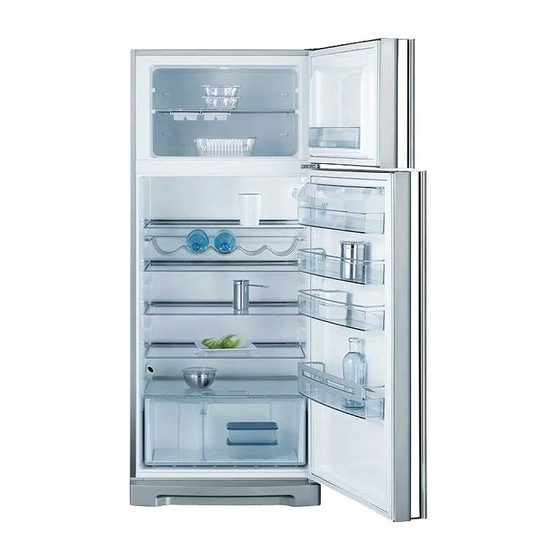
Page 9: Interior Accessories
Interior Accessories Storage shelves • You should always slide one of the full size glass storage shelf into the lowest set of guides, above the fruit and the vegetable containers, and keep it in this position. • The height of the storage shelves can be adjusted: •... -
Page 10: Fresh Food Refrigeration
Fresh Food Refrigeration To obtain the best performance: • do not store warm food or evaporating liquid in the refrigeator • do cover or wrap the food, particularly if it has a strong flavour. • position food so that air can circulate freely round it. Useful hints: Meat (all types): wrap in polythene bags and place on the glass shelf above the vegetable drawer(s). -
Page 11: Freezing
Freezing Attention! • Before foods are frozen, the actual temperature in the freezer com- partment must be -18°C or colder. • Please observe indicated freezing capacity on the serial plate. The freezing capacity represents the maximum amount of fresh goods that can be frozen within 24 hours. -
Page 12: Frozen Storage
Frozen Storage Attention! Before initial loading of the freezer compartment with previously frozen goods, the required storage temperature of -18°C must be reached. The freezer door storage compartment (2 stars) serves only for storage purposes at -12 °C. Storage time: 2-3 weeks, depending on food. •... -
Page 13: Preparation Of Ice Cubes
Preparation of Ice Cubes Fill the ice cube tray 3/4 full with cold water, place it in the freezer com- partment and leave to freeze. To loosen the frozen cubes, either bend the ice cube tray or hold it under running water for a few seconds. -
Page 14: Defrosting
Defrosting The refrigerator is defrosted automatically The integrated evaporator on the rear wall of the refrigerator com- partment is defrosted fully automatically. The water collects in the discharge trough at the back wall of the refrigerator, and is fed through the discharge opening in the catch tray at the compressor where it is evaporated. -
Page 15: Cleaning And Care
Cleaning and Care For hygienic reasons the appliance interior, including interior accessories, should be cleaned regularly. Warning! • The appliance may not be connected to the mains during cleaning. Dan- ger of electrical shock! Before cleaning switch the appliance off and rem- ove the plug from the mains, or switch off or turn out the circuit breaker or fuse. -
Page 16: Energy Saving Tips
After cleaning wipe with fresh water and rub dry. Accumulation of dust at the condenser increases energy consumption. For this reason carefully clean the condenser at the back of the appliance once a year with a soft brush or a vacuum cleaner. Check the water drain hole on the rear wall of the fridge. -
Page 17: What To Do If
What to do if ... Correcting Malfunctions Perhaps a malfunction has been caused by a minor error, which you can correct yourself with the help of the following instructions. Do not attempt any further repairs if the following instructions do not help in each specific case. -
Page 18: Changing The Light Bulb
Malfunction Possible cause Remedy seal with a hand-held hair dryer at those points which Large accumulation of are not airtight (no warmer frost in the appliance, Door is not properly sealed than approx. 50°C). At the perhaps also at the door same time, shape the war- seal. -
Page 19: Service And Spare Parts
Customer Care Department For general enquiries concerning your AEG appliance or for futher information on AEG products, please contact our Customer Care Department by letter or telephone at the address below or visit our website at www.aeg.co.uk. -
Page 20: Guarantee Conditions
GUARANTEE CONDITIONS Standard guarantee conditions We, AEG, undertake that if within 12 months of the date of the purchase this AEG applian- ce or any part thereof is proved to be defective by reason only of faulty workmanship or materials, we will, at our discretion repair or replace the same FREE OF CHARGE for labour, materials or carriage on condition that: ·... -
Page 21: Installation - Electrical Connection
Installation Electrical Connection Any electrical work required to install this appliance should be carried out by a qualified electrician or competent person. WARNING – THIS APPLIANCE MUST BE EARTHED The manufacturer declines any liability should these safety measures not be observed. Before switching on, make sure the electricity supply voltage is the same as that indicated on the appliance rating plate. -
Page 22: Positioning
Positioning This appliance should only be installed at a location where the ambient temperature corresponds to the climate classification indicated on the rat- ing plate, which is located at the left on the inside of the appliance. The following table shows which ambient temperature is correct for each climate classification: SN +10°C to + 32°C +16°C to + 32°C... -
Page 23: Reversing The Door
Reversing the Doors Before carrying out any operations, remove the plug from the power socket. To reverse the door, proceed as follows: 1. Remove the upper hinge and the upper support taking care that the upper door not fall off ; 2. -
Page 24: Regulations, Standards, Guidelines
m m Caution! Do not overtighten the screws (max. 2 Nm) as you may damage the door handles. m m Warning: After having reversed the doors check that all the screws are properly tightened and that the magnetic seal adheres to the cabinet. If the ambient temperature is cold (i.e. - Page 26 55-77 High Street SLOUGH Berks SL1 1DZ http://www.aeg.co.uk © Copyright by AEG 214.3617.41 06/04 Subject to change without notice...
- Page 27 This file has been downloaded from: www.UsersManualGuide.com User Manual and User Guide for many equipments like mobile phones, photo cameras, monther board, monitors, software, tv, dvd, and othes.. Manual users, user manuals, user guide manual, owners manual, instruction manual, manual owner, manual owner's, manual guide, manual operation, operating manual, user's manual, operating instructions, manual operators, manual operator, manual product, documentation manual, user maintenance, brochure, user reference, pdf manual...
Need help?
Do you have a question about the SANTO S70398DT and is the answer not in the manual?
Questions and answers