Table of Contents
Advertisement
Quick Links
Advertisement
Table of Contents

Subscribe to Our Youtube Channel
Related Manuals for Yaesu FR5DR


Summary of Contents for Yaesu FR5DR
- Page 1 C4FM/FM 144/430MHz DUAL BAND DIGITAL TRANSCEIVER FT5D FT5D Operating Manual...
-
Page 2: Table Of Contents
Contents Introduction ............. 2 Registering to Memory Channels....30 Recalling a Memory Channel ...... 31 Quick Guide ............ 3 Recall only memories in the same frequency Controls & Connections ........ 4 band (Band) using the Transceiver ............ 4 memory auto grouping (MAG) function ..31 Operation Keys .......... - Page 3 Setup Menu Operation ........ 62 Tables of Setup Menu Operations ....63 Restoring to Defaults (Reset) ...... 69 All Reset ............69 Setup Menu Reset ........69 Text input screen .......... 70 Specifications ..........72 YAESU LIMITED WARRANTY ...... 74...
-
Page 4: Introduction
Thank you for purchasing the FT5DR/DE Transceiver. We urge you to read this manual in its entirety, and also the Advance Manual (available for download on the Yaesu web- site), to gain a full understanding of the amazing capability of the exciting new FT5DR/ DE Transceiver. -
Page 5: Quick Guide
Quick Guide ① Turning the Power ON ③ Selecting the Operating Band Install the charged battery pack and then Press the [BAND] key. press and hold the Power switch. ④ Tuning the frequency ② Inputting the Call sign Rotate the DIAL knob. When turning the power ON for the first ⑤... -
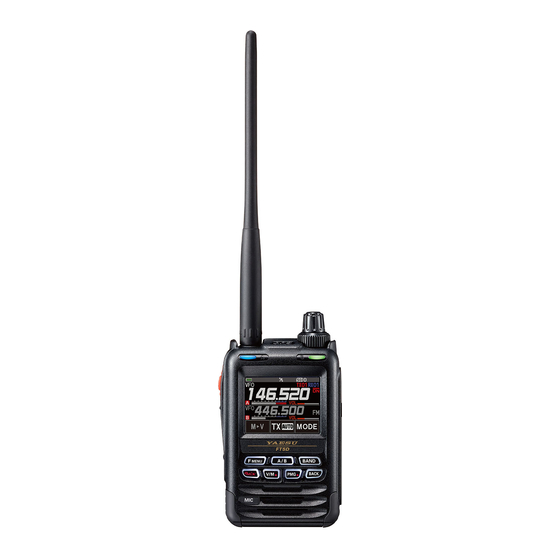
Page 6: Controls & Connections
(E-DC-6) to this jack. Do not connect any battery charger DIAL knob which is not specified by Yaesu. Rotate the DIAL Knob to change the fre- quency or select a memory channel. * When the included antenna and battery pack... -
Page 7: Operation Keys
Operation Keys Press Press and Hold Pressing each time switches between Press and hold for over one second to F menu key function screen and normal screen. enter Setup Menu. Press and hold for over one second Pressing each time switches between to switch between the Dual Band A/B key A-band and B-band. -
Page 8: Touch Screen Display
Touch Screen Display Lights when DTMF function is enabled Lights when Auto Power Off is active Lights when GPS is acquired Lights when AF DUAL Function is enabled Lights when GPS Log Function is enabled Lights when the mute Function is active Lights when the Voice memory function is enabled LOCK Lights when a microSD memory card is inserted... - Page 9 A-band / B-band display area A-band / B-band display modes : VFO mode : PMG mode (Recalls only the frequencies registered in PMG) : Memory mode (The numeric is the memory channel number) Press the BAND key while in memory mode, the MAG function can automat- ically recall memory channels in groups for each of the following bands: (For details, refer to “Using the Memory”...
- Page 10 Displays the operating mode (Digital mode is indicated by a red icon) : FM (Analog) mode : Normal digital mode (digital mode using C4FM modulation) : Wide digital mode (digital mode using C4FM modulation) : Data FR mode (data communication mode using C4FM modulation) : AMS (Automatic Mode Select) FM (Analog) mode : AMS (Automatic Mode Select) DN mode : AMS (Automatic Mode Select) VW mode...
- Page 11 ● Dual Band Screen A-band and B-band are displayed in a top-down fashion. Both bands are received simultaneously. Touch and hold the frequency of the operation band (white display) to display the numeric keypad screen for frequency input. Touch the sub-band (gray display) frequency to change the operation band.
- Page 12 / outside. For details, refer to the separate GM Instruction Manual which is avail- able on the Yaesu website. The call signs of the stations that can communicate is displayed in white characters.
- Page 13 ● AF DUAL Screen (Press the [F menu] key Touch [A.DUAL]) While receiving and listening to a radio broadcast, the A-band and B-band may also be monitored simultaneously for activity. When a signal is received on A-band or B-band, the broadcast audio is muted and the A or B band audio is heard.
-
Page 14: Safety Precautions ( Be Sure To Read )
Be sure to read these important precautions, and use this product safely. Yaesu is not liable for any failures or problems caused by the use or misuse of this prod- uct by the purchaser or any third party. Also, Yaesu is not liable for damages caused through the use of this product by the purchaser or any third party, except in cases where ordered to pay damages under the laws. - Page 15 Use only the provided or specified screws. in tightly. Using screws of a different size, may result in Contact Yaesu or the retail store where this fire, electric shock and component damage. transceiver was purchased for assistance, as Do not place the transceiver in a confined...
- Page 16 Be sure to check with the manufacturer of Do not use any products other than the spec- any hybrid or fuel-saving automobile regard- ified options and accessories. ing use of the transceiver in that car. Failure or miss operation may result. Noise generated by an onboard electrical device Install the hand strap and belt clip securely.
-
Page 17: Supplied Accessories And Options
Supplied Accessories and Options Supplied Accessories • Rechargeable Li-Ion Battery Pack (7.2V, 2,200mAh) SBR-14LI • Battery Charger SAD-25 • Antenna • Belt Clip SHB-26BK • Quick Release Holster • USB Cable • Operating Manual (This Manual) • SBR-14LI Manual • Battery Pack protective cap If any item is missing, contact the dealer from which you purchased the transceiver. -
Page 18: Preparation
Preparation Installing the Antenna Turn the antenna clockwise until it is secured. Hold the thick base of the antenna • Do not hold or twist the upper part of the antenna when installing or removing it. To do so may break the conductors inside the antenna. -
Page 19: Charging The Battery Pack
Charging the Battery Pack Charging the Battery Pack using the Battery Charger (SAD-25) Using the supplied battery charger (SAD-25), it takes about 9 hours* to charge the SBR- 14LI battery pack fully. *Depending on the battery status, the charging time might be increased 1. -
Page 20: External Power Supply
External Power Supply Connecting an External Power Supply for Use in a Vehicle The optional DC Cable with Cigarette-Lighter plug (SDD-13) allows power to be supplied from a motor vehicle type cigarette lighter socket. Connecting to an External Power Supply Using a Power Cable The optional DC cable (E-DC-6) allows the transceiver to be connected to an external DC power supply. -
Page 21: Formatting A Microsd Memory Card
Formatting a microSD Memory Card Format a new microSD memory card following the steps below before use. • Formatting a microSD memory card erases all data saved on it. If you are going to format the microSD memory card you are using, be sure to check the data saved on it before formatting. -
Page 22: Operation
Operation Turning the Transceiver ON Press and hold the Power (Lock) switch to turn the trans- ceiver ON. ● Turning the transceiver OFF Press and hold the Power (Lock) switch again to turn the transceiver OFF. ● Inputting the call sign The first time the transceiver is turned ON after it is purchased;... -
Page 23: Adjusting The Squelch Setting
For additional details, refer to the Advanced Manual which may be downloaded from the Yaesu website. ● Switching the Mono-band Screen Pressing and holding the [A/B] key will switch between Mono-Band and Dual-Band displays. -
Page 24: Selecting A Frequency Band
Selecting a Frequency Band Press the [BAND] key to select the desired frequency band. 1. Press the [F menu] key to display the function menu screen. 2. Press the [BAND] key to switch the frequency bands in reverse order. 3. Press the [BACK] key to return to the previous screen. -
Page 25: Changing The Frequency Step
Changing the Frequency Step The DIAL knob rotation frequency step may be changed. Normally, the factory default setting will provide a good frequency step. 1. Press and hold the [F menu] key, then touch [CONFIG]. 2. Touch [18 STEP] then rotate the DIAL knob to change the frequency step. 3. -
Page 26: Transmission
Fixing the Communication Mode To fix the transmission mode for operation, touch [MODE] to switch the communication mode. Communication Mode Icon Description of Modes This is the standard digital mode. V/D Mode Calls are less prone to interruptions caused by detec- (Voice/Data simultaneous transmission mode) tion and correction of the received digital voice signal. -
Page 27: Changing The Transmit Power Level
Changing the Transmit Power Level 1. Press the [F menu] key, then touch [TXPWR]. 2. Rotate the DIAL knob to select one of the following transmit power levels: TX PO Level PO Meter HIGH (5 W)* LOW3 (2.5 W) LOW2 (1 W) LOW1 (0.1 W) *The default setting. -
Page 28: Using The Convenient Digital C4Fm Feature
• If the firmware is not compatible with the DG-ID function, update the latest firmware to use the DG-ID function. The latest firmware is available on the YAESU website. Setting the transmit and receive DG-ID number to “00” for communicating with all other stations using C4FM digital mode 1. - Page 29 • Refer to the separate Operating Manual GM Edition for details on how to use the GM function (download the manual from our YAESU website). 7. Press the [GM/X] key to turn the GM (Group Monitor) function OFF and return to the normal operation.
- Page 30 5. Press the [BACK] key or the PTT switch to save the setting and return to the normal operation. 6. Press the [GM/X] key to turn the GM (Group Monitor) function ON and check whether or not other stations that are operating on frequency, with the GM (Group Monitor) function ON, and have the same GD-ID num- ber setting, are in the communication range.
-
Page 31: Repeater Operation
Repeater Operation Communicating Via the Repeater The transceiver includes an ARS (Automatic Repeater Shift) function which sets the re- peater operation automatically when the receiver is tuned to the repeater frequency. 1. Set the downlink (output) frequency from the repeater. Repeater Shift Icon 2. -
Page 32: Using The Memory
Back up the stored contents to a microSD memory card. For details on saving a backup onto a microSD memory card, refer to the Advanced Manual which may be downloaded from the Yaesu website. Registering to Memory Channels 1. Set the frequency and the communication mode to be registered to a memory channel. -
Page 33: Recalling A Memory Channel
• Use the numeric keys to input the characters. • Touch to move the cursor to right in the text input area. • See “Text input screen” on page 70 to input a memory tag. 6. Press the PTT or [V/M ● ] key, to save the data to memory and return to normal oper- ations. -
Page 34: Clearing Memories
Clearing Memories 1. Press and hold the [V/M ● ] key. 2. Rotate the DIAL knob to select the memory channel from which the data is to be cleared. 3. Tou ch [ ], then touch [M.DEL]. Confirmation screen “DELETE?” is displayed. 4. -
Page 35: Recalling The Home Channels
6. Press the [V/M ● ] key, or press the PTT switch, to changed home channel frequency and return to normal operations. For additional details on the following functions, refer to the Advanced Manual which may be downloaded from the Yaesu website. Memory Channel List All memory channels can be displayed and recalled from the list. -
Page 36: Pmg
The activity monitor can display up to 5 channels, but it is Press briefly very convenient to register about 2 or 3 frequently used fre- quencies. Memory channel tag YAESU Memory channel number currently selected Display in gray even if the received signal is lost. -
Page 37: Touch The Bar Graph To Switch The Frequency
Touch the bar graph to switch the frequency 1. Touch the bar graph on the screen. YAESU • The touched bar graph is displayed in orange and the receive is set to that frequency. • The receive frequency may also be changed by turn- ing the DIAL knob. -
Page 38: Cam (Channel Activity Monitor) Function
When a memory channel on the graph is touched, it will become the center operating frequency, so communication with friends may begin immediately (TOUCH & GO Operation). Memory channel tag YAESU Memory channel number currently selected Currently selected memory channel... - Page 39 3. Touch [EDIT]. • A list of memory channels registered to the CAM 1 GROUP 01 group is displayed. 2 GROUP 02 • Press the [V/M ● ] key to switch between the memory 3 GROUP 03 tag screen and the frequency screen. 4 GROUP 04 When the memory channel is displayed as a tag (name), press and hold the [V/M●] key to switch to the frequency...
-
Page 40: Using The Cam Function
Touch the bar graph to switch the frequency 1. Touch the bar graph on the screen. YAESU • The touched bar graph is displayed in orange and switched to the memory channel frequency and received. • Press the PTT switch to transmit as it is, so you can start communicating with the other station immediately. -
Page 41: Delete A Registered Memory Channel
Delete a registered memory channel from CAM group 1. Touch [GROUP] on the CAM screen. YAESU 2. Rotate the DIAL knob to select the CAM group (GROUP 01 to 10) in which the memory channel to be deleted is registered. -
Page 42: In The Cam Group At Once
Delete all the contents in the CAM group at once 1. Touch [GROUP] on the CAM screen. YAESU 2. Rotate the DIAL knob to select the CAM group to be deleted. 3. Touch [CLEAR]. Confirmation screen “DELETE?” is displayed. 1 GROUP 01 4. -
Page 43: Disable The Cam Function
3. Touch [NAME]. 4. Enter up to 16 characters for the CAM group tag. 1 GROUP 01 • Touch [ ] to move the cursor to left/right in the 2 GROUP 02 text input area. 3 GROUP 03 • Touch [ ] to insert a space at the cursor position. -
Page 44: Band Scope
Band Scope The Spectrum Analyzer presents a view of operating activity on channels above and be- low the current main band operating frequency as the center. 1. Press the [F menu] key, and then touch [SCOPE]. If [SCOPE] is not displayed, touch [FWD ] to display [SCOPE] and then touch it. -
Page 45: Scanning Function
• Memory Bank Scan For additional details on the Programmable Memory Scan (PMS) and Memory Bank Scan, refer to the Advanced Manual which may be downloaded from the Yaesu website. VFO Scan VFO scan function scans the frequencies, and detects signals. -
Page 46: When Scanning Stops
Setting the Receive Operation When Scanning Stops 1. Press and hold the [F menu] key, and then touch [SCAN]. 2. Touch [4 SCAN RESUME], and then press the [F menu] key. 3. Rotate the DIAL knob to select the operation performed after the scan stops: 2.0 sec - 10.0 sec The signal is received for a specified period of time, and then scanning resumes. -
Page 47: Specified Memory Channels
For additional details on the Programmable Memory Scan (PMS) and Memory Bank Scan, refer to the Advanced Manual which may be downloaded from the Yaesu website. Skip Memory Channels, and Specified Memory Channels Two types of memory channels may be designated, “skip memory channels” and “speci- fied memory channels”... -
Page 48: Convenient Functions
Convenient Functions Bluetooth Operation ® ® The FT5DR/DE has built-in Bluetooth functionality, so hands-free operation is pos- ® sible using the optional Bluetooth headset (SSM-BT10) or a commercially available ® Bluetooth headset. ® The operation of all commercially available Bluetooth headsets cannot be guaranteed. - Page 49 ® 5. Rotate the DIAL knob to select the desired Bluetooth device. SSM-BT10 6. Touch [CONNECT]. SSM-BT10 yaesu-01 yaesu-02 yaesu-03 R556 7. When pairing is complete and connected, the ® Bluetooth headset model name is displayed. SSM-BT10: LED blinks blue.
- Page 50 ® Hands-free operation with a Bluetooth headset (VOX function) When FT5DR/DE's VOX (automatic voice transmission) function is turned on, you can ® use the Bluetooth headset to perform hands-free operation that transmits automatically just by talking. Turn on the VOX function according to “VOX Operation” (page 50). ®...
- Page 51 Bluetooth devices: gray letters • To stop the search in the progress, touch [STOP]. ® 5. Rotate the DIAL knob to select the desired Bluetooth SSM-BT10 device. yaesu-01 6. Touch [CONNECT]. yaesu-02 yaesu-03 R556 ® Remove a registered (paired) Bluetooth device from the list ®...
-
Page 52: Vox Operation
VOX Operation The VOX system provides automatic transmit/receive switching based on voice input to ® the microphone or Bluetooth Headset. With the VOX system enabled, you do not need to press the PTT switch in order to transmit, and it is not necessary to use a VOX head- set in order to utilize VOX operation. - Page 53 4. Press the [F menu] key, and then rotate the DIAL knob to select to select the delay time (the transmit-receive 5 VOX delay after the cessation of speech). 0.5sec / 1.0sec / 1.5sec / 2.0sec / 2.5sec / 3.0sec DELAY : 0.5 sec Factory default value: “0.5sec”.
-
Page 54: Memory Channels
Convenient Preset Receiver Memory Channels Weather Broadcast (10 channels), International VHF Marine Radio (57 channels) and Shortwave Broadcasts Stations (89 channels) are recorded in the preset receiver mem- ory channels. ● Weather Broadcast preset receiver memory channels [WX CH] are listed on: ....................see below The frequencies (10 channel) used for the VHF Weather Broadcast Station are regis- tered to dedicated preset receiver memory channels. - Page 55 Preset International VHF (Marine) Radio Receiver Memory Channels The frequencies (57 channels) used for the international VHF Marine Radio are regis- tered in dedicated preset receiver memory channels. 1. Press the [A/B] key to set the A-band as the operating band. 2.
- Page 56 Preset Worldwide Shortwave Broadcast Receiver Memory Channels The frequencies (89 channels) used for international worldwide broadcasting are regis- tered to dedicated preset receiver memory channels. 1. Press the [A/B] key to set the A-band as the operating band. 2. Press the [F menu] key, and then touch [P.RCVR]. If [P.RCVR] is not displayed, touch [BACK ] to display [P.RCVR] and then touch it.
- Page 57 Frequency Broadcast Station Name Number (MHz) Name 17.505 SWEDEN Sweden 6.120 FINLAND Finland 9.560 FINLAND Finland 11.755 FINLAND Finland 15.400 FINLAND Finland 5.920 RUSSIA Russia 5.940 RUSSIA Russia 7.200 RUSSIA Russia 12.030 RUSSIA Russia 7.465 ISRAEL Israel 11.585 ISRAEL Israel 15.615 ISRAEL Israel...
-
Page 58: Using The Voice Recording
Using the Voice Recording With the voice recording function, the received audio of the other station, and/or the transmit audio of the FT5DR/DE is recorded on the microSD memory card. The record- ed file can be played back with FT5DR/DE or the microSD memory card can be taken out and used on a PC. - Page 59 Setting the Recording function The band or bands to be recorded, and whether or not to include the transmit audio in the recording may be selected: 1. Press and hold the [F menu] key, and then touch [TX/RX]. 2. Touch [3 AUDIO], and then touch [6 RECORDING]. 3.
-
Page 60: Taking Pictures (Snapshot Function)
In addition, the most recently captured image data can be transmitted to other transceivers* by pressing (Send Image Button) on the camera-mounted speaker microphone. * Refer to the Yaesu website or catalog for the compatible transceiver models. Lens Send Image Button Aim this part toward the object to photograph. -
Page 61: Gps Function
Taking pictures 1. Connect the camera-equipped speaker microphone (MH-85A11U) to the DATA termi- nal of the FT5DR/DE. • When connecting or disconnecting the MH-85A11U, turn off the FT5DR/DE. • When receiving an AM radio broadcast signal with the camera microphone connected, noise may occur, but this is not a malfunction. -
Page 62: Wires-X Function
Example of display when an APRS signal is received Setting several station parameters, such as the call sign and symbol is required before using the APRS function (initial settings). For details, refer to the APRS Function Instruction Manual which is available on the Yaesu website. -
Page 63: Tone Squelch Feature
For additional details on the following Functions, refer to the Advanced Manual which may be downloaded from the Yaesu website. Tone squelch feature The tone squelch opens the speaker audio only when a signal containing the specified CTCSS tone is received. By matching the tone frequency with the partner station in ad- vance, a quiet standby is possible. -
Page 64: Using Setup Menu
Using Setup Menu The Setup Menu permits configuring the various functions according to individual oper- ating needs and preferences. Setup Menu Operation 1. Press and hold the [F menu] key. The Setup Menu screen will be displayed. 2. Touch the desired item in Setup Menu. The Sub-menu screen will be displayed. -
Page 65: Tables Of Setup Menu Operations
Tables of Setup Menu Operations Selectable options Setup Menu no. / Item Description (Options in bold are the default settings) DISPLAY 1 TARGET LOCATION Set what to display using the smart COMPASS / NUMERIC navigation function. 2 COMPASS Set the compass display of the smart HEADING UP / NORTH UP navigation function. - Page 66 Selectable options Setup Menu no. / Item Description (Options in bold are the default settings) MEMORY 1 BANK LINK Set the memory bank link. BANK1 to BANK24 BANK LINK ON / OFF 2 BANK NAME Assign a name to each memory bank. BANK1 to BANK24 3 MEMORY NAME Input the memory channel tag.
- Page 67 Selectable options Setup Menu no. / Item Description (Options in bold are the default settings) 6 PRIORITY REVERT Turn the “Priority Channel Revert” ON / OFF feature ON or OFF during Dual Receive. * For details of the functions, refer to the GM Function Instruction Manual. 1 DP-ID LIST Displays the DP-ID list screen.
- Page 68 Selectable options Setup Menu no. / Item Description (Options in bold are the default settings) 22 BAND SELECT Set the frequency bands that can AIR: ON / OFF be selected for A-band and B-band VHF: ON / OFF UHF: ON / OFF (“OTHER”...
- Page 69 Selectable options Setup Menu no. / Item Description (Options in bold are the default settings) Mic-E : ON / OFF 10 APRS RINGER Set the bell ring on/off when a beacon POSITION : ON / OFF or message is received. WEATHER :...
- Page 70 25 MY SYMBOL Set your station symbol. 2(/b Bicycle) / 3(/> Car) / 4(YY Yaesu Radios) 26 POSITION COMMENT Set up the position comment function. Off Duty / En Route / In Service / Returning / Committed / Special / Priority / Custom 0 to 6 / EMERGENCY! STATUS :...
-
Page 71: Restoring To Defaults (Reset)
Restoring to Defaults (Reset) Caution When the All Reset function is performed, all data registered in the memory will be deleted. Be sure to note the settings on paper or back up the data on a microSD memory card. For details on how to save backup onto a microSD memory card. All Reset To restore all transceiver settings and memory content to the factory defaults. -
Page 72: Text Input Screen
Text input screen When the radio is first turned on after restoring defaults, the keyboard screen is dis- played to enter your own station call sign. ● Character input method 1. Touch a character on the screen to enter it. 2. - Page 73 Note...
-
Page 74: Specifications
Specifications ● General Frequency Range : TX 144 - 148 MHz or 144 - 146 MHz 430 - 450 MHz or 430 - 440 MHz : RX: A- Band 520 kHz - 999.995 MHz (USA Cellular Blocked) B- Band 108 MHz - 579.995 MHz Channel Steps : 5/6.25/8.33/9/10/12.5/15/20/25/50/100 kHz (8.33 kHz: only for Air Band, 9 kHz: only for AM Radio) - Page 75 ● Receiver Circuit Type : Double-conversion super heterodyne (NFM / AM) Direct-conversion (AM / FM Radio) Intermediate Frequency : 1st: A- Band 58.05 MHz 1st: B- Band 57.15 MHz 2nd: A- Band, B- Band 450 kHz Sensitivity : 0.52 - 30 MHz (AM)* 3 μV typ @10 dB SN 30 - 54 MHz (NFM)* 0.35 μV typ @12 dB SINAD...
-
Page 76: Yaesu Limited Warranty
Limited Warranty is valid only in the country/region where this product was originally purchased. On-line Warranty Registration: Thank you for buying YAESU products! We are confident your new radio will serve your needs for many years! Please register your product at www.yaesu.com - Owner’s Corner... - Page 77 YAESU Authorized Service Center, all reasonable efforts will be expended by YAESU MUSEN to cause this product to conform to its original specifications. YAESU MUSEN will return the repaired product (or a replacement product) free of charge to the original purchaser. The decision to repair or replace this product is the sole discretion of YAESU MUSEN.
- Page 78 Changes or modifications to this device that are not expressly approved by YAESU MUSEN could void the user’s authorization to operate this device. This device complies with part 15 of the FCC Rules. Operation is subject to the following two conditions: ( 1 ) This device may not cause harmful interference, and ( 2 ) this device must accept any interference including received, interference that may cause undesired operation.
- Page 79 Telephone: (714) 827-7600 EU Declaration of Conformity We, Yaesu Musen Co. Ltd of Tokyo, Japan, hereby declare that this radio equipment FT5DE is in full compliance with EU Radio Equipment Directive 2014/53/EU. The full text of the Declaration of Conformity for this product is available to view at http://www.yaesu.com/jp/red ATTENTION –...
- Page 80 Copyright 2021 YAESU MUSEN CO., LTD. All rights reserved. No portion of this manual may be reproduced without the permission of YAESU MUSEN CO., LTD. YAESU MUSEN CO., LTD. Tennozu Parkside Building 2-5-8 Higashi-Shinagawa, Shinagawa-ku, Tokyo 140-0002 Japan YAESU USA...
Need help?
Do you have a question about the FR5DR and is the answer not in the manual?
Questions and answers