Table of Contents
Advertisement
Quick Links
Operating Instructions
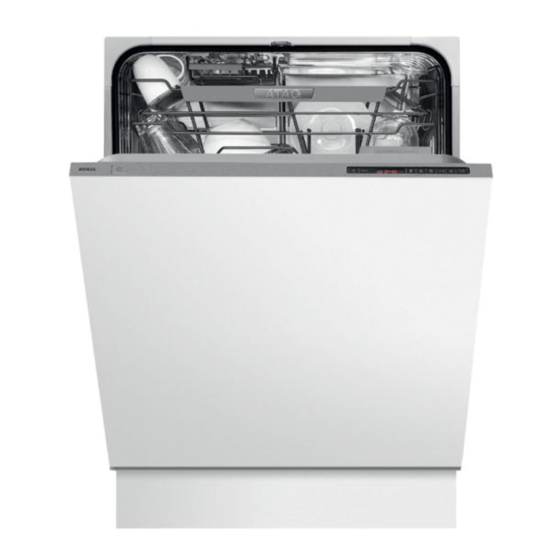
Dishwasher
VA6711ST
Dear ATAG customer!
We hope that you will have many years of use from your new machine.
The machine has many features. To make the most of its functions, we
recommend that you read the operating instructions before using the
machine. The operating instructions include information on how you
can help protect the environment.
Advertisement
Table of Contents

Related Manuals for Atag VA6711ST


Summary of Contents for Atag VA6711ST
- Page 1 Operating Instructions Dishwasher VA6711ST Dear ATAG customer! We hope that you will have many years of use from your new machine. The machine has many features. To make the most of its functions, we recommend that you read the operating instructions before using the machine.
-
Page 2: Table Of Contents
Contents Before washing for the first time Error messages Read the operating instructions Troubleshooting Be careful with certain materials Information for test institute Checking water hardness Energy labelling Programme key Dosages during testing Loading the dishwasher Safety instructions General Technical information Installation Information on energy labelling Winter storage/Transport... -
Page 3: Before Washing For The First Time
Before washing for the first time Read the operating instructions Read through the operating instructions before using the dishwasher, especially the sections Safety instructions, Child safety and Dishwashing. Be careful with certain materials Read the section Fragile dishes before dishwashing porcelain with unglazed decoration or other utensils made from plastic, wood or crystal that you value. -
Page 4: Safety Instructions
Safety instructions General Cleaning • Read the operating instructions and keep them in a When cleaning the edge around the door, use only a safe place! slightly damp cloth. Do not spray water around the edge! • Never use the dishwasher for any purpose other than Moisture can make its way into the lock, which contains that specified in these operating instructions. -
Page 5: Child Safety
Child safety Child safety and dishwashing WARNING! • Use the knife basket, or knife stand, for all long/sharp items. Children must be supervised – • Always close the door and start the programme dishwasher detergent is corrosive! immediately after you have added the detergent. •... -
Page 6: Dishwasher Components
Dishwasher components* Status light Knife basket Spray arms Middle basket Serial number plate Filters Salt compartment Cutlery basket Lower basket Detergent compartment Rinse aid compartment Upper basket Panel *Specifications may differ depending on the model and market. -
Page 7: Dishwasher Baskets
Dishwasher baskets* Upper basket 1. Wine glass shelf 2. Cup shelf 3. Knife guard Middle basket 1. Wire basket for cups, small glasses or bowls 2. Utensils basket for ladles, whisks, food turners, serving cutlery and similar items 3. Spray pipes 4. - Page 8 Dishwasher baskets* Knife basket 1. Basket 2. Knife support Cutlery basket Cutlery basket with lid *Specifications may differ depending on the model and market.
- Page 9 Dishwasher baskets* Positioning of cutlery basket lid (in upper basket) The cutlery basket lid can be removed and used, for example, as an extra cutlery basket in the upper basket (see below). *Specifications may differ depending on the model and market.
-
Page 10: Front Panel
Front panel The panel is fitted with touch buttons with audible feedback (see the chapter Settings). Main power switch Child lock (button lock) Programme selector High temperature Programme symbol Long dry Display Delayed start Rinse aid indicator Set time (for the Time program) TAB (3-in-1/all-in-one detergent) Time saver Salt indicator... -
Page 11: Dispenser
Dispenser 1. Prewash detergent compartment 2. Main wash detergent compartment 3. Rinse aid compartment 4. Detergent compartment lid 5. Rinse aid compartment lid... -
Page 12: Economic Dishwashing
Economic dishwashing Run programmes only with a full load Wait to run a programme until the dishwasher is full, this way you save energy. Use the Rinse & Hold programme to rinse the dishes if there are any unpleasant odours while you wait for the dishwasher to become fully loaded. -
Page 13: Fragile Dishes
Fragile dishes Some cookware is not dishwasher safe. This can be for several reasons. Some materials cannot withstand strong heat, others can be damaged by dishwashing detergent. Fragile decoration Porcelain with decoration on top of the glazing (the items feel rough) should not be washed in a dishwasher. Crystal / Glass Position items so that they do not touch each other during the wash. -
Page 14: Dishwashing
Dishwashing Below are step-by-step instructions to help you achieve the best possible dishwashing results. Load the baskets correctly Do not rinse dishes under running water before loading them in the dishwasher. Simply scrape off large food particles before loading the dishwasher. See the section Fragile dishes if you want to wash items that may be considered fragile. -
Page 15: Add Detergent
Dishwashing NOTE! WARNING! Dishwasher tablets are not recommended for short Knives and other pointed items must be placed with the programmes (less than 75 minutes). Use powder or points down in the cutlery basket or horizontally in other liquid dishwasher detergent instead. baskets. - Page 16 Dishwashing Normal wash Upper half Use to wash normally dirty dishes, and even dishes with You can use this programme if you only have cups and dried leftovers, such as plates, serving dishes, cups, glasses that need washing in the upper basket. Slightly glasses and so on.
- Page 17 Dishwashing Programme chart...
-
Page 18: Select Options
Dishwashing Select options Delayed start To select an option, press one of the option When you select Delayed start, the dishwasher will start buttons. The field under the button lights when the 1-24 hours after you press the Start/Stop button. option is activated. -
Page 19: After Dishwashing
Dishwashing Do you want to add more dishes? After dishwashing Open the door. The dishwasher stops automatically. Add Once the programme has finished, "End" appears the dishes, close the door and the dishwasher continues on the display. the programme. A buzzer also sounds at the end of the programme. See the section Settings, which describes how to change this If the dishwasher is turned off using the function. -
Page 20: Settings
Settings Do as follows to open the settings menu: First, open the door. Turn off the dishwasher using the main power switch (press and hold). Release the button. Press and hold the main power switch until the display lights up. Within five seconds, press and hold the Programme selector and the Long dry button. - Page 21 Settings Button Options Settings Description press Operation volume This sound is used to confirm each button press. (Off) (Low) (High) Press Start/Stop to save the setting value and continue to the next setting. (Low) LCD contrast For adjusting the contrast of the display on the panel. (High) Press Start/Stop to save the setting value and continue to the next setting.
- Page 22 Settings Button Options Settings Description press Water hardness If your dishwasher is fitted with a water softener you (Soft water) may need to adjust its setting depending on the water hardness. Contact the local waterworks to check the water hardness in your area. Water hardness is spe- cified using the following scales: The German water hardness scale (°dH) and the French water hardness scale (°fH).
-
Page 23: Time Remaining
Time remaining Once you have selected a programme and options, the display indicates how long the programme took the last time it was used.Once you have started the dishwasher, the display indicates how much programme time remains. The remaining time is updated after the water for the final rinse has been heated. -
Page 24: Status Light
Status light The status light at the bottom on the dishwasher provides information by means of 3 different colours. Adjust the status light so that it is seen clearly by pulling out or pushing in the transparent plastic strip. Status light Blue Load more. -
Page 25: Care And Cleaning
Care and cleaning The dishwasher tub is made of stainless steel and is kept 1. Turn the handle anticlockwise once. clean through normal use. However, if you have hard water, limescale deposits may form in the dishwasher. If this happens, run the Normal wash programme with high temperature and two tablespoons of citric acid in the detergent compartment (with no dishes in the machine). - Page 26 Care and cleaning Drainage pump NOTE! The pump can be accessed from inside the dishwasher. Do not forget to reinstall the fitted piece. 1. Cut the power to the dishwasher by pulling out the plug from the wall socket! 2. Remove the coarse filter and pipe section. 3.
- Page 27 Care and cleaning Cleaning the middle basket 1. Pull out the basket. 2. Check the holes in the spray pipe. Spray pipes 3. Clean with a needle or the like. Door When cleaning the edge around the door, use only a slightly damp cloth (with a little cleaner if necessary).
-
Page 28: Rinse Aid
Rinse aid Select dosage The rinse aid dispenser can be adjusted between 0 (off) Drying is faster if you use rinse aid. When the rinse aid and 6. needs topping up, the above symbol lights on the display. Top up with rinse aid Increase the rinse aid dosage: •... -
Page 29: Salt
Salt When the salt runs out, unscrew the lid and fill the compartment with salt. Water is only added the first time! When the salt needs topping up, the above symbol lights Wipe clean and tighten the lid. Run the Normal wash on the display. -
Page 30: Error Messages
Error messages Display Type of fault Action Overfilling Call the service division. Water outlet fault See "Possible causes" in the chapter Troubleshooting. Water inlet fault Check that the water tap is on. Inlet valve leakage Turn off the water tap and call the service divi- sion Turn off the machine with the main power switch and then turn it on again to clear the error message from the display. -
Page 31: Troubleshooting
Troubleshooting Problem Possible causes Action The dishes are not clean. The spray arms do not rotate. Remove the arms and clean them. Check that the dishes are not blocking the spray arms. Old detergent. Detergent is a perishable Avoid large packages. product. - Page 32 Troubleshooting Problem Possible causes Action The dishwasher does not start. You have forgotten to turn on the main Press and hold the main power switch power switch. until the display lights up. The door is not properly closed. Check. A fuse/circuit breaker has been tripped. Check.
- Page 33 Troubleshooting Problem Possible causes Action Cannot close door. The baskets are not correctly positioned. Check that the baskets are correctly posi- tioned horizontally, and that the middle basket's water connector is in line with its spray pipe. Check that the dishes are not blocking the baskets from sliding properly into place.
-
Page 34: Information For Test Institute
Information for test institute Energy labelling European test standard: EN 50242 Number of standard place settings: Dishwashing programmes: Normal wash, no options Connection: Cold water 15 °C Test method for noise measurement: IEC 60704-2-3 Dosages during testing Detergent: In accordance with EN 50242 Prewash: 7,5 gram Main wash:... - Page 35 Information for test institute 1. Teaspoons 2. Dessertspoons 3. Soupspoons 4. Forks 5. Knives 6. Serving cutlery – fork 7. Serving cutlery – gravy ladle 8. Serving cutlery – spoons...
-
Page 36: Technical Information
Technical information Information on energy labelling Information sheet, in compliance with Commission Delegated Regulation (EU) No. 1059/2010 ATAG Model designation: VA6711ST Number of standard place settings: Energy efficiency class: Annual energy consumption (AE 295 kWh per year Energy consumption of the standard cleaning cycle (E... -
Page 37: Installation
Installation [mm] 1189 Door length 30-94 It is important that you read through and follow the instructions and directions below. Conduct installation WARNING! and connection in accordance with the separate installation instructions. The plug must be disconnected or power to the socket Safety instructions turned off while the work is carried out! •... -
Page 38: Drainage Connection
Installation Drainage connection Electrical connection See the separate installation instructions for all necessary Information about the electrical connection can be found information. on the serial number plate This specification must match the electricity supply. This dishwasher is suitable for installing in a raised recess (to attain an ergonomic working height). -
Page 39: Service
Service Read the chapter Troubleshooting before contacting the service division. Make a note of the information on the serial number plate on the right inside the dishwasher. Note the type number (1) and the serial number (2). TYPE SERIAL NO... -
Page 40: Quick Guide
Quick guide Load the baskets Press the main power switch until the display lights up Do not rinse dishes under running water before loading them in the dishwasher. Simply scrape off large food particles before loading the dishwasher. Select a programme and any Add detergent options The detergent compartment has one smaller...
Need help?
Do you have a question about the VA6711ST and is the answer not in the manual?
Questions and answers