Advertisement
Quick Links
Advertisement

Subscribe to Our Youtube Channel
Related Manuals for Velleman VMP502


Summary of Contents for Velleman VMP502
- Page 1 VMP502 ® BASIC LEARNING KIT FOR RASPBERRY PI USER MANUAL...
-
Page 2: Safety Instructions
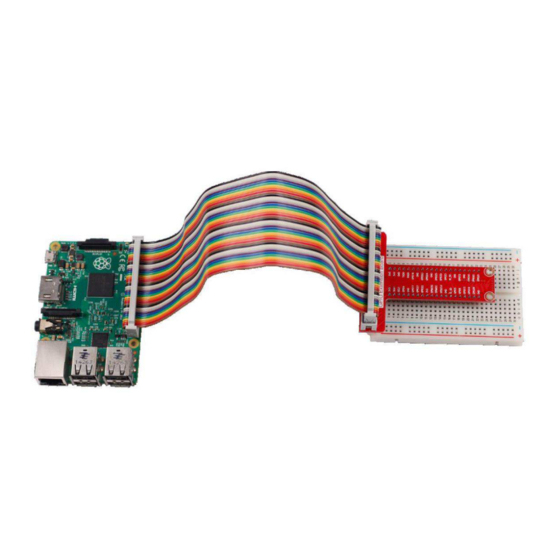
• Nor Velleman nv nor its dealers can be held responsible for any damage (extraordinary, incidental or indirect) – of any nature (financial, physical…) arising from the possession, use or failure of this product. - Page 3 VMP502 Contents • 830 points solderless breadbord • 5 x 10K resistors (RA10K0) • 5 x 2K resistors • 5 x 220R resistors (RA220E0) • 1 x 1602 LCD module (LCD1602BLC) • 1 x T-shape GPIO expansion board • 1 x ribbon cable for GPIO board •...
-
Page 4: Operation
VMP502 Operation A Blinking LED ® Learn how to programme the Raspberry Pi to make an LED burn. Required Hardware • ® 1 x Raspberry Pi • 1 x breadboard • 1 x LED • 1 x 220 Ω resistor •... - Page 5 VMP502 C Programming 1. Change directory: cd/home/pi/IDUINO_SuperKit_C_code_for_RaspberryPi/01_LED 2. Compile: gcc led.c –o led –lwiringPi 3. Run: sudo ./led Python Programming 1. Change directory: cd/home/pi/IDUINO_SuperKit_Python_code_for_RaspberryPi/ 2. Run: sudo python 01_led.py The LED should be blinking. Change the delay time if you want the LED to blink faster.
- Page 6 VMP502 Python Programming Controlling an LED by a Button Required Hardware • ® 1 x Raspberry Pi • 1 x breadboard • 1 x LED • 1 x 220 Ω resistor • 1 x button • jumper wires as needed V.
- Page 7 VMP502 ® Use a NO button as the Raspberry Pi input. When the button is pressed, the GPIO connected to the button will turn into low level (0 V). We can detect the state of the GPIO connected to the button through programming.
- Page 8 VMP502 Programming C Programming Python Programming V. 02 – 25/10/2019 ©Velleman nv...
- Page 9 VMP502 Flowing LEDs We will see how to make eight LEDs blink in various effects. Required Hardware • ® 1 x Raspberry Pi • 1 x breadboard • 8 x LED • 8 x 220 Ω resistor • jumper wires as needed V.
- Page 10 VMP502 Set the GPIO to a low level in turn by programming and LEDs 0 to 7 will light in turn. Control the delay and order to make the LEDs blink in different effects. Experiment C Programming 1. Change directory: cd/home/pi/IDUINO_SuperKit_C_code_for_RaspberryPi/03_8Led/ 2.
- Page 11 VMP502 Programming C Programming V. 02 – 25/10/2019 ©Velleman nv...
- Page 12 VMP502 Python Programming Breathing LED We will gradually increase and decrease the luminance of an LED with PWM. Required Hardware • ® 1 x Raspberry Pi • 1 x breadboard • 1 x LED • 1 x 220 Ω resistor •...
- Page 13 VMP502 A 60 % duty cycle means the signal is on 60 % of the time but off for 40 % of the time. The “on time” for a 60 % duty cycle could be a fraction of a second, a day, or even week, depending on the length of the period.
- Page 14 VMP502 C Programming 1. Change directory: cd/home/pi/IDUINO_SuperKit_C_code_for_RaspberryPi/04_PwmLed 2. Compile: gcc PwmLed.c –o PwmLed –lwiringPi 3. Run: sudo ./PwmLed Python Programming 1. Change directory: cd/home/pi/IDUINO_SuperKit_Python_code_for_RaspberryPi/ 2. Run: sudo python 04_PwmLed.py Press ENTER and you will see a gradual change of the LED luminance.
- Page 15 VMP502 Python Programming RGB LED We will gradually increase and decrease the luminance of an LED with PWM. Required Hardware • ® 1 x Raspberry Pi • 1 x breadboard • 1 x RGB LED • 3 x 220 Ω resistor •...
- Page 16 VMP502 hardware PWM output, but it needs three channels to control the RGB LED, which means it is diffeicult to ® control the RGB LED with the hardware PWM of the Raspberry Pi . Fortunately, the softPwm library simulates PWM (softPwm) by programming.
- Page 17 VMP502 Programming C Programming V. 02 – 25/10/2019 ©Velleman nv...
- Page 18 VMP502 Python Programming V. 02 – 25/10/2019 ©Velleman nv...
- Page 19 VMP502 Buzzer Required Hardware • ® 1 x Raspberry Pi • 1 x breadboard • 1 x buzzer (active) • 1 x PNP transistor (8550) • 3 x 1 kΩ resistor • jumper wires as needed An electronic buzzer is widely used in computers, alarms, electronic toys, etc.
- Page 20 VMP502 Experiment C Programming 1. Change directory: cd/home/pi/IDUINO_SuperKit_C_code_for_RaspberryPi/06_Beep/ 2. Compile: gcc beep.c –o beep –lwiringPi 3. Run: sudo ./beep Python Programming 1. Change directory: cd/home/pi/IDUINO_SuperKit_Python_code_for_RaspberryPi/ 2. Run: sudo python 06_beep.py You should the buzzer make a sound. Using a passive buzzer, you can make it sound “do re mi fa sol la si do” with some basic programming knowledge.
- Page 21 VMP502 Programming C Programming Python Programming V. 02 – 25/10/2019 ©Velleman nv...
- Page 22 VMP502 IR Receiver Module An IR receiver is a component which receives IR signals and can independently receive IR rays and output signals compatible with TLL level. Required Hardware • ® 1 x Raspberry Pi • 1 x breadboard •...
- Page 23 VMP502 Experiment The LED on the module will be blinking. Programming C Programming V. 02 – 25/10/2019 ©Velleman nv...
- Page 24 VMP502 Python Programming 555 Timer Required Hardware • ® 1 x Raspberry Pi • 1 x breadboard • 1 x NE555 • 3 x resistor (1 x 1 kΩ, 2 x 10 kΩ) • 2 x 100 nF capacitor •...
- Page 25 VMP502 A 555 timer is a medium-sized IC device which combines analogue and digital functions. The 555 timer can work under three modes. Here, the astable mode is used to generate square waves. Under the astable mode, the frequency of the output waveform of the 555 timer is defined by R and: =10 kΩ=Ω;...
- Page 26 VMP502 Experiment C Programming 1. Change directory: cd/home/pi/IDUINO_SuperKit_C_code_for_RaspberryPi/09_Timer555/ 2. Compile: gcc timer555.c –o timer555 –lwiringPi 3. Run: sudo ./timer555 Python Programming 1. Change directory: cd/home/pi/IDUINO_SuperKit_Python_code_for_RaspberryPi/ 2. Run: sudo python 09_timer555.py You should see data on the display, which are square waves generated by the 555 timer. The programme counts pulses by interrupt as we have learned previously.
- Page 27 VMP502 Programming C Programming Python Programming V. 02 – 25/10/2019 ©Velleman nv...
- Page 28 VMP502 Driving LEDs by 74HC595 We will use the 74HC595 to make eight LEDs blink regularly. Required Hardware • ® 1 x Raspberry Pi • 1 x breadboard • 1 x 74HC595 • 8 x LED • 3 x 220 Ω resistor •...
- Page 29 VMP502 Experiment C Programming 1. Change directory: cd/home/pi/IDUINO_SuperKit_C_code_for_RaspberryPi/10_74HC595_LED/ 2. Compile: gcc 74HC595_LED.c –o 74HC595_LED –lwiringPi 3. Run: sudo ./74HC595_LED Python Programming 1. Change directory: cd/home/pi/IDUINO_SuperKit_Python_code_for_RaspberryPi/ 2. Run: sudo python 10_74HC595_LED.py You should see eight LEDs blinking regularly. ® Here, three Raspberry Pi GPIOs are used to separately control eight LEDs based on the 74HC595.
- Page 30 VMP502 V. 02 – 25/10/2019 ©Velleman nv...
- Page 31 VMP502 Python Programming V. 02 – 25/10/2019 ©Velleman nv...
- Page 32 VMP502 V. 02 – 25/10/2019 ©Velleman nv...
- Page 33 VMP502 6.10 Driving a 7-Segment Display by 74HC595 We will learn to use the 74HC595 to drive a 7-segment display to cycle a figure from 0 to 9. Required Hardware • ® 1 x Raspberry Pi • 1 x breadboard •...
- Page 34 VMP502 Experiment C Programming 1. Change directory: cd/home/pi/IDUINO_SuperKit_C_code_for_RaspberryPi/11_Segment/ 2. Compile: gcc segment1.c –o segment1 –lwiringPi 3. Run: sudo ./segment1 Python Programming 1. Change directory: cd/home/pi/IDUINO_SuperKit_Python_code_for_RaspberryPi/ 2. Run: sudo python 11_segment.py You should see the 7-segment display cycle from 0 to 9, and from A to F.
- Page 35 VMP502 1. Change directory: gcc dice.c –o dice –lwiringPi 2. Run: sudo ./dice You should see numbers between 0 and 6 flashing quickly. Press the button on the breadboard and the display will display a random number between 0 and 6 for 2 seconds, and then circularly display random numbers between 0 and 6.
- Page 36 VMP502 Python Programming V. 02 – 25/10/2019 ©Velleman nv...
- Page 37 VMP502 6.11 Driving a Dot Matrix by 74HC595 Required Hardware • ® 1 x Raspberry Pi • 1 x breadboard • 2 x 74HC595 • 1 x dot matrix • jumper wires as needed V. 02 – 25/10/2019 ©Velleman nv...
- Page 38 VMP502 Pin number corresponding to rows and columns: Pin No. Pin No. The 8 x 8 dot matrix is made up of 64 LEDs, each LED is placed at the cross point of a row and a column. When the electrical level of a certain row is high and the electrical level of a certain column is low, then the corresponding LED will light.
- Page 39 VMP502 C Programming 1. Change directory: cd/home/pi/IDUINO_SuperKit_C_code_for_RaspberryPi/12_DotMatrix/ 2. Compile: gcc dotMatrix.c –o dotMatrix –lwiringPi 3. Run: sudo ./dotMatrix Python Programming 1. Change directory: cd/home/pi/IDUINO_SuperKit_Python_code_for_RaspberryPi/ 2. Run: sudo python 12_DotMatrix.py You should the LEDs light. Programming C Programming V. 02 – 25/10/2019...
- Page 40 VMP502 V. 02 – 25/10/2019 ©Velleman nv...
- Page 41 VMP502 Python Programming V. 02 – 25/10/2019 ©Velleman nv...
- Page 42 VMP502 6.12 LCD1602 Module We will see how to use the LCD1602 to display character strings. Required Hardware • ® 1 x Raspberry Pi • 1 x breadboard • 1 x LCD1602 • 1 x potentiometer • jumper wires as needed The LCD1602 is a dot matrix used to display characters, symbols, etc.
- Page 43 VMP502 Experiment C Programming 1. Change directory: cd/home/pi/IDUINO_SuperKit_C_code_for_RaspberryPi/13_LCD1602/ 2. Compile: gcc lcd1602_2.c –o lcd1602_2 –lwiringPi 3. Run: sudo ./lcd1602_2 Python Programming 1. Change directory: cd/home/pi/IDUINO_SuperKit_Python_code_for_RaspberryPi/ 2. Run: sudo python 13_lcd1602.py You should see two lines of characters displayed on the LCD1602.
- Page 44 VMP502 V. 02 – 25/10/2019 ©Velleman nv...
- Page 45 VMP502 Python Programming V. 02 – 25/10/2019 ©Velleman nv...
- Page 46 VMP502 V. 02 – 25/10/2019 ©Velleman nv...
- Page 47 VMP502 V. 02 – 25/10/2019 ©Velleman nv...
- Page 48 VMP502 V. 02 – 25/10/2019 ©Velleman nv...
- Page 49 VMP502 V. 02 – 25/10/2019 ©Velleman nv...
- Page 50 © COPYRIGHT NOTICE The copyright to this manual is owned by Velleman nv. All worldwide rights reserved. No part of this manual may be copied, reproduced, translated or reduced to any electronic medium or otherwise without the prior written consent of the copyright holder.
- Page 51 • Velleman® can decide to replace an article with an equivalent article, or to refund the retail value totally or partially when the complaint is valid and a free repair or replacement of the article is impossible, or if the expenses are out of proportion.
Need help?
Do you have a question about the VMP502 and is the answer not in the manual?
Questions and answers