Table of Contents
Advertisement
Quick Links
Advertisement
Table of Contents

Subscribe to Our Youtube Channel
Related Manuals for Hoover VHW964D-80


Summary of Contents for Hoover VHW964D-80
- Page 1 Instruction Book Instructions for installation and use Washer Dryer...
-
Page 2: Table Of Contents
Connecting the Drainage Pipe Our customer service advisors will require this information whenever you contact Levelling the Machine Hoover. Please keep all documentation in a safe place for future reference or for any Testing the Installation future owners. Description of the Machine... -
Page 3: Customer Service
Customer Service Caring for the environment At Hoover, we aim to make appliances that are reliable and long lasting. However, Together, we share the responsibility to safeguard our environment for future should your appliance need to be serviced during its working life, no one is more generations. -
Page 4: Warning And Safety Instructions
Do not touch the appliance when hands or feet are damp or wet. ask them to use official Hoover spare parts. Do not lean on the door when loading the machine or use the door to lift or move the Warning! The company denies all liability if and when these instructions are not machine. -
Page 5: Unpacking The Product
Unpacking the Product Installation Remove the machine from its packaging close to the final location of the machine. Before installing the machine, ensure that the mains plug and water supply valves are easily accessible from your chosen machine location. Make sure there is enough space for the machine. Select a space at least 600mm wide Step 1. -
Page 6: Water Supply
Water Supply Connecting the Cold Water Supply This machine should only be connected to a cold-water supply. The cold-water pressure should be between 0.5 and 8 bar (0.05-0.8 Mpa). Only one hose is required to install this machine to a cold water supply. Cold fill is an energy efficient system. -
Page 7: Connecting The Drainage Pipe
Connecting the drainage pipe Levelling The Machine This machine must be connected in accordance with the water supply regulations. Your machine is heavy so care must be taken when moving it. Water bylaws prohibit connection to a surface water drain. We recommend that two people move the machine to avoid strain and possible injury. -
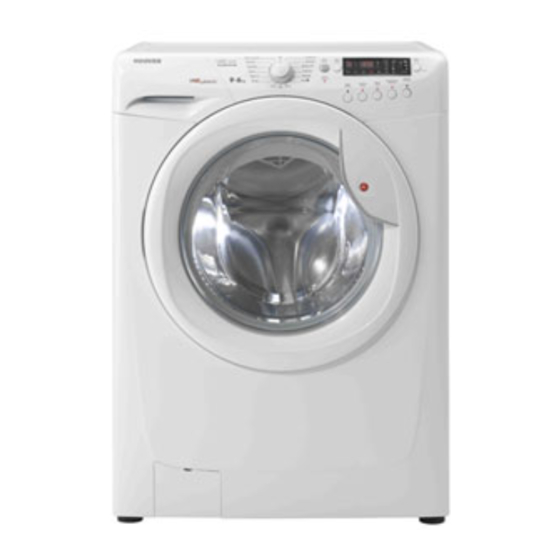
Page 8: Description Of The Machine
Description of the Machine Selector to the OFF position. The Hoover Washer Dryer details are indicated below: Step 6. Select the spin programme and press the Start Pause button to start the machine. If the machine takes longer than one minute to empty check the drain hose for kinks. -
Page 9: The Control Panel
Door Locked indicator The Control Panel The Door Locked indicator light is illuminated when the door is fully closed and the machine is ON. Spin Speed Selector When Start Pause is pressed on the machine with the door closed the indicator will flash momentarily and then illuminate. -
Page 10: Wash Options
Drying Programme Indicators special programme will increase the wash efficiency without increasing the length of Hoover washer dryers incorporate an Automatic Sensor Drying function which takes your wash programme. the guesswork out of setting the drying time. You simply select the degree of dryness Sensitive Care you require and the dryer automatically switches off when that level is reached. -
Page 11: Dry Options
Spin Speed DRY OPTIONS The spin cycle is used to remove as much water as possible from the laundry without damaging your clothes. The recommended spin speed for each programme is already Once the washing cycle has finished, remove some of the clothes if necessary to set to the highest level for that chosen programme. -
Page 12: Automatic Features
Automatic Features Programme Descriptions For handling the various types of fabric and their level of dirtiness in your laundry the KG Mode (Half Load) washing machine has different programme groups according to type of wash, Available on the Cottons and Synthetics cycles, the intelligent sensor adjusts the water temperature, spin speed and duration (see Programme Guide). - Page 13 Delicate Sports The cycle will consist of alternate periods of activity and pauses. This is particularly This washing machine has a unique Sportswear programme. suitable for washing very delicate fabrics, as it creates a hand-washing effect. It is specially designed to wash mixed sportswear fabrics that cannot be washed on Washing and rinsing are carried out using a high water level to provide the best results.
-
Page 14: Programme Guide
** Information for the test laboratories 1) Using the Wash Time button on the Rapid cycle will enable you to select either a 14, 30 or 44 Programme Guide (see page 25) minute wash cycle. Programme Fabric Type Water Water Spin Detergent Automatic Drying Cycle... -
Page 15: Detergent
Dispensing in the drum Detergent Liquid detergents and some tablets are dispensed via the machine drum using the Only use detergents that are suitable for use in a washing machine. You will obtain recommended dispensing device which is placed upright on top of the wash load the best results from your wash with the minimum use of chemical products, and the towards the back of the drum. -
Page 16: Washing Advice
Washing Advice Running a Wash Cycle The following tips are designed to assist in getting the best results from your machine This section summarises the main points when completing a wash cycle. For detailed whilst using it in the most environmentally friendly and economical way. It is also explanations of features, options and details of the machine refer to the relevant important to understand the items to avoid in your laundry, to ensure the continued section in the instruction manual. -
Page 17: Drying Advice
the wash cycle, the KG Mode will weigh the clothes and update the wash time Drying Advice remaining on the display every five seconds until the weight has been determined. Do not try to open the door when the door locked indicator is on, nor open the In addition to the advice for washing your clothes, you should also follow the guideli- dispenser drawer during the wash programme. -
Page 18: Running A Dry Cycle
Estimated drying times of Sensor Dry programmes Running a Dry Cycle This section summarises the main points when completing a drying cycle. For detailed explanations of drying programmes, please refer to the relevant section in this manual. Cottons Synthetics / Acrylics Programme Sorting the laundry Min 1 kg... -
Page 19: Care And Maintenance
Step 4. Turn the filter anti-clockwise until it stops in the vertical position. Care and Maintenance Remove the filter and clean. Step 5. Replace the filter and turn in a clockwise direction until locked in position. The washing machine needs very little maintenance, but regular attention to a few small Replace the stopper in the hose and close the filter cover. -
Page 20: Problem Solving Guide
Is there clothing or dirt between the door gasket and the door glass? Ensure that recommended checks, please call Hoover Service (tel: 08705 400 600); they may be the door glass and gasket are kept clean and free of laundry when loading the able to assist you over the telephone. - Page 21 Remember, you may be charged for the service call if incorrect installation or misuse causes a problem with your machine. If the following error codes are displayed, switch OFF the machine and contact Hoover Service: 0, 1, 4, 5, 7, 8 and 9.
-
Page 22: After Sales Service
Any parts which are fitted to the machine that are not original manufacturer’s At Hoover, we aim to make appliances that are reliable and long lasting. However, parts. should your appliance need to be serviced during its working life, no one is more Non-domestic use of the machine. - Page 25 ® Note: Hoover policy is one of continuous development and accordingly we reserve the right to alter specification without notice. The manufacturer declines all responsibility for errors printed in this instruction manual. Hoover Ltd. Pentrebach, Merthyr Tydfil, Mid Glamorgan, CF48 4TU...
Need help?
Do you have a question about the VHW964D-80 and is the answer not in the manual?
Questions and answers