Table of Contents
Advertisement
Quick Links
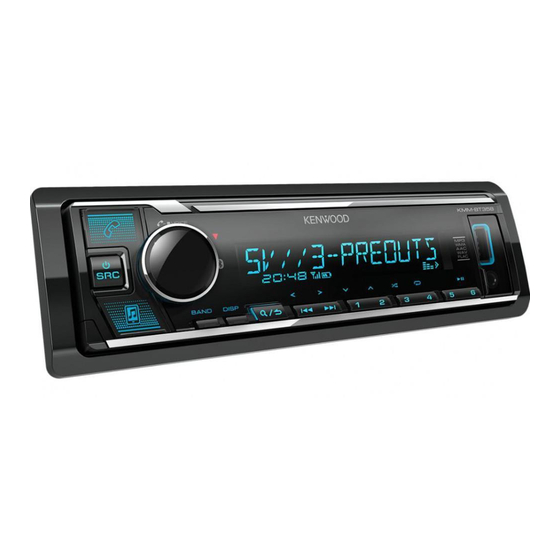
KMM-BT358
KMM-BT309
KMM-BT209
DIGITAL MEDIA RECEIVER
INSTRUCTION MANUAL
RÉCEPTEUR MULTIMÉDIA NUMÉRIQUE
MODE D'EMPLOI
DIGITAL-MEDIA-RECEIVER
BEDIENUNGSANLEITUNG
DIGITALE MEDIAONTVANGER
GEBRUIKSAANWIJZING
© 2022 JVCKENWOOD Corporation
KMM-BT358_E_B5A-3849-00_Cover_1st Draft.indd 1
KMM-BT358_E_B5A-3849-00_Cover_1st Draft.indd 1
Data Size:
B6L (182 mm x 128 mm)
Book Size:
B6L (182 mm x 128 mm)
B5A-3849-00 [EN]
9/6/2021 2:30:52 PM
9/6/2021 2:30:52 PM
Advertisement
Table of Contents

Related Manuals for JVC KENWOOD KMM-BT358


Summary of Contents for JVC KENWOOD KMM-BT358
- Page 1 KMM-BT358 KMM-BT309 KMM-BT209 DIGITAL MEDIA RECEIVER INSTRUCTION MANUAL RÉCEPTEUR MULTIMÉDIA NUMÉRIQUE MODE D’EMPLOI DIGITAL-MEDIA-RECEIVER BEDIENUNGSANLEITUNG DIGITALE MEDIAONTVANGER GEBRUIKSAANWIJZING © 2022 JVCKENWOOD Corporation B5A-3849-00 [EN] KMM-BT358_E_B5A-3849-00_Cover_1st Draft.indd 1 KMM-BT358_E_B5A-3849-00_Cover_1st Draft.indd 1 Data Size: B6L (182 mm x 128 mm) 9/6/2021 2:30:52 PM...
- Page 2 Informatie over het weggooien van elektrische en elektronische apparatuur en batterijen (particulieren) Dit symbool geeft aan dat gebruikte elektrische, elektronische producten en batterijen niet bij het normale huishoudelijke afval mogen. Lever deze producten in bij de aangewezen inzamelingspunten, waar ze gratis worden geaccepteerd en op de juiste manier worden verwerkt, teruggewonnen en hergebruikt.
- Page 3 Conformiteitsverklaring met betrekking tot de RE-richtlijn van de Europese Unie (2014/53/EU) Conformiteitsverklaring met betrekking tot de RoHS richtlijn van de Europese Unie (2011/65/EU) Fabrikant: Declaration of Conformity with regard to the RE Directive 2014/53/EU JVCKENWOOD Corporation Declaration of Conformity with regard to the RoHS Directive 2011/65/EU 3-12, Moriya-cho, Kanagawa-ku, Yokohama-shi, Kanagawa, 221-0022, JAPAN EU-vertegenwoordiger: Manufacturer:...
- Page 4 Slovensko Deutsch Polska S tem JVCKENWOOD izjavlja, da je radijska oprema » KMM-BT358/ Hiermit erklärt JVCKENWOOD, dass das Funkgerät “KMM-BT358/ Niniejszym, JVCKENWOOD deklaruje, że sprzęt radiowy “KMM-BT358/ KMM-BT309/KMM-BT209 « v skladu z Direktivo 2014/53/EU. KMM-BT309/KMM-BT209” der Richtlinie 2014/53/EU entspricht.
- Page 5 Ελληνικά HRVATSKI / SRPSKI JEZIK Українська Με το παρόν, η JVCKENWOOD δηλώνει ότι ο ραδιοεξοπλισμός JVCKENWOOD ovim izjavljuje da je radio oprema “KMM-BT358/ Таким чином, компанія JVCKENWOOD заявляє, що «KMM-BT358/KMM-BT309/KMM-BT209» συμμορφώνεται με την KMM-BT309/KMM-BT209” u skladu s Direktivom 2014/53/EU. радіообладнання «KMM-BT358/KMM-BT309/KMM-BT209»...
- Page 6 SOFTWARE LICENSE AGREEMENT Article 4 Right pertaining to the Licensed Software Any and all copyrights and other rights pertaining to the Licensed Software and related documents The software embedded in the Product (hereinafter the "Licensed Software") provided by Licensor is shall belong to the Licensor or the original holder of the right who granted to the Licensor the license or copyrighted to or sublicensable by the Licensor, and this Agreement provides for the terms and conditions sublicense for the Licensed Software (hereinafter the "Original Rightholder"), and the User shall not be...
- Page 7 Important Notice concerning the Software Article 9 Destruction of the Licensed Software If this Agreement is terminated pursuant to the provision of Article 8, the User shall destroy the Licensed -jansson Software, any related documents and copies thereof within two (2) weeks from such date of termination. Copyright (c) 2009-2012 Petri Lehtinen <petri@digip.org>...
- Page 8 -CMP sha2 AUTHOR: Aaron D. Gifford - http://www.aarongifford.com/ The MIT License (MIT) Copyright (c) 2014 Charles Gunyon Copyright (c) 2000-2001, Aaron D. Gifford All rights reserved. Permission is hereby granted, free of charge, to any person obtaining a copy of this software and associated documentation files (the "Software"), to deal in the Software without restriction, including without You may obtain a copy of the license at limitation the rights to use, copy, modify, merge, publish, distribute, sublicense, and/or sell copies of the...
- Page 9 Copyright (c) 1995, 1996 Carnegie-Mellon University. All rights reserved. T-Kernel 2.0 This product uses the source code of T-Kernel 2.0 under T-License 2.0 granted by T-Engine Forum Author: Chris G. Demetriou (www.tron.org) Permission to use, copy, modify and distribute this software and its documentation is hereby granted, BSD-3-Clause provided that both the copyright notice and this permission notice appear in all copies of the software, Copyright (c) 2000-2001, Aaron D.
-
Page 10: Table Of Contents
Contents Before Use ....................3 References ....................29 Basics ......................4 Maintenance More information Getting Started ..................5 Change the display information 1 Select the display language, acknowledge the crossover type and Troubleshooting ..................31 cancel the demonstration 2 Set the clock and date Specifications .................. -
Page 11: Before Use
Before Use IMPORTANT General: • Avoid using the external device if it might hinder safe driving. • To ensure proper use, please read through this manual before using this product. It is especially important that you read and observe Warnings and •... -
Page 12: Basics
Basics Faceplate Attach Volume knob Detach How to reset Reset the unit within 5 seconds after detaching the faceplate. Detach button Display window* * Only for illustration purpose. On the faceplate Turn on the power Press B SRC. • Press and hold to turn off the power. Adjust the volume Turn the volume knob. -
Page 13: Getting Started
Getting Started Basics Remote control (RC-406) (supplied for Remote sensor (Do not expose to bright sunlight.) Pull out the insulation sheet when using for the first time. Select the display language, acknowledge the crossover type and cancel the demonstration When you turn on the power for the first time (or [FACTORY RESET] is set to : Remote control functions are not available. -
Page 14: Set The Clock And Date
Getting Started Default: [XX] Set the clock and date [AUDIO CONTROL] Press the volume knob to enter [FUNCTION]. [SWITCH PREOUT] (For : Applicable only if [X’OVER] is set to [2WAY].) Turn the volume knob to select [CLOCK], then press the knob. (Page 7) [REAR]/[SUB-W]: Selects whether rear speakers or a subwoofer are To adjust the clock... - Page 15 Getting Started [P-OFF WAIT] Applicable only when the demonstration mode is turned off. Change the crossover type Sets the duration when the unit will automatically turn off (while in Press B SRC repeatedly to enter STANDBY. standby mode) to save the battery. Press and hold number buttons 4 and 5 to enter crossover select.
-
Page 16: Radio
Radio Other settings Press the volume knob to enter [FUNCTION]. Turn the volume knob to select an item (see the following table), then press the knob. Repeat step 2 until the desired item is selected/activated or follow the instructions stated on the selected item. Press and hold to exit. -
Page 17: Usb/Ipod
USB/iPod Radio [TI] [ON]: Allows the unit to temporarily switch to Traffic Information if Connect a USB device available (“TI” indicator lights up) while listening to all sources except in MW/LW. ; [OFF]: Cancels. USB input terminal USB type A cable* [PTY SEARCH] 1 Turn the volume knob to select the available Program Type (see the (general products) - Page 18 USB/iPod Basic operations Select music drive While in USB source, press 5 repeatedly. Stored songs in the following drive will be played back. • Selected internal or external memory of a smartphone (Mass Storage Class). • Selected drive of a multiple drive device. (This unit can support multiple drive device of up to 4 drives.
- Page 19 USB/iPod [SKIP SEARCH] setting Select a file to play Press the volume knob to enter [FUNCTION]. From a folder or list Turn the volume knob to select [USB], then press the knob. Turn the volume knob to select [SKIP SEARCH], then press the knob. Press Turn the volume knob to select the skip search ratio, then press the Turn the volume knob to select a folder/list, then press the knob.
-
Page 20: Aux
KENWOOD Remote Application You can listen to music from a portable audio player via the auxiliary input You can control the KENWOOD car receiver from the following devices using jack. KENWOOD Remote application. : iPhone/iPod touch (via Bluetooth or via USB Preparation: input terminal) or Android device (via Bluetooth) Select [ON] for [BUILT-IN AUX] in [SOURCE SELECT]. -
Page 21: Bluetooth
Bluetooth® KENWOOD Remote Application Repeat step 2 until the desired item is selected/activated. • Depending on the Bluetooth version, operating system and the firmware Press and hold to exit. version of your mobile phone, Bluetooth features may not work with this unit. -
Page 22: Bluetooth - Mobile Phone
When you connect iPhone/iPod touch to the USB input terminal, pairing request (via Bluetooth) is automatically activated if [AUTO PAIRING] is set to Search and select the name of your receiver (“KMM-BT358”/ [ON]. (Page 17) “KMM-BT309”/“KMM-BT209”) on the Bluetooth device. - Page 23 Bluetooth® The following operations may differ or be unavailable depending on the *1 This adjustment will not affect the volume of the other sources. connected phone. *2 Press and hold VOL to continuously increase the volume to 15. *3 Operations may vary according to the connected Bluetooth device. On the faceplate On the remote control Improve the voice quality...
- Page 24 Bluetooth® Make a call [PHONE BOOK] (Applicable only if the phone supports PBAP.) 1 Turn the volume knob quickly to enter alphabet search mode (if the You can make a call from the call history, phonebook, or dialing the number. phonebook contains many contacts).
- Page 25 Bluetooth® Make a call using voice recognition Bluetooth mode settings Press and hold to activate the voice recognition of the connected Press the volume knob to enter [FUNCTION]. phone. Turn the volume knob to select an item (see the following table), then Speak the name of the contact you want to call or the voice command press the knob.
-
Page 26: Bluetooth - Audio
Press and hold “PLEASE PAIR YOUR PHONE PIN 0000” appears on the display. Search and select the name of your receiver (“KMM-BT358”/ “KMM-BT309”/“KMM-BT209”) on the Bluetooth device. While in BT AUDIO source, you can connect to five Bluetooth audio devices Operate the Bluetooth device to confirm pairing. -
Page 27: Audio Settings
Audio Settings Bluetooth® On the faceplate Repeat play Press 4 repeatedly. [ALL REPEAT], [FILE REPEAT], [GROUP REPEAT], [REPEAT OFF] Random play Press and hold 3 to select [ALL RANDOM] or [GROUP RANDOM]. Press the volume knob to enter [FUNCTION]. • Press 3 to select [RANDOM OFF]. Turn the volume knob to select an item (see the following table), then Select a file from a folder/list Refer to “Select a file to play”... - Page 28 Audio Settings [MANUAL EQ] Adjusts your own sound settings for each source. [BALANCE] [L15] to [R15] ([0]): Adjusts the left and right speaker output balance. • The settings are stored to [USER] in [PRESET EQ]. [VOLUME OFFSET] [–15] to [+6] ([0]): Presets the initial volume level of each source by •...
- Page 29 Audio Settings 2-way crossover setting items Crossover settings Below are the available setting items for 2-way crossover and 3-way [SPEAKER SIZE] crossover. [FRONT] [SIZE] [8CM]/[10CM]/[12CM]/[13CM]/[16CM]/[17CM]/ [18CM]/[4×6]/[5×7]/[6×8]/[6×9]/[7×10] SPEAKER SIZE Selects according to the connected speaker size for optimum performance. [TWEETER] [SMALL]/[MIDDLE]/[LARGE]/[NONE] (not connected) •...
- Page 30 Audio Settings [SUBWOOFER [SW LPF FRQ] [30HZ]/[40HZ]/[50HZ]/[60HZ]/[70HZ]/[80HZ]/ [MID RANGE] [HPF FRQ] [30HZ]/[40HZ]/[50HZ]/[60HZ]/[70HZ]/[80HZ]/[90HZ]/ LPF] [90HZ]/[100HZ]/[120HZ]/[150HZ]/[180HZ]/ [100HZ]/[120HZ]/[150HZ]/[180HZ]/[220HZ]/[250HZ]/ [220HZ]/[250HZ]/[THROUGH] [THROUGH] [SW LPF SLOPE] [–6DB]/[–12DB]/[–18DB]/[–24DB] [HPF SLOPE] [–6DB]/[–12DB] [SW LPF PHASE] [REVERSE] (180°)/[NORMAL] (0°) [LPF FRQ] [1KHZ]/[1.6KHZ]/[2.5KHZ]/[4KHZ]/[5KHZ]/[6.3KHZ]/ [8KHZ]/[10KHZ]/[12.5KHZ]/[THROUGH] [SW LPF GAIN] [–8] to [0] [LPF SLOPE] [–6DB]/[–12DB] •...
- Page 31 Audio Settings – : [SUBWOOFER] is selectable only when [SWITCH PREOUT] is set [DTA SETTINGS] to [SUB-W] (page 6) and [SUBWOOFER SET] is set to [ON] (page 20). [POSITION] Selects your listening position (reference point). [ALL]: Not compensating ; [FRONT RIGHT]: Front right seat ; When 3-way crossover is selected: [FRONT LEFT]: Front left seat ;...
-
Page 32: Display Settings
Display Settings Zone identification for color settings and brightness settings Change the display settings Press the volume knob to enter [FUNCTION]. Turn the volume knob to select an item (see the following table), then press the knob. Repeat step 2 until the desired item is selected/activated or follow the instructions stated on the selected item. -
Page 33: Installation/Connection
Installation/Connection Display Settings [BRIGHTNESS] Sets the brightness for day and night separately. This section is for the professional installer. 1 [DAY]/[NIGHT]: Select day or night. For safety’s sake, leave wiring and mounting to professionals. Consult the 2 Select a zone. (See the illustration on page 24.) car audio dealer. - Page 34 Installation/Connection Part list for installation Installing the unit (in-dash mounting) (A) Faceplate (×1) (B) Trim plate (×1) (C) Mounting sleeve (×1) (D) Wiring harness (×1) (E) Extraction key (×2) Do the required wiring. (Page 28) Basic procedure Remove the key from the ignition switch, then disconnect the Hook on the top side terminal of the car battery.
- Page 35 Installation/Connection Removing the unit Connect external components Detach the faceplate. Remove the trim plate. Insert the extraction keys deeply into the slots on each side, then follow the arrows as shown on the illustration. Part Microphone input jack (Page 13) Output terminals (See the following “Connect external amplifiers via output terminals”.) Connect external amplifiers via output terminals When connecting an external amplifier to the output terminals of this unit,...
- Page 36 Installation/Connection Wiring connection If your car does not have an ISO terminal: We recommend installing the unit with a commercially available custom Antenna terminal wiring harness specific for your car and leave this job to professionals for your safety. Consult your car audio dealer. Fuse (10 A) Connecting the ISO connectors on some VW/Audi or Opel (Vauxhall) automobiles...
-
Page 37: References
References About USB devices Maintenance • You cannot connect a USB device via a USB hub. Cleaning the unit • Connecting a cable whose total length is longer than 5 m may result in abnormal playback. Wipe off dirt on the faceplate with a dry silicone or soft cloth. •... -
Page 38: Change The Display Information
References Change the display information Each time you press DISP, the display information changes. • If the information is unavailable or not recorded, “NO TEXT”, “NO INFO”, or other information Each time you press DISP, the display information changes. (eg. station name) appears or display will be blank. •... -
Page 39: Troubleshooting
Troubleshooting Symptom Remedy Symptom Remedy Sound cannot be heard. • Adjust the volume to the optimum level. “UNSUPPORTED DEVICE” • Check whether the connected USB device is compatible • Check the cords and connections. appears. with this unit and ensure the file systems are in supported formats. - Page 40 Troubleshooting Symptom Remedy Symptom Remedy “iPod ERROR” • Reconnect the iPod. Sound is being interrupted or • Reduce the distance between the unit and the Bluetooth • Reset the iPod. skipped during playback of a audio player. • Press and hold B SRC to turn off the power. Turn the Bluetooth audio player.
-
Page 41: Specifications
Specifications Frequency Range 87.5 MHz — 108.0 MHz (50 kHz step) USB Standard USB 1.1, USB 2.0 : High speed Usable Sensitivity 0.71 μV/75 Ω (S/N = 30 dB) : Full speed Quieting Sensitivity 2.0 μV/75 Ω File System FAT12/16/32 (DIN S/N = 46 dB) Maximum Supply Current DC 5 V... - Page 42 Specifications Frequency Response (±3 dB) 20 Hz — 20 kHz Operating Voltage 12 V DC car battery Input Maximum Voltage 1 000 mV Installation Size (W × H × D) 182 mm × 53 mm × 100 mm Input Impedance 30 kΩ...
- Page 43 KMM-BT358_E_B5A-3849-00_EN_1st Draft.indd 35 KMM-BT358_E_B5A-3849-00_EN_1st Draft.indd 35 Data Size: B6L (182 mm x 128 mm) 9/7/2021 9:14:06 AM 9/7/2021 9:14:06 AM Book Size: B6L (182 mm x 128 mm)
- Page 44 • Windows Media is a registered trademark or trademark of Microsoft Corporation in the United States and/or other countries. This product is protected by certain intellectual property rights of Microsoft. Use or distribution of such technology outside of this product is prohibited without a license from Microsoft. •...
Need help?
Do you have a question about the KMM-BT358 and is the answer not in the manual?
Questions and answers