
Related Manuals for Bissell 3576-6


Summary of Contents for Bissell 3576-6
- Page 1 CleanView U S E R ’ S G U I D E 3574/73G8/3576/20Q9 SERIES 8-12 12-13 Replacement Parts Consumer Services Warranty B A G L E S S Safety Instructions Product View Assembly Instructions Operation / Special Tools Maintenance Troubleshooting ®...
- Page 2 Your BISSELL CleanView II is well made, and we back it with a limited comprehensive one-year warranty. We also stand behind it with a knowledgeable, dedicated Consumer Services Department, so, should you ever have a problem, you’ll receive fast, considerate assistance.
- Page 3 IMPORTAnT SAFETy InSTRUCTIOnS When using an electrical appliance, basic precautions should be observed, including the following: READ ALL InSTRUCTIOnS BEFORE USInG yOUR UPRIGHT VACUUM. Always connect to a polarized outlet (left slot is wider than right). Unplug from outlet when not in use and before conducting maintenance.
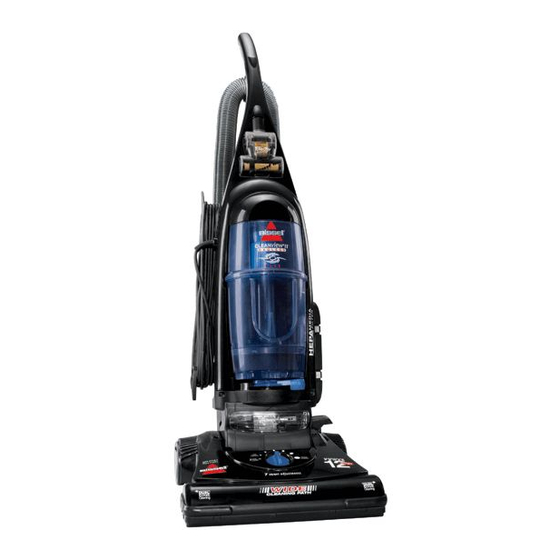
- Page 4 Crevice Tool Extension Wand Combination Dusting Brush/ Upholstery Tool Foot Hose Furniture Protection Guard Wide Cleaning Path Models Cord Clip Hose Clip Stretch Hose Carrying Handle Quick Release Cord Wrap Power Cord Quick Reach ® Handle Hose Wand Hose Wand Base Dirt Container Filter Cup Inner and Outer...
- Page 5 How To Put It Together The only tool you’ll need to assemble your vacuum cleaner is a screwdriver. Attach Handle To Vacuum Locate the vacuum Handle and remove the screw packet taped to the base of the Handle. Stand the vacuum upright and slide the base of the Handle firmly into the grooves at the top of the vacuum body.
- Page 6 How To Use your Vacuum Handle Positions Press the Handle Release Pedal with your foot to place your vacuum in one of three cleaning positions. Upright- For storage and above floor cleaning with tools. Normal Cleaning- Press Handle Release Pedal once. Use for most household floor cleaning tasks.
- Page 7 Special On-Board Tools Your BISSELL CleanView II is not only a pow- erful carpet and rug vacuum cleaner, it’s also a versatile above floor vacuum cleaner when you select one of the special tools. Raise Handle to Upright Position. Grasp the Quick Reach Handle and lift Hose Wand to separate from suction intake opening.
- Page 8 Reassemble and make sure it is completely dry before using again. Cleaning The Inner & Outer Circular Filters Use only BISSELL Style 9 Replacement Filters in your BISSELL CleanView II. Unplug the cleaner from electrical outlet. Remove the Dirt Container as described in the previous section.
- Page 9 Remove the small round Filter and any debris on top of it. Rinse well under warm water, then air dry thoroughly before replacing. Replacing the Post-Motor Filter Use only BISSELL Style 9 Replacement Filters in your BISSELL CleanView II. Unplug the cleaner from electrical outlet.
- Page 10 Check Drive Belt carefully for wear, cuts or stressed areas. Check Air Passageway for obstructions. Remove debris from this area. Replace Drive Belt Use only BISSELL Style 9 Replacement Belts (#32074) in your BISSELL CleanView II. Unplug cleaner from electrical outlet. With Rotating Floor Brush removed from vacuum cleaner (Steps 1-4 of Check Rotating Floor Brush and Drive Belt), grasp old Drive Belt and remove from Motor Pulley.
- Page 11 Replace Lightbulb Continued Determine the light bulb type of your vacuum: Standard Bulb (#203-1297) – approximately 1” long, flat end Large Bulb (#203-1007) – approximately 2” long, round end Standard Bulb – remove the bulb from the socket by grasping bulb and pulling straight out.
- Page 12 Clearing Clogs Continued Check Upper Tank and Louvers for build up or clogs. Check to make sure Louvers are installed correctly. To unlock the Louvers, grasp the rim and turn toward the left. Pull straight down to remove. If the Louvers are missing or not locked into place, check and clear the tube in the center of the Dirt Container.
- Page 13 Filters missing or installed incorrectly Dirt Container installed incorrectly Filter Cup installed incorrectly If suggested solutions do not correct the problem, call: BISSELL Consumer Services Remedies Position correctly and lock in place Check and clean Inner and Outer Circular Filters, Pre-Motor and...
- Page 14 Replacement Parts – BISSELL Cleanview II Series You may purchase replacement parts from your retailer, by calling BISSELL Consumer Services or by visiting our website. To locate a retailer near you, or to place an order using Visa, MasterCard, Discover or American Express, call...
- Page 15 Grand Rapids, MI 49501 ATTN: Consumer Services Or visit the BISSELL website - www.bissell.com When contacting BISSELL, have model number of unit available. Please record your Model Number: ___________________ Please record your Purchase Date: ___________________ nOTE: Please keep your original sales receipt. It is your warranty.
- Page 16 Subject to the *EXCEPTIONS AND EXCLUSIONS identified below, upon receipt of the product BISSELL Homecare Inc. will repair or replace (with new or remanufactured components or products), at BISSELL’s option, free of charge from the date of purchase by the original purchaser, for one year any defective or malfunctioning part.
Need help?
Do you have a question about the 3576-6 and is the answer not in the manual?
Questions and answers