Table of Contents
Advertisement
Quick Links
Advertisement
Table of Contents

Subscribe to Our Youtube Channel
Related Manuals for Stoelting F231-AD1


Summary of Contents for Stoelting F231-AD1
- Page 1 Model F231 OWNER’S MANUAL Manual No. 513658 Rev.3...
- Page 3 If problems develop or questions arise in connection with installation, operation, or servicing of the machine, contact the com- pany at the following location: STOELTING 800-558-5807 502 Hwy. 67 Kiel, WI 53042 Fax: 920-894-7029 © 2011 Stoelting, LLC, All Rights Reserved...
- Page 4 CAUTION If you need to replace a part, use genuine Stoelting The signal word “CAUTION” indicates a potentially parts with the correct part number or an equivalent hazardous situation, which, if not avoided, may result part.
-
Page 5: Table Of Contents
TABLE OF CONTENTS Section Description Page Description and Specifi cations Description ....................1 Specifi cations ..................... 1 Installation Instructions Safety Precautions ..................3 Shipment and Transit .................. 3 Machine Installation ..................3 Installing Permanent Wiring ................ 3 Initial Set-Up and Operation Operator’s Safety Precautions .............. -
Page 7: Description
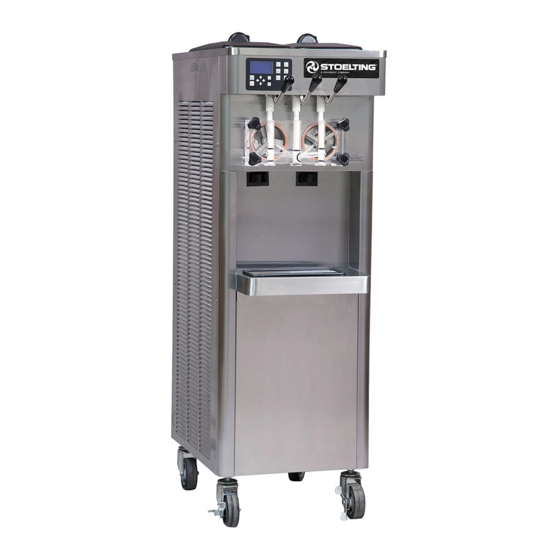
SECTION 1 INTRODUCTION 1.1 DESCRIPTION The Stoelting F231 fl oor machine is gravity fed. The machine is equipped with the IntelliTec2 control which provides a uniform product. The F231 is designed to operate with almost any type of commercial soft serve or non-dairy mixes available, including: ice milk, ice cream, yogurt, and frozen dietary desserts. - Page 8 SPECIFICATIONS Model F231 Dimensions Machine as shipped width 19-1/4’’ (48,9 cm) 32’’ (81,3 cm) height 58-1/4’’ (148,0 cm) 60’’ (152,4 cm) depth 28’’ (71,1 cm) 39’’ (99,1 cm) Weight 400 lbs (181,4 kg) 470 lbs (213,1 kg) Electrical 1 Phase, 208-240 VAC, 60Hz 3 Phase, 208-240 VAC, 60Hz running amps connection type...
-
Page 9: Installation Instructions
10 days and request inspection. The customer must place claim for damages and/or shortages in shipment with the carrier. Stoelting, Inc. cannot make any claims against the carrier. 2.3 MACHINE INSTALLATION WARNING Figure 2-1 Installing Baffl... -
Page 11: Initial Set-Up And Operation
SECTION 3 INITIAL SET-UP AND OPERATION 3.1 OPERATOR’S SAFETY PRECAUTIONS 3.2 OPERATING CONTROLS AND INDICATORS SAFE OPERATION IS NO ACCIDENT; observe these Before operating the machine, it is required that the op- rules: erator know the function of each operating control. Refer to Figure 3-1 for the location of the operating controls on Know the machine. -
Page 12: Disassembly Of Machine Parts
3.3 DISASSEMBLY OF MACHINE PARTS Before using the machine for the fi rst time, complete machine disassembly, cleaning and sanitizing proce- dures need to be followed. Routine cleaning intervals and procedures must comply with the local and state health codes. Inspection for worn or broken parts should be made at every disassembly of the machine. -
Page 13: Cleaning Disassembled Parts
B. DISASSEMBLY OF FRONT DOOR 3.4 CLEANING DISASSEMBLED PARTS Turn the machine off by pressing the Main Freezer Disassembled machine parts require complete cleaning, Power Off/On button on the IntelliTec2 control. sanitizing and air drying before assembling. Local and state health codes will dictate the procedure required. -
Page 14: Assembling Machine
Using sanitizing solution and the large barrel Lubricate the hex drive end of the auger with a brush provided, sanitize the freezing cylinder by small amount of spline lubricant. A small container dipping the brush in the sanitizing solution and of spline lubricant is shipped with the machine. -
Page 15: Freeze Down And Operation
Prepare 2 gallons of Stera-Sheen sanitizing When the product is at 75% consistency, the solution following the manufacturer’s instructions. display will read “SERVE”. Open the spigot to dispense product. Install the mix inlet regulator into the hopper. The machine dispenses product at a reasonable Pour the sanitizing solution into the hopper. -
Page 16: Mix Information
3.11 MIX INFORMATION Mix can vary considerably from one manufacturer to another. Differences in the amount of butterfat content and quantity and quality of other ingredients have a direct bearing on the fi nished frozen product. A change in machine performance that cannot be explained by a technical problem may be related to the mix. -
Page 17: Maintenance And Adjustments
SECTION 4 MAINTENANCE AND ADJUSTMENTS This section is intended to provide maintenance personnel CONDENSER CLEANING (AIR-COOLED with a general understanding of the machine adjustments. MACHINES) It is recommended that any adjustments be made by a The F231 has an air-cooled or water-cooled condenser. qualifi... -
Page 18: Extended Storage
EXTENDED STORAGE Refer to the following steps for storage of the machine over any long period of shutdown time: Clean all the parts that come in contact with mix thoroughly with a warm detergent water. Rinse in clear water and dry all parts. Do not sanitize. NOTE Do not let cleaning solution stand in the freezing cylinder or hopper during the shutdown period. -
Page 19: Troubleshooting
To return the machine to normal operation, any error If the error persists after attempting to clear it, causing condition must be corrected and the power to contact your Authorized Stoelting Distributor for the affected freezing cylinder must be cycled. Turn the further assistance. - Page 20 The Left Hopper Sensor Error (E12) indicates if off then back on. If the error persists, contact a failure of the hopper sensor or if the sensor is your Authorized Stoelting Distributor for further out of range. If the control panel displays an E12, assistance.
- Page 21 5.3 TROUBLESHOOTING - MACHINE PROBLEM POSSIBLE CAUSE REMEDY 1 Power to machine is off. 1 Supply power to machine. Machine does not 2 Freeze-up (auger will not turn). 2 Turn Clean/Off/On switch Off for 15 minutes, run. then restart. 3 Front door not in place. 3 Assemble front door in place.
-
Page 23: Replacement Parts
Decal - Attention Heat Sensitive 324672 Decal - Not Packing Material 324686 Decal - Danger Automatic Start 324803 Decal - Domed Stoelting Logo (Large) (Header Panel) 508048 Lubricant - Spline (2 oz Squeeze Tube) 508135 Petrol Gel - 4 oz Tube... -
Page 24: Auger Shaft And Faceplate Parts
6.2 AUGER SHAFT AND FACEPLATE PARTS 694255 381804 149003 666786 624678-5 4157968 3170644 625133 2149243-01 2177428 624677-5 3159696 3158086 624598-5 624664-5 624614-5 744262 417006 744273... - Page 25 6.2 AUGER SHAFT AND FACEPLATE PARTS (CONTINUED) Part Description Quantity 149003 Bushing - Front Auger Support 232734 Cap - Rosette - Teardrop 314453 Cover - Hopper 381804 Auger Flight 417006 Grid - Drip Tray (Metal) 482019 Knob - Front Door (Black) 624598-5 O-Ring - Outside Spigot - Black (5 Pack) 624614-5...
- Page 27 Stoelting, LLC warrants to the first user (the “Buyer”) that the freezer cylinders, hoppers, compressors, drive motors, speed reducers, augers and auger flights of Stoelting soft serve / shake freezers will be free from defects in materials and workmanship under normal use and proper maintenance appearing within five (5) years, and that...
Need help?
Do you have a question about the F231-AD1 and is the answer not in the manual?
Questions and answers