Table of Contents
Advertisement
Quick Links
Advertisement
Table of Contents

Subscribe to Our Youtube Channel
Related Manuals for Aurora DXP-62K-3


Summary of Contents for Aurora DXP-62K-3
- Page 1 USERS GUIDE DXP-62 Digital Xtreme Scaler / Switcher Manual Number: 160903...
- Page 2 Power outlet: To prevent electric shock, be sure the electrical plug used on the product power cord matches the electrical outlet used to supply power to the Aurora product. Use only the power adapter and power connection cables designed for this unit.
-
Page 3: Table Of Contents
User Guide TABLE OF CONTENTS PACKAGE CONTENTS ......................1 INTRODUCTION ........................2 About ..............................2 Features ..............................2 DESCRIPTION ........................... 3 Front Panel DXP-62 ..........................3 Rear Panel DXP-62 ..........................4 CONNECTION ........................... 5 Usage Precautions ................Error! Bookmark not defined. System Diagram............................ -
Page 4: Package Contents
PACKAGE CONTENTS Please make sure the following items are included within your package. Contact your dealer if any items are missing or damaged. 1 x DXP-62 2 x Mounting Ears (separate from the DXP-62) 1 x Power Cable (DC 12V) ... -
Page 5: Introduction
INTRODUCTION About The DXP-62 is the latest presentation scaler switcher innovation from Aurora. Designed to be a low cost full featured high end scaler with a variety of input ports to accommodate legacy and today’s technology. The VGA ports also can process YPbPr component video and composite video for the ultimate in flexibility. -
Page 6: Description
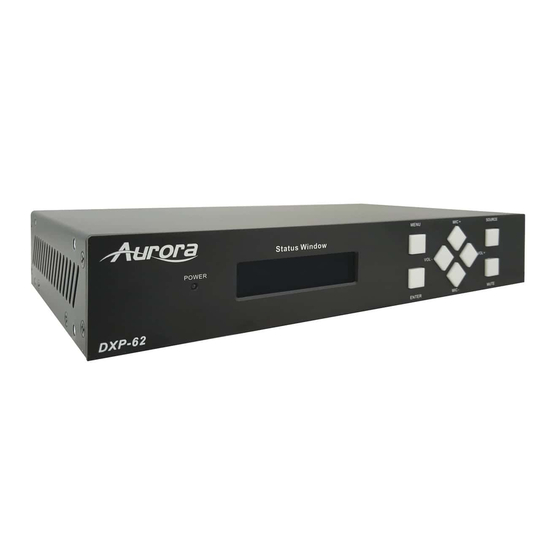
User Guide DESCRIPTION Front Panel DXP-62 Power Turns green when power on, red when in standby mode. indicator Shows the real-time system working status. Used as video source selection button, press to select one source, press again to select next source, switching circularly between HDMI1, Source HDMI2, HDMI3, VGA1 and VGA2. -
Page 7: Rear Panel Dxp-62
User Guide Rear Panel DXP-62 2 HDMI audio & 2 VGA audio inputs. User can choose any one audio (embedded HDMI audio or external input audio) for HDMI audio input Audio Input by using RS232 commands. Audio output port, the audio comes from the input audio corresponding Audio to the selected video source and mixed with MIC audio. -
Page 8: Connection
User Guide CONNECTION System Diagram Connection Procedure 1) Connect HDMI source devices (e.g. Blue-ray DVD) to HDMI input ports of the DXP-62 with HDMI cable. Connect VGA source device (e.g. PC) to VGA input ports of the DXP-62 with VGA cable. 2) Connect the corresponding audio source to the corresponding AUDIO INPUT port of the DXP-62... -
Page 9: Connection Of Microphone
User Guide with audio cable one to one. The audio of HDMI can be embedded or external by sending right command. 3) Connect HDMI display device to HDMI output port of the DXP-62 with HDMI cable. 4) Connect the HDMI twisted pair PoH receiver to HDBaseT output port of the scaler switcher with twisted pair. - Page 10 User Guide When switch to “MIC” (It has a low frequency characteristics, and wide frequency response in this mode), the microphone input is used for connecting with dynamic microphone. There are two different connections: 1) Unbalanced connection: “+” and “ ”...
-
Page 11: Application
HDMI and RS-232 control. Since the DXE-CAT-RX3C-A has an amplifier integrated, it can be easily used with the Aurora SKR-22T 25 watt flat ceiling tile speaker capable of 180 degree sound. For remote motorized screen control the DXE-CAT-RX3C-A has 2 relays to allow up/down functionality. The built in IP control allows the operator to automate the system locally or remotely via web pages. -
Page 12: Operation
User Guide OPERATION Buttons The buttons can be used for output resolution adjusting, switching operations, software updating, volume adjusting and operations in menus. Resolution Switching Supports auto-adjusting and manual-adjusting. Press and hold on SOURCE button for 7 seconds or more to enter in auto-adjusting/manual-adjusting mode. Note: 1. - Page 13 User Guide Auto-switching Function: New input Once detecting a new input signal, the DXP-62 would switch to this new signal automatically. Power rebooting The DXP-62 offers the function to remember the signal last displayed when rebooting. Once rebooting, it will automatically enter in auto-switching mode, and then detect all inputs and memorize their connection status for future rebooting using.
-
Page 14: Software Updating
Copy the file “DXP-62.bin” to the root directory of a USB memory stick. (Make sure the file is copied to the root directory for normal use. The “DXP-62.bin” file is provided/authorized by our engineering department or from the Aurora website customer portal) Plug the USB memory stick to the DXP-62 USB port . -
Page 15: Osd Menu Operation
User Guide OSD Menu Operations The DXP-62 provides a powerful OSD operation menu, contains 4 parts: option settings, image settings, audio settings and system settings. Press MENU button on front panel to enter into OSD menu. Option: Includes Output Adjust, Input4/5 Select, HDMI1/2/3/4 Audio select, and Software Update (USB) Output Adjust: Adjust output image position (X: horizontal direction and Y: vertical direction) and ratio aspect (width and height). - Page 16 User Guide 3. Switch to channel INPUT5/INPUT6 again. HDMI1 Audio Select: Switch between Embedded and Line to choose the desired audio output port for HDMI1. HDMI2 Audio Select: Switch between Embedded and Line to choose the desired audio output port for HDMI2. HDMI3 Audio Select: Switch between Embedded and Line to choose the desired audio output port for HDMI3.
- Page 17 User Guide Picture mode: Includes Dynamic, Standard, Mild, and User. And only in User mode, it is able to set the image contrast and brightness. Color Temperature: Includes Cool, Medium, Warm and User. And only in User mode, it is able to set values for Red, Green and Blue (RGB).
- Page 18 User Guide Sound mode: Includes Standard, Music, Movie, Sports and User. Only User mode supports to set treble and bass. Surround Sound: Includes Off, Surround and SRS Trusurround XT. To adjust the sound balance. Setup: Including OSD Language, Blending, HDMI CEC and OSD Duration. Please check the picture below: OSD Language: Supports 14 languages, including English (default), Chinese etc.
- Page 19 User Guide HDMI CEC: Enable/disable CEC and auto-standby function. Default: CEC on, STANDBY on. OSD Duration: Includes 5 s, 10 s, 15 s and Off. “s” is for Second. CEC Function Supports CEC and CEC standby functions, and can be enabled/disabled through RS232 commands or OSD menu.
-
Page 20: Rs232 Control
User Guide RS232 Control Operation As RS232 can be transmitted bi-directionally between the DXP-62 and the HDMI twisted pair PoH receiver, so it is able to control a third party RS232 device from local or control the DXP-62 from remote. Set the baud rate of the DXP-62 via... - Page 21 User Guide Command Function Feedback Feedback Example Audio Commands MUTE line !ALM1<cr> ~ALM1<cr> LINE Mute audio UnMute line !ALM0<cr> ~ALM0<cr> LINE Unmute audio Line audio ~LNUP xx<cr> LINE Volume: xx !LNUP<cr> volume up (xx=00~60) (xx=00~60) Line audio ~LNDN xx<cr> LINE Volume: xx !LNDN<cr>...
- Page 22 User Guide Command Function Feedback Feedback Example Change the !RS04<cr> resolution to ~RS04<cr> Resolution: 1360x768 1360X768 HD Change the !RS01<cr> resolution to ~RS01<cr> Resolution: 1024x768 1024X768 XGA Change the !RS02<cr> resolution to ~RS02<cr> Resolution: 1280x720 1280X720 720P Change the !RS03<cr> resolution to ~RS03<cr>...
- Page 23 User Guide Command Function Feedback Feedback Example 04=user) ~SM## xx <cr> Sound Mode: xx (xx= Set SM audio xx=01~05(01=standard; !SM##<cr> standard/ music/ movie/ mode 02=music; 03=movie; sports/ user) 04=sports; 05=user) Freeze output !FRZ1<cr> ~FRZ1<cr> Freeze: enable image Cancel the !FRZ0<cr> freezing of output ~FRZ0<cr>...
- Page 24 User Guide Command Function Feedback Feedback Example Disable MIC !MND0<cr> ~MND0<cr> MIC detect: disable noise detecting Check MIC ~MND# xxxx<cr>, ?MND#<cr> noise detecting MIC detect: XXXX xxxx=MIC detect statue info statue !HDC1<cr> HDCP Active ~HDC1<cr> HDCP Active !HDC0<cr> HDCP Manual ~HDC0<cr>...
- Page 25 User Guide Command Function Feedback Feedback Example Menu Commands OK for OSD !KYOK<cr> ~KYOK<cr> Key: ok selection !KYLT<cr> LEFT button ~KYLT<cr> Key: left !KYRT<cr> RIGHT button ~KYRT<cr> Key: right !KYUP<cr> UP button ~KYUP<cr> Key: up !KYDN<cr> DOWN button ~KYDN<cr> Key: down MENU button !KYMN<cr>...
- Page 26 User Guide Command Function Feedback Feedback Example Check Volume ~IVDS xxxx<cr> ?IVDS<cr> Volume Icon: xxxx Icon display status xxxx=volume icon info Check Digital ~DAS# x<cr> Embedded Audio Output: ?DAS#<cr> audio output x=1,2(1=enable,2=disable) enable/disable status HDMI1 Audio from XXXX ~AIS# x<cr>, Check the port x= 1~2 (1 =HDMI Audio...
- Page 27 User Guide Command Function Feedback Feedback Example image width) Stretch upwards from top !WU##<cr> ~WU##<cr> Output Height Adjust xx side (increase image height) Stretch downwards from !WD##<cr> ~WD##<cr> Output Height Adjust xx top side (decrease image height) Turn off HDMI !HMP0<cr>...
- Page 28 User Guide the input source is with HDCP, so is the output and vice versa. When HDCP is set to Manual, whether the output is with HDCP depends on the statue of HDCP. Turn off HDCP, then the output is without HDCP and vice versa. Screen output adjusting avails only when the screen output adjusting is on.
-
Page 29: Vga Converting Cable
User Guide VGA Converting Cable As VGA source supports YPbPr and C-video source, the compact scaler switcher provides with 2 VGA converting cables to compliant with these signals. When need to select these signals as input source, please switch to channel INPUT 5 (or INPUT 6), and then set the signal type in OSD. - Page 30 User Guide Connect with Composite Video (C-VIDEO) Source Operation Examples: 1. Via front panel buttons & OSD Press MENU button on front panel to enter in OSD, and then enter in OPTION setting menu: set “INPUT 5 Select” to AV1, and “INPUT 6 Select” to AV2. After setting, press SOURCE/AUTO button on front panel to switch to AV1 or AV2 source.
-
Page 31: Appendix 1
User Guide APPENDIX 1 Troubleshooting For best results always make certain you have the latest firmware. Problem Solution a. Check to see if Wall supply is plugged into wall outlet. 1. LED is not lit b. Make certain wall outlet has power. a. -
Page 32: Appendix 2 Technical Specifications
User Guide APPENDIX 2 Technical Specifications Model Name DXP-62 Max HDBT Distance 230ft (70m) Max Resolution 1920x1200 @60Hz Color Depth 36bit HDMI: 1.65Gbps per color, C-Video:150MHz, Bandwidth YPbPr: 170MHz, VGA: 375MHz RS-232 Max 115kbps HDMI Inputs VGA/YPbPr/Video Inputs HDMI Outputs HDBaseT Outputs 1 PoH (Video, RS-232, IR) Audio Inputs... - Page 33 User Guide...
-
Page 34: Appendix 3 Cabling
APPENDIX 3 Cabling Aurora extender products have been tested utilizing shielded cabling. Although our products will work fine without shielded cable it is highly recommended for environmental reasons as the signals are high frequency and can radiate as well as be susceptible to external frequencies and possibly cause noise or disruption in the image. -
Page 35: Appendix 4 Warranty
Limited 3 Year Warranty Aurora Multimedia Corp. (“Manufacturer”) warrants that this product is free of defects in both materials and workmanship for a period of 3 years as defined herein for parts and labor from date of purchase. This Limited Warranty covers products purchased in the year of 2009 and after. - Page 36 User Guide This product warranty extends to the original purchaser only and will be null and void upon any assignment or Aurora Multimedia Corp. 205 Commercial Court Morganville, NJ 07751 Phone: 732-591-5800 Fax: 732-591-6801...
Need help?
Do you have a question about the DXP-62K-3 and is the answer not in the manual?
Questions and answers