Table of Contents
Advertisement
Quick Links
Please read these safety precautions carefully before using the product.
If you ignore the warning message, you may be seriously injured or there is a possibility of
Warning
accident or death.
Caution
If you ignore the caution message, you may be slightly injured or the product may be damaged
Precautions in installing the Product
Warning
Keep away from heat sources like electrical heaters.
- Electrical shock, fire, malfunction or deformation may occur.
Keep the packing anti-moisture material or vinyl packing out of the reach of children.
- Anti-moisture material is harmful if swallowed. If swallowed by mistake, force the patient to vomit and visit the
nearest hospital. Additionally, vinyl packing can cause suffocation. Keep it out of the reach of children.
Do not put heavy objects on the product or sit upon it.
- If the product collapses or is dropped, you may be injured. Children must pay particular attention.
Do not leave the power or signal cable unattended on the pathway.
- The passerby can falter, which can cause electrical shock, fire, product breakdown or injury.
Install the product in a neat and dry place.
- Dust or moisture can cause electrical shock, fire or product damage.
If you can smell smoke or other odors or hear a strange sound unplug the power cord and contact the
service center.
- If you continue to use without taking proper measures, electrical shock or fire can occur.
If you dropped the product or the case is broken, turn off the product and unplug the power cord.
- If you continue to use without taking proper measures, electrical shock or fire can occur. Contact the service
center.
Do not drop metallic objects such as coins, hair pins, chopsticks or wire into the product, or inflammable
objects such as paper and matches. Children must pay particular attention.
- Electrical shock, fire or injury can occur. If a foreign object is dropped into the product, unplug the power cord and
contact the service center.
Caution
Make sure the product ventilation hole is not blocked. Install the product in a suitably wide place (more
than 10cm from the wall)
- If you install the product too close to the wall, it may be deformed or fire can break out due to internal heat.
Do not block the ventilation hole of the product by a tablecloth or curtain.
- The product can be deformed or fire can break out due to overheating inside the product.
Install the product on a flat and stable place that has no risk of dropping the product.
- If the product is dropped, you may be injured or the product may be broken.
Install the product where no EMI occurs.
Keep the product away from direct sunlight.
- The product can be damaged.
Safety Precautions
A1
Advertisement
Table of Contents

Related Manuals for LG Flatron M4201C-SA


Summary of Contents for LG Flatron M4201C-SA
- Page 1 Safety Precautions Please read these safety precautions carefully before using the product. If you ignore the warning message, you may be seriously injured or there is a possibility of Warning accident or death. Caution If you ignore the caution message, you may be slightly injured or the product may be damaged Precautions in installing the Product Warning Keep away from heat sources like electrical heaters.
-
Page 2: Safety Precautions
Safety Precautions Electrical Power Related Precautions Warning Make sure to connect the power cable to the grounded current. - You may be electrocuted or injured. Use the rated voltage only. - The product can be damaged, or you may be electrocuted. During a thunder or lightning storm, unplug the power cable or signal cable. -
Page 3: Precautions In Using The Product
Safety Precautions Caution Do not shock the product when moving it. - You may be electrocuted or the product can be damaged Do not dispose the product-packing box. Use it when you move. Make the panel face forward and hold it with both hands to move. - If you drop the product, the damaged product can cause electric shock or fire. -
Page 4: Using The Remote Control
• Auto Button There is not a function Automatic adjustment function which is supported (Operational for the analog signal only) • ARC button To select the image size of the screen. • Video Operation Button Applicable for LG products only... -
Page 5: Inserting Batteries Into Remote Control
Using the Remote Control • AV Button • Input Select Button Each time you press the Input button it will change to If you press the button once, Component1 the following Input Signal Component2 Window will appear. Select the signal type you want HDMI/DVI using the button. - Page 6 To arrange cables in order * Applicable only for models that support the stand Disassemble the stand cover. The cover may be easily disassembled by pressing up on the base as shown in the figure. Stand cover After connecting the cables, correctly position the stand cover into the holes on the stand.
-
Page 7: Connecting The Speakers
Connecting the Speakers * Applicable only for models that support the speakers Use the screws to secure the speakers on the rear side of the product as shown in the below figure. When the speaker is installed. -
Page 8: Name And Function Of The Parts
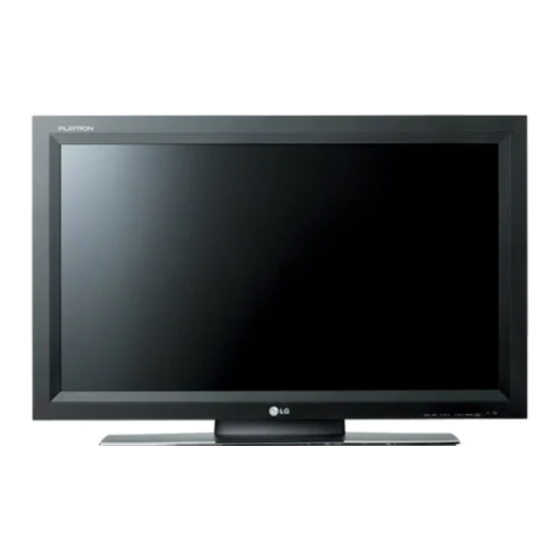
Name and Function of the Parts * The product image in the user’s guide could be different from the actual image. Rear View REMOTE RS-232C HDMI/DVI IN RGB IN AUDIO COMPONENT IN AV IN CONTROL IN (CONTROL& (RGB/DVI) VIDEO L-AUDIO-R VIDEO L-AUDIO-R SERVICE) -
Page 9: Connecting To External Devices
Connecting to External Devices When Connecting to your PC First of all, see if the computer, product and the peripherals are turned off. Then, connect the signal input cable. When connecting with the D-Sub signal input cable. When connecting with the HDMI to DVI signal input cable (not included). RGB IN Rear side of the product. - Page 10 Connecting to External Devices Turn on power by pressing the power button on the product. Power button Turn on the PC. Select an input signal. Press the INPUT button on the remote control to select the input signal. INPUT Or, press the INPUT button at the front side of the product. INPUT AUTO/SET Input...
-
Page 11: Watching Rgb Outputs
Connecting to External Devices Watching RGB Outputs Use this function when displaying ANALOG RGB inputs of a PC to the other product. To use different products connected to each other • Connect one end of the signal input cable(15-pin D-Sub Signal Cable) to the RGB OUT connector of product 1 and connect the other end to the RGB IN connector of other products. -
Page 12: When Watching Vcr / Dvd
Connecting to External Devices When watching VCR / DVD Connect the video cable as shown in the below figure and then connect the power cord (See page A9). When connecting with a S-Video cable. When connecting with a BNC cable. Connect to the S-Video input terminal to •... - Page 13 Connecting to External Devices When watching HDTV/DVD(480p/576p/720p/1080i/480i/576i) Connect the video/audio cable as shown in the below figure and then, connect the power cord (See page A9). Connect the input terminal with a proper color match. • Product Product COMPONENT IN VIDEO COMPONENT IN L-AUDIO-R...
- Page 14 Connecting to External Devices When watching HDMI/DVI/RGB from the VCR/DVD/Set-top Box (480p/576p/720p/1080i) Connect the video/audio cable as shown in the below figure and then connect the power cord (See page A9). Product Product Product HDMI/DVI IN RGB IN AUDIO HDMI/DVI IN RGB IN AUDIO HDMI/DVI IN...
-
Page 15: Watching Av Outputs
Connecting to External Devices Watching AV Outputs • When you set the input signal of the main screen as 'AV (CVBS)', you can transmit the signal that you're watching to the AV output terminal. Video/TV BNC Cable Audio Cable (not included) (not included) AV IN VIDEO... -
Page 16: Attaching The Product To A Wall
Attaching the product to a wall * Applicable only for models that support the stand • Set it up close to the wall so the product doesn't fall over when it is pushed backwards. The instructions shown below is a safer way to set up the product, which is to fix it on the wall so the product doesn't fall over when it is pulled in the forward direction. -
Page 17: Selecting And Adjusting The Screen
Selecting and Adjusting the Screen Name of the Buttons in the Screen Adjustment Unit • Press this button to turn on the power. Press this button again to Power Button turn it off. • This Indicator lights up green when the display operates normally(on Power Indicator mode). - Page 18 Selecting and Adjusting the Screen Name of the Buttons in the Screen Adjustment Unit [For PC Analog signal] AUTO/SET Button Auto in progress For opimal display change resolution to 1360 X 768 [When XGA Mode is active and 1360 X768 is selected] INPUT Button INPUT AUTO/SET...
- Page 19 Selecting and Adjusting the Screen OSD Menu Icon Function Description Adjusts screen brightness, contrast and color that you prefer. PICTURE Adjusts the audio function. SOUND Adjusts the timer function. TIMER Adjusts the screen status according to the circumstances. SPECIAL Adjusts the screen video. SCREEN Note OSD(On Screen Display)
-
Page 20: How To Adjust The Osd (On Screen Display) Screen
Selecting and Adjusting the Screen How to adjust the OSD (On Screen Display) screen Save Move where Move where Exit from the Pops up Select a Select a Adjust the status adjustment the menu you want to you want to menu screen. -
Page 21: Adjusting Screen Color
Selecting and Adjusting the Screen Adjusting Screen Color Advanced Reset The PSM function automatically adjusts the screen image quality depending on the AV usage environment. • Dynamic : Select this option to display with a sharp image. • Standard : The most general and natural screen display status. •... - Page 22 Selecting and Adjusting the Screen Adjusting Screen Color XD is LG Electronics unique picture improving technology to display a real HD source through an advanced digital signal processing algorithm. It's not available to use this function in RGB-PC or HDMI/DVI PC modes.
-
Page 23: Adjusting The Audio Function
Selecting and Adjusting the Screen Adjusting the audio function Balance Speaker The best sound tone quality will be Surround MAX selected automatically depending on the Flat video type that you're currently watching. Balance Music Speaker Movie Sports User • Surround MAX : Set the Surround MAX on. This function plays back the mono or stereo sound input with the dynamic surround effects. -
Page 24: Adjusting The Timer Function
Selecting and Adjusting the Screen Adjusting the timer function Clock Off time On time Auto sleep Clock If the time is on the clock is incorrect, reset the clock manually. 1) Press the MENU button and then use button to select the TIME menu. 2) Press the button and then use button to select the Clock menu. -
Page 25: Selecting The Options
Selecting and Adjusting the Screen Selecting the options Language Child lock ISM Method Set ID Tile Mode Power Indicator Logo light Demo Language To choose the language in which the control names are displayed. Child lock Use the buttons to select On or Off. The Set can be set up so that it can only be used with the remote control. - Page 26 Selecting and Adjusting the Screen Selecting the options To use this function • - Must be displayed with various other products. - Must be in a function that can be connected to RS-232C or RGB Out Tile mode It is used to enlarge the screen and Language Tile Mode also used with several products to...
- Page 27 Selecting and Adjusting the Screen Selecting the options - Tile mode (product 1 ~ 9) : r(3) x c(3) ID 3 ID 1 ID 2 ID 4 ID 5 ID 6 column ID 9 ID 7 ID 8 - Tile mode (product 1 ~ 2) : r(2) x c(1) ID 1 ID 2 column...
- Page 28 Selecting and Adjusting the Screen Selecting the options Language Tile Mode Child lock Tile ID ISM Method H-Size Set ID V-Size Tile Mode H-Position Power Indicator V-Position Logo light Reset To set Demo Select the location of the Tile by setting an ID. •...
-
Page 29: Adjusting Screen Clock/Phase And Position
Selecting and Adjusting the Screen Adjusting Screen CLOCK/PHASE and Position Auto config. Manual config. XGA Mode Reset This button is for the automatic adjustment of the screen position, clock and phase. Auto-config. This function is suitable for analogue signal input only. (RGB PC input only) If the picture isn't clear after auto adjustment and especially that characters are still... - Page 30 Selecting and Adjusting the Screen Adjusting Screen CLOCK/PHASE and Position To select the image size of the screen. Spectacle When your AV receives the wide screen signal, it will lead you to adjust the picture horizontally, in a nonlinear proportion, to fill the entire screen.
-
Page 31: Troubleshooting
Troubleshooting No image is displayed G Is the product power cord connected? • See if the power cord is properly connected to the outlet. G Is the power indicator light on? • See if the power switch is turned on. G Power is on, power indicator is green •... -
Page 32: The Screen Image Looks Abnormal
Troubleshooting The screen image looks abnormal. G Is the screen position wrong? • D-Sub analog signal – Press the “AUTO” button in the remote control to automatically select the optimal screen status that fits into the current mode. If adjustment is not satisfactory, use the Position OSD menu. -
Page 33: The Audio Function Does Not Work
Troubleshooting The audio function does not work. G No sound? • See if the audio cable is connected properly. • Adjust the volume. • See if the sound is set properly. • Select the appropriate equalize sound. G Sound is too dull. •... -
Page 34: Specifications
Specifications The product specifications can change without prior notice for product improvement. LCD Panel [32 inch] 32 inches (80.04 cm) TFT (Thin Film Transistor) LCD (Liquid Crystal Display) Panel Visible diagonal size: 80.04 cm 0.5025 mm (Pixel Pitch) [37 inch] 37 inches (94.03 cm) TFT (Thin Film Transistor) LCD (Liquid Crystal Display) Panel Visible diagonal size: 94.03 cm... - Page 35 Specifications The product specifications can change without prior notice for product improvement. Dimensions &Weight Width x Height x Depth [32 inch] [1] 80.30 cm (31.61 inches) x 54.00cm (21.26 inches) x 18.00 cm (7.09 inches) [2] 80.30 cm (31.61 inches) x 49.30 cm (19.4 inches) x 9.99 cm (3.93 inches) [3] 96.40 cm (37.95 inches) x 54.00cm (21.26 inches) x 18.00 cm (7.09 inches) [4] 96.40 cm (37.95 inches) x 49.30 cm (19.4 inches) x 9.99 cm (3.93 inches) [37 inch]...
- Page 36 Specifications The product specifications can change without prior notice for product improvement. Dimensions &Weight [32 inch] [1] 19.4 kg (42.77 lbs) [2] 16.0 kg (35.27 lbs) [3] 21.1 kg (46.52 lbs) [4] 17.7 kg (39.02 lbs) [37 inch] [1] 26.1 kg (57.54 lbs) [2] 22.0kg (48.50 lbs) [3] 30.5 kg (67.24 lbs) [4] 25.7 kg (56.66 lbs)
- Page 37 Specifications 32/37/42 inch model The product specifications can change without prior notice for product improvement. Video Signal Max. Resolution RGB : 1600 X 1200 @60Hz HDMI/DVI : 1280 X 1024 @60Hz – It may not be supported depending on the OS or video card type. Recommended Resolution RGB : WSXGA 1360 X 768 @60Hz HDMI/DVI : WSXGA 1360 X 768 @60Hz –...
-
Page 38: Power Indicator
Specifications PC Mode – Preset Mode Vertical Vertical Horizontal Horizontal Frequency Frequency Frequency Preset mode Frequency Preset mode (Hz) (Hz) (kHz) (kHz) 31.469 640 x 350 VESA 1024 x 768 60.123 31.468 720 x 400 VESA 1024 x 768 68.68 31.469 640 x 480 VESA... - Page 39 Specifications VESA wall mounting Connected to another object (stand type and wall-mounted type.) This product accepts a VESA- compliant mounting interface pad.- (This has to be purchased separately if required.) For further information, refer to the VESA Wall Mounting Instruction Guide. Kensington Security Slot- (This has to be purchased separately if required.) Connected to a locking cable that can be purchased...
Need help?
Do you have a question about the Flatron M4201C-SA and is the answer not in the manual?
Questions and answers