Table of Contents
Advertisement
Advertisement
Table of Contents

Related Manuals for Rheem Richmond RMTGH-95DVLP


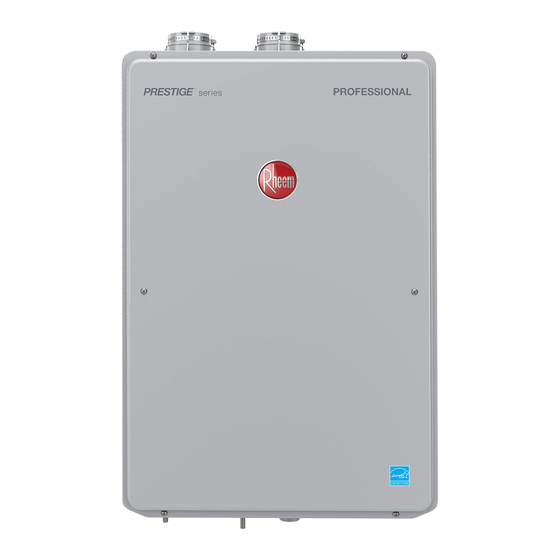
Summary of Contents for Rheem Richmond RMTGH-95DVLP
- Page 1 INSTALLATION INSTRUCTIONS FOR THE CONTRACTOR...
-
Page 2: Standards Compliance
INSTALLATION INSTRUCTIONS Standards Compliance This water heater must be installed in North Capitol Street Northwest, Washington, accordance with these instructions, local DC 20001, as ANSI standard Z223.1, or National codes, and utility company requirements. Fire Protection Association, 1 Batterymarch Park, MA 02269 as NFPA 54. In the United States where local codes are not available, use the latest edition of the American In Canada, use the latest edition of the CSA... - Page 3 INSTALLATION INSTRUCTIONS Choosing a Location (cont.) 0" min. 12" min. (0 mm) (300 mm) Sealed 0" (0 mm) 12" min. 1/2" min. (300 mm) (13 mm) • Every penetration of a floor or ceiling should be sealed. • Failure to install and properly vent the water 12"...
-
Page 4: Product Inspection
INSTALLATION INSTRUCTIONS Product Inspection • Visually inspect the water heater for any possible • Verify that all included supplied parts are present damage. as shown. • Check the rating plate on the water heater to make sure the water heater was designed to be used with the supplied type of gas (natural or LP). - Page 5 INSTALLATION INSTRUCTIONS Water Heater Installation (cont.) NOTICE: The National Fuel Gas Code (NFGC) and CSA B149.1 mandate a manual gas shut-off valve. See NFGC/B149.1 for complete instructions. Local codes or plumbing authority requirements may vary from the instructions or diagrams provided and take precedence over these instructions.
- Page 6 INSTALLATION INSTRUCTIONS Water Heater Installation (cont.) Typical Installation of WARNING: DO NOT install this water Outdoor Water Heater heater indoors or in an enclosure. It is designed for outdoor installation only. Any other type of installation (No Venting Required) can result in death, personal injury, and/or damage to the product or property.
-
Page 7: Mounting The Water Heater
INSTALLATION INSTRUCTIONS Mounting the Water Heater CAUTION: Reinforcement of the wall is required in case the wall is not strong enough to hold the water heater. Failure to do so could result in personal injury and/or product damage. The mounting location for the water heater should allow for easy access and operation. -
Page 8: Venting Requirements
INSTALLATION INSTRUCTIONS Venting for Direct-Vent Water Heater DANGER: ABS (Schedule 40, ASTM D-2661) (Not permitted Failure to properly vent in Canada) the water heater to the outdoors as outlined in The fittings, other than the VENT TERMINAL, this Venting section will result in death or serious should be equivalent to the following: personal injury. - Page 9 INSTALLATION INSTRUCTIONS NOTICE: accordance with the venting instructions in this To use 2-inch vent pipe, a manual before completing the installation and reducing adapter or bushing will be required. putting the water heater into service. Depending on the size of pipe that is chosen for Air Intake Condensate Trap venting the water heater, it might be necessary to use a fitting for stepping down in pipe size, to...
- Page 10 INSTALLATION INSTRUCTIONS Venting for Direct-Vent Water Heater (cont.) In the Commonwealth of 3. SIGNAGE. A metal or plastic identification plate shall be permanently mounted to the exterior of the Massachusetts building at a minimum height of eight (8) feet above grade directly in line with the exhaust vent terminal for The Commonwealth of Massachusetts requires the horizontally vented, gas-fueled heating appliance...
- Page 11 INSTALLATION INSTRUCTIONS Horizontal Vent Terminal Location Outside Walls Fixed Closed Fixed Operable Closed Operable Vent Terminal Air Supply Inlet Area Where Terminal is Not Permitted Interior Wall...
- Page 12 INSTALLATION INSTRUCTIONS Venting for Direct-Vent Water Heater (cont.) The following chart details the minimal dimensional information needed to determine the proper location of the vent terminal for direct vent and outdoor tankless water heaters. See corresponding letter reference in the illustration at left. U.S.
- Page 13 INSTALLATION INSTRUCTIONS Horizontal Vent Considerations WARNING: Moisture in the flue gas will condense as it leaves the vent terminal. In cold weather this condensate can freeze on the exterior Rising moisture will collect under eaves. Caulk wall, under the eaves, and on surrounding objects. If sof t vent is too close, Some discoloration to the exterior of the building block off and install new...
-
Page 14: Horizontal Vent Installation
INSTALLATION INSTRUCTIONS Venting for Direct-Vent Water Heater (cont.) Wall Plate Downward Slope 12" Exhaust Vent Pipe Air Intake Pipe (300 mm) Inspection Ceiling Inspection Access Panel Access Panel (Optional) (Optional) Cleaner-Primer and Medium-Body Horizontal Vent Installation Solvent Cement WARNING: All joints in vent piping must be properly sealed, Danger of fire or bodily injury –... - Page 15 INSTALLATION INSTRUCTIONS Horizontal Vent Installation (cont.) Fasteners will vary depending on the wall type. For particle board or composite sheathing, use 4 hollow wall anchors. The anchors should be at least 1/8 in. (0.3 cm) in diameter and the appropriate length for the sheathing thickness.
- Page 16 INSTALLATION INSTRUCTIONS Venting for Direct-Vent Water Heater (cont.) Alternative Horizontal Vent Installations Alternative horizontal vent termination kits are commercially available. Please refer to the instruction sheet packaged with the kit for complete installation instructions. Downward Slope Concentric vent Exhaust Vent Pipe Air Intake Pipe termination kit Inspection...
-
Page 17: Vertical Vent Installation
NOTICES: A, B, C, D • Only Rheem-approved termination and parts should be used during installation. • Maintain the recommended air space clearance to combustible materials and building insulation. - Page 18 INSTALLATION INSTRUCTIONS Venting for Direct-Vent Water Heater (cont.) Vertical Vent Terminal Location Optional 12" Min. (300 mm) Vent Pipe Through Roof A, B, C, D The following chart with diagrams details the minimum dimensional information needed to determine the proper location of the vertical vent terminal for direct-vent indoor tankless water heaters: U.S.
- Page 19 INSTALLATION INSTRUCTIONS Standard Vertical Vent Termination Optional Adjustable Roof Flashing Support Clamp Upward Slope Air Intake Exhaust Vent Support Hanger Pipe Pipe Condensate Drain...
- Page 20 INSTALLATION INSTRUCTIONS Venting for Direct-Vent Water Heater (cont.) Alternative Vertical Vent Termination Alternative vertical vent termination kits are commercially available. Please refer to the instruction sheet packaged with the kit for complete installation instructions. Minimum Clearance Above Anticipated Snow Level Adjustable Roof Flashing Support Clamp Upward Slope...
-
Page 21: Thermal Expansion
INSTALLATION INSTRUCTIONS Water Supply Thermal Expansion CAUTION: This water heater MUST ONLY be used with the following water A thermal expansion tank will be required if the supply conditions to prevent product damage and water heater is installed in a recirculation system. operation failure. -
Page 22: Water Supply Installation
INSTALLATION INSTRUCTIONS Water Supply Water Supply Connections (cont.) To ensure proper operation of the water heater, • To supply HOT water to upper floors, additional follow these water pressure guidelines. water pressure will be required (0.44 psi [3 kPa] per foot of height). Calculate the distance •... - Page 23 INSTALLATION INSTRUCTIONS Water Supply Installation (cont.) NOTICES: • Be sure to connect the COLD water inlet and the HOT water outlet as shown on the water heater. If reversed, the water heater will not function. • The flow rate of HOT water may vary when more than two faucets (appliances, fixtures, etc.) are being used simultaneously.
-
Page 24: Relief Valve
INSTALLATION INSTRUCTIONS Water Supply (cont.) Relief Valve For safe operation of the water heater, be sure that: A new pressure-relief valve, complying with the • The pressure rating of the relief valve must not Standard for Relief Valves and Automatic Gas exceed 150 psi (1,034 kPa) or the maximum Shut-Off Devices for Hot Water Supply Systems, working pressure of the water heater. -
Page 25: Installation Instructions
INSTALLATION INSTRUCTIONS Hot and Cold Pipe Insulation Installation WARNINGS: For increased energy efficiency, use pipe insulation as shown in the diagram. Insulate the pipes all • When pipe insulation is not rated for the the way to the top. DO NOT cover any drain or appropriate weather conditions, install electric pressure-relief valve(s). -
Page 26: Gas Supply Connections
INSTALLATION INSTRUCTIONS Gas Supply Gas Supply Connections • If flexible connectors are used, the minimum inside diameter must be 3/4" or greater and the WARNING: rated capacity of the connector must be equal Do not attempt to to or greater than the BTU capacity of the water convert this water heater for use with a different heater. -
Page 27: Gas Piping
INSTALLATION INSTRUCTIONS Gas Piping 2. Use the table for your gas type to find the pipe size required for your cubic feet per hour of gas Pipe-Sizing Procedure – Example and your pipe length. The gas supply must be capable of handling the Example: The heating value of propane gas for entire gas load at the location. -
Page 28: Gas Supply Installation
INSTALLATION INSTRUCTIONS Gas Supply (cont.) Gas Supply Installation Using the proper-size piping, fittings, and components, build the gas supply line to the water heater. Install the manual gas appliance shut-off valve NOTICE: to the gas connection at the water heater. The The gas supply line should shut-off is supplied with the water heater. -
Page 29: Leak Testing
INSTALLATION INSTRUCTIONS Leak Testing WARNING: Never use an open flame to test for gas leaks, because death, personal injury, and/or property damage can result. The water heater and its gas connections MUST be leak-tested at normal operating pressures before the unit is placed in operation. These tests should also include all factory connections. -
Page 30: High Altitude Installation
3,280 ft. (1,000 m) without the proper adjustments. Please contact your installer, local gas supplier, place of purchase, or the Rheem Customer Service phone number listed on page 26 in the “Call for Assistance” section. Electrical Wiring DANGER: •... -
Page 31: Wiring Diagram
INSTALLATION INSTRUCTIONS Wiring Diagram... - Page 32 INSTALLATION INSTRUCTIONS Electrical Wiring (cont.) Remote Control Selection Review the following considerations before determining the location of the remote and Location control(s): • Do not install any remote control WARNING: outdoors or where it can come in Field wiring connections contact with water.
-
Page 33: Remote Control Installation
INSTALLATION INSTRUCTIONS Remote Control Installation WARNING: Field wiring connections and electrical grounding must comply with local codes or, in the absence of local codes, with the latest edition of the National Electrical Code, ANSI/ NFPA 70, in the U.S., or Canadian Electrical Code, CSA C22.1, Part 1, in Canada. - Page 34 INSTALLATION INSTRUCTIONS Electrical Wiring (cont.) Connecting the Remote Control to the Water Heater: Firmly tighten the terminal screws by hand. Ensure that the power to the water heater has been disconnected. Remote Control Remote Control Connection Cover Connection Cover Secure the remote control extension cable on the hook located on the side of the remote control connection base.
-
Page 35: Insulation Blankets
INSTALLATION INSTRUCTIONS Insulation Blankets In general, insulation blankets for external use The manufacturer’s warranty does not cover any on gas water heaters are not necessary. The damage or defect caused by insulation, insulation purpose of an insulation blanket is to reduce the attachment, or use of any type of energy-saving standby heat loss from the water heater’s storage or other unapproved devices (unless authorized... -
Page 36: Installation Checklist
INSTALLATION INSTRUCTIONS Installation Checklist A. Water Heater Location C. Water Supply/Relief Valve Water supply has sufficient pressure. Indoor water heaters must be installed indoors. Air has been purged from the water heater Outdoor water heaters must be installed and the piping. outdoors. -
Page 37: Lighting The Water Heater
INSTALLATION INSTRUCTIONS Lighting the Water Heater NOTICE: WARNING: If you have any problems Before operating reading or following the instructions in this manual, this water heater, be sure to read and follow STOP and call a qualified service technician or the instructions on the following label, all labels contractor. - Page 38 INSTALLATION INSTRUCTIONS Lighting the Water Heater Operating Instructions Read, understand, and follow the safety information listed on the operating label on page 63 and in the “Important Safety Information” section in this manual. Turn on all electric power to the water heater. The water heater burner will automatically light when there is a demand for hot water.
-
Page 39: Setting The Water Temperature
INSTALLATION INSTRUCTIONS The contents on pages 65 through 68 should only be performed by qualified service personnel. Setting the Water Temperature WARNING: Improper adjustment, Priority Indicator alteration, service, or maintenance can result in In-Use death, personal injury, property damage, and/or Indicator (Lit during product damage. - Page 40 INSTALLATION INSTRUCTIONS Setting the Water Temperature (cont.) While “120” is blinking, press the UP and Press the DOWN adjustment button repeatedly DOWN adjustment buttons at the same time. until 100°F (38°C) or 85°F (29°C) shows in the “120” will stop blinking. LED display.
-
Page 41: High-Altitude Dip Switch Adjustments
INSTALLATION INSTRUCTIONS Minimum Temperature Adjustment by the Main Remote Control (UMC–117, USC1–117, and USC2–117) Residential water heater temperatures can be Press the DOWN adjustment button repeatedly adjusted down to 85°F (29°C), when required. until 100°F (38°C) shows in the LED display. To change the temperature settings down to NOTICE: 85°F (29°C):... - Page 42 INSTALLATION INSTRUCTIONS High-Altitude DIP Switch Adjustments (cont.) Dip switch adjustment 3,280 feet (1,000 m) thru 6,560 feet (2,000 m) If altitude is above 3,280 ft. (1,000 m) and below 6,560 ft. (2,000 m), change the third switch on “DIP 2” to the ON position (UP). Dip switch Remove the front cover panel on the water adjustment...
Need help?
Do you have a question about the Richmond RMTGH-95DVLP and is the answer not in the manual?
Questions and answers