Table of Contents
Advertisement
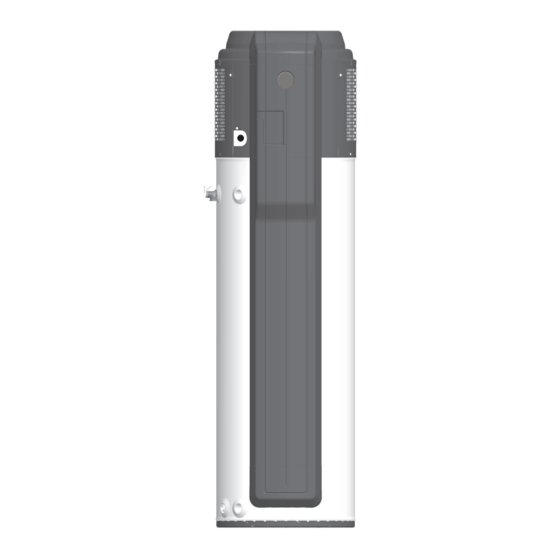
Electric Residential Heat Pump
Water Heaters
Printed in USA
Use & Care Manual
With Installation Instructions for the Installer
Residential 40 & 50 Gallon
© 2009 Rheem Manufacturing Co.
The purpose of this manual is twofold:
one, to provide the installer with the basic
directions and recommendations for the proper
installation and adjustment of the water heater;
and two, for the owner–operator, to explain
the features, operation, safety precautions,
maintenance and troubleshooting of the water
heater. This manual also includes a parts list.
It is imperative that all persons who are
expected to install, operate or adjust this
water heater read the instructions carefully
so they may understand how to perform
these operations. If you do not understand
these instructions or any terms within it, seek
professional advice.
Any questions regarding the operation,
maintenance, service or warranty of this
water heater should be directed to the seller
from whom it was purchased. If additional
information is required, refer to the section on
"If you need service."
Do not destroy this manual. Please read
carefully and keep in a safe place for future
reference.
Recognize this symbol as an
!
indication of Important Safety
Information!
California Proposition 65 Warning:
!
This product contains chemicals known
to the State of California to cause
cancer, birth defects or other
reproductive harm.
92-103234-02
AP15121-1 (01/10)
Advertisement
Table of Contents

Related Manuals for Rheem Residential 40 & 50 Gallon


Summary of Contents for Rheem Residential 40 & 50 Gallon
-
Page 1: Water Heaters
Recognize this symbol as an indication of Important Safety Information! California Proposition 65 Warning: This product contains chemicals known to the State of California to cause cancer, birth defects or other reproductive harm. 92-103234-02 AP15121-1 (01/10) © 2009 Rheem Manufacturing Co. Printed in USA... -
Page 2: Table Of Contents
Safety Information FOR YOUR RECORDS Safety Precautions ..3, 4 Write the model and serial numbers here: Installation Instructions You can find them on a label on the appliance. Location ....5 Staple sales slip or cancelled check here. -
Page 3: Water Temperature Setting
IMPORTANT SAFETY INFORMATION. READ ALL INSTRUCTIONS BEFORE USING. DANGER! WATER TEMPERATURE SETTING Safety and energy conservation are factors to be considered when selecting the water temperature setting of water heater. Water temperatures above 125°F can cause severe burns or death from scalding. Be sure to read and follow the warnings outlined on the label pictured below. -
Page 4: Safety Precautions
IMPORTANT SAFETY INFORMATION. READ ALL INSTRUCTIONS BEFORE USING. WARNING! For your safety, the information in this manual must be followed to minimize the risk of fire or explosion, electric shock, or to prevent property damage, personal injury, or loss of life. -
Page 5: Location
Installing the water heater. The location chosen for the water heater must take into consideration the following: Local Installation Regulations This water heater must be installed National Fire Protection Association, in accordance with these instructions, Batterymarch Park, Quincy, MA 02269 as booklet ANSI/NFPA 70. local codes, utility codes, utility company requirements or, in the Canadian installations should refer to... -
Page 6: Thermal Expansion
Installing the water heater. Thermal Expansion Determine if a check valve exists in the piping. This rapid pressure increase can inlet water line. Check with your local quickly reach the safety setting of the water utility. It may have been installed in relief valve, causing it to operate during the cold water line as a separate back flow each heating cycle. -
Page 7: Typical Installation
Typical Installation Ceiling in Alcove 8" Minimum Clearance above Heat Pump to allow air circulation Heat Pump Filter Primary Condensate line (3/4") to open drain or outdoors Access Door to Temperature Control Secondary Condensate tubing (1/2") to open drain or outdoors Union Electrical Access for Hook-up... -
Page 8: To Fill The Water Heater
Installing the water heater. To Fill the Water Heater WARNING: The tank must Make certain the drain valve is allow the air to vent from the water be full of water before heater is turned on. The water heater completely closed. heater and piping. -
Page 9: Insulation Blankets
Electrical Connections continued. A separate branch circuit with copper The branch circuit wiring should include either: conductors, over current protective device and suitable disconnecting Metallic conduit or metallic sheathed means must be provided by a qualified cable approved for use as a electrician. -
Page 10: Pipe Insulation
Installing the water heater. Relief and DrainValve Insulation Installation For increased energy efficiency, CAUTION: Ensure the this water heater has been supplied T&P Valve opening is not with two 2-3/8” sections of pipe obstructed by the insulation. insulation. Please install the insulation, according to the illustration at left. -
Page 11: Installation Checklist
Installation Checklist A. Water Heater Location ❑ P rovisions made to protect area from ❑ Close to area of heated water demand. water damage. ❑ I ndoors and protected from moisture, ❑ Sufficient room to service heater. wet conditions and freezing temperatures. -
Page 12: Operating Instructions
Operating the water heater. CAUTION: Hydrogen gas can be produced in a hot water system served by this water heater that has not been used for a long period of time (generally two weeks or more). HYDROGEN GAS IS EXTREMELY FLAMMABLE!! To dissipate such gas and to reduce risk of injury, it is recommended that the hot water faucet be opened for several minutes at the kitchen sink before using any electrical appliance connected to the hot water system. -
Page 13: Operational Modes
Basic Water Heater Operation For the most efficient operation of the This mode will run for approximately heat pump water heater, the "Energy 2 weeks then return to the mode and Saver" mode is recommended. Press temperature settings set by the user. the key on the control pad labeled "En- ergy Saver". -
Page 14: Draining The Water Heater
Care and cleaning of the water heater. Draining the Water Heater In order to drain the water heater, turn CAUTION: Shut off power to the water off the cold water supply. Open a hot heater before draining water. water faucet or lift the handle on the DANGER: Before manually operating relief valve to admit air to the tank. -
Page 15: Extended Shut-Down
Vacation and Extended Shut-Down If the water heater is to remain idle for freezing temperatures. NOTICE: Refer to the Hydrogen Gas Caution in the an extended period of time, the power After a long shut-down period, the Operating Instructions. and water to the appliance should water heater’s operation and controls be turned off to conserve energy should be checked by qualified service... -
Page 16: Troubleshooting Tips
Before You Call For Service… Troubleshooting Tips Save time and money! Review the chart on this page first and you may not need to call for service. Problem Possible Causes What to Do Rumbling noise Water conditions in your A llow a few quarts of water to run from drain valve ●... -
Page 17: Replacement Parts
Replacement Parts. For 50 gallon Heat Pump Water Heaters. Instructions For Placing a Parts Order Address parts orders to the distributor Part description (as noted below) or store where the heater was and number of parts desired. purchased. CAUTION: For your safety DO NOT All parts orders should include: attempt repair of electrical wiring, heating elements, heat pump or electronic controls. - Page 18 Cavity Insert Instructions The following instructions are intended for qualified service personnel ONLY, and should only be done when necessary. In order to replace the ECO,thermistor or heating element, remove the cavity insert crossbar by following the instructions below: Turn off the power to the water heater. Remove the jacket access panel(s) and insulation.
-
Page 19: Wiring Diagram
Wiring Diagram... -
Page 20: If You Need Service
IF YOU NEED SERVICE head 1. Should you have any questions about your new water heater, or if it requires adjustment, repair, or routine maintenance, it is suggested that you first contact your installer, plumbing contractor or previously agreed upon service agency.
Need help?
Do you have a question about the Residential 40 & 50 Gallon and is the answer not in the manual?
Questions and answers