Daikin RZQG100L8Y1L Installer's Reference Manual
Split system air conditioners
Hide thumbs
Also See for RZQG100L8Y1L:
- Installation manual (16 pages) ,
- Installation manual (16 pages)

Related Manuals for Daikin RZQG100L8Y1L


Summary of Contents for Daikin RZQG100L8Y1L
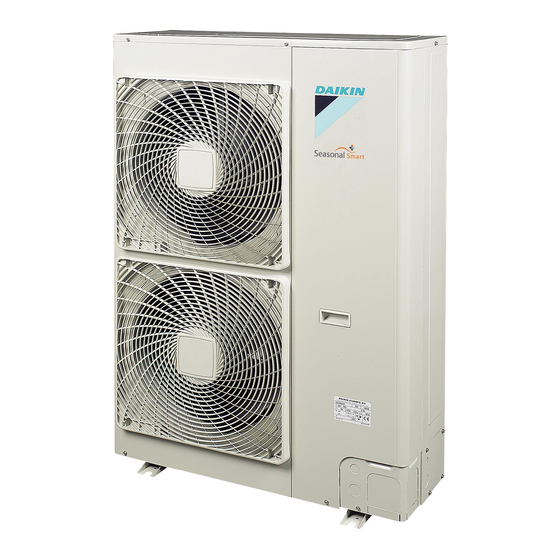
- Page 1 Installer reference guide Split system air conditioners RZQG71L9V1L RZQG71L8Y1L RZQG100L8Y1L RZQG125L8Y1L Installer reference guide English Split system air conditioners RZQG140L7Y1L...
-
Page 2: Table Of Contents
1 Table of contents 6.5.2 Precautions when checking the refrigerant piping ..15 Table of contents 6.5.3 Checking refrigerant piping: Setup....... 16 6.5.4 To check for leaks............16 6.5.5 To perform vacuum drying ........... 16 Charging refrigerant ..............16 1 General safety precautions 6.6.1 About charging refrigerant ........... -
Page 3: Meaning Of Warnings And Symbols
(on top of the and cause malfunction of the equipment. instructions described in the Daikin documentation). ▪ In places where there is a risk of fire due to the leakage of flammable gases (example: thinner or gasoline), carbon fibre, CAUTION ignitable dust. -
Page 4: Refrigerant
1 General safety precautions ▪ Only use tools exclusively for the refrigerant type used in the 1.2.3 Refrigerant system, this to ensure pressure resistance and prevent foreign If applicable. See the installation manual or installer reference guide materials from entering into the system. of your application for more information. -
Page 5: Electrical
2 About the documentation 1.2.6 Electrical NOTICE Precautions when laying power wiring: DANGER: RISK OF ELECTROCUTION ▪ Turn OFF all power supply before removing the switch box cover, connecting electrical wiring or touching electrical parts. ▪ Disconnect the power supply for more than 1 minute, ▪... -
Page 6: Installer Reference Guide At A Glance
Technical engineering data ▪ A subset of the latest technical data is available on the regional Daikin website (publicly accessible). ▪ The full set of latest technical data is available on the Daikin Business Portal (authentication required). Installer reference guide at a... -
Page 7: About The Units And Options
4 About the units and options General safety precautions Preparation Outdoor unit installation manual Cable tie Fluorinated greenhouse gases label Energy label Overview: Preparation This chapter describes what you have to do and know before going on-site. About the units and options It contains information about: ▪... -
Page 8: Additional Installation Site Requirements Of The Outdoor Unit In Cold Climates
5 Preparation Prevailing wind direction Install the outdoor unit away from direct sea winds. Air outlet Example: Behind the building. The outdoor unit is designed for outdoor installation only, and for ambient temperatures ranging: Model Cooling Heating RZQG –15~50°C –20~15.5°C 5.2.2 Additional installation site requirements of the outdoor unit in cold climates... -
Page 9: Refrigerant Piping Requirements
5 Preparation Depending on the applicable legislation and the unit's Item Description maximum working pressure (see "PS High" on the unit Flare connections May not be reused. Make new ones to name plate), larger piping thickness might be required. prevent leaks. See "6.4.3 Guidelines when connecting the refrigerant piping" on Refrigerant piping diameter... -
Page 10: Preparing Electrical Wiring
6 Installation Preparing electrical wiring INFORMATION For installation of the indoor unit (mounting the indoor unit, connecting the refrigerant piping to the indoor unit, 5.4.1 About preparing electrical wiring connecting the electrical wiring to the indoor unit …), see the installation manual of the indoor unit. INFORMATION Also read the precautions and requirements in the Opening the units... -
Page 11: Precautions When Mounting The Outdoor Unit
6 Installation 6.3.2 Precautions when mounting the outdoor 6.3.4 To install the outdoor unit unit INFORMATION Also read the precautions and requirements in the following chapters: ▪ General safety precautions ▪ Preparation 4× M12 6.3.3 To provide the installation structure Check the strength and level of the installation ground so that the unit will not cause any operating vibration or noise. -
Page 12: To Prevent The Outdoor Unit From Falling Over
6 Installation Drain holes (dimensions in mm) ▪ Connecting the refrigerant piping to the indoor unit ▪ Installing oil traps ▪ Insulating the refrigerant piping ▪ Keeping in mind the guidelines for: ▪ Pipe bending ▪ Flaring pipe ends ▪ Brazing ▪... -
Page 13: Guidelines When Connecting The Refrigerant Piping
6 Installation 6.4.3 Guidelines when connecting the refrigerant piping Take the following guidelines into account when connecting pipes: ▪ Coat the flare inner surface with ether oil or ester oil when Flare tool for Conventional flare tool R410A (clutch connecting a flare nut. Tighten 3 or 4 turns by hand, before Clutch type Wing nut type type) -
Page 14: To Connect The Refrigerant Piping To The Outdoor Unit
6 Installation Valve stem Item Tightening torque (N∙m) Field piping connection Service port cap 11.5~13.9 Stem cap ▪ Keep both stop valves open during operation. 6.4.8 To connect the refrigerant piping to the ▪ Do NOT apply excessive force to the valve stem. Doing so may outdoor unit break the valve body. -
Page 15: To Determine If Oil Traps Are Required
6 Installation ▪ Insulate the liquid piping (a) and the gas piping (b). Then ▪ Wind heat insulation around the curves, and then cover it The indoor unit is installed Install an oil trap every 10 m (height with vinyl tape (c). higher than the outdoor difference). -
Page 16: Checking Refrigerant Piping: Setup
6 Installation 3 Vacuum the system for at least 2 hours to a manifold pressure NOTICE of −0.1 MPa (−1 bar). ▪ Connect the vacuum pump to both the service port of 4 After turning the pump OFF, check the pressure for at least the gas stop valve and the service port of the liquid 1 hour. -
Page 17: Precautions When Charging Refrigerant
6 Installation NOTICE RZQG71_Y1 RZQG100~140_Y1 Before completely recharging, perform vacuum drying on the outdoor unit's internal refrigerant piping as well. To do so, use the internal service port of the outdoor unit (between the heat exchanger and the 4‑way valve). Do NOT use the service ports of the stop valves, because vacuum drying cannot be performed properly from these ports. -
Page 18: To Determine The Complete Recharge Amount
6 Installation To determine the additional refrigerant amount (R in kg) 6.6.7 To fix the fluorinated greenhouse gases L1 (m) label 1 Fill in the label as follows: L1 (standard): 30~40 m 40~50 m 50~60 m 60~75 m Contains fluorinated greenhouse gases L1 (size-up): 15~20 m 20~25 m 25~30 m 30~35 m RXXX 0.5 kg... -
Page 19: Precautions When Connecting The Electrical Wiring
6 Installation 6.7.3 Precautions when connecting the Item Tightening torque (N•m) electrical wiring M4 (earth) 1.2~1.4 M5 (X1M) 2.0~3.0 INFORMATION M5 (earth) 2.4~2.9 Also read the precautions and requirements in the following chapters: 6.7.5 Specifications of standard wiring ▪ General safety precautions components ▪... -
Page 20: Finishing The Outdoor Unit Installation
6 Installation Connecting to the When cables are routed from the unit, a frame protection sleeve for the conduits (PG insertions) can be inserted at the knockout hole. When you do not use a wire conduit, protect the wires with vinyl tubes to prevent the edge of the knockout hole from cutting the wires. -
Page 21: To Check The Insulation Resistance Of The Compressor
7 Commissioning NOTICE Before starting up the system, the unit MUST be energised for at least 6 hours. The crankcase heater needs to heat up the compressor oil to avoid oil shortage and compressor breakdown during startup. NOTICE NEVER operate the unit without thermistors and/or pressure sensors/switches. -
Page 22: To Perform A Test Run
7 Commissioning 3 Check operation for 3 minutes. There are NO damaged components or squeezed pipes on the inside of the indoor and outdoor units. 4 Check operation of the airflow direction. There are NO refrigerant leaks. Action Result Press. Air Volume/direction The correct pipe size is installed and the pipes are Air Volume Direction... -
Page 23: Hand-Over To The User
8 Hand-over to the user Error code Possible cause Maintenance safety precautions ▪ There is a voltage imbalance. DANGER: RISK OF ELECTROCUTION ▪ There is a missing phase in case of three-phase power supply units. Note: DANGER: RISK OF BURNING Operation will be impossible. -
Page 24: 11 Disposal
11 Disposal 5 Once the compressor stops (after 2~5 minutes), close the gas WARNING stop valve. Prevent hazards due to inadvertent resetting of the thermal Result: The pump down operation is finished. The user cut-out: power to this appliance MUST NOT be supplied interface may display "... -
Page 25: 12 Technical Data
12 Technical data Technical data A subset of the latest technical data is available on the regional Daikin website (publicly accessible). The full set of latest technical data is available on the Daikin Business Portal (authentication required). 12.1 Service space: Outdoor unit Suction side In the illustrations below, the service space at the suction side is based on 35°C DB and cooling operation. -
Page 26: Piping Diagram: Outdoor Unit
12 Technical data b (mm) ≥100 ≥100 ≤½H b≥250 ½H <H ≤H b≥300 ≥100 ≥100 ≥100 >H ≥2000 ≥100 ≥3000 ≥200 ≥100 ≥1000 ≥600 ≥1500 Stacked units (max. 2 levels) ( ≥100 ≥100 ≥300 ≥1000 ≥100 ≥100 ≥100 ≥100 ≥300 ≥1000 A1=>A2 (A1) If there is danger of drainage dripping and freezing between the upper and lower units…... -
Page 27: Wiring Diagram: Outdoor Unit
13 Glossary 12.3 Wiring diagram: Outdoor unit Switching power supply Q1DI Earth leakage circuit breaker (field supply) The wiring diagram is delivered with the unit, located at the inside of R1~R6 Resistor the service cover. Thermistor (air) Notes for RZQG_V1: Thermistor (discharge) Symbols (see legend). - Page 28 Optional equipment Equipment made or approved by Daikin that can be combined with the product according to the instructions in the accompanying documentation. Field supply Equipment NOT made by Daikin that can be combined with product according instructions accompanying documentation.
- Page 32 4P473074-1A 2019.04...
Need help?
Do you have a question about the RZQG100L8Y1L and is the answer not in the manual?
Questions and answers