Table of Contents
Advertisement
Quick Links
Advertisement
Table of Contents

Related Manuals for HTC ROSE110


Summary of Contents for HTC ROSE110
- Page 1 Smart Phone User Manual www.htc.com...
- Page 2 COPYRIGHT INFORMATION Copyright © 2007 HTC Corporation. All Rights Reserved. , ExtUSB and HTC Care are trademarks and/or service marks of HTC Corporation. Microsoft, MS-DOS, Windows, Windows Vista, Windows NT, Windows Server, Windows...
- Page 3 The information is provided “as is” without warranty of any kind and is subject to change without notice. HTC also reserves the right to revise the content of this document at any time without prior notice.
- Page 4 Without limiting the foregoing, it is further understood that HTC and its Providers are not responsible for Your use or misuse of the Weather Information, Data and/or Documentation or the results from such use. HTC and its Providers make no express or implied warranties, guarantees or affirmations that weather information will...
- Page 5 Limitation of Damages TO THE MAXIMUM EXTENT PERMITTED BY APPLICABLE LAW, IN NO EVENT SHALL HTC OR ITS PROVIDERS BE LIABLE TO USER OR ANY THIRD PARTY FOR ANY INDIRECT, SPECIAL, CONSEQUENTIAL, INCIDENTAL OR PUNITIVE DAMAGES OF ANY KIND, IN CONTRACT OR...
- Page 6 plug. The plug must be plugged into an appropriate outlet which is properly installed and grounded in accordance with all local codes and ordinances. SAFETY PRECAUTIONS FOR POWER SUPPLY UNIT • Use the correct external power source A product should be operated only from the type of power source indicated on the electrical ratings label.
- Page 7 • Take extra precautions • Keep the battery or device dry and away from water or any liquid as it may cause a short circuit. • Keep metal objects away so they don’t come in contact with the battery or its connectors as it may lead to short circuit during operation.
- Page 8 PREVENTION OF HEARING LOSS CAUTION: Permanent hearing loss may occur if earphones or headphones are used at high volume for prolonged periods of time. Note For France, mobile headphones, earphones, and wired remote controllers (listed below) for this device have been tested to comply with the Sound Pressure Level requirement laid down in NF EN 50332-1:2000 and/or NF EN 50332-2:2003 standards as required by French Article L.
- Page 9 Areas with a potentially explosive atmosphere are often, but not always, clearly marked. These include fueling areas, below deck on boats, fuel or chemical transfer or storage facilities, and areas where the air contains chemicals or particles, such as grain, dust, or metal powders. ROAD SAFETY Vehicle drivers in motion are not permitted to use telephony services with handheld devices, except in the case of emergency.
- Page 10 HEARING AIDS Some digital wireless phones may interfere with some hearing aids. In the event of such interference, you may want to consult your service provider, or call the customer service line to discuss alternatives. NONIONIZING RADIATION This product should be operated in the suggested normal condition only to ensure the radiative performance and safety of the interference.
- Page 11 General Precautions • Avoid applying excessive pressure to the device Do not apply excessive pressure on the screen and the device to prevent damaging them and remove the device from your pants’ pocket before sitting down. It is also recommended that you store the device in a protective case. Cracked display screens due to improper handling are not covered by the warranty.
- Page 12 • Avoid wet areas Never use the product in a wet location. • Avoid using your device after a dramatic change in temperature When you move your device between environments with very different temperature and/or humidity ranges, condensation may form on or within the device.
-
Page 13: Table Of Contents
1.5 Starting Up ....................... 29 Turn your phone on and off.......................29 Auto configure the data connection settings................30 1.6 Home Screen......................31 HTC Home Sliding Panel ........................32 Tasks screen .............................35 Status Indicators ............................35 1.7 Recent Programs Screen and Start Menu............37 1.8 Programs on your phone.................. - Page 14 Chapter 2 Using Phone Features 2.1 Using the Phone...................... 52 The Phone screen ..........................52 Enter your PIN ............................52 Set ring tones............................52 2.2 Making a Call......................53 Make a call from the Phone screen ....................53 Make a call from Contacts ........................54 Make a call from Call History ......................54 Make a call from Speed Dial ......................55 2.3 Receiving a Call......................
- Page 15 Chapter 4 Managing your Phone 4.1 Personalizing Your Phone..................70 Set up the Home screen ........................70 Set date, time, language, and other regional options..............70 Choose how to be notified about events or actions ..............71 Set personal information........................73 Set performance and maintenance options................73 4.2 Copying and Managing Files ................
- Page 16 Chapter 6 Exchanging Messages 6.1 Messaging ........................ 96 6.2 Text Message ......................97 Compose and send text messages ....................97 Copy and paste text..........................98 Manage text messages........................99 6.3 MMS Messages ...................... 101 Edit MMS settings..........................101 Create and send MMS messages ....................103 View and reply to MMS messages....................
- Page 17 Chapter 8Getting Connected 8.1 Comm Manager..................... 130 8.2 Connecting to the Internet ................. 131 Ways of Connecting to the Internet..................... 131 Wi-Fi ................................ 131 GPRS/3G ..............................133 Dial-up ..............................133 8.3 Internet Explorer Mobile ..................135 Browsing the Web ..........................135 Navigate the whole web page.......................
- Page 18 Chapter 9 Navigating on the Road 9.1 Google™ Maps (Available by Country).............. 160 Open Google Maps..........................160 Search for a place of interest ......................161 9.2 Guidelines and Preparation for Using GPS ............162 9.3 Downloading Satellite Data via QuickGPS............164 Download options ..........................
- Page 19 10.8 FM Radio ........................ 195 FM Radio controls..........................195 Save presets............................196 FM Radio Main Menu ........................197 10.9 Java ......................... 198 Install and run MIDlets/MIDlet suite.................... 198 Manage MIDlets/MIDlet suite ......................199 Chapter 11 Using Other Applications 11.1 Microsoft® Office Mobile ..................202 11.2 Microsoft®...
-
Page 21: Chapter 1 Getting Started
Chapter 1 Getting Started 1.1 Getting to Know Your Phone and Its Accessories 1.2 Installing the SIM Card, Battery, and Storage Card 1.3 Charging the Battery 1.4 Using the Strap Holder 1.5 Starting Up 1.6 Home Screen 1.7 Recent Programs Screen and Start Menu 1.8 Programs on your phone 1.9 Quick List 1.10 Entering Information... -
Page 22: Getting To Know Your Phone And Its Accessories
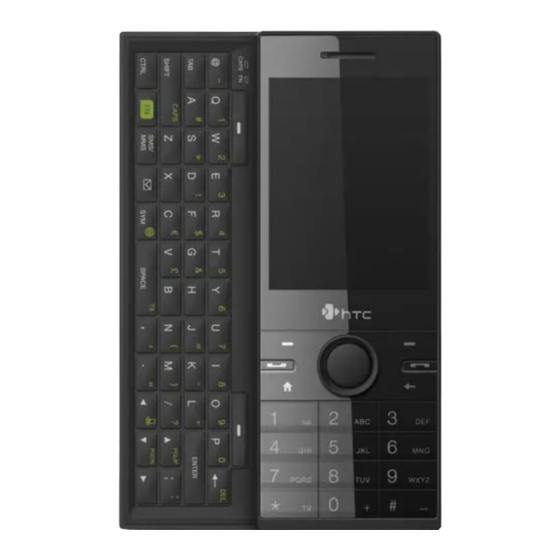
22 Getting Started 1.1 Getting to Know Your Phone and Its Accessories QWERTY keyboard See “Use the Earpiece QWERTY Keyboard” Listen to a phone call. in this chapter for details. NAVIGATION CONTROL/CENTER OK Display Screen Use to scroll left, right, up, or down. - Page 23 Getting Started 23 POWER Press and 3.2 Megapixel Camera hold (about 3 See “Taking Photo and seconds) to turn Videos with the Phone on and off the Camera” in chapter 10 for phone. details. Press and quickly Volume Up release to display Press to increase the Quick List.
-
Page 24: Led Alerts
24 Getting Started LED alerts The buttons below the screen and the LED ring of the NAVIGATION CONTROL will light up in the following situations: Controls Light Behavior SEND button Light flashes when there is an incoming call. END button Light stays solid when there is an incoming call. -
Page 25: Installing The Sim Card, Battery, And Storage Card
Getting Started 25 1.2 Installing the SIM Card, Battery, and Storage Card SIM Card Your SIM card is given to you by your wireless service provider and contains your basic subscriber information, such as your phone number and your address book. Before you begin, make sure the phone is turned off. -
Page 26: Storage Card
26 Getting Started To remove the SIM card With the SIM card and storage card compartment opened, push the SIM card holder to the direction of “OPEN. ” Lift the edge of the SIM card holder and then remove the SIM card. Storage Card If you have a SIM card installed, you need to remove it first before you can install the microSD card. -
Page 27: Battery
Getting Started 27 Battery Your phone comes with a rechargeable Lithium-ion or Lithium-ion polymer battery and is designed to use only manufacturer-specified original batteries and accessories. To install the battery Slide the back cover downward to remove it. Align the exposed metal contacts on the edge of the battery with the prongs in the body of the phone. -
Page 28: Charging The Battery
28 Getting Started 1.3 Charging the Battery New batteries are shipped partially charged. Before you start using your phone, it is recommended that you install and charge the battery. Some batteries perform best after several full charge/discharge cycles. The battery is fully charged after about 3 hours of charging. -
Page 29: Starting Up
Getting Started 29 Attach the loop over the small hook at the bottom of the back side of the phone. Slightly pull the strap, lanyard or string accessory to fix it securely in place. Replace the back cover. 1.5 Starting Up After installing your SIM card and battery and charging the battery, you can now power on and start using your phone. -
Page 30: Auto Configure The Data Connection Settings
30 Getting Started Auto configure the data connection settings The first time you power on your phone, you will see a notification message from Connection Setup. Connection Setup automatically configures your phone’s data connections, such as 3G/GPRS, WAP, and MMS, so that you do not need to enter the settings manually for your phone. -
Page 31: Home Screen
Getting Started 31 1.6 Home Screen The Home screen displays status indicators and the HTC Home Sliding Panel. The Home screen also gives you quick access to various applications and settings that you frequently use on your phone. Click to display the Recent Programs list and the available programs in your phone. -
Page 32: Htc Home Sliding Panel
32 Getting Started HTC Home Sliding Panel The HTC Home Sliding Panel lets you quickly access various information, applications, and settings on your phone. Navigate through the items on the HTC Home Sliding Panel by pressing NAVIGATION up or down. When an... - Page 33 Getting Started 33 Message Read snippets of your unread messages or create a new text or media (MMS) message. Click the message to open the full message. Press NAVIGATION left/right to go through your unread messages. Email View snippets of your unread e-mails or create a new e-mail.
- Page 34 Press CENTER OK to view the selected tutorial. You can remove the Getting Started item from the HTC Home Sliding Panel. To remove, press NAVIGATION right until you see Done! Getting Started and then press CENTER OK. On the...
-
Page 35: Tasks Screen
Getting Started 35 Settings Lets you quickly access the Comm Manager and Task Manager and change your profile, wallpaper, or ring tone. Click All Settings to show all available settings. Tasks screen When you open the QWERTY keyboard while on the Home screen, a screen is shown letting you quickly start writing an e- mail, SMS, or MMS message and... - Page 36 36 Getting Started Icon Description Icon Description Battery level Uppercase text input, caps lock Low battery Uppercase text input Numeric or symbol (labeled in green Very low battery color on keyboard) input, locked Numeric or symbol input (labeled in Battery charging green color on keyboard) No battery or battery fault XT9 text input mode, lowercase...
-
Page 37: Recent Programs Screen And Start Menu
Getting Started 37 1.7 Recent Programs Screen and Start Menu Your phone comes with several bundled programs that you can start using immediately. You can also install additional programs from the included Windows Mobile® Getting Started Disc or from other sources and install them on your phone. By default, the Recent Programs screen is shown when you click Start. -
Page 38: Programs On Your Phone
38 Getting Started 1.8 Programs on your phone The following table lists icons of the programs that are already installed on your phone or are available on the discs that came with your phone. Icon Program You can ActiveSync Synchronize information between your phone and PC. Adobe Reader View PDF files. - Page 39 Getting Started 39 Icon Program You can Configure your phone’s data connections, such as GPRS/3G, Connection WAP, and MMS, based on the detected or selected network Setup operator. Contacts Keep track of contact information. Clear Storage Clear the memory and restores the phone back to its factory default settings.
- Page 40 40 Getting Started Icon Program You can Internet Use your phone an external modem for your computer. Sharing Messaging Send and receive e-mails, MMS and text messages. Messenger Connect to the Windows Live Messenger service. Excel Mobile View Excel worksheets. PowerPoint Mobile View PowerPoint files.
- Page 41 Getting Started 41 Icon Program You can STK (SIM Tool Access information and other services offered by your wireless Kit) Service service provider. Create speed dial entries for dialing frequently-called phone Speed Dial numbers or for opening frequently-accessed programs. Streaming Stream live or on-demand video.
-
Page 42: Quick List
42 Getting Started 1.9 Quick List The Quick List offers convenient access to a list of functions, such as locking your phone and keypad, opening Comm Manager, and choosing a different profile. To access the Quick List Briefly press (press and quickly release) the POWER button. -
Page 43: Use The Keypad
Getting Started 43 XT9 text input mode, lowercase XT9 text input mode, uppercase XT9 text input mode, caps lock Use the Keypad Use the keypad to dial phone numbers or type short text messages. To change the input mode Press and hold the *T9 key. On the menu, click the input mode you want. -
Page 44: Use Xt9 Mode
44 Getting Started Use XT9 mode To enter a word in XT9 mode, press the numeric keys that contain the letters you want. As you enter letters, XT9 analyzes your keypresses and attempts to complete the word. For example, to enter the word “shoe, ” press 7, 4, 6, 3. To enter text in XT9 mode Press and hold the *T9 key. -
Page 45: Use Numeric Mode
Getting Started 45 • Spell Correction. Corrects typographical errors by selecting from a list of possible words that reflect the characters of the keys you have tapped as well as characters of nearby keys. • Next Word Prediction. Predicts the next word in your text based on previous phrases you have constructed. -
Page 46: More Text Entry Tasks
46 Getting Started More text entry tasks In both Multipress and XT9 modes, the first letter of a sentence is by default capitalized. To change between uppercase, lowercase, and caps lock Press the *T9 key to change between uppercase, lowercase, and caps lock within a text input mode. - Page 47 Getting Started 47 Note To enable/disable the QWERTY keyboard sliding open or closing sound, click Start > All Programs > Settings > Sounds. In Keyboard sliding, select None to disable the sound or select a sound to enable the sound. SOFT keys LED indicators for Cap and Fn keys...
-
Page 48: Battery Information
48 Getting Started • To remain in the scrolling mode or to continue entering numbers or symbols (labeled in green color), press twice and then press the corresponding keys. • Press the left or right SOFT KEY to perform the command shown in the label above the key. - Page 49 Getting Started 49 To check and optimize battery power On the Home screen, click Start > All Programs > Settings > Power Management, and adjust the backlight, display, or light sensor settings. If you do not want to charge the battery while the phone is connected to the computer, click Start >...
- Page 50 50 Getting Started...
-
Page 51: Chapter 2 Using Phone Features
Chapter 2 Using Phone Features 2.1 Using the Phone 2.2 Making a Call 2.3 Receiving a Call 2.4 In-Call Options 2.5 Ending a Call 2.6 Additional Dialing Information 2.7 SIM Tool Kit (STK) 2.8 Setting Up Bluetooth SIM Access for Car Kit Phones... -
Page 52: Using The Phone
52 Using Phone Features 2.1 Using the Phone You can use your phone to make, receive, and keep track of voice calls, and send text messages (SMS, Short Message Service) and MMS (Multimedia Messaging Service) messages. The Phone screen From the Phone screen, you can open, call, or find a contact, and even save a new number in Contacts. -
Page 53: Making A Call
Using Phone Features 53 If you select Vibrate, the sound is muted and the phone will vibrate when you receive a call. The Vibrate icon ( ) appears in the title bar. Selecting None in the Ring tone list mutes the phone. For more information about sounds, see “Choose how to be notified about events or actions”... -
Page 54: Make A Call From Contacts
54 Using Phone Features Make a call from Contacts On the Home screen, click Start > All Programs > Contacts. Select the desired contact, and press TALK/SEND. To specify the number to dial By default, the mobile telephone number (m) of a contact is dialed when you make a call from Contacts;... -
Page 55: Make A Call From Speed Dial
Using Phone Features 55 Make a call from Speed Dial You can make calls using Speed Dial. To learn how to use Speed Dial, see “Speed Dial” in Chapter 10. 2.3 Receiving a Call When you receive a phone call, you have the option to answer it or ignore it. To answer or ignore an incoming call •... -
Page 56: In-Call Options
56 Using Phone Features 2.4 In-Call Options Your phone gives you various options when you are in a call. Press NAVIGATION up Toggle between turning on and off the speakerphone. icon appears at the top of the screen when in Speakerphone mode. -
Page 57: Ending A Call
Using Phone Features 57 To enable Call Waiting Call Waiting should be enabled and supported for you to be notified of an incoming call when you are using the phone. On the Home screen, click Start > All Programs > Settings > Phone >... -
Page 58: Additional Dialing Information
58 Using Phone Features 2.6 Additional Dialing Information Make an emergency call Enter the appropriate emergency number for your locale, and press TALK/SEND. Additional emergency numbers may be included in your SIM card. Contact your service provider for details. Make an international call Press and hold the 0 (Zero) key on the keypad until “+”... -
Page 59: Sim Tool Kit (Stk)
Using Phone Features 59 2.7 SIM Tool Kit (STK) A SIM card must be inserted in your phone in order to use this feature, which allows you to access a range of information services provided by your service provider. On the Home screen, click Start > All Programs > To access a service, click the item in the list. - Page 60 60 Using Phone Features...
-
Page 61: Chapter 3 Synchronizing Information With Your Computer
Chapter 3 Synchronizing Information with Your Computer 3.1 About Synchronization 3.2 Using Microsoft Windows Mobile® Device Center 3.3 Installing and Using Microsoft ActiveSync® 3.4 Synchronizing with Your Computer 3.5 Synchronizing via Bluetooth 3.6 Synchronizing Music and Video... -
Page 62: About Synchronization
62 Synchronizing Information with Your Computer 3.1 About Synchronization You can take information from your computer wherever you go by synchronizing them to your phone. The following types of information can be synchronized: • Microsoft Outlook® information, which include Outlook e-mail, contacts, calendar, tasks, and notes •... -
Page 63: Using Microsoft Windows Mobile® Device Center
Synchronizing Information with Your Computer 63 Note You can also synchronize Outlook e-mail, contacts, calendar, and tasks on your phone with the Exchange Server at your work. For more information about setting up your phone to synchronize with the Exchange Server, see Chapter 7. 3.2 Using Microsoft Windows Mobile®... -
Page 64: Installing And Using Microsoft Activesync
64 Synchronizing Information with Your Computer 3.3 Installing and Using Microsoft ActiveSync® Follow the steps below to install and set up ActiveSync 4.5 or later on Windows XP or other compatible Windows systems. Note For a list of compatible Windows systems, please go to http://www.microsoft.com/windowsmobile/activesync/activesync45.mspx Install and set up ActiveSync Insert the Getting Started Disc into the disc drive on your PC. -
Page 65: Synchronizing With Your Computer
Synchronizing Information with Your Computer 65 3.4 Synchronizing with Your Computer Connect your phone to your PC to synchronize the information between your phone and PC. While your phone is connected, ActiveSync (or Windows Mobile Device Center on your PC) synchronizes every time you make a change on either the PC or your phone. -
Page 66: Change Which Information Is Synchronized
66 Synchronizing Information with Your Computer Change which information is synchronized You can change the information types and the amount of information to synchronize for each type either on your phone or your computer. Follow the steps below to change synchronization settings on your phone. Note Before changing synchronization settings on your phone, disconnect it from your computer. -
Page 67: Troubleshoot Sync Connection Problem
Synchronizing Information with Your Computer 67 Troubleshoot sync connection problem In some cases, when the computer connects to the Internet or a local network, it may disconnect the connection with your phone in favor of the Internet or network connection. If this happens, click Start >... -
Page 68: Synchronizing Music And Video
68 Synchronizing Information with Your Computer Notes • To preserve battery power, turn off Bluetooth when not in use. • To connect and synchronize your phone with a computer via Bluetooth, your computer must have built-in Bluetooth or installed with a Bluetooth adapter or dongle. -
Page 69: Chapter 4 Managing Your Phone
Chapter 4 Managing your Phone 4.1 Personalizing Your Phone 4.2 Copying and Managing Files 4.3 Adding and Removing Programs 4.4 Using Task Manager and Managing Memory 4.5 Protecting Your Phone 4.6 Restarting Your Phone 4.7 Resetting Your Phone... -
Page 70: Personalizing Your Phone
70 Managing your Phone 4.1 Personalizing Your Phone Set up the Home screen The Home screen is the starting place for most of the tasks you perform on your phone. You can gain access to all features and programs from the Home screen. To customize the Home screen On the Home screen, click Start >... -
Page 71: Choose How To Be Notified About Events Or Actions
Managing your Phone 71 To set the date and time On the Home screen, scroll to the Home item and then press CENTER OK. Click Date and Time and then set the Time zone, Date, and Time. Click Done. Choose how to be notified about events or actions A profile is a group of settings that determine how your phone will alert you to phone events such as incoming calls and notifications. - Page 72 72 Managing your Phone Note For ring tones, you can use sound files in either the *.wav, *.mid, *.wma, or *.mp3 file format. For notifications or reminders, you can use *.wav or *.mid files. When you select a sound, the sound plays. To hear it again, select Menu > Play. To set sound for the keypad and keyboard On the Home screen, click Start >...
-
Page 73: Set Personal Information
Click Alarm 1 or Alarm 2. Set the Alarm settings you want and then click Done. An Alarm icon appears on the Home item of the HTC Home Sliding Panel. Set personal information Entering and displaying owner information are best practices; they allow someone to return the phone to you in case it is lost. - Page 74 74 Managing your Phone • In Multipress time out, set the length of time between keypresses when entering text in Multipress mode. • In Confirmation time out, set the delay before an unconfirmed action times out. • In In-call alert volume, set the volume for incoming call or receiving new message alerts while you are in a call.
-
Page 75: Copying And Managing Files
Managing your Phone 75 To find the phone specification On the Home screen, click Start > All Programs > Settings > Device Information. To turn on and off error reporting On the Home screen, click Start > All Programs > Settings > Error Reporting. - Page 76 76 Managing your Phone To start File Explorer File Explorer lets you browse and manage the contents of your phone. The root folder on the phone is named My Device, and contains the following folders: My Documents, Program Files, Windows, and more. Click Start >...
-
Page 77: Adding And Removing Programs
Managing your Phone 77 4.3 Adding and Removing Programs Before you purchase additional programs for your phone, make sure that they are compatible for Windows Mobile® 6.1 Standard operating system. To add programs Download the program to your PC (or insert the disc that contains the program into your PC). -
Page 78: Use Task Manager
78 Managing your Phone Use Task Manager Task Manager allows you to view or stop the programs currently running on your phone. To stop a running program in Task Manager On the Home screen, click Start > All Programs > Expert > Task Manager. On the Task Manger screen, select a program on the list and then click End Task. - Page 79 Managing your Phone 79 To disable the SIM PIN On the Home screen, click Start > All Programs > Settings > Security > Disable SIM PIN. Enter your PIN, and click Done. To change the SIM PIN Be sure to make a note of your PIN. When the SIM PIN is enabled, you must provide this PIN to unlock the phone.
-
Page 80: Restarting Your Phone
80 Managing your Phone Select the Password type, then enter and confirm your password. Click Done. Note Once you configure the phone lock settings, you can enable the phone lock from the Quick List directly without configuring the settings again. To disable the phone lock Click Unlock and then enter the password you have set to unlock your phone. -
Page 81: Resetting Your Phone
Managing your Phone 81 4.7 Resetting Your Phone Resetting your phone will remove all the data from its memory and restore the phone back to the factory default settings. Note If Encrypt files placed on storage cards is or was enabled before, then backup all files from the storage card BEFORE using Clear Storage or updating the ROM system software. - Page 82 82 Managing your Phone...
-
Page 83: Chapter 5 Organizing Phone Information
Chapter 5 Organizing Phone Information 5.1 Contacts 5.2 SIM Manager 5.3 Calendar 5.4 Tasks 5.5 Quick Notes 5.6 Voice Notes 5.7 Voice Recorder... -
Page 84: Contacts
84 Organizing Phone Information 5.1 Contacts Contacts is your address book and information storage for the people and businesses you communicate with. If you use Outlook on your PC, you can synchronize contacts between your phone and PC. Create a contact on your phone To create a new contact on your phone On the Home screen, click Start >... -
Page 85: Edit And Call A Contact
Organizing Phone Information 85 Edit and call a contact To view and edit a contact information On the Home screen, click Start > All Programs > Contacts. Select the contact whose information you want to view or edit and click Menu >... -
Page 86: Share Contact Information
86 Organizing Phone Information • If you have entered information under Company for your Outlook contacts on your phone, you can quickly locate the contacts that work for a specific company. In the contact list, click Menu > View By > Company. Click the company to see the contacts who work there. -
Page 87: Sim Manager
Organizing Phone Information 87 To send contact information via MMS On the Home screen, click Start > All Programs > Contacts. Select a contact, then click Menu > Send as vCard. Enter the recipient in To of the MMS message, then click Send. If the recipient accepts the beam, text message, or MMS message, the contact information you sent are automatically saved in that person’s Contacts list. - Page 88 88 Organizing Phone Information To save each number under a different contact name on the SIM/USIM card, SIM Manager appends an indicator at the end of each name. You can edit this indicator first before you start copying contacts to your SIM/USIM card. Click Start >...
-
Page 89: Calendar
Organizing Phone Information 89 5.3 Calendar Use Calendar to schedule appointments, including meetings and other events. If you use Outlook on your PC, you can synchronize appointments between your phone and PC. Create a personal appointment To set Calendar options On the Home screen, click Start >... -
Page 90: Send Appointments
90 Organizing Phone Information Highlighted areas represent time segments that have scheduled appointments. Click an item to view the details of the appointment. Click to change the view. Agenda View An appointment with the icon indicates that the scheduled appointment has a conflict with one or more existing appointments. -
Page 91: Tasks
Organizing Phone Information 91 • Notes You can only specify if an attendee is required or optional if your phone is connected to a Microsoft Exchange 2007 server. Otherwise, all attendees are designated as required. For more information, see Chapter 7. •... -
Page 92: Quick Notes
92 Organizing Phone Information • Notes You can synchronize information on your phone with your PC to keep your task list up to date in both locations. • If you create a new task with a reminder on your PC and then synchronize tasks with your phone, the reminder will play at the time that was set on your PC. -
Page 93: Voice Notes
Organizing Phone Information 93 5.6 Voice Notes Use Voice Notes to create short voice recordings. Voice notes are included in the All Notes list and are named consecutively (Recording1, Recording2, and so on). To create a voice note On the Home screen, click Start > All Programs > Voice Notes. Hold the phone’s microphone near your mouth. -
Page 94: Voice Recorder
94 Organizing Phone Information 5.7 Voice Recorder Voice Recorder lets you record a voice clip and quickly send it via MMS. To record a voice clip Click Start > All Programs > Voice Recorder. Hold the phone’s microphone near your mouth. Click Record to start recording your voice clip. -
Page 95: Chapter 6 Exchanging Messages
Chapter 6 Exchanging Messages 6.1 Messaging 6.2 Text Message 6.3 MMS Messages 6.4 Setting Up E-mail Accounts 6.5 E-mail... -
Page 96: Messaging
96 Exchanging Messages and Using Outlook 6.1 Messaging Messaging is where all of your e-mail, text message, and MMS accounts are located. When you receive a new message, you can open that particular message from the Home screen. Simply scroll to the row where the new message is and click New e-mail New text/MMS message... -
Page 97: Text Message
Exchanging Messages and Using Outlook 97 To change message account settings • On the Messaging screen, select the message account whose settings you want to change and click Menu > Settings. • On a message account’s message list, click Menu > Tools > Options. 6.2 Text Message Send short text messages to your contacts. -
Page 98: Copy And Paste Text
98 Exchanging Messages and Using Outlook Copy and paste text Copy words or lines of text in your messages or e-mails and then paste them on the current or new message. To copy text from a message or e-mail that is being written In the message that is being written, position the cursor where you want to start copying from. -
Page 99: Manage Text Messages
Exchanging Messages and Using Outlook 99 Manage text messages Text messages that are sent to and received from a contact (or number) are grouped as a single thread in your inbox. Threaded SMS lets you see exchanged messages (similar to a chat program) with a contact on the screen. To reply to a text message In the SMS / MMS inbox, click a message thread to open it. - Page 100 100 Exchanging Messages and Using Outlook To copy a message in the thread to the SIM card In the SMS / MMS inbox, click the message to open it. Use the NAVIGATION Up or Down control to select a message in the thread that you want to copy to the SIM card.
-
Page 101: Mms Messages
Exchanging Messages and Using Outlook 101 To reply to a text message with an MMS message You can reply to a text message in a thread or to a SIM text message using an MMS message. In the SMS / MMS inbox, click a message thread to open it. Click Menu >... - Page 102 102 Exchanging Messages and Using Outlook To configure MMS settings Click Start > All Programs > Settings > MMS Setting to open the Preferences screen. Select or clear the provided check boxes according to your needs. On the Preferences screen, click Menu > MMSC Settings to access Multimedia Messaging Service Center (MMSC) settings.
-
Page 103: Create And Send Mms Messages
Exchanging Messages and Using Outlook 103 Create and send MMS messages You can compose MMS messages in a combination of various slides, where each slide can consist of a photo, audio or video clip, and/or text. Notes • MMS is a charged service. In order to use MMS successfully, this has to be provisioned on your mobile account. -
Page 104: View And Reply To Mms Messages
104 Exchanging Messages and Using Outlook Click Insert Audio to insert an audio clip. Select an audio clip on the Select Audio screen. To record a new audio clip, click Menu > Capture Audio. Click Send to send the message. After inserting an MMS message element, press NAVIGATION right to add a new slide. -
Page 105: Setting Up E-Mail Accounts
Exchanging Messages and Using Outlook 105 To block a phone number from sending you MMS messages If you do not want to receive MMS messages from a particular sender, you can add the sender’s phone number to the MMS Blacklist. When you receive a new MMS message, open and view the message. -
Page 106: Set Up Your Phone To Synchronize Outlook E-Mail With The Computer
106 Exchanging Messages and Using Outlook Set up your phone to synchronize Outlook e-mail with the computer If you have installed the synchronization software on your PC and created a partnership with your phone, then your phone is ready to send and receive Outlook e-mail. - Page 107 Exchanging Messages and Using Outlook 107 Note E-mail Setup searches your phone for preloaded e-mail configuration settings. If the phone cannot find the server settings for the specified e-mail account, your phone needs to connect to the Internet and try to download the settings. If it cannot find the settings online, you need to enter the settings manually.
- Page 108 108 Exchanging Messages and Using Outlook To customize download and format settings Before you click Finish when setting up your Internet e-mail account, you can click Review all download settings to choose download options, message format, and other settings. Click Advanced Settings for further options. Options Description Automatic Send/Receive You can select a time interval for connecting to the Internet...
-
Page 109: Set Up A Custom Domain E-Mail
Exchanging Messages and Using Outlook 109 Set up a custom domain e-mail When you are using an e-mail domain name that is hosted by a different e-mail provider (for example, your e-mail address may be Benjamin@startup.com but Email.com hosts the e-mail account and provides e-mail services), select the Custom Domain option in the E-mail Setup wizard to set up your e-mail account on your phone. -
Page 110: E-Mail
110 Exchanging Messages and Using Outlook 6.5 E-mail After setting up e-mail accounts on your phone, you can start sending and receiving e-mail messages. Create and reply to e-mails To compose and send an e-mail Click Start > All Programs > Messaging then select an e-mail account. Click Menu >... - Page 111 Exchanging Messages and Using Outlook 111 To filter the Inbox message list Filter the e-mail messages in your Inbox to only display the e-mails that contain the sender or e-mail subject you are searching for. Enter the sender name or e-mail subject you want to look for using the keypad or keyboard.
-
Page 112: Synchronize E-Mails
112 Exchanging Messages and Using Outlook To download an attachment In an open message with an attachment to download, click the attachment. If there is more than one attachment, click the other attachments to download them. You can directly open the file in the associated program after you download them by clicking the attachment again. -
Page 113: Customize E-Mail Settings
Exchanging Messages and Using Outlook 113 To automatically synchronize an Outlook e-mail account Connect your phone to your computer through USB or Bluetooth. Otherwise, connect through Wi-Fi or a data connection if you are synchronizing Outlook e-mail with the Exchange Server. For more information, see Chapter 7. - Page 114 114 Exchanging Messages and Using Outlook...
-
Page 115: Chapter 7 Working With Company E-Mails And Meeting Appointments
Chapter 7 Working with Company E-mails and Meeting Appointments 7.1 Synchronizing with Your Company E-mail Server 7.2 Working with Company E-mails 7.3 Managing Meeting Requests 7.4 Finding Contacts in the Company Directory 7.5 E-mail Security... -
Page 116: Synchronizing With Your Company E-Mail Server
116 Working with Company E-mails and Meeting Appointments 7.1 Synchronizing with Your Company E-mail Server Synchronize your phone with your company’s Microsoft Exchange Server to keep you connected with your e-mails, contacts, calendar, and other information. Set up a company e-mail server connection Use your phone to access your company e-mails by setting up an Exchange Server connection. -
Page 117: Start Synchronization
Working with Company E-mails and Meeting Appointments 117 Note If you synchronized e-mails with your PC before, open ActiveSync on your phone and click Menu > Add Server Source to set up an Exchange Server connection. When you are prompted to select information types for synchronization, you need to clear the E-mail check box under the Windows PC item first before you can select the E-mail check box under Exchange Server. - Page 118 118 Working with Company E-mails and Meeting Appointments added on the Exchange Server. To make Direct Push work, you need to have a Wi-Fi or data connection on your phone. You need to perform a full synchronization between your phone and the Exchange Server first before Direct Push can be enabled.
-
Page 119: Scheduled Synchronization
Working with Company E-mails and Meeting Appointments 119 Scheduled synchronization If you do not want to use Direct Push, you can set a regular schedule for synchronizing Outlook e-mail and information. In ActiveSync on your phone, click Menu > Schedule. Select a shorter time interval in the Peak times box for you to be able to receive e-mails more frequently. -
Page 120: Search For E-Mails On The Exchange Server
120 Working with Company E-mails and Meeting Appointments Search for e-mails on the Exchange Server You can access messages that are not available on your phone by searching your Microsoft Exchange Server mailbox. The search results will be downloaded and displayed in a Search Results folder. -
Page 121: Out-Of-Office Auto-Reply
Working with Company E-mails and Meeting Appointments 121 • Set Flag. Mark the message with a red flag to indicate that it needs follow up. • Complete Flag. Mark the message with a check mark to indicate that the issue or request in the e-mail is already completed. -
Page 122: Managing Meeting Requests
122 Working with Company E-mails and Meeting Appointments 7.3 Managing Meeting Requests When you schedule and send meeting requests from your phone, you can invite attendees to your meeting and check their status to know their availability. When you receive a meeting request, you can reply by accepting or declining the request. -
Page 123: Finding Contacts In The Company Directory
Working with Company E-mails and Meeting Appointments 123 If you accepted the meeting request, it will automatically be added as an appointment in Calendar on your phone. 7.4 Finding Contacts in the Company Directory In addition to having contacts on your phone, you can access contact information from your organization’s Company Directory. - Page 124 124 Working with Company E-mails and Meeting Appointments In Contacts In a new e-mail • In a new meeting request using Calendar, scroll to Attendees and click No attendees > Add Required Attendee or Add Optional Attendee and then click Company Directory at the top of the list. Enter the part or full contact name and click Search.
-
Page 125: E-Mail Security
Working with Company E-mails and Meeting Appointments 125 Notes • You can save a contact from the Company Directory to your phone by selecting the contact and then clicking Menu > Save to Contacts. • You can search on the following information as long as that information is included in your organization’s Company Directory: First name, Last name, E-mail name, Display name, E-mail address, or Office location. - Page 126 126 Working with Company E-mails and Meeting Appointments To verify the digital signature on a signed message you receive Open the Outlook e-mail message that has been digitally signed. At the top of the message, click View signature status. Click Menu > Check Certificate. To view the details of the certificate in the message, click Menu >...
-
Page 127: Set Permissions On An E-Mail Message
Working with Company E-mails and Meeting Appointments 127 Select Encrypt messages to protect your e-mails from being viewed except by the intended recipients. Select Sign messages so that recipients are certain that e-mails are sent by you and have not been altered. Click Menu >... - Page 128 128 Working with Company E-mails and Meeting Appointments...
-
Page 129: Chapter 8Getting Connected
Chapter 8 Getting Connected 8.1 Comm Manager 8.2 Connecting to the Internet 8.3 Internet Explorer Mobile 8.4 Internet Sharing (Using Your Phone as a Modem) 8.5 Bluetooth 8.6 Windows Live™ 8.7 Windows Live Messenger 8.8 RSS Hub 8.9 System Center Mobile Device Manager... -
Page 130: Comm Manager
130 Getting Connected 8.1 Comm Manager Comm Manager acts like a central switch that lets you enable or disable phone features as well as manage your data connections easily. To open Comm Manager: Click Start > All Programs > Comm Manager. Click to toggle between turning on or off Airplane mode. -
Page 131: Connecting To The Internet
Getting Connected 131 8.2 Connecting to the Internet Ways of Connecting to the Internet Your phone’s networking capabilities allow you to access the Internet or your corporate network at work through wireless and conventional connections. You can connect to the Internet by using one of the following: •... - Page 132 132 Getting Connected In Select network, choose the WLAN network to connect to. In Network type, select Internet and click Connect. • Notes When you select an open (unsecured) network, you will be automatically connected to the network after clicking Connect. •...
-
Page 133: Gprs/3G
Getting Connected 133 GPRS/3G You can use GPRS/3G to connect to the Internet or to send and receive MMS on your phone. When you use GPRS/3G, you will be billed per KB (Kilobyte) when sending or receiving information. If GPRS/3G settings are not preset on your phone, obtain the Access point name from your wireless service provider. - Page 134 134 Getting Connected In Description, enter a name for the connection. In Connects to, select The Internet. Enter the appropriate information in the remaining fields. Click Done. To set up a dial-up connection to your corporate network On the Home screen, click Start > All Programs > Settings > Connections > Dial-up >...
-
Page 135: Internet Explorer Mobile
Getting Connected 135 Add a URL exception Some URLs for Web pages on your company intranet may use periods, for example: intranet.companyname.com. To view these pages in Internet Explorer Mobile, you must create a URL exception. On the Home screen, click Start > All Programs > Settings > Connections > Menu >... -
Page 136: Navigate The Whole Web Page
136 Getting Connected Click Menu > Add to Click Menu > View and Click Menu > Tools to Favorites to save the then select the zoom level let you send the link current Web page in your and type of view you want via e-mail, view the Favorites folder. -
Page 137: Copy Web Page Text
Getting Connected 137 Copy web page text Copy text from a web page and then paste it on a text message or e-mail. To copy text on a web page On the web page, click Menu > Copy/Paste > Select Text. Use the NAVIGATION CONTROL to position the cursor where you want to start copying and then click Select. -
Page 138: Set Up The Phone As A Modem
138 Getting Connected Set up the phone as a modem To set up the phone as a USB modem On your phone, click Start > All Programs > Internet Sharing. In the PC Connection list, select USB. In the Network Connection list, select the name of connection that your phone uses to connect to the Internet. - Page 139 Getting Connected 139 Off. Bluetooth is turned off. In this mode, you can neither send nor receive information using Bluetooth. Visible. Bluetooth is turned on, and all other Bluetooth-enabled devices within range can detect your phone. Note By default, Bluetooth is turned off. If you turn it on, and then turn off your phone, Bluetooth also turns off.
-
Page 140: Bluetooth Partnerships
140 Getting Connected Bluetooth partnerships A Bluetooth partnership is a relationship that you create between your phone and another Bluetooth-enabled device in order to exchange information in a secure manner. To create a Bluetooth partnership On the Home screen, click Start > All Programs > Settings > Connections > Bluetooth. -
Page 141: Connect A Bluetooth Hands-Free Or Stereo Headset
Getting Connected 141 The name of the paired device is then displayed. You may edit and enter a new name for that device, then click Next. Select the check boxes of services that you want to use from the paired device. -
Page 142: Beam Information Using Bluetooth
142 Getting Connected Click Start > All Programs > Settings > Connections. Click Bluetooth > Add new device. Select the name of the Bluetooth headset, then click Next. The phone will automatically pair with the Bluetooth headset. Windows Mobile will automatically try one of the preconfigured passcodes (0000, 1111, 8888, 1234) to pair the Bluetooth headset with the phone. - Page 143 Getting Connected 143 For Windows Vista, select Allow Bluetooth devices to find this computer; or For Windows XP, select Turn discovery on and Allow Bluetooth devices to connect to this computer. Create a Bluetooth partnership between your phone and computer. For information about creating a partnership, see “Bluetooth partnerships”.
-
Page 144: Bluetooth Explorer And Bluetooth File Sharing
144 Getting Connected The default folder on your computer where beamed items are stored may be Windows XP: C:\Documents and Settings\your_username\My Documents Windows Vista: C:\users\your_username\My Documents. Bluetooth Explorer and Bluetooth file sharing Bluetooth Explorer searches for other Bluetooth devices that have file sharing enabled and lets you access their Bluetooth shared folder. -
Page 145: Use The Phone As A Bluetooth Modem
Getting Connected 145 Navigate to the folder where you want to paste the files on your device, then click Menu > Edit > Paste. Use the phone as a Bluetooth modem You can connect your phone to a notebook or desktop computer through Bluetooth and use the phone as a modem for the computer. -
Page 146: Print Files Via Bluetooth
146 Getting Connected • For Windows Vista Click Start > Control Panel > Network and Sharing Center. Click Manage network connections and then under Personal Area Network, double-click Bluetooth Network Connection. In the Bluetooth Personal Area Network Devices dialog box, select your phone, then click Connect. -
Page 147: Windows Live
Getting Connected 147 To print a calendar appointment Click Start > All Programs > Calendar and then select the appointment whose details you want to print. Follow steps 2 through 5 in the “To print contact information” procedure. To print a message Click Start >... -
Page 148: Set Up Windows Live
148 Getting Connected Set up Windows Live The first time you use Windows Live, sign in by using your Windows Live ID, which is your Windows Live Mail or Hotmail address, and password. To set up Windows Live for the first time Click Start >... - Page 149 Getting Connected 149 Windows Live Search bar. Press NAVIGATION left or right to switch among Live Mail, Messenger, and Sync status. Click to open/ activate the selected Windows Live component. Click to access Windows Live Messenger settings. Click Menu to access and change settings.
-
Page 150: Windows Live Messenger
150 Getting Connected 8.7 Windows Live Messenger Live Messenger lets you send and receive instant messages online. With this mobile version of Windows Live Messenger, you enjoy many of the same cool features that you get from the desktop version, which include the following: •... -
Page 151: Add Windows Live Contacts
Getting Connected 151 Add Windows Live contacts You can add new Windows Live contacts in Live Messenger or in Contacts. To add a Windows Live contact in Live Messenger Click Menu > Add new contact. Enter the e-mail address of the contact then click OK. To add a Windows Live contact in Contacts You can only add Windows Live contacts if you selected the Store Windows Live contacts in your mobile phone’s contact list checkbox when you set up Windows... -
Page 152: Send Instant Messages
152 Getting Connected Send instant messages You can send instant messages with emoticons, and even talk by sending a voice clip. While chatting, you can send and receive files directly on a message window. You can also start conversations with several contacts and switch between their message screens, or you can invite participants to join in a conversation. -
Page 153: Personalize The Messenger
Getting Connected 153 To send an instant message with emoticon Select a contact and start a conversation. Enter your text message in the text entry area of the message screen. To add an emoticon, click Menu > Add emoticon then select an icon from the list of emoticons. -
Page 154: Rss Hub
154 Getting Connected 8.8 RSS Hub RSS Hub is an RSS reader that keeps you up-to-date with the latest news from the Internet. It monitors Internet news channels and downloads the most current news updates and podcasts so you are instantly informed of breaking news and events. For more information and tips on using RSS Hub, see Help on your phone. -
Page 155: View And Organize Headlines
Getting Connected 155 View and organize headlines Click a channel in the channel list to display the headlines for that channel. Click a headline to open Headline or news the news summary summary contains screen a keyword Headline has been read New or unread headline Click to return to... -
Page 156: View The News Summary
156 Getting Connected New or unread headlines display in bold and are marked with a blue newspaper icon. Headlines that have been read are marked with a gray newspaper icon. View the news summary Click a headline in the headline list to display the news summary. Channel name Headline and Audio/Video/Image... -
Page 157: System Center Mobile Device Manager
Getting Connected 157 8.9 System Center Mobile Device Manager System Center Mobile Device Manager is a server-side solution that provides a more secure and efficient management of Windows Mobile-powered phones. Note The phone needs to be connected using a data connection for the System Center Mobile Device Manager to manage the Windows Mobile phone. - Page 158 158 Getting Connected...
-
Page 159: Chapter 9 Navigating On The Road
Chapter 9 Navigating on the Road 9.1 Google™ Maps (Available by Country) 9.2 Guidelines and Preparation for Using GPS 9.3 Downloading Satellite Data via QuickGPS... -
Page 160: Google™ Maps (Available By Country)
160 Navigating on the Road 9.1 Google™ Maps (Available by Country) Google™ Maps lets you track your current location, view real-time traffic situations, and receive detailed directions to your destination. It also provides a search tool where you can locate places of interest or an address on a vector or a satellite map. Note You need an active data connection or Wi-Fi connection to use Google Maps. -
Page 161: Search For A Place Of Interest
Navigating on the Road 161 Search for a place of interest You can search and locate a place of interest using Google Maps. Google Maps also shows the contact information and gives directions on how to get to the place of interest from your current location. -
Page 162: Guidelines And Preparation For Using Gps
162 Navigating on the Road • Click Directions to here or Directions from here to get directions on how to get to the place of interest from your current location or vice versa. • Click Search nearby to search for other places of interest near your current location. - Page 163 Navigating on the Road 163 Do not place where it will block the driver’s vision. Do not place where air bags could deploy. Do not place anywhere in the vehicle without securing the phone in the holder. • Please use the GPS system cautiously. Users shall be liable for any damages resulting from negligent operation of the system.
-
Page 164: Downloading Satellite Data Via Quickgps
164 Navigating on the Road 9.3 Downloading Satellite Data via QuickGPS Before you start using your phone for GPS navigation, open the QuickGPS program first to download ephemeris data (current satellite position and timing information) onto your phone. This data is needed to determine the GPS position of your current location. -
Page 165: Download Options
Your computer must be connected to the Internet in order to download data. Note The ephemeris data is stored on HTC web servers. QuickGPS is preconfigured to connect to these servers. - Page 166 166 Navigating on the Road...
-
Page 167: Chapter 10 Experiencing Multimedia
Chapter 10 Experiencing Multimedia 10.1 Taking Photos and Videos with the Phone Camera 10.2 Camera Album 10.3 Pictures & Videos 10.4 Windows Media Player Mobile 10.5 Streaming Media 10.6 Audio Manager 10.7 Audio Booster 10.8 FM Radio 10.9 Java... -
Page 168: Taking Photos And Videos With The Phone Camera
168 Experiencing Multimedia 10.1 Taking Photos and Videos with the Phone Camera Taking photos and shooting video clips are easy with your phone’s built-in 3.2 megapixel camera. To open Camera Do any of the following: • Press the CAMERA button on the right side of the phone. •... -
Page 169: Capture Modes
Experiencing Multimedia 169 Capture modes To change the capture mode On the Camera screen, press NAVIGATION right or left to change the capture mode. The Camera program lets you capture pictures and video clips by using various built-in modes. The title bar displays the active capture mode. The available capture modes are as follows: Icon Capture mode... -
Page 170: Camera Mode Icons And Indicators
170 Experiencing Multimedia Camera mode icons and indicators The camera icons and indicators disappear after a few seconds if there is no user interaction. Press the NAVIGATION CONTROL's direction keys, the Keypad's keys, or the left/right SOFT KEYs to display the icon indicators again. The Camera [Photo] screen Indicates the current zoom ratio. -
Page 171: Use Zooming
Experiencing Multimedia 171 The Camera [Picture Theme] screen Displays the current and total number of photos that can be taken using the selected template. Use zooming Before capturing a still image or a video clip, you can first zoom in to make the object in focus move closer, and you can zoom out to make the object move farther away. -
Page 172: The Review Screen
172 Experiencing Multimedia The Review screen After capturing a photo or video, you will be presented with options that you can do with the captured media file. Contact Picture mode only Press (Landscape orientation) NAVIGATION up View the image in Camera Album or play back the video in Windows Media Player. -
Page 173: Customize Camera Advanced Settings
Experiencing Multimedia 173 Customize Camera Advanced settings On the Camera screen, click (left SOFT KEY) on the Camera screen to open the Camera Advanced settings where you can activate self-timer, change the ambience, customize capture settings, and more. Use the NAVIGATION CONTROL to go through the available settings. Option Allows you to Mode... - Page 174 174 Experiencing Multimedia Option Allows you to Metering Mode Select a metering mode to allow the camera to measure the amount of light in the center and around the image and calculate the best-fit exposure value before capturing. Choose either Center Area to measure light using the center area of the image or Average to measure light using the area all around the image.
- Page 175 Experiencing Multimedia 175 Option Allows you to Record with Audio Select On to record audio while capturing video clips. This is selected (Video and MMS On by default. If you select Off and then capture a video clip, it will Video modes only) have no audio.
-
Page 176: Camera Album
176 Experiencing Multimedia 10.2 Camera Album View your images and videos that you captured using the Camera program in Camera Album. Camera Album offers a host of features that let you rotate images, view your images as a slide show, use images as contact pictures, and more. Note Camera Album can only display files using the JPEG, MPEG4 or H.263 file formats. - Page 177 Experiencing Multimedia 177 To view an image in full screen On the main Camera Album screen, use the NAVIGATION CONTROL to select the image you want to view and then press CENTER OK. While viewing the image, click Zoom In to zoom in on the image. Note If you do not see Zoom In on the screen, press CENTER OK to show the menu bar at the bottom of the screen.
-
Page 178: Pictures & Videos
178 Experiencing Multimedia To play back video files On the main Camera Album screen, click the thumbnail of the video file you want to play back. Windows Media Player then plays back the file. 10.3 Pictures & Videos The Pictures & Videos program allows you to view and manage media files on your phone. -
Page 179: Pictures & Videos Menu
Experiencing Multimedia 179 This icon indicates that the file is a video file. Click Play to play back the file in Windows Media Player Mobile. This icon indicates that the file is a GIF animation file. Click View to play back the file. -
Page 180: Windows Media Player Mobile
180 Experiencing Multimedia 10.4 Windows Media Player Mobile You can use Microsoft® Windows Media® Player Mobile for Smartphone to play digital audio and video files that are stored on your phone or on a network, such as on a Web site. To open Windows Media Player Mobile, click Start >... -
Page 181: About The Screens And Menus
Experiencing Multimedia 181 Press Change rating Fast-forward a file NAVIGATION right (hold) Rewind a file NAVIGATION left (hold) About the screens and menus Windows Media Player Mobile has three primary screens: Playback screen Now Playing screen Library screen The default screen that This special playlist The screen that lets you displays the playback... -
Page 182: About Licenses And Protected Files
182 Experiencing Multimedia About licenses and protected files Some media files have associated licenses that protect them from being unlawfully distributed or shared. If you want to copy a protected file from your PC to your phone, use the Windows Media Player on your PC to synchronize the file to your phone. - Page 183 Experiencing Multimedia 183 The files begin synchronizing to your phone. The next time you connect your phone to your PC while Windows Media Player is running, synchronization will start automatically. To synchronize and copy content manually to your phone If you have not set up synchronization between your phone and PC, follow steps 1 to 3 in “To synchronize content to your phone automatically.
-
Page 184: Play Media
184 Experiencing Multimedia Notes • Always use Windows Media Player 11 on your PC to synchronize (copy) files to your phone. • Audio files copy faster if Windows Media Player is configured to automatically set the quality level for audio files copied to your phone. For more information, see the Windows Media Player Help. -
Page 185: Streaming Media
Experiencing Multimedia 185 10.5 Streaming Media The Streaming Media program allows you to stream live broadcasts or on-demand media content from the Web. You do not have to wait until the entire media content is completely downloaded before watching the video or hearing the sound. - Page 186 186 Experiencing Multimedia Click Menu > Address Bar. In the address bar, enter the URL address of the Web page that contains the http link to the desired *.3gp, *.mp4, or *.sdp file. On the Web page, select the RTSP link and press CENTER OK. Streaming Media then automatically opens and starts playing the file.
-
Page 187: Audio Manager
Experiencing Multimedia 187 To configure streaming video connection settings Click Menu > Options to configure the following settings: • Playback. Specify the media buffer (in terms of duration) to allot for storing video and audio data while streaming media. • Networks. -
Page 188: Library
188 Experiencing Multimedia Library On the Audio Manager’s Library screen, an arrow that appears in an item indicates that there is a submenu available. Use the NAVIGATION CONTROL to go through the items and press CENTER OK to open the submenu. Library: Main screen Library: All Songs screen No. -
Page 189: Music Player
Experiencing Multimedia 189 No. Description Shows the song titles or file names of music files when you are in the All Songs submenu. Use the NAVIGATION CONTROL to select a music file and play it in the Music Player. Shows more submenus when you are in one of the category screens, such as Artists, Album, etc. - Page 190 190 Experiencing Multimedia Shuffle and Loop indicators Shows the playback time. Click Menu > Time Display to choose the display format for the playback time (Elapsed time or Remaining time). Control Press CENTER OK Play/Pause the song. Move backward in a song. Press and hold Move forward in a song.
-
Page 191: Playlists
Notes • Audio Manager searches for playlists in the following locations: Phone: \Application Data\HTC\AudioManager\playlists Storage card: \Storage Card\Playlist • If a Windows Media Player playlist contains a combination of music, video and image files, Audio Manager accesses the music files only and filters out the other media types. -
Page 192: Set Music As Ring Tone
192 Experiencing Multimedia Set music as ring tone Audio Manager allows you to select your favorite music and set it as a ring tone for your phone. Use the NAVIGATION CONTROL to select a song in the Library, or select a song to play it in Music Player. -
Page 193: Audio Booster
Experiencing Multimedia 193 This control Does this Title Shows the name for the song. Duration Shows the length of the song after trimming. Time Shows the playback time when the song is played. Press CENTER OK to toggle between playing and stopping Play/Stop playback. - Page 194 194 Experiencing Multimedia This control Does this Click the check box to enable or disable the equalizer. Frequency Click then use the NAVIGATION band CONTROL to adjust the frequency. Menu • Click Menu > Cancel to exit Audio Booster without applying the modified settings.
-
Page 195: Fm Radio
Experiencing Multimedia 195 Note You can only delete custom equalizer presets. Equalizer presets that are pre-installed cannot be deleted. 10.8 FM Radio FM Radio lets you listen to FM radio stations on your phone. Since FM Radio uses the provided stereo wired headset as an antenna, you must plug in the headset first onto the earphone jack of your phone before you open the program. -
Page 196: Save Presets
196 Experiencing Multimedia Press CENTER OK Toggle between turning mute on or off. NAVIGATION left Decrease the radio frequency by 0.1MHz. NAVIGATION right Increase the radio frequency by 0.1 MHz. NAVIGATION up Go to the next available preset station. NAVIGATION down Go back to the previous preset station. -
Page 197: Fm Radio Main Menu
Experiencing Multimedia 197 To save FM stations Tune to the desired FM frequency, then click Menu > Save as preset. On the screen, press NAVIGATION up/down to go to the desired preset number where you want to save the FM station and then press CENTER OK. Click Menu >... -
Page 198: Java
198 Experiencing Multimedia 10.9 Java MIDlets are Java™-based applications that can run on mobile phones. Your phone supports Java 2 Edition, J2ME™. Java allows you to download Java-based applications, such as games and tools that are specifically designed for mobile phones. -
Page 199: Manage Midlets/Midlet Suite
Experiencing Multimedia 199 Click Install. You may be prompted to confirm installation of an untrusted MIDlet. Click Yes to install the MIDlet or No to cancel. After selecting Yes, you are prompted to select a folder to install the MIDlet Click OK to select the default folder or click Menu >... - Page 200 200 Experiencing Multimedia On the Java Apps screen, select the MIDlet/MIDlet suite using the NAVIGATION CONTROL. Click Menu > Actions > Update. Java then searches for updates. Click Yes or No depending on the update scenario. To change the display name of a MIDlet or folder On the Java Apps screen, select the MIDlet/MIDlet suite using the NAVIGATION CONTROL.
-
Page 201: Chapter 11 Using Other Applications
Chapter 11 Using Other Applications 11.1 Microsoft® Office Mobile 11.2 Microsoft® Office Word Mobile 11.3 Microsoft® Office Excel® Mobile 11.4 Microsoft® Office PowerPoint® Mobile 11.5 Microsoft® Office OneNote® Mobile 11.6 Adobe® Reader® LE 11.7 Speed Dial 11.8 Voice Speed Dial... -
Page 202: Microsoft® Office Mobile
202 Using Other Applications 11.1 Microsoft® Office Mobile Microsoft® Office Mobile consists of three applications that let you view and edit Microsoft documents. These three applications are: • Microsoft® Office Word Mobile lets you view and edit Microsoft Word documents and text files. •... -
Page 203: Edit And Send Documents
Using Other Applications 203 Note You can only open one document at a time. You must close the opened document first before you can open another document. To change the zoom ratio Click View and then on the menu, select the zoom ratio to use. Click View >... -
Page 204: Microsoft® Office Excel® Mobile
204 Using Other Applications Tips • Click Menu > Format to change the font format. You can use Bold, Italic, Underline, and Highlight. • If you are using a formatting style and you want to revert to no formatting style, click Menu >... -
Page 205: View Worksheets
Using Other Applications 205 View worksheets To open a file In Excel Mobile, click Menu and choose the location (e.g. My Device) where the *.xls file is saved. Locate the file you want to open and click Select. Note You can only open one worksheet at a time. You must close the opened worksheet first before you can open another worksheet. - Page 206 206 Using Other Applications To edit the cell text Select the cell whose text you want to edit and then press CENTER OK or click Menu > Edit > Cell Text. Type in the text and click Done. To delete the cell content Select the cell whose content you want to delete and click Menu >...
- Page 207 Using Other Applications 207 To insert a row or column Select the cell where you want to insert a row or column and then click Menu > Insert > Row or Column. If you insert a row, the row will be inserted above the selected cell;...
-
Page 208: Microsoft® Office Powerpoint® Mobile
208 Using Other Applications 11.4 Microsoft® Office PowerPoint® Mobile Microsoft® Office PowerPoint® Mobile gives viewing capabilities for your PowerPoint presentations. To open PowerPoint Mobile Click Start > All Programs > Office Mobile > PowerPoint Mobile. To open a file In PowerPoint Mobile, click Menu and choose the location where the *.ppt file is saved. -
Page 209: Microsoft® Office Onenote® Mobile
Using Other Applications 209 To show links in a slide On your phone, you can show and activate hyperlinks in slides that you created on Microsoft PowerPoint. Press the right SOFT KEY to show Menu. Click Menu > Show Links. Press CENTER OK to activate the hyperlink. -
Page 210: Adobe® Reader® Le
210 Using Other Applications • To take a picture and add it into the note, click Menu > Take Picture. • To add a picture from file into the note, click Menu > Insert Picture. • To create a bulleted or numbered list, click Menu > List > Numbered or Bulleted. -
Page 211: Speed Dial
Using Other Applications 211 While reading a PDF file, click Menu or Tools to open a list of options that lets you zoom in, directly go to a bookmark, find text in the file, and more. 11.7 Speed Dial You can create speed dial entries for frequently-called numbers or frequently- accessed items so you can dial a number or access an item by pressing a single key. -
Page 212: Voice Speed Dial
212 Using Other Applications To make a call or launch a program using Speed Dial If you have assigned a speed dial (for example, the second location) to a contact or a program in Speed Dial, you can simply press and hold the 2 key on the phone keypad to dial the contact’s number or open the program. - Page 213 Using Other Applications 213 To create a voice tag for a program To create a voice tag for a program, for example, Camera, do the following: On the Home screen, click Start > All Programs > Camera. (Do not press CENTER OK when Camera is selected.) Click Menu >...
- Page 214 214 Using Other Applications...
-
Page 215: Appendix
Appendix A.1 Regulatory Notices A.2 Specifications... -
Page 216: Regulatory Notices
ROSE110. To ensure continued reliable and safe operation of your device, use only the accessories listed below with your ROSE110. The Battery Pack has been assigned a model number of ROSE160. This product is intended for use with a certified Class 2 or Class 3 Limited Power Source, rated 5 Volts DC, maximum 1 Amp power supply unit. - Page 217 Appendix 217 • Connect the equipment into an outlet on a circuit different from that to which the receiver is connected. • Consult the dealer or an experienced radio or television technician for help. Modifications The FCC requires the user to be notified that any changes or modifications made to the device that are not expressly approved by High Tech Computer Corporation may void the user’s authority to operate the equipment.
- Page 218 218 Appendix • American National Standards Institute (ANSI) IEEE. C95.1-1992 • National Council on Radiation Protection and Measurement (NCRP). Report 86. 1986 • International Commission on Non-Ionizing Radiation Protection (ICNIRP) 1996 • Ministry of Health (Canada), Safety Code 6. The standards include a substantial safety margin designed to assure the safety of all persons, regardless of age and health.
-
Page 219: Safety Precautions For Rf Exposure
Appendix 219 Cautions In August 1996 the Federal Communications Commission (FCC) of the United States with its action in Report and Order FCC 96-326 adopted an updated safety standard for human exposure to radio frequency electromagnetic energy emitted by FCC regulated transmitters. -
Page 220: Telecommunications & Internet Association (Tia) Safety Information
220 Appendix Telecommunications & Internet Association (TIA) safety information Pacemakers The Health Industry Manufacturers Association recommends that a minimum separation of six inches be maintained between a handheld wireless phone and a pacemaker to avoid potential interference with the pacemaker. These recommendations are consistent with the independent research by and recommendations of Wireless Technology Research. -
Page 221: Rohs Compliance
Appendix 221 The purpose of this Directive is, as a first priority, the prevention of WEEE, and in addition, to promote the reuse, recycling and other forms of recovery of such wastes so as to reduce disposal. The WEEE logo on the product or on its box indicates that this product must not be disposed of or dumped with your other household waste. -
Page 222: Specifications
Standalone GPS / AGPS Connectivity Bluetooth® 2.0 Wi-Fi®: IEEE 802.11 b/g HTC ExtUSB™ (11-pin mini-USB 2.0 and audio jack in one) Camera 3.2 megapixel color camera with fixed focus Audio Built-in microphone and speaker Ring tone supported formats: AAC, AAC+, eAAC+, AMR-NB, AMR-... - Page 223 Appendix 223 Battery Rechargeable Lithium-ion polymer battery Capacity: 1000 mAh Standby time: Up to 400 hours for WCDMA Up to 260 hours for GSM Talk time: Up to 300 minutes for WCDMA Up to 350 minutes for GSM (The above are subject to network and phone usage.) AC Adapter AC input: 100 ~ 240V AC, 50/60 Hz DC output: 5V and 1A...
- Page 224 224 Appendix...
-
Page 225: Index
Index... - Page 226 - Bluetooth modem 145 - hands-free headset 141 - modes 138 Accessibility settings - overview 138 - confirmation time out 74 - partnerships 140 - in-call alert volume 74 - stereo headset 141 - multipress time out 74 - synchronize 67 - system font size 73 - visible 139 ActiveSync 64...
- Page 227 Configure data connection settings 30 Dial-up connection 133 Confirmation time out 74 Digitally sign messages 125, 126 Connecting to Wi-Fi Network 131 Digital Rights Management (DRM) 182 Connection Setup 30, 39 Digital signature 126 Connect phone to Internet Direct Push 117 - Dial-up 133 Download - Wi-Fi 131...
- Page 228 Internet Sharing 40, 137 Home screen - change background 70 - customize 70 - overview 31, 70 Java 39 HTC Home Sliding Panel 32 - Appointments 33 - Email 33 - Getting Started 34 Language/locale setting 70 - Home 32...
- Page 229 - from Speed Dial 55 Out-of-office 121 Managed Programs 157 Outlook e-mail 106 Managing Meeting Requests 122 Owner information 73 Memory 77 Messaging 40, 96 Messenger 40 Panorama 169 Microsoft ActiveSync 64 Parts and accessories 22 Microsoft Windows Mobile Device Center Pause in dialing sequence 58 PDF 210 Personal information 73...
- Page 230 - Camera Album 38 - Windows Live Mobile 147 - Clear Storage 39 - Windows Media Player Mobile 41, 180 - Clock & Alarm 38 Put call on hold 57 - Comm Manager 38 - Connection Setup 39 - Contacts 39, 84 QuickGPS 40, 164 - File Explorer 75 Quick List 42...
- Page 231 Synchronize - ActiveSync 65 - change information types 66 SAPSettings 40, 59 - music and video 68 Search for e-mails on the Exchange Server - schedule synchronization with Ex- change Server 117 Secure/Multipurpose Internet Mail - via Bluetooth 67 Extension (S/MIME) 125 - Windows Media Player 68 Securing Wi-Fi Connection 132 - with computer 65...
- Page 232 Verify digital signature 126 Zoom 171 Video (capture mode) 169 Video Recorder 41 View and reply to MMS messages 104 Viewing media files 178 View your appointments 89 Visible (Bluetooth) 139 Voice Notes 41, 93 Voice Recorder 41 Voice Tag 212 - create voice tag for phone number, e-mail address, or URL in Contacts - create voice tag for program 213...
Need help?
Do you have a question about the ROSE110 and is the answer not in the manual?
Questions and answers