Table of Contents
Advertisement
Quick Links
Advertisement
Table of Contents

Related Manuals for Brother LS-3125


Summary of Contents for Brother LS-3125
- Page 1 Руководство пользователя Руководство пользователя...
- Page 3 “IMPORTANT SAFETY INSTRUCTIONS” When using the sewing machine, basic safety precautions should always be followed, including the following: “Read all instructions before using.” DANGER – To reduce the risk of electric shock: The sewing machine should never be left unattended when plugged in. Always unplug this sewing machine from the electrical outlet immediately after using and before cleaning.
- Page 4 “INSTRUCTIONS DE SÉCURITÉ IMPORTANTES” Lors de l’utilisation de la machine à coudre, il convient de toujours suivre les consignes de sécurité essentielles et de prendre notamment les précautions suivantes: “Lire toutes les instructions avant d’utiliser la machine.” DANGER - Pour réduire le risque de décharge électrique: Ne jamais laisser la machine sans surveillance lorsqu’elle est branchée.
- Page 5 “INSTRUCCIONES DE SEGURIDAD IMPORTANTES” Cuando se usa una máquina de coser, debe seguirse unas precauciones básicas y que se detallan a continuación. “Leer todas las instrucciones antes de usarla” PELIGRO - Para reducir el riesgo de una descarga eléctrica. La máquina no debe dejarse nunca desatendida mientras esté conectada. Desconectar la máquina de la red cuando se termine de usar y antes de limpiarla.
- Page 6 Никогда не используйте швейную машину, если у нее поврежден сетевой шнур или вилка, если машина плохо работает, если ее уронили или повредили, если в машину попала вода. В этих случаях машину следует отправить официальному дилеру компании BROTHER вашего региона или в уполномоченный сервисный центр для проверки, ремонта и наладки ее электрической или механической части.
- Page 7 ТОЛЬКО ДЛЯ ВЕЛИКОБРИТАНИИ, ИРЛАНДИИ, МАЛЬТЫ И КИПРА ВНИМАНИЕ! • При замене предохранителя в вилке кабеля питания используйте предохранители с сертификацией ASTA по стандарту BS 1362 (т. е. с маркировкой ) с номиналом, указанным на вилке. • Обязательно установите на место крышку предохранителя. Запрещается использовать вилку, если не установлена крышка...
-
Page 8: Table Of Contents
TABLE DES MATIÉRES CONTENTS Page Page PIÉCES PRINCIPALES ..............1 PRINCIPAL PARTS..............1 PIÉCES PRINCIPALES ..............2 PRINCIPAL PARTS..............2 ACCESSOIRES ................3 ACCESSORIES ................3 FONCTIONNEMENT DE LA OPERATING YOUR SEWING MACHINE A COUDRE..............4 MACHINE ................4 Raccordement..............4 Connecting Plugs ............4 Interrupteur principal et de la lampe ........5 Main Power and Sewing Light Switches ...... - Page 9 INDICE СОДЕРЖАНИЕ Стр. Página ОСНОВНЫЕ ЧАСТИ............1 ELEMENTOS PRINCIPALES ............1 ОСНОВНЫЕ ЧАСТИ............2 ELEMENTOS PRINCIPALES ............2 ПРИНАДЛЕЖНОСТИ ............3 ACCESORIOS..................3 РАБОТА НА ШВЕЙНОЙ МАШИНЕ ........4 FUNCIONAMIENTO DE LA MÁQUINA DE COSER ....4 Подключение электропитания ........4 Conexión de los enchufes ............
-
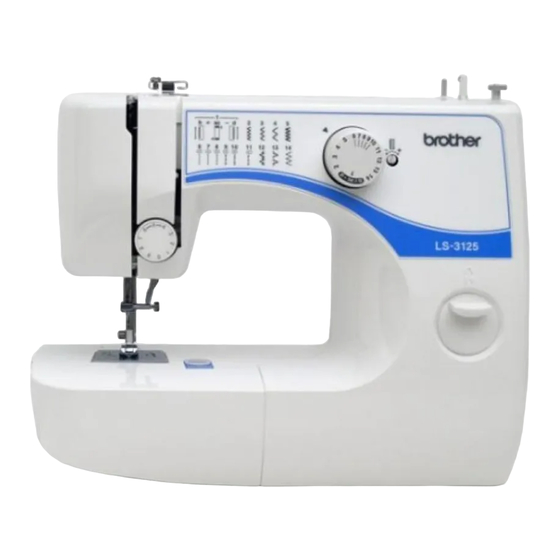
Page 10: Principal Parts
PRINCIPAL PARTS PIÉCES PRINCIPALES ELEMENTOS PRINCIPALES ОСНОВНЫЕ ЧАСТИ * The illustrations of the sewing machine on the following pages may * Les illustrations représentées aux pages suivantes peuvent différer differ slightly from your machine. légèrement de votre machine à coudre. * Las ilustraciones de la máquina de coser, representadas en las siguientes * Изображения... -
Page 11: Principal Parts
PRINCIPAL PARTS PIÉCES PRINCIPALES a Pattern selection dial a Sélecteur de modèle de point b Buttonhole fine-adjusting screw b Vis d’équilibrage des boutonnières c Thread take-up lever c Levier releveur de fil d Extension table with accessory storage d Table d’extension avec tiroir à accessoires e Upper tension control dial e Sélecteur de tension supérieure f Reverse sewing lever... -
Page 12: Accessories
ACCESSORIES ACCESSOIRES a Buttonhole foot “A” (1 pc.) a Pied pour boutonnières “A” (1 pc.) b Zipper foot “I” (1 pc.) b Pied pour fermetures à glissière “I” (1 pc.) c Button sewing foot “M” (1 pc.) c Pied pour boutons “M” (1 pc.) d Needle (regular single needle No. -
Page 13: Operating Your Sewing Machine
OPERATING YOUR SEWING FONCTIONNEMENT DE LA MACHINE MACHINE A COUDRE Connecting Plugs Raccordement 1. Insert the foot controller plug, located between the foot 1. Brancher la fiche qui se trouve sur le cordon d’alimentation controller and the power supply plug on the cord, into the entre la pédale et la fiche d’alimentation dans la machine. -
Page 14: Main Power And Sewing Light Switches
Main Power and Sewing Light Switches Interrupteur principal et de la lampe This switch turns the main power and sewing light on or off. (See Cet interrupteur permet d’allumer et d’éteindre la machine ainsi fig. A.) que la lampe de couture. (Voir fig. A.) a Turn on (toward the “I”... -
Page 15: Inserting The Needle
Inserting the Needle Pour mettre l’aiguille en place Turn power switch to “O”. Mettre l’interrupteur d’alimentation sur “O”. 1. Remove the power supply plug from the electrical outlet. 1. Retirer la fiche de la prise de courant. 2. Raise the needle bar to its highest position. 2. -
Page 16: Changing The Presser Foot
Changing the Presser Foot Changement de pied-de-biche It may be necessary to change the presser foot according to your En fonction des besoins, il peut s’avérer nécessaire de changer le sewing needs. pied-de-biche. SNAP-ON TYPE MODELE A CLIQUET Turn power switch to “O”. Mettre l’interrupteur principal sur “O”. -
Page 17: Converting To Free-Arm Style
Converting to Free-Arm Style Modèle bras libre Free-Arm sewing is convenient for sewing tubular and hard-to- La couture à bras libre s’impose pour des coutures tubulaires ou reach areas on garments. To change your machine to the free-arm pour des endroits difficiles à atteindre sur des vêtements. Pour style, lift up on the extension table and pull it out. -
Page 18: Various Controls
VARIOUS CONTROLS DESCRIPTIF DES DIFFERENTES COMMANDES Pattern Selection Dial Sélecteur de modèle de point To select a stitch, simply turn the pattern selection dial in either direction. Stitch widths and lengths are shown on the following Pour sélectionner un modèle de point, tourner le sélecteur de page. -
Page 19: Patterns And Stitch Names
PATTERNS AND STITCH NAMES PAGE IN PATTERN STITCH NAME INSTRUCTIONS 1(a-b-c-d) 4-STEP AUTOMATIC BUTTONHOLE ZIGZAG STITCH ZIGZAG STITCH ZIGZAG STITCH ZIGZAG (SATIN) STITCH 6-10 STRAIGHT STITCH STRAIGHT STITCH (Left needle position) STRETCH BLIND STITCH SHELL TUCK STITCH ELASTIC STITCH MOTIFS ET NOMS DES POINTS PAGE DU MODÈLE NOM DU POINT... - Page 20 DIBUJO Y NOMBRE DE LOS PUNTOS PÁGINA DEL PUNTADA NOMBRE manual 1(a-b-c-d) OJAL AUTOMÁTICO DE 4 PASOS PUNTADA ZIGZAG PUNTADA ZIGZAG PUNTADA ZIGZAG PUNTADA ZIGZAG (DE REALCE) 6-10 PUNTADA RECTA PUNTADA RECTA (aguja a la izquierda) PUNTADA INVISIBLE ELÁSTICA PUNTADA ONDAS PUNTADA ELÁSTICA НАИМЕНОВАНИЯ...
-
Page 21: Reverse Sewing Lever
Reverse Sewing Lever Levier de couture en marche arrière To sew in reverse, press down the reverse sewing lever as far as Pour coudre en arrière, abaisser au maximum le levier de couture possible and hold it in that position while lightly stepping on the en marche arrière, et le maintenir dans cette position tout en foot controller. - Page 22 ENHEBRADO DE LA MÁQUINA ЗАПРАВКА НИТИ В МАШИНУ Bobinado de la canilla Намотка шпульки 1. Установите катушку с нитью на предназначенный для нее 1. Coloque un carrete de hilo en el porta carretes y pase el hilo por el disco de tensión de bobinado de la canilla стержень...
-
Page 23: Lower (Bobbin) Threading
Lower (bobbin) Threading Mise en place du fil inférieur (canette) Turn power switch to “O”. Mettre l’interrupteur principal sur “O”. 1. Raise the needle to its highest position by turning the balance 1. Remonter complètement l’aiguille en tournant le volant vers wheel toward you (counterclockwise) and raise the presser soi (dans le sens opposé... -
Page 24: Upper (Needle) Threading
Upper (Needle) Threading Mise en place du fil supérieur (fil de l’aiguille) Enhebrado superior (de la aguja) Заправка верхней нити (в иглу) - Page 25 1. Raise the presser foot using the presser foot lifter and turn the 1. Lever le pied-de-biche à l’aide du levier correspondant et balance wheel toward you (counterclockwise) to raise the tourner le volant à main vers soi (dans le sens contraire aux thread take-up lever to its highest position.
-
Page 26: Drawing Up Lower (Bobbin) Thread
Drawing Up Lower (bobbin) Thread Remontée du fil inférieur (canette) 1. Raise the presser foot and the needle to their highest positions. 1. Lever au maximum le pied-de-biche et l’aiguille. 2. With your left hand, hold the end of the upper thread. With 2. -
Page 27: Twin-Needle Sewing (Option)
Twin-Needle Sewing (Option) Couture avec l’aiguille jumelée (en option) Your sewing machine is designed for twin-needle sewing which allows you to sew using two upper threads. You can use the same Cette machine à coudre a été conçue pour pouvoir être utilisée color or two different colors of thread for decorative stitches. - Page 28 Costura con aguja doble (opción) Шитье двойной иглой (опция) Швейная машина поддерживает шитье двойной иглой, то есть Su máquina de coser ha sido concebida para poder utilizar una aguja doble y permitir la costura con dos hilos superiores. Puede usar el можно...
-
Page 29: Thread Tension
Thread Tension Tension des fils Thread tension will affect the quality of your stitches. It may need La tension des fils va affecter directement la qualité des points et to be adjusted when you change fabric or thread type. il se peut qu’elle doive être réglée lors du changement de tissu ou de fil. - Page 30 NOTE: REMARQUE: The bobbin thread tension has already been adjusted at the La tension du fil inférieur a déjà été réglée d’usine pour une factory for general use. For most sewing applications, no utilisation normale. Pour la plupart des applications de couture, il adjustment is needed.
-
Page 31: Relative Chart Of Sewing Fabrics, Needles And Threads Combinations
RELATIVE CHART OF SEWING FABRICS, NEEDLES AND THREADS COMBINATIONS SEWING FABRICS NEEDLE SIZES THREAD SIZES Cotton: 80 Fine tricot, Fine lace, Thin linen, Silk, VERY THIN #65/9 Synthetic/ Polyester Long Fiber Organza, Chiffon Fine Mercerized Cotton Cotton: 60-80 Silk: “A” LIGHTWEIGHT Voile, Taffeta, Synthetics, Silk, Batiste #75/11... - Page 32 TABLA DE RELACIÓN ENTRE TEJIDOS, HILOS Y AGUJAS TAMAÑO DE TEJIDOS TAMAÑO DE HILO AGUJA Algodón: 80 Punto fino, Encaje fino, Lino fino, Seda, Tul, MUY FINO n° 65/9 Sintético/ Fibra larga de poliéster Gasa Algodón fino. Algodón: 60-80 Seda: “A” LIGERO Velo, Tafetán, Sintéticos, Seda, Batista n°...
-
Page 33: Straight Stitching
Straight Stitching Point droit Pattern Modèle 6-10 (Center needle position) 6-10 (Aiguille au centre) (Left needle position) (Aiguille à gauche) The Straight Stitch (6-10 or 11) is used for top stitching and Le point droit (modèle 6-10 ou 11) sert pour la “haute couture” et sewing lightweight fabrics. - Page 34 Para empezar a coser (fig. A) Начало шитья (рис. A) 1. Установите ручку выбора строчки в положение, 1. Colocar el selector de puntadas en la puntada derecha adecuada соответствующее прямой строчке (6 10 или 11) с (6-10 ó 11), con el largo deseado. требуемой...
-
Page 35: Zigzag Stitching
Zigzag Stitching Points zigzag Pattern Modèle (Zigzag Stitch) (Point zigzag) (Zigzag Stitch) (Point zigzag) (Zigzag Stitch) (Point zigzag) POINT ZIGZAG ZIGZAG STITCH Régler le sélecteur de modèle de point sur le point zigzag Set the pattern selection dial to the appropriate Zigzag Stitch (2, 3 approprié... -
Page 36: Blind Hem Stitching
Blind Hem Stitching Point élastique invisible Pattern Modèle (Stretch Blind Stitch) (Point élastique invisible) The Stretch Blind Stitch is used to finish the edge of projects made Le point élastique invisible sert à terminer le bord d’ouvrages with stretch fabrics without the stitch showing. réalisés sur des tissus élastiques (extensibles) sans que les points 1. -
Page 37: Elastic Stitching
Elastic Stitching Point élastique Pattern Modèle (Elastic Stitch) (Point élastique) The Elastic Stitch can be used in 3 ways: mending, sewing elastic Le point élastique possède trois fonctions principales: le or joining fabric. Each is explained below. raccommodage, la couture d’élastiques ou l’assemblage de tissus. Chacune de ces trois fonctions se trouve détaillée ci-dessous. -
Page 38: Shell Tuck Stitching
Shell Tuck Stitching Point picot Pattern Modèle (Shell Tuck Stitch) (Point picot) Utiliser ce point pour réaliser une lisière à picot (semblable à de The Shell Tuck Stitch can be used to sew a picot (lace-like) edge la dentelle) sur un tissu léger. on a lightweight fabric. -
Page 39: Making A Buttonhole
Making a Buttonhole Création d’une boutonnière Pattern Foot Modèle Pied-de-biche 1(b ac d) Buttonhole foot 1(b ac d) Pied pour boutonnières NOTE: REMARQUE: 1. It is recommended to practice making a buttonhole on a scrap 1. Il est vivement conseillé de s’entraîner au préalable sur une piece of fabric before attempting it on the actual garment. - Page 40 MAKING A BUTTONHOLE Step Sewn Portion Pattern How to Sew 1. Set the pattern selection dial to a. Step a 2. Lower the presser foot and sew 5 to 6 stitches. (Front end of 3. Stop the machine when the needle is at the left side of the stitches and buttonhole) raise the needle from the fabric.
- Page 41 COSIDO DE UN OJAL Pasos Zona de cosido Diseño Como coser Paso a 1. Ponga el selector de diseño en a. (remate de la 2. Baje el prensatelas y cosa 5 ó 6 puntadas. parte delantera 3. Pare la máquina cuando la aguja se encuentre a la izquierda de las puntadas del ojal) y levante la aguja del tejido.
- Page 42 SECURING THE STITCHING AND CUTTING THE COMMENT ARRETER LA COUTURE ET OUVRIR LA BUTTONHOLE BOUTONNIERE 1. To secure the stitching, turn the material 90 degrees 1. Pour arrêter la couture, tourner le tissu de 90 degrés dans le counterclockwise, set the pattern selection dial to the Straight sens inverse des aiguilles d’une montre, mettre le sélecteur de Stitch (6-10) with the desired length and sew to the edge of the modêle de point sur le point droit (6-10), réglé...
-
Page 43: Buttonhole Fine Adjustment
Buttonhole Fine Adjustment Equilibrage des boutonnières If the stitching on the two sides of the buttonhole do not appear Si les points de chaque côté de la boutonnière sont uniform, the following adjustments can be made. dissemblables, procéder aux réglages suivants: 1. -
Page 44: Button Sewing
Button Sewing Pour coudre un bouton Pattern Foot Other Modèle Pied-de-biche Autre 2, 3 or 4 Button Sewing Foot Darning Plate 2, 3 ou 4 Pied pour boutons Plaque à repriser 1. Measure the distance between the buttonholes and set the 1. -
Page 45: Zipper Insertion
Zipper Insertion Insertion de fermeture à glissière Pattern Modèle 6-10 (Straight Stitch) 6-10 (Point droit) The zipper foot is used to sew on various types of zippers and can Le pied à semelle étroite permet de coudre de nombreux types de fermetures easily be positioned to the right or left side of the needle. -
Page 46: Gathering
Gathering Pour froncer un tissu Pattern Modèle 6-10 (Straight Stitch) 6-10 (Point droit) 1. Set the pattern selection dial to the Straight Stitch (6-10) with 1. Mettre le sélecteur de modèle sur le point droit (6-10) avec la the desired length. longueur souhaitée. -
Page 47: Darning
Darning Reprisage Pattern Foot Other Modèle Pied-de-biche Autre 6-10 (Straight Stitch) None Darning Plate 6-10 (Point droit) Sans pied Plaque à repriser 1. Place the darning plate on the needle plate as shown in fig. A. 1. Placer la plaque à repriser sur la plaque à aiguille comme le 2. -
Page 48: Appliques
Appliques Appliques Pattern Modèle 2, 3, 4, 5 (Zigzag Stitch) 2, 3, 4, 5 (Point zigzag) An applique is created by cutting a contrasting piece of fabric Pour créer une applique, il suffit de découper un morceau d’un into a shape to be used as a decoration on a garment or project. tissu contrastant et de lui donner la forme d’une décoration à... -
Page 49: Monogramming And Embroidering
Monogramming and Embroidering Monogrammes et broderies Pattern Foot Other Modèle Pied-de-biche Autre 2, 3, 4, 5 (Zigzag Stitch) None Darning Plate 2, 3, 4, 5 (Point zigzag) Sans pied Plaque à repriser PREPARING FOR MONOGRAMMING AND EMBROIDERING PREPARATION AVANT DE FAIRE DES MONOGRAMMES OU DES BRODERIES 1. - Page 50 MONOGRAMMING (fig. A) MONOGRAMMES (fig. A) 1. Sew moving the hoop slowly along the lettering at a constant 1. Coudre à une vitesse constante en déplaçant lentement le speed. tambour le long des lettres. 2. To secure the stitching, set the pattern selection dial to the 2.
-
Page 51: Changing The Bulb
Changing the Bulb Remplacement de l’ampoule 1. Remove the power supply plug from the electrical outlet. 1. Retirer la fiche d’alimentation de la prise de courant. 2. Loosen the face plate screw as shown in fig. A. 2. Desserrer la vis du capot de la machine comme indiqué à la 3. -
Page 52: Oiling
Oiling Graissage 1. Remove the power supply plug from the outlet. 1. Retirer la fiche d’alimentation de la prise de courant. 2. Put 2 to 3 drops of oil at each of the points indicated in fig. A. 2. Mettre 2 ou 3 gouttes d’huile sur chacun des points indiqués 3. - Page 53 NOTE: REMARQUE: When the needle is lowered, the shuttle hook cannot be Il est impossible de retirer le crochet de la navette lorsque removed. l’aiguille est abaissée. Cleaning the Shuttle Race Nettoyage de la coursière de la navette 1. Remove any accumulated lint and thread with a brush from 1.
-
Page 54: Performance Checklist
Cleaning the Feed Dogs Nettoyage des griffes d’entraînement 1. Remove the presser foot holder and the needle. 1. Retirer le support de pied-de-biche et l’aiguille. 2. Remove the needle plate using a coin or oval screwdriver to 2. Retirer la plaque à aiguille avec une pièce de monnaie ou un take out the screws. -
Page 55: Performance Check List
PERFORMANCE CHECK LIST UPPER THREAD LOWER (BOBBIN) SKIPPED STITCHES LOOP IN SEAM FABRIC PUCKERS BREAKS THREAD BREAKS Upper thread is Needle is Lower (bobbin) Thread tension is Thread tension is not correctly incorrectly thread is tangled. incorrect. too tight. installed. inserted. - Page 56 PERFORMANCE CHECK LIST FABRIC DOES MACHINE IS MACHINE NEEDLE NOT FEED NOISY OR DOES NOT BREAKS PROPERLY SLOW START The combination Lint is clinging to Power supply of needle size/ Needle is not the bottom of the plug is removed thread size/fabric correctly inserted.
-
Page 57: Liste De Vérification En Cas De Défaillances
LISTE DE VÉRIFICATION EN CAS DE DÉFAILLANCES RUPTURE DU FIL RUPTURE DU FIL LA COUTURE FAIT LE TISSU FRONCE DES POINTS SAUTENT SUPERIEUR INFERIEURÅ (canette) DES BOUCLES Le fil supérieur n’est Le fil inférieur (canette) L’aiguille est mal Mauvaise tension des Le fil est trop tendu. - Page 58 LISTE DE VÉRIFICATION EN CAS DE DÉFAILLANCES L’ENTRAINEMENT DU LA MACHINE EST LA MACHINE NE TISSU N’EST PAS L’AIGUILLE CASSE BRUYANTE OU LENTE DEMARRE PAS CORRECT La combinaison Des peluches sont L’aiguille est mal La fiche d’alimentation aiguille/fil/tissu est accrochées sous la installée.
- Page 59 LISTADO DE POSIBLES INCIDENCIAS ROTURA DEL HILO ROTURA DEL HILO BAGAS EN LAS ARRUGAS EN EL SALTO DE INFERIOR SUPERIOR PUNTADAS PUNTADAS TEJIDO (de la canilla) El hilo inferior La tensión de los hilos ROTURA DEL HILO La aguja está mal La tensión de los hilos es (de la canilla) está...
- Page 60 LISTADO DE POSIBLES INCIDENCIAS LA MAQUINA ES EL TEJIDO NO LA MAQUINA NO LAAGUJA SE ROMPE RUIDOSA O FUNCIO- ARRASTRA BIEN ARRANCA NA MUY DESPACIO La combinaison El enchufe de alimenta- La aguja está mal Hay polvo en la placa aiguille/fil/tissu est ción está...
- Page 61 ТАБЛИЦА КОНТРОЛЬНЫХ ПРОВЕРОК ТЕХНИЧЕСКИХ ХАРАКТЕРИСТИК...
- Page 62 ТАБЛИЦА КОНТРОЛЬНЫХ ПРОВЕРОК ТЕХНИЧЕСКИХ ХАРАКТЕРИСТИК...
-
Page 63: Repacking The Machine
Repacking the Machine Emballage de la machine Conserver le carton et les matériaux d’emballage pour pouvoir Keep the carton and packing materials for future use. It may les réutiliser dans le futur ou pour réexpédier la machine. Un become necessary to reship the sewing machine. Improper emballage mal fait ou avec des matériaux inadéquats pourrait packing or improper packing material could result in damage occasionner des dégâts pendant le transport. -
Page 64: Index
INDEX Page Page Satin Stitching................24 Accessories ................3 Sewing Light Applique ................. 39 Light Bulb Replacement ..........42 Switch................5 Shell Tuck Stitching ..............29 Blind Hem Stitching ..............27 Shuttle Hook Removal ............43-44 Bobbin winding ..............12 Shuttle Race Cleaning..............44 Buttonhole ..............30-31, 33 Straight Stitching..............24 Buttonhole Fine Adjustment ............ -
Page 65: Index
INDEX Page Page Accessoires ................3 Nettoyage ................43-45 Aiguille Nettoyage de la coursière de la navette ........44 Remplacement/Inspection ..........6 Nettoyage des griffes d’entraînement ........45 Appliques ................39 Pédale ..................5 Pièces principales ..............1, 2 Boutonnière ..............30-31, 33 Point de bourdon..............26 Broderies ................ - Page 66 INDICE Página Página Accesorios ..................3 Modalidad brazo libre................. 8 Aguja Monogramas ................40-41 Cambio/Verificación ..............6 Ajuste fino de los ojales ..............34 Ojales ..................30, 32-33 Aplicaciones ..................39 Palanca de retroceso ................ 12 Bobinado de la canilla ..............13 Pedal ....................
- Page 67 УКАЗАТЕЛЬ Стр. Стр. А Р Аппликации ................39 Ручка выбора вида строчки ............9 В С Виды строчек Сетевой выключатель............... 5 Атласная строчка ............26 Смазка..................43 Потайная строчка мережка.......... 27 Т Прямая строчка............. 24 Строчка “зигзаг”............26 Таблица контрольных проверок технических характеристик Строчка...
- Page 68 English French Spanish Russian 885-405 XE8873-001 Printed in China...
Need help?
Do you have a question about the LS-3125 and is the answer not in the manual?
Questions and answers