Table of Contents
Advertisement
Quick Links
Owner's Guide
Thank you for purchasing your new Eureka vacuum!
Important instructions
For easy assembly, please take a few
moments to read this owner's guide.
If you have questions about your new
vacuum, please contact our customer
service HELPLINE at 1-800-282-2886.
We're here to help!
Eureka stands by our
Clean Promise seal.
Learn more at
www.eureka.com/cleanpromise
www.eureka.com
NEC220 series
Cordless stick vacuum cleaner; household type
Advertisement
Table of Contents

Related Manuals for Eureka NEC220 Series


Summary of Contents for Eureka NEC220 Series
- Page 1 NEC220 series Cordless stick vacuum cleaner; household type Owner’s Guide Thank you for purchasing your new Eureka vacuum! Important instructions For easy assembly, please take a few moments to read this owner’s guide. If you have questions about your new vacuum, please contact our customer service HELPLINE at 1-800-282-2886.
-
Page 2: Table Of Contents
The Eureka limited warranty ........ -
Page 3: Important Safeguards
This will ensure that the should, has been dropped, damaged, left outdoors, or dropped safety of the product is maintained. into water, call the Eureka Customer Service HELPLINE at • Do not modify or attempt to repair the appliance or the battery 1-800-282-2886. -
Page 4: What Comes In The Carton
3 screws & Important safeguards Spare filters drywall anchors Charger 2-in-1 upholstery tool Motorized floor nozzle Additional tools on select models PowerPlush nozzle Motorized pet tool (NEC226-NEC229) (NEC229) Crevice tool Wand Eureka Customer Service HELPLINE 1-800-282-2886... -
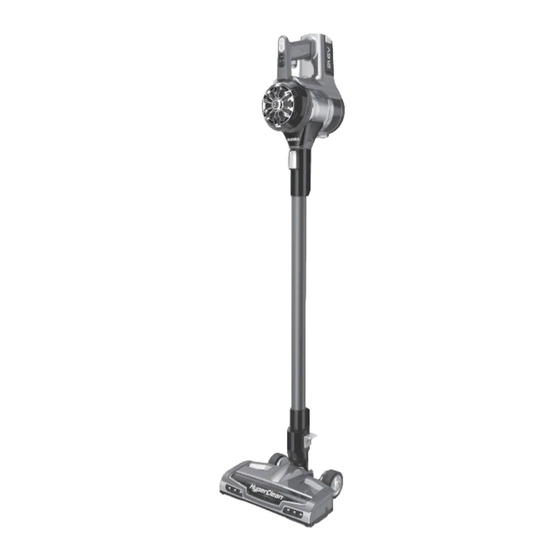
Page 5: How To Identify Parts Of Your Vacuum Cleaner
Dust cup lever Filter assembly Charging Wand Battery port (inside dust cup) Bottom lid For filter maintenance instructions, see page 9 Post-motor filter Release button for floor nozzle Fiber filter Foam filter Brushroll indicator light Motorized floor nozzle Filter screen Headlights www.eureka.com... -
Page 6: Easy Assembly, How To Install Wall Mount, How To Charge Battery And Battery Indicator Lights
Battery indicator lights show level of charge (Fig. 5) • Indicator lights stop blinking when fully charged. • Charge battery fully before using for the first time. This may take up to Click! four hours. Eureka Customer Service HELPLINE 1-800-282-2886... -
Page 7: How To Use Your Vacuum Cleaner
(Fig. 4). 2. Or, remove dust cup from hand vacuum by twisting to ‘unlock’ position (Fig. 5). Once emptied, reattach dust cup by lining up arrow and ‘unlock’ position. Twist dust cup until arrow lines up with ‘locked’ position. www.eureka.com... - Page 8 Additional accessory tools on select models Use with or without wand. • Click power button once to start. PowerPlush nozzle (NEC226-NEC229) • Attach Powerplush nozzle for optimal performance on bare floors Eureka Customer Service HELPLINE 1-800-282-2886...
-
Page 9: How To Maintain Your Vacuum Cleaner
Brushroll maintenance - clean frequently or when brushroll indicator light turns red Place motorized floor nozzle upside down. Use scissors or knife If debris cannot be removed easily, remove retainer clip to to cut strings and threads. access brushroll. Using flathead screwdriver or coin, turn screw to the ‘unlock’ position. Remove retainer clip and lift out brushroll to clean and remove To reassemble: debris. 1. A lign one end of brushroll with floor nozzle gear. 2. Press other end into slot. 3. H ook retainer clip under tab and press down. 4. I nsert screw and turn to ‘lock’ position. PowerPlush brushroll – clean frequently 24h Place motorized floor nozzle upside down. Use fingers to remove Remove retainer clip and lift out brushroll to clean and remove clog or debris. Do not use scissors or knife to cut strings and debris. Brushroll is washable. Roll in a towel to absorb water; dry threads. If debris cannot be removed easily, remove retainer clip THOROUGHLY before reassembling. Follow steps above. to access brushroll. Follow steps above. www.eureka.com... -
Page 10: The Eureka Limited Warranty
Eureka authorized resellers. What Eureka will do: Eureka will, at its option, repair or replace a defective vacuum or vacuum What Eureka will do: part that is covered by this warranty. Repairs may be performed using new Eureka will, at its option, repair or replace a defective Battery Module or or refurbished parts that meet or exceed Eureka specifications for new... -
Page 11: Thermal Cut-Off And Problem Solving
30 minutes before attempting to use the vacuum. 2) After the 30 minute period, press the power button. If the vacuum still does not work, call the Eureka Customer Service HELPLINE at 1-800-282-2886. Problem Solution •... -
Page 12: How To Order Replacement Parts
Order genuine Eureka accessories and replacement parts Visit www.eureka.com or call 1-800-282-2886 Image Part name Part # (fits models) Battery Z0702 (all) Z0601 (all) Charger Z0101 (all) Crevice tool Z0801 (all) Foam and fiber filters Z0901 (all) Post-motor filter Z0501 (all)
Need help?
Do you have a question about the NEC220 Series and is the answer not in the manual?
Questions and answers