Table of Contents
Advertisement
Quick Links
Advertisement
Table of Contents

Subscribe to Our Youtube Channel
Related Manuals for FIC CT2


Summary of Contents for FIC CT2
- Page 1 User Guide...
- Page 2 otebook User Guide Copyright © 2005 All Rights Reserved - Printed in Taiwan Notebook Computer User Guide Original Issue: 2005/03 This manual guides you in setting up and using your new notebook computer. Information in this manual has been carefully checked for accuracy and is subject to change without notice.
- Page 3 otebook User Guide FCC Information to User Safety and Care Instructions No matter what your level of experience with computers, please make sure you read the safety and care instructions. This information can help protect you and your computer from possible harm. Radio and television interference Warning: Use the specified shielded power cord and shielded signal cables with this computer, so as not to interfere with radio and television reception.
- Page 4 otebook User Guide You may find helpful the following booklet, prepared by the Federal Communications Commission: Interference Handbook (stock number 004- 000-00345-4). This booklet is available from the U.S. Government Printing Office, Washington, DC20402 Warning: The user must not modify or change this computer without approval.
- Page 5 otebook User Guide Peripheral Devices Notice Only peripherals (input/output devices, terminals, printers, etc) certified to comply with Class B limits may be attached to this equipment. Operation with non-certified peripherals is likely to result in interference to radio and TV reception.
- Page 6 otebook User Guide (93/68/EEC), the procedures given in European Council Directive 99/5/EC and 89/3360EEC. The equipment was passed. The test was performed according to the following European standards: EN 300 328-2 V.1.2.1 (2001-12) EN 301 489-1 V.1.3.1 (2001-09) / EN 301 489-17 V.1.1.1 (2000-09) EN 50371: 2002 EN 55022: 2001 EN 55024: 2001...
- Page 7 otebook User Guide PRODUCT AND MAY CAUSE ARTIFACTS TO BE DISPLAYED IN THE PICTURE. IN CASE OF 525 OR 625 PROGRESSIVE SCAN PICTURE PROBLEMS, IT IS RECOMMENDED THAT THE USER SWITCH THE CONNECTION TO THE ‘STANDARD DEFINITION’ OUTPUT. IF THERE ARE QUESTIONS REGARDING OUR TV SET COMPATIBILITY WITH THIS MODEL 525p AND 625p DVD PLAYER, PLEASE CONTACT OUR CUSTOMER SERVICE CENTER.’...
-
Page 8: About Your Notebook Computer
otebook User Guide About Your Notebook Computer ongratulation for having purchased your new Professional Multimedia Notebook. This notebook incorporates the strongest features, which integrate the latest technologies available in the notebook industry. Your new notebook computer not only drives today multimedia applications but also be ready for tomorrow ... -
Page 9: About Your User Guide
otebook User Guide About Your User Guide elcome to your Professional Multimedia Notebook User Guide. This manual covers everything you need to know in learning how to use your computer. This manual also assumes that you know the basic concepts of Windows and the PC. You will start doing a lot of great and fun things with your computer. -
Page 10: Table Of Contents
otebook User Guide Table of Contents ABOUT YOUR NOTEBOOK COMPUTER.......... 8 ABOUT YOUR USER GUIDE..............9 INTRODUCTION................15 ..............16 EATURE IGHLIGHT ............18 NPACKING THE OMPUTER ............. 20 NSIDE OF THE OTEBOOK Notebook Status Icons ..............22 The Function of Easy Buttons ............24 .......... - Page 11 otebook User Guide Installing the Chipset Driver ............45 Installing ENE- KBC driver ............46 Installing the VGA Device Driver ..........46 Installing the Audio Device Driver..........47 Installing the Modem Device Driver ..........47 Installing the LAN Device Driver..........48 Installing ALPS - Touch Pad driver ..........
- Page 12 otebook User Guide Making PC Cards Work ............... 72 Hot Swapping PC Cards .............. 73 ............. 73 SING LASH EMORY ARDS What is Flash Memory Card? ............73 FUN WITH MULTIMEDIA............77 ..........78 OTEBOOK ULTIMEDIA EATURES ..........78 UDIO OUND YSTEM EATURES...
- Page 13 otebook User Guide 6.2.1 Internal HDD Sub-Menu..........106 CMOS S ......... 107 SING THE DVANCED ETUP .............. 109 ECURITY ETUP .............. 111 SING THE ETUP ..........112 OW TO XIT THE ETUP ROGRAM BIOS............113 OW TO PGRADE THE USING OPTIONS ................115 .................
- Page 14 otebook User Guide Keyboard ..................132 Flash BIOS ................. 132 I/O Ports ..................132 Wireless devices ................. 132 AC/DC Power Supply Adapter ........... 132 Battery ..................133 Weight and Dimension ............... 133...
-
Page 15: Introduction
Introduction 1 Introduction our Notebook PC is a fully Windows compatible portable personal computer. With the latest features in mobile computing and multimedia technology, this notebook makes a natural traveling companion. With leap of technology and compact, your Notebook PC runs on a whole wide range of general business, personal productivity, entertainment, and professional applications. -
Page 16: Feature Highlight
otebook User Guide Feature Highlight Before we go to identify each part of your Notebook PC, we will first introduce you to other notable features of your computer. Processing Unit • Your notebook runs on Intel® Celeron® M Dothan microprocessor that is integrated with 1MB L2 Cache. - Page 17 Introduction DVD Multi DVD Multi is a standard that certifies DVD drives between three DVD formats. A DVD Multi drive can read and write DVD-R, DVD-RW, and DVD-RAM. PCMCIA Provides one PCMCIA slot that allows you to insert one Type II card. IEEE 1394 (BTO) Provides one IEEE 1394 port for fast data transmission by external hard disk or digital video (DV).
-
Page 18: Unpacking The Computer
otebook User Guide Flash BIOS Flash BIOS allows you to easily upgrade the System BIOS using the Phoenix Flash utility program. Power and System Management • Integrated SMM (System Management Mode) on system chipset that shuts down components not in use to reduce power consumption. To execute power management, you can set up the parameter in Power Options properties by pointing your mouse to Control Panel of Windows. - Page 19 Introduction Hardcopy User Guide/E-book Quick Setup Manual Carefully inspect each component to make sure that nothing is missing and/or damaged. If any of these items is missing or damaged, notify your dealer immediately. Be sure to save the shipping materials and the carton in case you need to ship the computer or if you plan to store the computer away sometime in the future.
-
Page 20: The Inside Of The Notebook
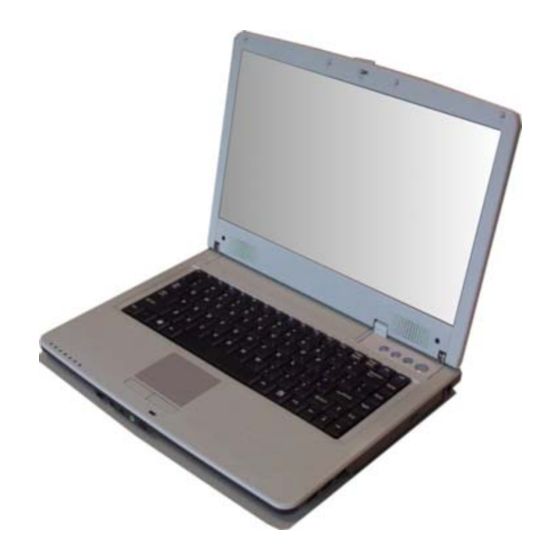
otebook User Guide The Inside of the Notebook The notebook computer is compact with features on every side. First, look at the inside of the system. The following sections describe inside features. 1. Color LCD Display 2. Built-in Stereo Speaker 3. - Page 21 Introduction TFT color LVDS with 14” 1280x768 WXGA (Wide XGA) resolution panels. Capable of displaying 16M colors (32-bit true color) on either size panels. LCD display control hot-keys allows you to adjust the brightness of the LCD. Simultaneous display capability for LCD and external desktop computer monitor.
-
Page 22: Notebook Status Icons
otebook User Guide • Power On/Resume Button Switches the computer power on and off, or resumes whenever it is in Suspend mode. • Touchpad Pointing Device Microsoft mouse compatible with two Touchpad click buttons. The two select buttons located at each side support tapping selection and dragging functions. - Page 23 Introduction 5. Caps Lock 6. Scroll Lock 7. Num Lock • Power Indicator Lets you know that power to the system is turned on. This LED is positioned so that you can see the power state whether the LCD panel is opened or closed.
-
Page 24: The Function Of Easy Buttons
otebook User Guide • Scroll Lock When LED in green indicates that the Scroll Lock key on the keyboard is activated. The Scroll Lock key has different functions depending on the software you are using. • Num Lock When LED in green light indicates that the Num Lock key on the keyboard is activated. -
Page 25: The Front Side Of The Notebook
Introduction • E-mail Button This is the most convenient way to access the outlook 2000/2003... utility just by pressing this button. You can simplify several procedures in entering into Outlook 2000/2003... environment. The Front Side of the Notebook 1. 4-in-1 Card slot. 2. - Page 26 otebook User Guide • Headphone Jack (with SPDIF out) Lets you plug in a stereo headphone, powered speakers, or earphone set with 1/8 inch phono plug for personal listening. (The SPDIF transmits digitized audio signal by optical fiber. The external audio amplifier can get the best audio quality without loss.) •...
-
Page 27: The Rear Side Of The Notebook
Introduction The Rear Side of the Notebook The system ports at the back of your notebook computer can connect various devices. Each port is described as followings. 1. TV Port (S-video) 2. VGA Port 3. Kensington Lock Hole • TV Port Lets you connect to the S-Video TV connector for presentation or VCD, DVD watching. -
Page 28: The Left Side Of The Notebook
otebook User Guide The Left Side of the Notebook The left side of your notebook computer provides the features shown in the following figure. 1. Modem Port 2. LAN Port 3. Air Outlet Vent 4. IEEE 1394 5. PCMCIA slot Left Side Features •... -
Page 29: The Right Side Of The Notebook
Introduction • IEEE 1394 IEEE 1394 port is a high speed I/O port that can transfer high levels of data in real-time, such as external hard disk, Digital Video Camera. • PCMCIA Slot An Infrared Remote Control is stored in this slot while shipping. Besides, this slot functions as a normal PCMCIA slot. -
Page 30: The Underside Of The Notebook
otebook User Guide • USB 2.0 Ports The Universal Serial Bus (USB) port allows you to connect USB 2.0- compliant devices (for example, printers, scanners and so on) to your notebook computer. • Optical Disk Drive Allows you to load and start programs from a compact disc (CD) or a digital video disc (DVD) and play conventional audio CDs. -
Page 31: Infrared Remote Control
Introduction Bottom of the System • Battery Bay Equipped with a choice of Lithium-Ion (Li-Ion) battery pack. • Battery Release Latch Push the latch to the left end to remove the battery pack. • Hard Disk Compartment Open this cover of this compartment to replace with other Hard Disk Drive. - Page 32 otebook User Guide The infrared remote control that fits just perfectly in you hand is for power, volume up/down, six music/video media buttons (play, fwd, rwd, stop, etc), 4-way thumb joystick, and other keyboard functions. You will no longer to move your body to control the software by touching ing the notebook, just lay on your couch and enjoy the convenience that the IR remote control brings to you.
-
Page 33: 1.10 Notebook Accessories
Introduction 12. Prev Back to previous chapter 13. Next Go to next chapter 14. Fwd Fast Forward 15. Rew Fast Backward 16. Volume up Increase the volume 17. Volume down Decrease the volume 18. Mute Mute the sound 19. Record Begin to record 20. -
Page 34: 1.11 Notebook Options
otebook User Guide Battery Pack Aside from the AC adapter, your computer can also be powered through the internal battery pack. The battery pack uses rechargeable Lithium-Ion (Li-Ion) battery cells that provide long computing hours when fully charged and power management enabled. - Page 35 Introduction DVD Multi is a standard that certifies DVD drives for media compatibility between three DVD formats. A DVD Multi drive can read and write DVD-R, DVD-RW, and DVD-RAM, all of which are supported by the DVD Forum.
-
Page 37: Getting Started
Getting Started Getting Started our Notebook is designed and pre-configured for easy setup and use. This chapter describes the installation steps you should follow to get the notebook up and running as quickly as possible. Contact your dealer if they have pre-installed all the needed drivers to fully operate your computer or if there is an update on the driver installation of the notebook. -
Page 38: Using The Battery Pack
otebook User Guide Using the Battery Pack The notebook is designed to operate with one of the following power sources: • With AC power using the AC adapter connected to an electrical outlet. • With a Lithium-Ion (Li-Ion) battery pack. You should use the AC adapter whenever it is possible, relying on the battery pack only when AC power is unavailable. - Page 39 Getting Started Installing the Battery Pack This notebook provides the most convenient way to install the battery pack into your computer. With the extended nose directed toward the compartment, insert and push the battery pack. Removing the Battery Pack To remove the battery pack, slide the lock latch to the end of left side to unlock the battery pack (1), and push Battery release latch to left (2).
-
Page 40: Extending Battery Life
otebook User Guide Replacing the Battery Pack When your notebook estimates that the battery only has enough charge to continue for a few minutes, it will alert you with a battery low warning beep. If you are consuming a lot of power by using the audio system, the PCMCIA slots, the hard disk drives, and Combo drive, your notebook might run out of charge much sooner than you expect. -
Page 41: Connecting The Ac Power Source
Getting Started Connecting the AC Power Source The AC adapter provides external power source to your computer and charges the internal battery pack at the same time. The AC adapter also has an auto- switching design that can connect to any 100VAC ~ 240VAC power outlets. To connect the power adapter: Plug the AC power cord into the power socket of the AC power adapter. -
Page 42: Starting Your Computer
otebook User Guide For the power supply of this equipment, an approved power cord has to be used. Make sure the socket and any extension cord(s) you use can support the total current load of all the connected devices. Before cleaning the computer, make sure it is disconnected from any external power supplies (i.e. -
Page 43: Adjusting The Display Controls
Getting Started After the test, the screen will also display a message "press <F2> to enter SETUP". You don’t need to run this program at the moment as your dealer already made the necessary settings for your computer optimal operation. Refer to Chapter 6 on running the SETUP program later. -
Page 44: Installing Windows Xp From Optical Disk Drive
otebook User Guide first if they have already installed all the drivers along with the operating system. If not, follow the procedures below: NSTALLING INDOWS FROM PTICAL RIVE To install Windows XP directly from your optical disk drive, please go to Boot menu of BIOS setup menu. -
Page 45: Driver Installation Note
Getting Started Change the setting of Secondary IDE Channel with following the previous steps that was set to Primary IDE Channel. Restart your notebook to let the setting take effect. DRIVER INSTALLATION NOTE Please be notified that when you install the driver utility, it should be install the CHIPSET Driver first. -
Page 46: Installing Ene- Kbc Driver
otebook User Guide ENE- KBC NSTALLING DRIVER Installing ENE-KBC driver for Windows XP Click the Start button, then point to Run. The Run dialog box appears. Click the Browse button and specify the directory as. "E:\Drivers\WinXP\KBC\Setup.exe". Implement the setup program to install this driver. The Welcome dialog box appears. -
Page 47: Installing The Audio Device Driver
Getting Started NSTALLING THE UDIO EVICE RIVER Your notebook computer uses the Audio controller. Installing Audio device driver for Windows XP Click the Start button, then point to Run. The Run dialog box appears. Click the Browse button and specify the directory as. "E:\Drivers\WinXP\Audio\Setup.exe"... -
Page 48: Installing The Lan Device Driver
otebook User Guide LAN D NSTALLING THE EVICE RIVER Please follow the procedures below for installing the LAN driver: Installing LAN driver for Windows XP Click the Start button, then point to Run to appear the Run dialog box. Click the Browse button to specify the directory as "E:\Drivers\WinXP\Lan\winsetup.exe"... -
Page 49: Installing The Wireless Lan Device Driver
Getting Started Click the Browse button and specify the directory as. "E:\Drivers\WinXP\Card Reader\Setup.exe". Click Next to process the further step continuously when screen displays this command. Press Finish to finish the installation. LAN D NSTALLING THE IRELESS EVICE RIVER Please follow the procedures below for installing the Wireless LAN driver: Installing the Wireless LAN driver for Windows XP Click the Start button, then point to Run. -
Page 50: Installing The Bluetooth Utility
otebook User Guide NSTALLING THE LUETOOTH TILITY Please follow the procedures below for installing the Bluetooth Utility Installing the Bluetooth utility for Windows XP Click the Start button, then point to Run. The Run dialog box appears. Click the Browse button and specify the directory as. "E:\Drivers\WinXP\Bluetooth Utility\Setup.exe ". - Page 51 Getting Started inside parts of the computer to cool off. Closing the panel will force the heat up against the LCD screen, which may degrade the LCD when done regularly. More importantly, never close the LVDS panel for a long period of time when computer is on and power saving features are disabled.
-
Page 53: Using Your Notebook
Using Your Notebook Using Your Notebook his chapter describes how to operate the standard built-in features of the notebook that you normally would use in your day-to-day computer work. If you are new to computers and to your operating system, you also need to read the manual for the operating system on how to work with your computer. -
Page 54: Starting Your Operating System
otebook User Guide Starting Your Operating System The operating system is a must ingredient in using your computer. Without an operating system, it is like playing chess without the chessboard. It is the platform for all your software application programs to run on. The most popular operating system today is Microsoft Windows. - Page 55 Using Your Notebook 1. Function Keys 2. Control Keys 3. Windows Start Menu Key 4. Control Keys 5. Windows Shortcut Key 6. Cursor Control Keys Keyboard Key features and operations are described below: • Function Keys Function keys are application-driven, like F1 through F12 can be found on the keyboard.
- Page 56 otebook User Guide • Windows keys Use the following two keys to facilitate your work: Start Menu key Displays the Start menu. Shortcut/Application key Provides quick access to shortcut menus. This key acts like a right mouse button. • Cursor Control keys Cursor control keys let you position the cursor on the screen where you want.
-
Page 57: Basic Keyboard Functions
Using Your Notebook ASIC EYBOARD UNCTIONS Keypad Function Description <Enter> key. Execute a command. Within many text editing application programs, the <Enter> key inserts a hard carriage return, just like what ordinary typewriter does. <Esc> key. Press this key to cancel or escape from a command or function. -
Page 58: Cursor Control Keys
otebook User Guide Keypad Function Description <Ctrl> key. Known as the Control key. Used in most application program in combination with other keys to execute a certain command. <Alt> key. Known as the Alternate key. Used in most application program in combination with other keys to execute a certain command. -
Page 59: Screen Control Keys
Using Your Notebook CREEN ONTROL Keypad Function Description <Home> key. Moves the cursor to the beginning of a screen or line. <PgUp> key. Moves the cursor up one screen at a time <PgDn> key. Moves the cursor down one screen at a time <End>... - Page 60 otebook User Guide Keypad Function Description Enable or Disables the built-in wireless LAN. Switches display between LCD, CRT, or LCD and CRT simultaneously. To shut down or resume the built-in system speaker volume. Press this key to activate the system into the suspend mode.
-
Page 61: Using The Glide Pad Pointing Device
Using Your Notebook Using the Glide Pad Pointing Device Your computer comes with a built-in Glide Pad pointing device that is found on the center of the palm-rest surface. The Glide Pad offers a number of options that let you customize how it functions. -
Page 62: Configuring Your Screen Display
otebook User Guide 3. Glide Pad Glide Pad Features Here how to use the Glide Pad pointing device: The rectangular surface acts like a miniature duplicate of your display screen. To move the mouse cursor, place the finger lightly on the sensor pad and move in the desired direction. -
Page 63: Possible Display Configurations
Using Your Notebook large set of extended functions and higher resolutions especially useful when you are connecting an external high-resolution and high-frequency CRT or LCD. Please Refer to Section 5 "Installing the Notebook Device Drivers" of Chapter 2 in this manual for the procedures on how to install the VGA device driver under Windows. -
Page 64: Changing The Display Properties Under Windows
otebook User Guide HANGING THE ISPLAY ROPERTIES UNDER INDOWS To change the display properties of your screen under Windows system, just right-click on the desktop area and select Properties or go to the Control Panel and click on the Display icon. The Display Properties dialog box will appear on your screen. - Page 65 Using Your Notebook and documents are stored in RAM (Random Access Memory). This allows your notebook to wake up quickly, but a low level of power is required to maintain this suspended state. How quickly your system powers down into Standby mode is up to you by setting proper times in Power Options of Control Panel in Window.
-
Page 66: Working With The Built-In Hdd
otebook User Guide Working with the Built-in HDD Your notebook computer is equipped with a built-in large capacity 2.5 inch IDE hard disk drive where you store or install your computer operating system and all application software programs. You need to format the hard disk before using. - Page 67 Using Your Notebook Make sure the computer is turned on. Press the eject button found on the door cover of the combo drive. The CD tray mechanism will pop-out slightly and slowly pull out the whole length of the tray. Place the disc on top of the CD tray with the label side facing up.
-
Page 68: Using Pcmcia Cards
otebook User Guide How to care the CD When you handle CDs, pay attention to the following guidelines: • Always pick up the CD by its edges. • Avoid scratching or soiling either side of the CD. • Do not write with the hard ball-point pen or apply labels on either side of the CD. - Page 69 Using Your Notebook To allow manufacturers to add functions and technologies in the PC Card form factor, PCMCIA has defined two PC Card types: Type Thickness Sample Devices Type II 5.0 mm Fax/Modem & Network Cards Type III 10.5 mm Hard Disks (ATA Cards) Type II Cards Type II card has a thickness of 5.0 millimeters (mm).
-
Page 70: What Is Cardbus
otebook User Guide • Storage Cards When you insert a storage PC card, PC card Adapter for other memory card (i.e. Compact Flash card, Smart Media card...) or small hard drive card in the notebook computer, it appears as a unique drive depending on the type of card you are using. - Page 71 Using Your Notebook Inserting PC Cards To insert a PC card into the PCMCIA slot: Locate the PC card slot cover on the left side of the computer. Insert the side of PC card with the 68-pin socket into the PC slot. The face label of the card should also be facing up.
-
Page 72: Making Pc Cards Work
otebook User Guide Select the socket from the list that you want to remove, and click Stop button. The system then disables the function of PCMCIA card. Then you can remove the inserted PC card, push the button found on the right side of the PC slot to release the eject button. -
Page 73: Hot Swapping Pc Cards
Using Your Notebook insert the driver CD provided by the PC card manufacturer into the combo drive and install to Windows system. You need to read the manual guide of the PC card on how to configure and operate the card. Some PC cards require additional system resources. - Page 74 otebook User Guide For a single moment, only one card can be inserted into the 4 in 1 card or CF slot Inserting Flash Memory Card To insert a flash memory card into the slot is similar to PCMCIA card. You only need to pay more attention whenever insert the flash memory card into the slot with the correct side.
- Page 75 Using Your Notebook Removing Flash Memory Card It is similar to PCMCIA card for removing a flash memory card from the slot. You should first disable the card setting in the system as described in the PCMCIA chapter. To remove the flash memory card, you should only pull out the card by finger, there is no release button for flash memory slot.
-
Page 77: Fun With Multimedia
Fun with Multimedia Fun with Multimedia his chapter lets you make full use of all the multimedia features of your computer in having fun and excitement during work or leisure. You will learn how to mix and match the built-in sound system, use Combo drive in creating an exciting full multimedia presentation. -
Page 78: Notebook Multimedia Features
otebook User Guide Notebook Multimedia Features Your notebook computer is rich in multimedia features that make your computing fun, comfortable, exciting and easy. Your computer is well able to perform all multimedia tasks through the following: • Intel® Celeron ® M Processor Dothan •... -
Page 79: Setting Up The Audio Driver Properties
Fun with Multimedia • Sound volume adjust by K/B hot-key Setting Up the Audio Driver Properties Before you can start using the audio capabilities of your computer, you need first to setup properly the audio driver after installing Windows. If you bought your computer with Windows pre-installed, it is most likely that your dealer have configured the sound driver for you. -
Page 80: Recording Sounds
otebook User Guide Figure 4-1 Entertainment Programs Group The standard multimedia components are as follows: • Windows Media Player - for playing sound, video and animation files • Sound Recorder - for recording sounds and playback • Volume Control - for adjusting the volume of mixer For more information on how to operate these multimedia components, run the program and click on the Help menu. - Page 81 Fun with Multimedia be played back through the internal speaker or earphone jack using an external speaker, headphone, or earphone set. You can also use the files as voice annotations on many applications for more real presentation. This section will describe briefly how you can record sounds under Windows operating system.
- Page 82 otebook User Guide Click Properties in the Options main menu. Click the round button for Recording and tick off each component that list in the "Shows the following Volume Controls" box. Figure 4-3 Audio Properties Click OK and the Recording Control dialog box will appear. Here, you will select the input device for the recording source.
-
Page 83: Using An External Microphone
Fun with Multimedia Figure 4-4 Recording Volume Control SING AN XTERNAL ICROPHONE Your computer allows you to connect an external microphone for high quality recording. The external microphone jack is found on the left side of your computer. Use only microphone with 1/8-inch mini-jack connector. Follow the same procedure for recording voice. -
Page 84: Playing Audio And Sound
otebook User Guide Figure 4-5 Play Audio CD by Windows Media Player Select the starting point where you want to start recording. Switch to the Sound Recorder and press the Record button. Switch immediately to the Windows Media Player and press the Play button. -
Page 85: Using The Windows Media Player
Fun with Multimedia For more quality sound output, you can choose to connect an external amplified speaker or earphone from headphone jack. Always minimize the volume first before placing the phone set to your ear. SING THE INDOWS EDIA LAYER The easiest way to playback multimedia media files is to run the Windows Media Player. -
Page 86: Using Dvd
otebook User Guide Figure 4-6 Windows Media Player Using DVD DVD is the breakthrough in superb full-motion picture playback. One disc can contain at least 4.7GB of information, capable of holding one full-length movie with soundtracks, subtitles, and different languages. Much more, the DVD-ROM drive of your computer is backward compatible with CD-ROM drive so it allows you to use any CD as well. - Page 87 Fun with Multimedia You can use Windows Media Player to watch DVDs on your Notebook computer. Like a conventional DVD player, by using the Player, you can skip to specific titles and chapters, play sequences in slow motion, gain access to special features, and switch audio and caption languages.
- Page 88 otebook User Guide For best DVD playback, please enable the DMA function of this notebook, for how to enable the DMA channel on both DVD/CD-ROM drive and Hard Disk, please refer to driver installation on section 5 of chapter 2. Moreover, you can enable Hardware Accelerator if the software MPEG-2 player you are using has supported this function.
- Page 89 Fun with Multimedia...
-
Page 91: Connecting To Peripherals
Connecting to Peripherals Connecting to Peripherals his chapter describes how you attach peripheral devices to your notebook. You can attach a printer or mouse; connect an external monitor and keyboard, or any other peripheral device. You will learn how to use these peripheral devices with the step-by-step instructions depicted in this chapter. -
Page 92: Using The Usb Port
otebook User Guide Using the USB Port USB or Universal Serial Port is a peripheral bus standard developed by Compaq, DEC, IBM, Intel, Microsoft, NEC and Northern Telecom. Personal computers equipped with USB will allow computer peripherals to automatically configure as soon as they are physically attached - without the need to reboot or run setup. - Page 93 Connecting to Peripherals To connect an external monitor: Turn off your computer and make sure the monitor power switch is turned off. The notebook computer must be powered off or suspended while the monitor is being connected. Although you can connect the external Monitor without power off the computer and the external monitor, however, it is harmful to both devices and it shortens the life of these devices.
-
Page 94: Using The Ieee 1394 Port
otebook User Guide Refer to Chapter 3 regarding the possible External CRT resolutions and how to change the display properties. Using the IEEE 1394 Port IEEE 1394 is a new I/O standard that is supported by Win98 (second edition) or later Windows versions. With supporting high-speed transmission and delivering data at a guaranteed rate, you can record digital video clips and download them directly via a super-speed IEEE 1394 port at the left of the notebook. -
Page 95: 5.4 Using The Tv Port
Connecting to Peripherals Please make sure that the external IEEE 1394 HDD box you purchase on local electronic store should provide external power adapter. There are different types of IEEE1394 HDD box and hard disk from different manufactures, the power consumption has varied range. If the power of the external IEEE 1394 HDD is supplied from the USB of this notebook, it may not run properly. -
Page 96: Using The External Audio System
otebook User Guide Double-click on the Display icon and point to Setting tab. Double-click Advanced button and point to Intel(R) Extreme Graphics tab and then click Graphics Properites... In the Device tab, select the Telvision icon and change the related detail setting if you want. -
Page 97: Using The Lan Port
Connecting to Peripherals Using the LAN Port This notebook comes with an internal 10Base-T/100Base-TX LAN module that connects your computer to other computers/networks through a local area network (LAN) and supports data transfer rates at 10Mbps and can be up to 100Mbps. -
Page 98: Using The Wireless Lan
otebook User Guide Using the Wireless LAN Wireless LAN is the major breakthrough in computer communication technology. It lets user connect to the LAN environment without using any wire to traditional RJ-45 jack. User can enjoy the wireless connection within the range of Access Point (AP) of LAN. - Page 99 Connecting to Peripherals Locate the analog phone cable in the accessories box in notebook shipping carton. Each end of the cable has a RJ-11 connector. Connect one end of the cable into a standard wall outlet. Connect the other end of the cable into the computer modem port. The speed of data transmission is dependent on the quality of telephone lines.
-
Page 101: Customizing Your Notebook
Customizing Your Notebook Customizing Your Notebook our computer uses the Phoenix BIOS Setup program that allows you to set several system configuration in changing the way your computer performs. This includes you r system time and date, disk drive configuration and password setup. This information is then stored in the CMOS RAM and will remain permanent unless you change it again. -
Page 102: Running The Bios Setup Program
otebook User Guide Running the BIOS Setup Program Your computer is likely to have been properly setup and configured by your dealer prior to delivery. However, you may find it necessary to use the computer’s BIOS (Basic Input-Output System) Setup program to change system configuration information, such as the current date and time, or your hard disk drive type. - Page 103 Customizing Your Notebook • Item Specific Help The right side of the screen. This area describes each parameter and its available settings. • Menu Bar The top line of the screen. Each of the five selections displays its own screen. •...
-
Page 104: Using The Main Menu Setup
otebook User Guide Using the Main Menu Setup P h o e n i x B I O S S e t u p U t i l i t y Main Advanced Security Boot Exit Item Specific Help System Time: :54 :32] <Tab>, <Shift-Tab>, System Date:... - Page 105 Customizing Your Notebook • System Date Allows you to set the system date using the month/date/year format. Enter the current time for reach field and use the <Tab>, <Shift>+<Tab>, or <Enter> key to move from one field or back to another.
-
Page 106: Internal Hdd Sub-Menu
otebook User Guide 6.2.1 I HDD S NTERNAL P h o e n i x B I O S S e t u p U t i l i t y Main Advanced Security Boot Exit Item Specific Help Primary Master: [40008MB] Type: [Auto] User = you enter... -
Page 107: Using The Advanced Cmos Setup
Customizing Your Notebook Using the Advanced CMOS Setup P h o e n i x B I O S S e t u p U t i l i t y Advanced Main Security Boot Exit Item Specific Help Quiet Boot [Disabled] Summary Screen [Disabled]... - Page 108 otebook User Guide • Aperture Size: Lets you specify the memory size of the Graphics Engine. Please set it to default value. • Legacy USB Support Enable or disable the USB Bus support when in connection with USB device. • LAN Boot Control: Lets you specify Enabled or Disabled for booting the notebook from Network.
-
Page 109: Security Menu Setup
Customizing Your Notebook Security Menu Setup P h o e n i x B I O S S e t u p U t i l i t y Security Main Advanced Boot Exit Item Specific Help Supervisor Password Is: Clear User Password Is: Clear... - Page 110 otebook User Guide • Set Supervisor Password Supervisor password gives you the authority in accessing the setup utility. You also need to enter this password in system booting and resuming from suspend mode. When you press <Enter> in this field, the Set Supervisor Password dialog box appears.
-
Page 111: Using The Boot Setup
Customizing Your Notebook Using the Boot Setup This item allows you to set the search drive sequence where the system will try to boot up first. P h o e n i x B I O S S e t u p U t i l i t y Main Advanced Security... -
Page 112: How To Exit The Setup Program
otebook User Guide How to Exit the Setup Program There are two choices to escape from the Setup program. P h o e n i x B I O S S e t u p U t i l i t y Main Advanced Security... -
Page 113: How To Upgrade The Bios
Customizing Your Notebook • Save Changes Saves Setup data to CMOS. • Battery Refresh Conditions the battery so that the battery can be fully charged. How to Upgrade the BIOS Your computer uses EPROM Flash BIOS chip that allows you to easily upgrade the BIOS program. -
Page 115: Using Options
Using Options Using Options his chapter describes the advanced features and expandable architecture in your notebook. You can upgrade your system for specific requirements. -
Page 116: Upgrade
otebook User Guide System Upgrade This section provides some steps in doing system upgrade for your notebook computer. The upgrade procedures include the following: EMORY PGRADE Your notebook computer offers 200-pin SODIMM (Small Outline Dual Inline Memory Module) at least 256MB DDR-SDRAM. The memory compartment is located inside your computer. - Page 117 Using Options The 256MB, 512MB memory modules are available: To install the memory module: Make sure the system is powered off, the battery also is removed and that no peripheral devices are attached. Turn the computer upside-down and locate the screw that secures the DIMM door at the underside of the notebook.
-
Page 118: Upgrade Hard Disk
otebook User Guide Press down on the edge of the memory module until the locking tabs on both sides is locked. Put the DIMM door back and secure the screw on the DIMM door. Turn the system over. To remove a memory module, push the locking tabs aside from the memory module until the module pops up. -
Page 119: Wireless Module Installation
Using Options Place the hard disk back to the compartment. Cover the lid, then rotate and tighten the screws. Set the boot device as DVD/CD-RW Combo drive and Primary Master as Auto on BIOS setup menu. Please refer to Chapter 6 about the setting of BIOS setup menu. -
Page 121: Caring For Your Notebook
Caring for Your Notebook Caring for Your Notebook our Notebook PC is a fully IBM compatible portable personal computer with the latest features in mobile computing and multimedia technology. Lightweight and compact, your Notebook PC runs on a whole wide range of general business, personal productivity, and professional applications, it is ideal for use in the office, at home, and on the road. -
Page 122: Important Safety Instructions
otebook User Guide Important Safety Instructions Portable computers take the most beating from end users. This section gives you detailed information about how to maintain a safe working environment while using the notebook computer. You can maintain its condition and performance by following these guidelines. - Page 123 Caring for Your Notebook • While unplugging the power cord, disconnect it by the plug head, not by its wire. • Make sure the socket and any extension cords you may use can support the total current load of all the connected devices. •...
-
Page 124: Cleaning Your Computer
otebook User Guide The notebook computer has dropped and damaged. The notebook computer has obvious sign of breakage. • Do not leave this notebook computer in an environment unconditioned. Storage temperature above 60ºC (140ºF) may damage the notebook computer. • An approved power cord has to be used for the notebook computer’s power supply. -
Page 125: Maintaining The Lcd Quality
Caring for Your Notebook Maintaining the LCD Quality When it comes to screen problems, heat plays a big part. After a good working session, the typical routine is to shut the machine and close the cover. But the display surface - no matter what type it is - and the components inside the computer radiates heat;... -
Page 126: Battery Care Guidelines
otebook User Guide • Use hard disk maintenance programs like Disk Defragmenter of Windows. These reorganize your hard disk by eliminating fragmentation and improving your hard disk access time. • Install a system password in your computer so others won't be able to use the hard disk. -
Page 127: When You Travel
Caring for Your Notebook • You should always discharge your battery before recharging it on either of these two conditions: first, this is the first time you start to use your battery; second, you had not charge the battery for more than 2 months. To discharge the battery, please execute the "Battery Refresh"... - Page 128 otebook User Guide...
-
Page 129: Appendix Asystem Specification
System Specification APPENDIX A System Specification his appendix gives information on the technical and hardware specifications of your computer. Please note that the information mentioned here may not be exactly the same with your computer as specification is subject to change without notice or modifying this manual. -
Page 130: Processor Unit
otebook User Guide ROCESSOR • Intel® Celeron® M Processor Dothan • Above 1.3 GHz CPU • 1MB integrated L2 cache for the processor YSTEM EMORY • Two 200-pin memory slots • User-upgradeable to maximum 1GB using 200-pin SODIMM 256MB, 512MB modules •... -
Page 131: Storage
System Specification TORAGE • 2.5” Format 9.5mm High HDD Module; Bus Mastering, Ultra DMA ATA-100 Support for LBA Scheme • Enhanced IDE bootable DVD-ROM drive module • Optional DVD/CD-RW Combo drive • Optional DVD Dual/Multi drive • 4-in-1 (SD, MS, MMC, and MS_Pro) card reader UDIO YSTEM •... - Page 132 otebook User Guide EYBOARD • Full-sized 87-keys keyboard with Windows systems hot-keys, inverted T- cursor keys, 8 hot keys, 12 function keys, and embedded numeric keypad • Provides international language keyboard BIOS LASH 512K Flash ROM BIOS for easy BIOS upgrade I/O P ORTS •...
- Page 133 System Specification ATTERY • Rechargeable 6 Cells Li-ion battery pack with Smart Battery function • Approximately 4 Hours (by average JEITA) Battery Life EIGHT AND IMENSION • 335.5 (W) x 238.9 (D) x 24.9 (H) ~33.1 mm • Approximately 2.3 kg...
- Page 134 otebook User Guide...
Need help?
Do you have a question about the CT2 and is the answer not in the manual?
Questions and answers