Table of Contents
Advertisement
Quick Links
Advertisement
Table of Contents

Related Manuals for FIC CW0A1


Summary of Contents for FIC CW0A1
- Page 1 CW0A1 Mini-note User Guide...
- Page 2 User Guide Copyright©2008 All Rights Reserved - Printed in Taiwan CW0A1 Mini-note User Guide Original Issue: 2008/09 This manual guides you in setting up and using your new Mini-note. Information in this manual has been carefully checked for accuracy and is subject to change without notice.
- Page 3 otebouide FCC Information to User Safety and Care Instructions No matter what your level of experience with computers, please make sure you read the safety and care instructions. This information can help protect you and your computer from possible harm. Important Safety Instructions This section gives you detailed information about how to maintain a safe working environment while using the Notebook (Laptop).
- Page 4 ini-note User Guide cord from the wall outlet, and allow the internal system components to cool before touching. 11. Refer your system for servicing to qualified service personal under the following conditions: When the power cord or plug is damaged or frayed. If liquid has been spilled into the product.
- Page 5 otebouide 19. The risk of ignition caused by small metallic objects, such as paper clips or staples, moving around inside TRANSPORTABLE EQUIPMENT during transportation shall be reduced objects entering the equipment, please do not remove dummy card from the product. For Safety Regulation: Risk of explosion if battery is replaced by an incorrect type.
- Page 6 ini-note User Guide Unplug this product from the wall outlet before cleaning. Do not use liquid cleaners or aerosol cleaners. Use a dry cloth for cleaning. Ensure that no liquid enters the system. Laser Compliance Statement The CD-ROM/DVD-ROM/CD-RW/DVD-RW drive in this computer is a laser product.
- Page 7 otebouide INCORRECT DE LA BATTERIE. REMPLACER UNIQUEMENT AVEC UNE BATTERIE DU MÊME TYPE OU D'UN TYPE RECOMMANDÉ PAR LE CONSTRUCTEUR. METTER AU RÉBUT LES BATTERIES USAGÉES CONFORMÉMENT AUX INSTRUCTIONS DU FABRICANT. German VORSICHT ! Explisionsgefahr bei unsachgemäßen Austausch der Batterie.Ersatz nur durch denselben oder einem vom Hersteller empfohlenem ähnlichen Typ.Entsorgung gebrauchter Batterien nach Angaben des Herstellers.
- Page 8 ini-note User Guide Make sure the socket and any extension cord(s) you use can support the total current load of all the connected devices. Before cleaning the computer, make sure it is disconnected from any external power supplies (i.e. AC adapter). The power cord set (appliance coupler, flexible cord, and wall plug) you received with the Notebook (Laptop) meets the requirements for use in the country where you purchased the...
- Page 9 otebouide designed to provide reasonable protection against harmful interference in a residential installation. This equipment generates, uses and can radiate radio frequency energy and, if not installed and used in accordance with the instructions, may cause harmful interference to radio communications. However, there is no guarantee that interference will not occur in a particular installation.
- Page 10 ini-note User Guide with a minimum distance of 20 centimeters between the radiator and your body. 15.247 (b)(4), the EUT meets the requirement that it be operated in a manner that ensures the public is not exposed to radio frequency energy levels in excess of the Commission’s guidelines (1.1307, 1.1310, 2.1091 and 2.1093) 5.105 Federal Communications Commission (FCC) Requirements, Part This equipment has been tested and found to comply with the limits for a class...
- Page 11 otebouide Installation and use of this Wireless LAN device must be in strict accordance with the instructions included in the user documentation provided with the product. Any changes or modifications (including the antennas) made to this device that are not expressly approved by the manufacturer may void the user’s authority to operate the equipment.
- Page 12 ini-note User Guide 低功率射頻電機技術規範 (920808) 4.7無線資訊傳輸設備(UNII): 4.7.5. 在5.25-5.35 秭赫頻帶內操作之無線資訊傳輸設備,限於室內使用。 4.7.6. 無線資訊傳輸設備須忍受合法通信之干擾且不得干擾合法通信;如造成 干擾,應立即停用,俟無干擾之虞,始得繼續使用。 4.7.7. 無線資訊傳輸設備的製造廠商應確保頻率穩定性,如依製造廠商使用手 冊上所述正常操作,發射的信號應維持於操作頻帶中。 電波障害自主規制について この装置は、情報処理装置等電波障害自主規制協議会(VCCI)の基準に基 づくクラスB情報技術装置です。この装置は、家庭環境で使用することを目 的としていますが、この装置がラジオやテレビジョン受信機に近接して使用 されると、受信障害を引き起こすことがあります。取扱説明書に従って正し い取り扱いをしてください。 Shielded Cables Notice All connections to other computing devices must be made using shielded cables to maintain compliance with FCC regulations. Peripheral Devices Notice Only peripherals (input/output devices, terminals, printers, etc) certified to comply with Class B limits may be attached to this equipment.
- Page 13 otebouide The optical disk drive is Class 1 Laser Product. Caution Changes or modifications not expressly approved by the manufacturer may void the user’s authority, which is granted by the Federal Communications Commission, to operate this computer. Use Conditions This part complies with Part 15 of the FCC Rules. Operation is subject to the following conditions: (1) this device may not cause harmful interference, and (2) this device must accept any interference received, including interference that may cause undesired operation.
- Page 14 ini-note User Guide EN 301 489-1 V.1.3.1 (2001-09) / EN 301 489-17 V.1.1.1 (2000-09) EN 50371: 2002 EN 55022: 2006 EN 55024: 2001 EN 60950: 1:2001 EN 61000-3-2: 2000 EN 61000-3-3: 1995 + A1: 2001 802.11b and 802.11g Restrictions: - European standards dictate maximum radiated transmit power of 100mW EIRP and frequency range 2.400-2.4835GHz;...
-
Page 15: About Your Mini-Note
otebouide About Your Mini-note ongratulation for having purchased your new Mini-note. This Mini-note incorporates the newest features to serve your daily needs easily for anywhere you go. -
Page 16: About Your User Guide
ini-note User Guide About Your User Guide elcome to your New Mini-note User Guide. This manual introduces you to the basic concepts of your new Mini-note. This manual is divided into eight chapters. Chapter 1 Introduction Chapter 2 Getting Started Chapter 3 Using Your Mini-note Chapter 4... -
Page 17: Table Of Contents
otebouide Table of Contents ABOUT YOUR MINI-NOTE ..............15 ABOUT YOUR USER GUIDE............... 16 INTRODUCTION................23 ..............24 EATURE IGHLIGHT ............25 NPACKING THE NOTE ............26 NSIDE OF THE NOTE Mini-note Status Icons..............29 ..........30 RONT IDE OF THE NOTE .......... - Page 18 ini-note User Guide Installing the LAN Device Driver..........47 Installing the Card Reader Device Driver ........48 ............ 48 URNING OFF NOTE USING YOUR MINI-NOTE............51 .......... 52 TARTING PERATING YSTEM ......52 NDERSTANDING THE EYBOARD UNCTIONS Basic Keyboard Functions ............54 Cursor Control Keys ..............
- Page 19 otebouide CONNECTING TO PERIPHERALS ..........77 USB P ..............78 SING THE ..........79 SING THE XTERNAL ONITOR .......... 80 SING THE XTERNAL UDIO YSTEM LAN P ..............80 SING THE LAN............81 SING THE IRELESS CUSTOMIZING YOUR MINI-NOTE..........83 BIOS S ..........
- Page 20 ini-note User Guide ................ 108 YSTEM PECIFICATION Processor Unit................108 System Memory................108 LCD Display................108 VGA System ................108 Storage..................109 Audio System ................109 Touchpad ..................109 Keyboard ..................109 Flash BIOS ................. 109 I/O Ports ..................109 Wireless devices .................
- Page 21 otebouide This page is intended to be blank.
-
Page 23: Introduction
Introduction 1 Introduction our Mini-note is a fully Windows® compatible portable computer. Slim, sleek ultra-portable computer. This device matches all the demands for high performance computing and multimedia technology. Your Mini-note runs a wide variety to customize your special requirements, personal productivity, entertainment, professional applications and especially ideal for use on the road. -
Page 24: Feature Highlight
ini-note User Guide Feature Highlight Before we identify each part of your Mini-note, we will first introduce you to other notable features of your Mini-note. Processing Unit • Check Your Mini-note runs on Intel® Atom microprocessor that is integrated with 512KB L2 Cache. with your dealer on the CPU type and speed. -
Page 25: Unpacking The Mini-Note
Introduction PCI Local Bus Architecture 32-bit PCI Enhanced IDE optimizes the data transfer between the CPU and PATA hard disk drives. Support ultra DMA ATA-66 PIO Mode up to PIO Mode 4, bus mastering for LBA Scheme. Audio System Full-duplex 16-bit stereo audio system output. Sound Blaster compatible. Flash BIOS Flash BIOS allows you to easily upgrade the System BIOS using the Phoenix Flash utility program. -
Page 26: The Inside Of The Mini-Note
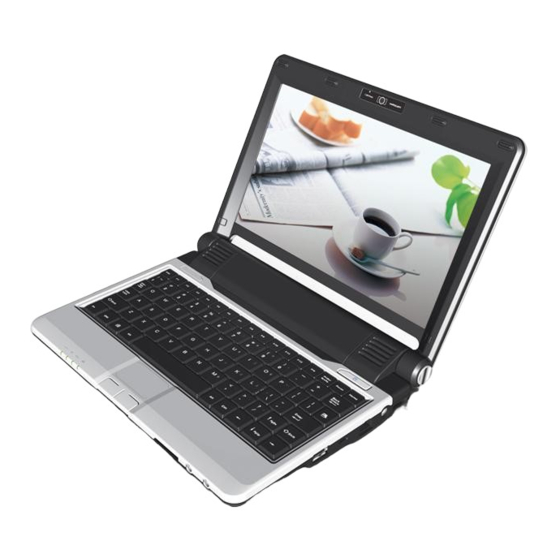
ini-note User Guide The Mini-note An AC Adapter and AC Power Cord Li-Ion Battery Pack CD Driver Utility and User Guide Carefully inspect each component to make sure that nothing is missing and/or damaged. Be sure to save the shipping materials and the carton in case you need to ship the Mini-note or store for an extended period of time. - Page 27 Introduction 1. Webcam 2. Color Widescreen LCD Display. 3.6. Built-in Stereo Speakers 4. LED Indicators 5. Integrated Microphone 7. Power On/Resume Button 8. Keyboard 9. Touchpad Pointing Device • Webcam The Webcam is 1.3M pixels. It can be used as a communication device that transmits instant image through network for conference.
- Page 28 ini-note User Guide Capable of displaying 16M colors (32-bit true color) LCD display control hot-keys allows you to adjust the brightness of the LCD. Simultaneous display capability for LCD and external desktop computer monitor. • Built-in Stereo Speakers Integrated mini stereo speaker provides sound and audio output for your multimedia presentations or listening pleasure.
-
Page 29: Mini-Note Status Icons
Introduction • Touchpad Pointing Device Microsoft mouse compatible with two Touchpad click buttons. The two select buttons located at each side of the Touchpad support tapping selection and dragging functions. These buttons work like a standard notebook mouse. Simply move your fingertip over the Touchpad to control the position of the cursor. -
Page 30: The Front Side Of The Mini-Note
ini-note User Guide • Drive Access When LED turns on indicates that the system is accessing the Hard Disk or Optical Disk Drive. • WLAN/Bluetooth Access When LED turns on indicates that the wireless LAN module is activated. When LED lights off, it indicates that the function is disabled. •... -
Page 31: The Left Side Of The Mini-Note
Introduction • 4 in 1 card slot The card slot supports SD, MMC, MS (Memory Stick), and MS_Pro flash memory card format. You can use either of the 4 types flash memory cards for extra storage media. Please pay attention to correct direction when you insert the flash memory card. -
Page 32: The Right Side Of The Mini-Note
ini-note User Guide • VGA Port Lets you attach an external monitor or projector for wider display. You can run the LCD display and the external monitor simultaneously or switch it to monitor only using the display hot-key. • USB 2.0 Port The Universal Serial Bus (USB) port allows you to connect USB 2.0- compliant devices (for example, printers, scanners and so on) to your Mini-note. - Page 33 Introduction 5. DC Power Port Right Side Features • ExpressCard Slot A newly developed PC Card interface, its connector has 26 pins and has a potential transfer rate of up to 500 MB/sec (or 250 MB/sec in each direction).4 in 1 card slot •...
-
Page 34: The Underside Of The Mini-Note
ini-note User Guide The Underside of the Mini-note The bottom of the Mini-note offers the following features. 1. Battery Release Latch 2. Hard Disk Compartment 3. Battery Lock Latch 4. Battery Bay Bottom of the System • Battery Release Latch To release the battery, first locate the Battery Lock Latch at the left side in unlock status, then push the Battery Release Latch to the right end to remove the battery pack. -
Page 35: Mini-Note Accessories
Introduction Mini-note Accessories AC Adapter The AC Adapter supplies external power to your Mini-note and charges the internal battery pack simultaneously. The AC adapter has an auto-switching design that can connect to any 100VAC ~ 240VAC power outlets. Change the power cord if you are going to use your Mini-note in countries with different connector outlets. - Page 36 ini-note User Guide This page is intended to be blank.
-
Page 37: Getting Started
Getting Started Getting Started our Mini-note is designed and pre-configured for easy setup and use. This chapter describes the installation steps you should follow to get the Mini- note up and running as quickly as possible. -
Page 38: Using The Battery Pack
ini-note User Guide Using the Battery Pack The Mini-note is designed to operate with one of the following power sources: • With AC power using the AC adapter connected to an electrical outlet. • With a Lithium-Ion (Li-Ion) battery pack. You should use the AC adapter whenever it is possible, relying on the battery pack only when AC power is unavailable. - Page 39 Getting Started Installing the Battery Pack This Mini-note provides the most convenient way to install the battery pack into your Mini-note. With the extended nose directed toward the compartment, insert and push the battery pack. Removing the Battery Pack To remove the battery pack, slide the lock latch to the end of right side to unlock the battery lock latch (1), then slide the battery release latch to the end of left side to release the battery latch (2), and take out the battery pack with your finger (3) simultaneously.
-
Page 40: Extending Battery Life
ini-note User Guide Replacing the Battery Pack When your Mini-note estimates that the battery only has enough charge to continue for a few minutes, it will alert you with a battery low warning beep. If you are consuming a lot of power by using the audio system, and the hard disk drives, your Mini-note might run out of charge much sooner than you expect. -
Page 41: Connecting The Ac Power Source
Getting Started Connecting the AC Power Source The AC adapter provides external power source to your Mini-note and charges the internal battery pack at the same time. The AC adapter also has an auto- switching design that can connect to any 100VAC ~ 240VAC power outlets. To connect the power adapter: Plug the AC power cord into the power socket of the AC power adapter. -
Page 42: Starting Your Mini-Note
ini-note User Guide For the power supply of this equipment, an approved power cord has to be used. Make sure the socket and any extension cord(s) you use can support the total current load of all the connected devices. Before cleaning the Mini-note, make sure it is disconnected from any external power supplies (i.e. -
Page 43: Adjusting The Display Controls
Getting Started already made the necessary settings for your Mini-note optimal operation. Refer to Chapter 6 on running the SETUP program later. After the test has completed, your Mini-note will start to search and boot up the operating system from your hard drive. The Mini-note normally comes with a Windows operating system pre-installed in your hard drive. -
Page 44: Installing Windows Xp From Optical Disk Drive
ini-note User Guide NSTALLING INDOWS FROM PTICAL RIVE To install Windows XP directly from your USB - Slim Combo Drive (optional), please go to Boot menu of BIOS setup menu. Use arrow key to select "CD-ROM Drive", then use "+" or "-" to move it to the top. Go to Exit menu and select "Exit Saving Changes". -
Page 45: Installing The Vga Device Driver
Getting Started Click "Next" to complete it. Tick the option "Yes, I want to restart this computer now.", and press “Finish” to restart your system. VGA D NSTALLING THE EVICE RIVER Following is the procedure for installing the Video Accelerator 3D Adapter VGA driver to your Mini-note: Installing VGA device driver for Windows XP Click the Start button, then point to Run. -
Page 46: Installing The Touch Pad Device Driver
ini-note User Guide Click the Browse button and specify the directory as. "E:\Drivers\WinXP\Audio\Setup.exe" where the audio driver is located. Click "OK" to execute the setup program. The Setup box appears. Click ”Next” continuously to install this driver when screen displays this command. -
Page 47: Installing Bluetooth Device Driver
Getting Started Click Browse button and specify the directory as "E:\Drivers\WinXP\Wireless LAN\Setup.exe" Click "OK" to execute the setup program. The Setup box appears. Click “Next” twice to execute the setup program. Click “Install” to implement setup program to install this driver. Click “Finish”... -
Page 48: Installing The Card Reader Device Driver
ini-note User Guide Installing LAN device driver for Windows Click the Start button, then point to Run. The Run dialog box appears. Click the Browse button and specify the directory as. "E:\Drivers\WinXP\LAN\Setup.exe " Click "OK" to execute the setup program. The Setup box appears. Click "Next”... - Page 49 Getting Started After turning off the Mini-note, make it a habit to leave the LCD panel open for a while whenever used for an extended period of time. This allows the inside parts of the Mini-note to cool off. Closing the panel will force the heat up against the LCD screen, which may degrade the LCD when done regularly.
- Page 50 ini-note User Guide This page is intended to be blank.
-
Page 51: Using Your Mini-Note
Using Your Using Your Mini-note his chapter describes how to operate the standard built-in features of the Mini-note. -
Page 52: Starting Your Operating System
ini-note User Guide Starting Your Operating System The operating system is the software foundation for your Mini-note. It is the platform for all your software application programs to run on. The most popular operating system today is Microsoft® Windows®. The Mini-note comes with an operating system pre-installed and needs only to be setup and configured during initial use. - Page 53 Using Your 1. Function Keys 2. Control Keys 3. Windows Start Menu Key 4. Control Keys 5. Windows Shortcut Key 6. Cursor Control Keys Keyboard Key features and operations are described below: • Function Keys Function keys are application-driven, like F1 through F12 can be found on the keyboard.
-
Page 54: Basic Keyboard Functions
ini-note User Guide • Windows keys Use the following two keys to facilitate your work: Start Menu key Displays the Start menu. Shortcut/Application key Provides quick access to shortcut menus. This key acts like a right mouse button. • Cursor Control keys Cursor control keys let you position the cursor on the screen where you want. - Page 55 Using Your Keypad Function Description <Fn> + <PrtScr> key. Known as the Print Screen key. Press this key to map the whole screen to share memory for your specific usage. <Del> key. Known as the Delete key. Press this key to delete the character to the right of the cursor, or delete marked texts or items.
-
Page 56: Cursor Control Keys
ini-note User Guide Keypad Function Description <Caps Lock> key. Used in most application program to always activate uppercase alphabet characters. <Fn> + <Scroll Lock> key. Used in most application program to scroll the screen without having to move the cursor. URSOR ONTROL Keypad... -
Page 57: Windows Hot Keys
Using Your Keypad Function Description <Fn> + <PgUp> key. Moves the cursor up one screen at a time <Fn> + <PgDn> key. Moves the cursor down one screen at a time <Fn> + <End> key. Moves the cursor to the end of a screen or line. INDOWS Keypad Function Description... - Page 58 ini-note User Guide Keypad Function Description To enable the Bluetooth function. To enable the Wireless LAN function. Switches display between LCD, CRT, or LCD and CRT simultaneously. To enable or disable the Webcam function. To shut down or resume the built-in system speaker volume.
-
Page 59: Using The Touchpad Pointing Device
Using Your Keypad Function Description Increases the audio volume of the Mini- note incrementally. Using the Touchpad Pointing Device Your Mini-note comes with a built-in Touchpad pointing device that is found on the center of the palm-rest surface. The Touchpad offers a number of options that let you customize how it functions. - Page 60 ini-note User Guide 1. Left Selection Button 2. Right Selection Button 3. Touchpad Touchpad Features Here how to use the Touchpad pointing device: The rectangular surface acts like a miniature duplicate of your display screen. To move the mouse cursor, place the finger lightly on the sensor pad and move in the desired direction.
-
Page 61: Configuring Your Screen Display
Using Your To simulate holding the mouse button down (dragging an icon or selection), use the tap-and-drag gesture. This feels much like a double- click, except that the finger remains on the pad after the second tap: Tap, lift, tap, hold and move. The simulated button remains held as long as the finger remains on the pad. -
Page 62: Changing The Display Properties Under Windows
ini-note User Guide Display Possible Resolution Maximum Colors Widescreen 1024 x 600 16 million colors 8.9” WSVGA LCD CRT Only 1920 x1200 16 million colors (Maximum resolution) 65,536 or 64K colors is also equivalent to 16-bit high color while 16 million or 16M colors is equivalent to 32-bit true color. - Page 63 Using Your off power of most components when system is idle or not in use. This feature not only gives you longer battery life but also cools the systems and components as well. The definitions of Standby Mode, Hibernation Mode, and Shutdown are depicted as follows: Standby Mode Standby Mode is mainly for power saving.
-
Page 64: Working With The Built-In Hdd
ini-note User Guide Shutdown All power has been turned off from the Mini-note. This means that no power including external AC power source and battery power source will be consume by the Mini-note. Working with the Built-in HDD Your Mini-note is equipped with a built-in large capacity 1.8 inch hard disk drive where you store and run your Mini-note’s operating system and application software programs. - Page 65 Using Your Only one correct side can be accepted for the 4 in 1 card slot. If you cannot insert the card into the 4 in 1 slot or you had inserted the card but it is not recognized by the computer, please remove the card and insert it again. To prevent the damage made both on card and the slot, never forced an entry into the slot with incorrect side.
- Page 66 ini-note User Guide This page is intended to be blank.
-
Page 67: Fun With Multimedia
Fun with Multimedia Fun with Multimedia his chapter lets you make full use of all the multimedia features of your Mini-note in having fun and excitement during work or leisure. -
Page 68: Multimedia Features
ini-note User Guide Multimedia Features Your Mini-note is rich in multimedia features that make your computing fun, comfortable, exciting and easy. Your Mini-note is well able to perform all multimedia tasks through the following: • Intel ® Atom Processor • Up to 1GB DDRII- SDRAM •... -
Page 69: Setting Up The Audio Driver Properties
Fun with Multimedia Setting up the Audio Driver Properties Before you can start using the audio capabilities of your Mini-note, you need first to setup properly the audio driver after installing Windows. If you bought your Mini-note with Windows pre-installed, it is most likely that your dealer have configured the sound driver for you. -
Page 70: Recording Sounds
ini-note User Guide Figure 4-1 Entertainment Programs Group The standard multimedia components are as follows: • Windows Media Player - for playing sound, video and animation files • Sound Recorder - for recording sounds and playback • Volume Control - for adjusting the volume of mixer For more information on how to operate these multimedia components, run the program and click on the Help menu. - Page 71 Fun with Multimedia be played back through the internal speaker or earphone jack using an external speaker, headphone, or earphone set. You can also use the files as voice annotations on many applications for more real presentation. This section will describe briefly how you can record sounds under Windows operating system.
- Page 72 ini-note User Guide Click Properties in the Options main menu. Click the round button for Recording and tick off each component that list in the "Shows the following Volume Controls" box. Figure 4-3 Audio Properties Click OK and the Recording Control dialog box will appear. Here, you will select the input device for the recording source.
-
Page 73: Using An External Microphone
Fun with Multimedia Figure 4-4 Recording Volume Control SING AN XTERNAL ICROPHONE Your Mini-note allows you to connect an external microphone for high quality recording. The external microphone jack is found on the front side of your Mini-note. Use only microphone with 1/8-inch mini-jack connector. Follow the same procedure for recording voice. -
Page 74: Using The Windows Media Player
ini-note User Guide SING THE INDOWS EDIA LAYER The easiest way to playback multimedia media files is to run the Windows Media Player. Follow these steps: Click on Start, point to Programs, Accessories, and then Entertainment. Click on Windows Media Player to start program. Click on the File menu and select the file you want to play. - Page 75 Fun with Multimedia Figure 4-6 Windows Media Player...
- Page 76 ini-note User Guide This page is intended to be blank.
-
Page 77: Connecting To Peripherals
Connecting to Peripherals Connecting to Peripherals his chapter describes how you attach additional peripheral devices to your Mini-note. The Mini-note allows you to add a printer or mouse; connect an external monitor and keyboard, or other compatible peripheral device. Use of additional devices is described in this chapter. -
Page 78: Using The Usb Port
ini-note User Guide Using the USB Port USB (Universal Serial Bus) is a hardware interface that enables you to connect multiple devices (such as printers, mice, keyboards, storage devices, joysticks, digital cameras, and video conference cameras, etc.) to your Mini-note, and up to 127 devices can be attached. -
Page 79: Using The External Monitor Port
Connecting to Peripherals Using the External Monitor Port Your computer has a 15-pin Monitor port for supporting any external CRT or LCD color monitor. You need a display signal cable (usually provided with the monitor). One end of the cable must have a 15-pin connector for the system. To connect an external monitor: Turn off your computer and make sure the monitor power switch is turned off. -
Page 80: Using The External Audio System
ini-note User Guide Refer to Chapter 3 regarding the possible External CRT resolutions and how to change the display properties. Using the External Audio System At the front side of your Mini-note, you will find the built-in audio ports. You can connect Microphone jacks, earphone or powered speaker. -
Page 81: Using The Wireless Lan
Connecting to Peripherals network (LAN) and supports data transfer rates at 10Mbps and can be up to 100Mbps. The 10Base-T standard also called Twisted Pair Ethernet is connected with RJ-45 connectors. The 100Base-TX is based on the older Ethernet standard. Because it is 10 times faster than Ethernet, it is often referred to as Fast Ethernet. - Page 82 ini-note User Guide Access Point (AP) is the wireless transmission and receiving device, it generally connects to the server of a LAN environment or act as a LAN hub with wireless connection. Access point can be set in an office environment, airport, major railway station, etc.
-
Page 83: Customizing Your Mini-Note
Customizing Your Mi ni-note Mini-note Customizing Your our Mini-note uses the Phoenix BIOS Setup program allowing your system configuration to be altered to best suit your computing needs: User- adjustable options include system time and date, disk drive configuration and password setup. BIOS information stored in the CMOS RAM will remain permanent unless changed. -
Page 84: Running The Bios Setup Program
ini-note User Guide Running the BIOS Setup Program Your Mini-note is setup and pre-configured. The Mini-note’s BIOS (Basic Input-Output System) Setup program may be used to change system configuration information such as the current date and time, or your hard disk drive type. - Page 85 Customizing Your Mi ni-note • Item Specific Help The right side of the screen. This area describes each parameter and its available settings. • Menu Bar The top line of the screen. Each of the five selections displays its own screen.
-
Page 86: Using The Main Menu Setup
ini-note User Guide Using the Main Menu Setup P h o e n i x B I O S S e t u p U t i l i t y Main Advanced Security Boot Exit Item Specific System Time: :54 :32] <Tab>, <Shift- System Date:... - Page 87 Customizing Your Mi ni-note • System Date Allows you to set the system date using the month/date/year format. Enter the current time for reach field and use the <Tab>, <Shift>+<Tab>, or <Enter> key to move from one field or back to another.
-
Page 88: Internal Hdd Sub-Menu
ini-note User Guide 6.2.1 I HDD S NTERNAL P h o e n i x B I O S S e t u p U t i l i t y Main IDE Channel 0 Master [TOSHIBA MK6028GAL- Item Specific Help Type: [Auto] User = you enter... -
Page 89: Using The Advanced Cmos Setup
Customizing Your Mi ni-note Using the Advanced CMOS Setup P h o e n i x B I O S S e t u p U t i l i t y Main Advanced Security Boot Exit Item Specific Help Legacy USB Support [Enabled] Display the diagnostic... -
Page 90: Security Menu Setup
ini-note User Guide Security Menu Setup P h o e n i x B I O S S e t u p U t i l i t y Main Advanced Security Boot Exit Item Specific Help Supervisor Password Is: Clear User Password Is: Clear... -
Page 91: Using The Boot Setup
Customizing Your Mi ni-note • Set User Password This field is only available when Supervisor Password has set. Enter the user password when boot the system or resume from suspend mode. But if the Write Protect is set in the Fixed disk boot sector field, you should enter a supervisor password to access the fixed disk when boot the system or resume from suspend mode. -
Page 92: How To Exit The Setup Program
ini-note User Guide F1 Help Select Item F5/F6 Change Values F9 Setup Defaults Esc Exit --> Select Menu Enter Select Sub-Menu F10 Save and Exit This page allows you to set the search drive sequence where the system will try to boot up first. -
Page 93: How To Upgrade The Bios
Customizing Your Mi ni-note • Exit Discarding Changes Allows you to discard all changes made while running the BIOS setup program and exit from the system setup program. • Load Setup Defaults Lets you load the default values for all setup items. •... - Page 94 ini-note User Guide Press any key to restart this system. Contact your dealer for the latest BIOS update file.
-
Page 95: Using Options
Using Options Using Options his chapter describes the advanced features and expandable architecture in your Mini-note. -
Page 96: Upgrade
ini-note User Guide System Upgrade This section provides some steps in doing system upgrade for your Mini-note. The upgrade procedures include the following: Hard Disk Upgrade Your Mini-note computer offers one 1.8" format, 8 mm height hard disk. If the volume does not fit your need or it is crashed, you can upgrade it by replacing with new hard disk. -
Page 97: Wireless Module Installation
Using Options Cover the lid, then rotate and tighten the screws. Set the boot device as DVD/CD-RW Combo drive and Primary Master as Auto on BIOS setup menu. Please refer to Chapter 6 about the setting of BIOS setup menu. Then, boot the system by using WinXP CD-ROM and the system will detect the hard disk automatically and prompt you how to format the new disk. - Page 98 ini-note User Guide This page is intended to be blank.
-
Page 99: Caring For Your Mini-Note
Caring for Your Notebook Caring for Your Mini- note our Mini-note the latest features in mobile computing and multimedia technology. If properly cared for and maintained, the performance and reliability of the Mini-note can be greatly prolonged. -
Page 100: Important Safety Instructions
ini-note User Guide Important Safety Instructions This section gives you detailed information about how to maintain a safe working environment while using the Mini-note. You can maintain its condition and performance by following these guidelines. Please read it carefully to ensure maximum safety. •... - Page 101 Caring for Your Notebook • Though your AC adapter is suitable for universal international voltage, it still requires a stable and continual power supply. Make sure the voltage of the power source when connect the Mini-note to the power outlet. If your are not sure of your local power specifications, consult your dealer or local power company.
-
Page 102: Cleaning Your Mini-Note
ini-note User Guide • An approved power cord has to be used for the Mini-note power supply. For a rated current up to 6A and an equipment weight more than 3 kg, a power cord not lighter than H05VV-F, 2G, 0.75mm , has to be used. -
Page 103: Maintaining Your Hard Disk
Caring for Your Notebook You should also enable the power management of your Mini-note to turn off the LCD power and display when the system is inactive for some time. Adding a screen saver also helps prolong the life of your Mini-note screen. Follow the safety guidelines mentioned earlier and how to clean your Mini- note. -
Page 104: Battery Care Guidelines
ini-note User Guide Battery Care Guidelines The battery pack furnished with the Mini-note requires reasonable care and handling to ensure efficient operation and maximum life. There is a risk of fire and chemical burn if the battery pack is handled improperly. To ensure that the battery pack endures normal life cycle, always observe the following precautions when handling the battery pack: •... -
Page 105: When You Travel
Caring for Your Notebook When You Travel For safety and convenience when traveling, please follow these instructions: • Back up all needed files on your hard disk before traveling. • Recharge your battery overnight to ensure full battery power before you leave. - Page 106 ini-note User Guide This page is intended to be blank.
-
Page 107: Appendix A System Specification
System Specification APPENDIX A System Specification his appendix provides technical specifications for the Mini-note. - Page 108 ini-note User Guide System Specification ROCESSOR • Intel® Atom microprocessor • 1.6 GHz CPU • 512KB integrated L2 cache for the processor YSTEM EMORY • One 200-pin memory slot • 512MB and 1024MB memory modules using 200-pin SODIMM • DDRII – 533 SDRAM modules LCD D ISPLAY •...
- Page 109 System Specification TORAGE 1.8” Format 8 mm High PATA HDD Module; Bus Mastering, Ultra DMA ATA-66 Support for LBA Scheme UDIO YSTEM • Full-duplex 16-bit stereo speaker with wavetable support • H/W Audio Sound Blaster 16 compatible • Built-in dual speakers •...
- Page 110 ini-note User Guide • 2 x Universal Serial Bus (USB 2.0) • 1 x LAN port • 1 x 4-in-1 card slot IRELESS DEVICES IEEE 802.11b/g, Mini-PCI card AC/DC P OWER UPPLY DAPTER Universal auto-switching (100V~240V) 40W adapter, 20 Volt ATTERY •...
Need help?
Do you have a question about the CW0A1 and is the answer not in the manual?
Questions and answers