
Related Manuals for Salora 19LED2615DW


Summary of Contents for Salora 19LED2615DW
- Page 1 GEBRUIKSAANWIJZING Lees de gebruiksaanwijzing alvorens de TV te gebruiken en houd hem bij de hand voor latere referentie.
-
Page 2: Belangrijke Instructies
BELANGRIJKE INSTRUCTIES Veiligheidsinformatie OPGELET DE DVD/VIDEO CD/CD SPELER IS EEN KLASSE 1 LASERPRODUCT. DE DVD/VIDEO CD/CD SPELER GEBRUIKT EEN ZICHTBARE LASERSTRAAL DIE GEVAARLIJKE BLOOTSTELLING AAN STRALING KAN VEROORZAKEN. ZORG ERVOOR DE DVD/VIDEO CD/CD SPELER TE GEBRUIKEN ZOALS BESCHREVEN IN DE GEBRUIKSAANWIJZING. - Page 3 Het bliksemsymbool in een gelijkbenige driehoek dient om u ervan te verwittigen dat er binnen het toestel gevaarlijke spanningen aanwezig zijn. OPGELET RISICO VAN ELEKTRISCHE SCHOK NIET OPENEN OPGELET: OM HET RISICO OP EEN ELEKTRISCHE SCHOK TE VERMIJDEN MAG HET TOESTEL NIET GEOPEND WORDEN.
- Page 4 Hou het toestel op een bepaalde afstand van magnetische voorwerpen zoals luidsprekers. LASER VEILIGHEID Dit toestel beschikt over een optisch lasersysteem in een CD-mechanisme dat voorzien is van de nodige veiligheidsvoorzieningen. Probeer het niet uit elkaar te nemen. Blootstelling aan de laserstraal kan oogschade veroorzaken.
-
Page 5: Accessoires
Bewaar de disc in zijn doosje als hij niet gebruikt wordt. Als het oppervlak bevuild is Gebruik een zacht en vochtig (alleen water) doekje. Wrijf vanuit het midden naar de rand van de disc zodat er geen vervorming kan ontstaan. (Indien u de disc in een cirkelbeweging reinigt kunnen er cirkelvormige krassen ontstaan die in vervorming resulteren). -
Page 6: Table Of Contents
INHOUD BEGINNEN BELANGRIJKE INSTRUCTIES..................1-4 ACCESSOIRES ......................…4 EIGENSCHAPPEN .......................…6 ALGEMENE ONDERDELEN..................…7-8 AFSTANDSBEDIENING....................9-10 VOORBEREIDING VAN DE AFSTANDSBEDIENING..........…11 BASIS AANSLUITINGEN ..................12-16 BEDIENING BASISBEDIENING .....................17-31 DVD ........................17-24 TV .........................25-31 HOOFDMENU......................32-37 TV MODUS......................3 2 - 3 6 AV EN ANDERE MODI....................36 PC MODUS ........................37 VOOR REFERENTIE... -
Page 7: Eigenschappen
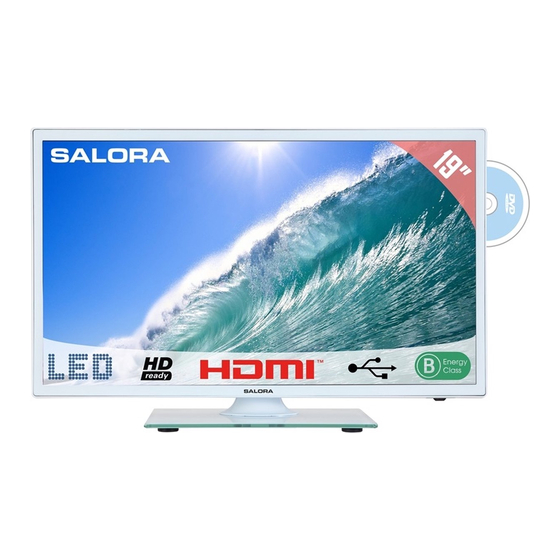
EIGENSCHAPPEN 18.5” TFT SCHERM Dit toestel beschikt over een 18.5” TFT scherm om heldere beelden weer te geven. INGEBOUWDE DVD SPELER AUTOMATISCH TV ZOEKEN (EUROPESE) TELETEKST FUNCTIE USB MULTIMEDIA WEERGAVE ON SCREEN DISPLAY IN MEERDERE TALEN MULTIFUNCTIONELE AFSTANDSBEDIENING INGANGEN: CVBS, AUDIO R/L, HDMI, SCART, PC AUDIO, VGA, YPBPR UITGANGEN: HOOFDTELEFOON, AV OUT (DVD) AFNEEMBARE STEUN VOOR VOET AANSLUITING VOOR EXTERNE ANTENNE... -
Page 8: Algemene Onderdelen
ALGEMENE ONDERDELEN HOOFDEENHEID 1. TFT scherm 2. Infrarood ontvanger / Power indicator: in stand-by licht deze rood op, wanneer het toestel ingeschakeld wordt deze indicator blauw 3. Voetbevestiging 4. VOL +/- toets: om het volume te verhogen of te verlagen of om naar links/rechts te gaan 5. - Page 9 ALGEMENE ONDERDELEN HOOFDEENHEID 1. Stroomtoevoer 2. CVBS en AUDIO L/R ingangen 3. HDMI ingang 4. SCART ingang 5. PC AUDIO ingang 6. VGA ingang 7. AV OUT uitgang, alleen voor DVD modus 8. USB1 aansluiting voor multimediaweergave in TV modus 9.
-
Page 10: Afstandsbediening
AFSTANDSBEDIENING AAN/UIT: Het apparaat op stand-by modus schakelen; nogmaals indrukken om in te schakelen. AUTO: Het scherm automatisch afstellen (PC/VGA); : De diskhouder openen of sluiten (DVD). RODE toets (TV) PROG: Programmeermenu openen (DVD). GROENE toets (TV) INTRO: Huidig afspelende CD scannen. BLAUWE toets (TV) A-B: Segment tussen twee specifieke punten herhalen (DVD) - Page 11 AFSTANDSBEDIENING : Het afspelen starten of pauzeren. : Vooruitspoelen. : Terugspoelen. 19. MEDIA: Druk meerdere keren op deze toets om het toestel te wisselen tussen DISK, USB en KAART in DVD modus. 20. █ : Het afspelen stoppen. : Volgende hoofdstuk afspelen. : Vorige hoofdstuk afspelen.
-
Page 12: Voorbereiding Van De Afstandsbediening
VOORBEREIDING AFSTANDSBEDIENING PLAATSEN VAN DE BATTERIJEN Plaats de batterijen zoals getoond in onderstaande illustratie en zorg ervoor dat de + en – geplaatst worden zoals aangeduid in het batterijencompartiment (fig. 1) LEVENSDUUR VAN DE BATTERIJEN De batterijen gaan gewoonlijk een jaar mee, maar dit hangt af van hoeveel de afstandsbediening gebruikt wordt. -
Page 13: Basis Aansluitingen
BASIS AANSLUITINGEN Zorg ervoor dat er geen kabels zijn aangesloten alvorens het toestel op netstroom aan te sluiten. Lees de instructies alvorens andere toestellen aan te sluiten. AANSLUITEN VAN DE NETSTROOM Hoofdtoestel Stopcontact AC Adapter AANSLUITEN VAN EXTERNE ANTENNE Sluit een externe antenne aan om te genieten van de beste beeldkwaliteit. - Page 14 COMPOSIET AV (CVBS) AANLSUITING Voor basisaansluiting, gebruik de composiet AV kabel Audio L/R (wit/rood) en CVBS (geel) kabel voor aansluiting van andere toestellen. Achterkant van DVD/VCR COMPONENT (YPbPr) AANSLUITING YPbPr kabel Audio kabel Achterkant van DVD/VCR...
- Page 15 HDMI AANSLUITING Sluit de HDMI kabel aan andere HDMI kabel apparaten aan om een high-definition multimedia signaal te ontvangen. Achterkant van DVD/VCR SCART AANSLUITING SCART kabel Achterkant van DVD/VCR...
- Page 16 PC/VGA AANSLUITING Achterkant Gebruik een VGA kabel en Audio kabel van PC een audio kabel om op de TV een PC aan te sluiten en de TV als monitor te gebruiken. kabel COMPOSIET AV UITGANG (CVBS UITGANG VOOR DVD MODUS) AV kabel Externe display...
- Page 17 AANSLUITING HOOFDTELEFOON Kabel hoofdtelefoon USB AANSLUITING (TV) USB AANSLUITING (DVD)
-
Page 18: Basisbediening
ZORG ERVOOR DAT ALLE TOESTELLEN EN DE AC ADAPTER GOED ZIJN AANGESLOTEN EN HET TOESTEL IN DE CORRECTE MODUS STAAT BASIS BEDIENING - Druk op de POWER toets van de afstandsbediening om het toestel in te schakelen (de indicator wordt blauw); druk opnieuw om het toestel in stand-by te zetten (indicator wordt rood). - Page 19 4. Snel voorwaarts/achterwaarts Druk tijdens de weergave op of om snel voorwaarts of achterwaarts te zoeken. Druk op (PLAY) om terug tot een normale weergave te gaan. 5. Pauze/weergave Druk tijdens de weergave op om de weergave te pauzeren en druk opnieuw om verder te gaan met normale weergave.
- Page 20 c) De nummers in de folder worden getoond. Gebruik de navigatietoetsen om een nummer te kiezen en druk op (PLAY) om de weergave te starten, of druk op OK. d) Gebruik de of toetsen om de volgende of vorige menupagina weer te geven. e) Druk op REPEAT van de afstandsbediening om de weergavemodus te kiezen: - SINGLE: weergave van één enkel nummer - REPEAT ONE: herhaling van het nummer...
- Page 21 Foto’s spiegelen Druk op de navigatietoets naar boven om de foto verticaal te spiegelen. Druk op de navigatietoets naar onderen om de foto horizontaal te spiegelen. Beelden in- en uitzoomen Druk op ZOOM om het beeld te verkleinen of vergroten tot 50%, 75%, 100%, 125%, 150% en 200%.
- Page 22 e) Gebruik of om naar de volgende of de vorige menupagina te gaan. f) Druk op REPEAT van de afstandsbediening om de weergavemodus te kiezen: - SINGLE: weergave van één enkel nummer - REPEAT ONE: herhaling van het nummer - REP DIR: alle nummers in de folder worden herhaald.
- Page 23 13. Programma weergave a) Druk op de PROG toets en het scherm toont het programmeermenu. b) Gebruik de navigatietoetsen om een geheugenindex te kiezen en druk op OK om met het programmeren te beginnen. Breng de gewenste nummers van de titels/hoofdstukken in via de navigatietoetsen.
- Page 24 18. Wijzigen van de gesproken taal (DVD/VCD/CD) Het is mogelijk de gesproken taal te wijzigen ten opzichte van de originele instelling. (Dit werkt alleen met discs die meerdere gesproek talen voorzien). - Druk tijdens de weergave op AUDIO om de gewenste en beschikbare taal te kiezen. OPMERKING: als er geen gesproken taal is opgenomen, heeft deze toets geen functie.
- Page 25 2. AUDIO Downmix - gebruikt om de audio uitgangsmodus te kiezen. Opties: a) LT/RT - links/rechts gemengd b) STEREO 3. VOORKEUREN 3.1 TV systeem - selecteer het gewenste TV-systeem. 3.2 Audio systeem - selecteer de gewenste gesproken taal bij disc met meerdere talen. 3.3 Ondertitels - selecteer de taal voor ondertitels bij een disc met meerdere talen.
- Page 26 - Druk op de TV/AV toets van de afstandsbediening op het toestel in TV modus te zetten DE GEWENSTE ZENDER KIEZEN 1. Druk op CH+ om naar de volgende zender te gaan. 2. Druk op CH- om naar de vorige zender te gaan. 3.
- Page 27 INSTELLEN VIDEOFORMAAT Druk op ASPECT om het videoformaat direct in te stellen. Beschikbare mogelijkheden: Auto, 4:3, 16:9, Zoom1, Zoom2, PAL+ OPMERKING: het beschikbare formaat hangt af van de ingangsbron. GELUIDSINSTELLING Druk op NICAM om de gewenste geluidsinstelling te kiezen OPMERKING: afhankelijk van de zender kan deze toets verschillende opties bieden. INFORMATIESCHERM Druk op DISPLAY om informatie over de zender op te roepen, zoals zendernummer, kleursysteem, geluidsysteem, enz.
- Page 28 MEDIA AFSPELEN - Steek de USB geheugenapparaat in de USB1 poort. - Druk op de TV/AV knop op het apparaat of op de afstandsbediening om dit apparaat op Mediamodus te schakelen. - Druk op de VERLATEN knop op de afstandsbediening om terug te keren naar de vorige menupagina.
- Page 29 - Druk op de RODE knop om een dialoogvenster te openen en druk op de LINKSE of RECHTSE navigatieknop om het item al dan niet te wissen. - Druk op de OK knop om het gemarkeerde bestand af te spelen. Tijdens normale weergave van FOTO’S: - Druk op de DISPLAY knop op de afstandsbediening om de taakbalk te openen/verbergen.
- Page 30 - Druk op de RODE knop om een dialoogvenster te openen en druk op de LINKSE of RECHTSE navigatieknop om het item al dan niet te wissen. - Druk op de OK toets om het gemarkeerde bestand af te spelen. Tijdens normaal afspelen van MUZIEK: - Druk op de LINKSE/RECHTSE navigatieknop om de gewenste optie te selecteren in de taakbalk en druk ter bevestiging op de OK knop.
- Page 31 - Druk op de RODE knop om een dialoogvenster te openen en druk op de LINKSE of RECHTSE navigatieknop om het item al dan niet te wissen. - Druk op de OK toets om het gemarkeerde bestand af te spelen. Tijdens normale weergave van FILMS: - Druk op de DISPLAY knop op de afstandsbediening om de taakbalk te openen/verbergen.
- Page 32 4. TEKST - Druk op de LINKSE of RECHTSE navigatieknop om het TEKST item te selecteren. - Druk op de OK knop om het te openen en druk op de LINKSE of RECHTSE navigatieknop om de gewenste disk te selecteren. - Druk op de OK knop om het te openen en gebruik de navigatieknoppen om de gewenste folder te selecteren.
-
Page 33: Hoofdmenu
HOOFDMENU ● Dit toestel beschikt over verschillende instelmenus. Eens de instellingen gedaan blijven deze in het geheugen en zorgen er aldus voor dat het toestel steeds onder dezelfde condities functioneert. ● De instellingen blijven in het geheugen (zelfs als het toestel in stand-by gezet wordt) totdat u ze terug wijzigt. - Page 34 1.2 Handmatig afstemmen - Gebruik de UP/DOWN navigatietoetsen om dit item aan te duiden en druk op OK om in het menu te gaan. - Gebruik de UP/DOWN navigatietoetsen om de tweede optie te kiezen. - Gebruik de LINKSE/RECHTSE navigatietoetsen om de regeling te beginnen.
- Page 35 2.1 Beeldmodus Beschikbare opties: gebruiker, dynamisch, standaard, zacht. OPMERKING: de instellingen van contrast, helderheid, kleur, tint en scherpte zijn beschikbaar als ‘gebruiker’ is gekozen. 2.2 Contrast De waarde van het contrast kan ingesteld worden tussen 0-100. 2.3 Helderheid De waarde van de helderheid kan ingesteld worden tussen 0-100. 2.4 Kleur De waarde van de kleur kan ingesteld worden tussen 0-100.
- Page 36 3.1 Geluidmodus Beschikbare opties: standaard, muziek, film, sport, gebruiker. OPMERKING: de instellingen van hoge en lagen tonen is mogelijk als ‘gebruiker’ is gekozen. 3.2 Hoge tonen De waarde van de hoge tonen kan ingesteld worden tussen 0-100. 3.3 Lage tonen De waarde van de lage tonen kan ingesteld worden tussen 0-100.
-
Page 37: Av En Andere Modi
5. OPTIES 5.1 OSD taal Om de taal van OSD in te stellen. 5.2 Teletekst taal Om de taal van teletekst in te stellen. 5.3 Beeldverhouding Beschikbare opties: auto, 4:3, 16:9, Zoom1, Zoom2, PAL+ OPMERKING: dit kan volgens het beschikbaar signaal soms niet instelbaar zijn. 5.4 Blauw scherm Om de blauwe achtergrond in of uit te schakelen. -
Page 38: Pc Modus
PC MODUS - Schakel de computer en de TV in. - Sluit de computer aan via een VGA kabel. - Druk op de TV/AV toets om PC modus te selecteren. - Druk op MENU om in het hoofdmenu te komen en gebruik de LINKSE/RECHTSE navigatietoetsen om SCHERM aan te duiden. -
Page 39: Onderhoud
ONDERHOUD ● Schakel het toestel in stand-by en trek de stekker uit het stopcontact alvorens het toestel te onderhouden. ● Reinig met een droog en zacht doekje. ● Als de behuizing erg vuil is, gebruik een doekje dat ondergedompeld is in een water/zeep solutie en voldoende is uitgewrongen. -
Page 40: Installatie Van De Voet
INSTALLATIE VAN DE VOET Bij uw toestel wordt een aparte voet meegeleverd. Gelieve de volgende instructies te volgen voor het monteren van de voet alvorens de TV in gebruik te nemen. Stap 1 Plaats de TV met het beeld omlaag op een zachte doek of een kussen om paneelbeschadiging te voorkomen. -
Page 41: Specificaties
SPECIFICATIES Scherm 18.5 inch LED TV Resoutie 1366×768 Pixelgrootte 0.1(H)×0.3(V)mm Luminantie 200 cd/m2 Contrastverhouding 1000:1 Beeldschermverhouding 16:9 Reactietijd 9 ms Kijkhoek 176(H)/176(V) Zichtbaar bereik 409.8(H)×230.4(V)mm Levensduur 30,000 uur Film: AVI, MP4, TS, MPG, MKV/MOV, DAT, VOB, RM/RMVB MULTIMEDIA WEERGAVE FORMATEN Muziek: MP3, AAC (TV MODUS) USB1 Foto: JPG/JPEG, BMP, PNG... -
Page 42: In Geval Van Problemen
IN GEVAL VAN PROBLEMEN Gebruik onderstaande lijst voor het oplossen van mogelijke problemen. Probleem OPLOSSING (ALGEMEEN) Geen voeding Stop de stekker stevig in het stopcontact. Geen beeld Controleer of alles goed is aangesloten. Controleer of alles goed is aangesloten Geen geluid Controleer of de ingangselectie van de TV en het stereo Vervormd geluid systeem overeenkomen. -
Page 43: Instelling Regionale Code
IN GEVAL VAN PROBLEMEN Probleem (DVD) Oplossing Weergave start niet, Controleer of de regionale code overeenkomt zelfs niet na selectie van de titel De initieel ingestelde De initieel ingestelde talen zijn niet beschikbaar op de disc, talen voor audio en alleen die op de disc kunnen gebruikt worden. - Page 44 INSTRUCTION MANUAL Read all of the instructions before using this TV and keep the instruction manual in a safe place for future reference.
-
Page 45: Important Instructions
IMPORTANT INSTRUCTIONS Safety information CAUTION: DVD/VIDEO CD/CD PLAYER IS A CLASS 1 LASER PRODUCT. HOWEVER THIS DVD/VIDEO CD/CD PLAYER USES A VISIBLE LASER BEAM WHICH COULD CAUSE HAZARDOUS RADIATION EXPOSURE IF DIRECTED. BE SURE TO OPERATE THE DVD/VIDEO CD/CD PLAYER CORRECTLY AS INSTRUCTED. WHEN THIS DVD/VIDEO CD/CD PLAYER IS PLUGGED TO THE WALL OUTLET, DO NOT PLACE YOUR EYES CLOSE TO THE OPENING OF THE DISC TRAY AND OTHER OPENINGS TO LOOK INTO THE INSIDE OF THIS PLAYER. - Page 46 Read all instructions before using Do not use this product near water. Install the product in accordance with the operating instructions. Do not set the product near heat sources, such as radiators, heat registers, stoves, or other apparatus (including amplifiers) that produce heat. ...
-
Page 47: Accessories
DISC Handling and Maintenance Handling precautions Hold the disc by the edges so the surface will not be soiled with fingerprints. Fingerprints, dirt and scratches can cause skipping and distortion. Do not write on the label side with a ball-point pen or other writing utensils. ... - Page 48 TABLE OF CONTENTS GETTING STARTED IMPORTANT INSTRUCTIONS...................1-3 ACCESSORIES......................3 FEATURES........................5 GENERAL PARTS......................6-7 REMOTE CONTROL....................8-9 REMOTE CONTROL PREPARATION.................10 BASIC CONNECTION....................11-15 OPERATIONS BASIC OPERATIONS.....................16-30 DVD........................16-23 TV........................24-30 MAIN MENU......................31-36 TV MODE......................31-35 AV AND OTHER MODES..................35 PC MODE.........................36 FOR REFERENCE MAINTENANCE......................37 WALL MOUNTING……………………………………………………………………..……37 STAND INSTALLATION………………………………………………………………..……38 SPECIFICATIONS.......................39 TROUBLESHOOTING....................40-41 REGION CODE SETTING………………………………………………………………….41...
-
Page 49: Features
FEATURES 18.5" TFT DISPLAY This player has a built-in 18.5” TFT display window to provide clear vision and low radiation. WITH BUILT-IN DVD PLAYER SUPPORT AUTO TV SCANNING SUPPORT TELETEXT (EUROPE) FUNCTION SUPPORT USB MULTIMEDIA PLAYBACK SUPPORT MULTI-LANGUAGES ON SCREEN DISPLAY SUPPORT FULL FUNCTION REMOTE CONTROL SUPPORT CVBS, AUDIO R/L, HDMI, SCART, PC AUDIO, VGA AND YPBPR INPUT SUPPORT EARPHONE, AV OUT (DVD) OUTPUT... -
Page 50: General Parts
GENERAL PARTS MAIN UNIT 1. TFT display screen 2. Remote control sensor \ Power indicator- In standby mode the indicator light will display red color; when switching on the unit the indicator light will display blue color. 3. Stand holder 4. - Page 51 GENERAL PARTS MAIN UNIT 1. Power input 2. CVBS and AUDIO L/R input terminals 3. HDMI input terminal 4. SCART input terminal 5. PC AUDIO input terminal 6. VGA input terminal 7. AV output terminal (DVD mode only) 8. USB1 slot - For multimedia playback in TV mode. 9.
-
Page 52: Remote Control
REMOTE CONTROL POWER: To set the unit in standby mode; press it again to switch it on. AUTO: To adjust the screen automatically (PC/VGA); : To open or close the disc compartment (DVD). RED button (TV) PROG: To enter program menu page (DVD). GREEN button (TV) INTRO: To scan current played CD. - Page 53 REMOTE CONTROL : To play or pause playing. : To move fast forward. : To move fast backward. 19. MEDIA: Switch this unit among DISC/USB/CARD playback (DVD). 20. █ : To stop playing. : To play next chapter. : To play previous chapter. 23.
-
Page 54: Remote Control Preparation
REMOTE CONTROL PREPARATION BATTERY INSTALLATION Install the batteries as the following pictures. Be sure + and – terminals are positioned as indicated in the battery compartment (Fig1). SERVICE LIFE OF BATTERIES - The batteries normally last for one year although this depends on how often the remote control is used. -
Page 55: Basic Connection
BASIC CONNECTION ● Ensure all the cables are disconnected from the main unit before connecting to AC power source. ● Read through the instructions before connecting other equipments. CONNECTING TO AC POWER SOURCE Main unit To power outlet AC Adaptor CONNECT EXTERNAL ANTENNA TO UNIT Install external antenna into antenna jack for best picture. - Page 56 COMPOSITE AV (CVBS) CONNECTION For basic connection, use the composite Audio L/R (white/red) and AV cable CVBS (yellow) cable to connect the unit with other devices. Back of DVD/VCR COMPONENT (YPbPr) CONNECTION YPbPr cable AUDIO cable Back of DVD/VCR...
- Page 57 HDMI CONNECTION Use HDMI cable to connect HDMI cable the unit with other devices to receive high-definition multimedia signal. Back of DVD/VCR SCART CONNECTION SCART cable Back of DVD/VCR...
- Page 58 PC/VGA CONNECTION Use VGA cable and Audio Audio cable cable to connect the unit with Back of PC TV or PC, and use this product VGA cable as a monitor. COMPOSITE AV OUT (CVBS OUTPUT FOR DVD MODE) CONNECTION AV cable External Display Device...
- Page 59 CONNECT EARPHONE TO THE UNIT EARPHONE cable USB CONNECTION (TV) USB CONNECTION (DVD)
-
Page 60: Basic Operations
MAKE SURE ALL THE EQUIPMENTS AND AC ADAPTOR ARE CONNECTED PROPERLY AND THE UNIT IS SET IN CORRECT MODE BEFORE KINDS OF OPERATIONS. BASIC OPERATIONS - Press POWER button on the unit or remote control to power ON the unit (indicator will glow blue);... - Page 61 4. Fast forward/Fast backward During playback, press button or button to fast forward/backward. Press (PLAY) button to resume normal play. 5. Pause/play During playback, press button to pause playing, press it again to resume normal playback. 6. Music playback a) Insert the disc which contains music files and after a few seconds, the screen will show all the folders on the disc.
- Page 62 d) During normal playing, press button, the player will play the next or previous file. e) Press REPEAT button to change play mode. - SINGLE: play one file only. - REPEAT ONE: repeat one file. - REP DIR: all the files in the folder will be played repeatedly. - FOLDER: all the files in the folder will be played.
- Page 63 Picture Shrink/Zoom Press ZOOM button repeatedly to enlarge or shrink picture to 50%, 75%, 100%, 125%, 150% and 200%. NOTE: If the picture is enlarged, you may press navigation buttons to pan across other portions of the picture. Slideshow effects Press PROG button on remote control repeatedly to select desired effects.
- Page 64 e) In file selecting page, press button to turn the current menu page to the next or previous menu page. f) Press REPEAT button to change play mode. - SINGLE: play one file only. - REPEAT ONE: repeat one file. - REP DIR: all the files in the folder will be played repeatedly.
- Page 65 13. Program play a) Press PROG button and the screen will display the program menu. b) Press navigation buttons to choose memory index and then press OK button to start input. Enter desired titles/chapters numbers by using the numeric buttons. The selected titles/ chapters are stored into the memory.
- Page 66 18. Changing audio soundtrack language (DVD/VCD/CD disc) It is possible to change the audio soundtrack language to a different language from the one selected at the initial settings (This operation works only with discs on which multiple audio soundtrack languages are recorded). - When playing a disc, press AUDIO button to select desired and available soundtrack or soundtrack language.
- Page 67 2. AUDIO Downmix - It is used to select desired audio output mode. Options: a) LT/RT-Left/Right mix mode b) STEREO 3. PREFERENCE 3.1 TV System - Select desired TV system. 3.2 Audio - Select desired audio language, if your disc contains multiple audio languages. 3.3 Subtitle - Select desired subtitle language, if your disc contains multiple subtitle languages.
- Page 68 - Press TV/AV button on the unit or remote control to set the unit in TV mode. SELECT DESIRED PROGRAM 1. Press CH+ button to play next channel. 2. Press CH- button to play previous channel. 3. Press number buttons on remote control directly to select desired program. NOTE: Press -/-- button repeatedly to switch the digit when selecting multiple digit channels.
- Page 69 SOUND SETTING - Press NICAM button on remote control repeatedly to select desired soundtrack. NOTE: In different channels, pressing NICAM button may have different options. INFORMATION DISPLAY - Press DISPLAY button on remote control to display related information of your channel, including channel number, color system, sound system and so on.
- Page 70 MEDIA PLAYBACK - Insert a USB memory device into USB1 slot. - Press TV/AV button on the unit or remote control to switch this unit to Media mode. - Press EXIT button on remote control to return to previous menu page. 1.
- Page 71 - Press RED button to enter a dialog box, and press LEFT or RIGHT navigation button to decide whether delete it or not. - Press OK button to play highlighted file. During PHOTO normal playing: - Press DISPLAY button on remote control to display/hide the tool bar. - Press LEFT/RIGHT navigation buttons to select desired option and press OK button to confirm it.
- Page 72 - Press RED button to enter a dialog box, and press LEFT or RIGHT navigation button to decide whether delete it or not. - Press OK button to play highlighted file. During MUSIC normal playing: - Press LEFT or RIGHT navigation button to select desired option in the tool bar, and press OK button to confirm selection.
- Page 73 - Press RED button to enter a dialog box, and press LEFT or RIGHT navigation button to decide whether delete it or not. - Press OK button to play highlighted file. During MOVIE normal playing: - Press DISPLAY button on remote control to display/hide the tool bar. - Press LEFT or RIGHT navigation button to select desired option in the tool bar, and press OK button to confirm selection.
- Page 74 4. TEXT - Press LEFT or RIGHT navigation button to select TEXT item. - Press OK button to enter it and press LEFT or RIGHT navigation button to select desired disk. - Press OK button to enter it and press navigation buttons to select desired folder. - Press OK button to enter it and press navigation buttons to select desired Text file.
-
Page 75: Main Menu
MAIN MENU ● The unit contains different setting menus. Once the initial programming is entered, it will be remained in the memory until change, and the unit can always be operated under the same conditions. ● The settings will be remained in the memory until the settings are changed ever after setting the player to standby mode. - Page 76 1.2 ATV Manual Tuning - Press UP or DOWN navigation button to select this item, and press OK button to enter it. - Press UP or DOWN navigation button to select the second option. - Press LEFT or RIGHT navigation button to adjust 1.3 Programme Edit - Press UP or DOWN navigation button to select this item, and press OK button to enter it.
- Page 77 2.1 Picture Mode Available options: User, Dynamic, Standard, Mild. NOTE: The value of Contrast, Brightness, Colour, Tint and Sharpness is adjustable only when Picture Mode is User. 2.2 Contrast The value of contrast can be adjusted from 0-100. 2.3 Brightness The value of brightness can be adjusted from 0-100.
- Page 78 3.1 Sound Mode Available options: Standard, Music, Movie, Sports, User. NOTE: The value of Treble and Brass is adjustable only when Sound Mode is User. 3.2 Treble This item is used to adjust the level of higher-pitched sounds from 0-100. 3.3 Bass This item is used to adjust the level of lower-pitched sounds from 0-100.
-
Page 79: Av And Other Modes
5. OPTION 5.1 OSD Language This item is used to select desired On Screen Display language. 5.2 TT Language This item is used to select desired TT language. 5.3 Aspect Ratio Available options: Auto, 4:3, 16:9, Zoom1, Zoom2, PAL+. NOTE: Aspect Ratio may not be adjustable if no available signals are present. 5.4 Blue Screen This item is used to set the blue background ON or OFF. -
Page 80: Pc Mode
PC MODE - Power on your computer and this TV. - Connect your computer to this TV using a VGA cable. - Press TV/AV button on the unit or remote control to switch this unit to PC mode. - Press MENU button to display the main menu and press LEFT or RIGHT navigation button to select SCREEN. -
Page 81: Maintenance
MAINTENANCE ● Be sure to press POWER button to set the player to the standby mode and disconnect the AC adaptor before maintaining the player. ● Wipe the player with a dry, soft cloth. ● If the surface is extremely dirty, wipe clean with a cloth which has been dipped in a weak soap-water solution and wrung out thoroughly, and then wipe again with a dry cloth. -
Page 82: Stand Installation
STAND INSTALLATION Your TV is packaged with the Stand and the Cabinet separated. Before enjoying this TV, please carry out the Stand Installation according to the instructions below. Step 1 Place the TV faced down on a soft cloth or cushion to prevent the panel from being damaged. -
Page 83: Specifications
SPECIFICATIONS Display Device 18.5 inch LED TV Resolution 1366×768 0.1(H)×0.3(V)mm Pixel Pitch Luminance 200 cd/m2 Contrast Ratio 1000:1 Aspect Ratio 16:9 Response Time 9 ms Viewing Angle 176(H)/176(V) 409.8(H)×230.4(V)mm Visible Range 30,000 Hrs Life Time Movie: AVI, MP4, TS, MPG, MKV/MOV, DAT, VOB, RM/RMVB USB1 MULTIMEDIA Music: AAC PLAYBACK FORMAT... -
Page 84: Troubleshooting
GENERAL TROUBLESHOOTING Check the following points before assuming malfunctions of this unit: Symptom[COMMON] Remedy No power. Insert the adaptor securely into the power outlet. No picture. Ensure that the equipment is connected properly. ● Ensure that the equipment is connected properly. ●... -
Page 85: Region Code Setting
GENERAL TROUBLESHOOTING ● An alternative language is not selected with discs which Alternative audio do not contain more than one language. soundtrack (or subtitle) ● In the case of some discs, the alternative language can languages fail to be not be selected by operating the LANGUAGE or SUBTITLE selected. - Page 86 MANUEL D’INSTRUCTION Lisez le manuel d’utilisation avant d’utiliser le TV et gardez-le pour consultation ultérieure.
- Page 87 INSTRUCTION IMPORTANTES Information de sécurité ATTENTION LE LECTEUR DVD/VIDEO CD/CD EST UN PRODUIT LASER CLASSE 1. LE LECTEUR DVD/VIDEO CD/CD UTILISE UN RAYON LASER VISIBLE QUI POURRAIT CAUSER UNE RADIATION DANGEREUSE. UTILISEZ LE LECTEUR DVD/VIDEO CD/CD COMME INDIQUE DANS LES INSTRUCTIONS QUAND LE LECTEUR DVD/VIDEO CD/CD EST CONNECTE AU COURANT SECTEUR NE REGARDEZ PAS DANS L’OUVERTURE DU COMPRATIMENT DISQUE OU DANS LES AUTRES OUVERTURES DU LECTEUR.
- Page 88 L’isez toutes les instructions avant utilisation Ne pas utiliser l’appareil à côté d’eau. Installez l’appareil en suivant les instructions. Ne placez pas l’appareil à côté des sources de chaleurs telles que radiateurs, poêle, ou autres appareils (y compris amplificateurs) qui produisent de la chaleur. Evitez qu’on puisse marcher sur le câble courant secteur.
- Page 89 Traitement et entretien des discs Traitement Tenez le disc avec le bord pour ne pas pour ne pas mettre des empreintes sur la surface. Les empreintes et des griffes peuvent causer une distorsion. N’écrivez pas avec un stylo ou autre instrument sur la face label. ...
- Page 90 SOMMAIRE COMMENCER INSTRUCTIONS IMPORTANTES................1-3 ACCESSORIES......................3 CARACTERISTIQUES....................5 COMMANDES ET CONNEXIONS APPAREIL……............6-7 TELECOMMANDE…....................8-9 PREPARATION DE LA TELECOMMANDE..............10 CONNEXTIONS DE BASE..................11-15 COMMANDES OPERATION DE BASE..................16-30 DVD........................16-23 TV........................24-30 MENU PRINCIPAL....................31-36 MODE TV......................31-35 AV ET AUTRES MODES..................35 MODE PC.........................36 REFERENCES ENTRETIEN......................37 MONTAGE AU MUR…………………………………………………………………..……37 INSTALLATION DU PIED……………………………………………………………..……38 SPECIFICATIONS.......................39 EN CAS DE PROBLEMES..................40-41 CODE REGIONAL………….……………………………………………………………….41...
-
Page 91: Caracteristiques
CARACTERISTIQUES ECRAN 18.5’’ TFT Cet appareil possède un écran 18.5’’ TFT pour offrir des images claires avec radiation minimale. LECTEUR DVD INCORPORE SYNTONISATION AUTOMATIQUE DES EMETTEURS FONCTION TELETEXTE LECTURE USB MULTIMEDIA AFFICHAGE ECRAN MULTI-LANGUES TELECOMMANDE MULTI-FONCTIONS ENTREES CVBS, AUDIO L/R, HDMI, SCART, PC AUDIO, VGA, YPBPR SORTIES CASQUE, AV OUT (DVD) PIED AMOVIBLE ENTREE ANTENNE... - Page 92 COMPOSANTS UNITE PRINCIPALE 1. Ecran TFT 2. Récepteur infrarouges / Indicateur puissance – en mode standby l’indicateur s’allume en rouge; quand l’appareil est en fonction l’indicateur devient bleu 3. Pied 4. VOL+/- Pour augmenter ou diminuer le volume ou pour bouger gauche/droite 5.
- Page 93 COMPOSANTS UNITE PRINCIPALE 1. Connexion alimentation 2. Entrées CVBS et AUDIO L/R 3. Entrée HDMI 4. Entrée SCART 5. Entrée Audio PC 6. Entrée VGA 7. Sortie AV OUT uniquement en mode DVD 8. Connexion USB1 pour lecture multimédia (TV) 9.
-
Page 94: Telecommande
TÉLÉCOMMANDE MARCHE/ARRET: Pour mettre l'unité en veille ou en marche. AUTO: Pour ajuster l'écran automatiquement (en mode PC/VGA); : Pour ouvrir et fermer le compartiment de disque. Bouton ROUGE (TV) PROG : Pour entrer dans le menu de programmation (DVD) Bouton VERT (TV) INTRO : Pour effectuer une recherche sur le CD en cours. - Page 95 TÉLÉCOMMANDE : Pour mettre en pause ou lire. : Pour avance rapide. : Pour retour rapide. 19. MÉDIA : Appuyez sur ce bouton pour basculer entre les modes DISQUE, USB et CARTE en mode DVD. 20. █ : Pour arrêter la lecture. : Pour aller au chapitre suivant.
-
Page 96: Preparation De La Telecommande
PREPARATION DE LA TELECOMMANDE INSTALLATION DES PILES Insérez les piles comme montré dans les illustrations suivantes. Faites attention à la position + et – comme indiqué dans le compartiment à piles (Fig1). DUREE DE VIE DES PILES - Normalement les piles ont une durée de vie d’un an, mais ceci dépend du nombre de fois que la télécommande est utilisée. -
Page 97: Connextions De Base
CONNEXIONS DE BASE ● Faites attention que tous les câbles sont déconnectés de l’appareil avant de brancher le courant secteur. ● Lisez les instructions avant de connecter les autres appareils. CONNEXION COURANT SECTEUR Appareil Prise courant secteur Adaptateur AC CONNEXION ANTENNE EXTERIEURE Connectez l’antenne extérieur pour obtenir une réception optimale. - Page 98 CONNEXION COMPOSITE AV (CVBS) Pour connexion de base, utilisez le câble composite Audio L/R Câble AV (blanc/rouge) et CVBS (jaune) pour connexion avec d’autres appareils Dos du DVD/VCR CONNEXION COMPOSANTS (YPbPr) Cable YPbPr Cable audio Dos du DVD/VCR...
- Page 99 CONNEXION HDMI Utilisez un câble HDMI pour connecter d’autres Câble HDMI appareils et pour recevoir des signaux multimédia en haute définition. Dos du DVD/VCR CONNEXION SCART Câble SCART Dos du DVD/VCR...
- Page 100 CONNECXION PC/VGA Utilisez un câble VGA et audio Câble audio pour connecter le PC et utiliser Dos du PC l’appareil comme moniteur. Câble CONNEXION SORTIE AV (SORTIE CVBS EN MODE DVD) Câble AV Ecran externe...
- Page 101 CONNEXION CASQUE D’ECOUTE Câble du casque d’écoute CONNEXION USB (TV) CONNEXION USB (DVD)
-
Page 102: Operation De Base
ASSUREZ-VOUS QUE TOUS LES APPAREILS ET L’ADAPTATEUR COURANT SECTEUR SONT BIEN CONNECTES ET QUE L’APPAREIL EST MIS EN MODE CORRECT AVANT DE COMMENCER LES OPERATIONS OPERATIONS DE BASE - Pousez le bouton POWER sur la télécommande pour mettre l’appareil en fonction (l’indicateur devient bleu);... - Page 103 4. Avancement rapide en avant/en arrière Pendant la lecture poussez ou pour un avancement rapide en avant ou en arrière. Poussez II pour revenir à la lecture normale. 5. Pause/lecture Pendant la lecture poussez II pour pauser la lecture ; repoussez pour continuer la lecture.
- Page 104 d) Pendant la lecture, utilisez ou pour aller vers le numéro suivant ou précédant. e) Poussez le bouton REPEAT sur la télécommande pour choisir entre : - SINGLE : lecture d’un numéro - REPEAT ONE : répétition d’un numéro - REP DIR : tous les documents dans le folder sont répétés - FOLDER : tous les documents dans le folder sont reproduits REMARQUE : les possibilités de répétition dépendent du disc.
- Page 105 Agrandir/diminuer les photos Poussez le bouton ZOOM plusieurs fois pour diminuer/agrandir la photo à 50%, 75%, 100%, 125%, 150% et 200%. REMARQUE : quand la photo est agrandie, vous pouvez utiliser les boutons de navigation pour bouger la photo. Effets de présentation dia Poussez plusieurs fois le bouton PROG pour sélectionner les modes de transition entre les photos.
- Page 106 e) Dans les pages de sélection, utilisez ou pour aller vers la page suivante ou la pae précédante. f) Poussez le bouton REPEAT sur la télécommande pour choisir entre : - SINGLE : lecture d’un numéro - REPEAT ONE : répétition d’un numéro - REP DIR : tous les documents dans le folder sont répétés - FOLDER : tous les documents dans le folder sont reproduits REMARQUE : les possibilités de répétition dépendent de la source USB.
- Page 107 13. Lecture programmée a) Poussez PROG et l’écran affiche le menu suivant. b) Utilisez les boutons de navigation pour choisir l’index de mémoire et poussez OK pour démarrer la programmation. Entrez les numéros des titres/chapitres voulus avec les boutons numériques. Cesn numéros sont mémorisés.
- Page 108 18. Changer la langue parlée (DVD/VCD/CD) Il est possible de changer la langue parlée initiellement mémorisé. (Ceci ne fonctionne qu’avec des discs avec plusieurs langues pour sous-titres). - Pendant la lecture poussez AUDIO pour choisir entre les langues disponibles REMARQUE : quand le disc ne contient pas de langues ce bouton n’a pas de fonction.
- Page 109 2. AUDIO Downmix - pour sélectionner le mode sortie audio. Options : a) LT/RT : mixage gauche/droite b) STEREO 3. PREFERENCE 3.1 Système TV - pour sélectionner le système TV 3.2 Audio - pour sélectionner la langue parlée, si le disque contient plusieurs langues.
- Page 110 Poussez le bouton TV/AV sur la télécommande pour choisir le mode TV. SELECTION DE L’EMETTEUR Poussez CH+ pour aller vers l’émetteur suivant Poussez CH- pour aller vers l’émetteur précédant Utilisez les boutons nuémriques pour choisir directement le numéro de l’émetteur. REMARQUE : utilisez -/-- quand le numéro comprend plusieurs chiffres CONTRÔLE VOLUME Poussez VOL+ ou VOL- pour régler le volume.
- Page 111 REGLAGES SON Poussez NICAM pour sélectionner le réglage son. REMARQUE : selon la source, le bouton NICAM peut avoir différentes options AFFICHAGE INFORMATION Poussez DISPLAY pour afficher des informations de l’émetteur comme numéro, système couleurs, sytème son, etc TELETEXTE Quand télétexte est disponible : Poussez TEXT pour afficher le télétexte Poussez HOLD pour bloquer une page télétexte Poussez INDEX pour aller vers la page index...
- Page 112 LECTURE MÉDIA - Insérez un périphérique de stockage USB dans la prise USB1 au préalable. - Appuyez sur TV/AV sur le dessus de l'unité ou sur la télécommande pour basculer en mode MÉDIA. - Appuyez sur QUITTER sur la télécommande pour retourner à la page de menu précédente.
- Page 113 - Appuyez sur ROUGE pour afficher une boîte de dialogue, puis utilisez les touches Gauche ou Droite pour confirmer ou non la suppression. - Appuyez sur OK pour visualiser la sélection. En cours de visualisation normale de PHOTO : - Appuyez sur le bouton DISPLAY sur la télécommande pour afficher ou masquer la barre d'outils.
- Page 114 - Appuyez sur ROUGE pour afficher une boîte de dialogue, puis utilisez les touches GAUCHE ou DROITE pour confirmer ou non la suppression. - Appuyez sur OK pour visualiser la sélection. En cours d'écoute normale de MUSIQUE : - Appuyez sur GAUCHE ou DROITE pour sélectionner l'option de la barre d'outils puis sur OK pour confirmer.
- Page 115 - Appuyez sur ROUGE pour afficher une boîte de dialogue, puis utilisez les touches GAUCHE ou DROITE pour confirmer ou non la suppression. - Appuyez sur OK pour visualiser la sélection. En cours de visualisation normale de FILM : - Appuyez sur le bouton DISPLAY sur la télécommande pour afficher ou masquer la barre d'outils.
- Page 116 4. TEXTE - Appuyez sur GAUCHE ou DROITE pour sélectionner TEXTE. - Appuyez sur OK pour confirmer puis appuyez sur GAUCHE ou DROITE pour sélectionner le disque. - Appuyez sur OK pour confirmer puis appuyez sur les touches de navigation pour sélectionner le dossier.
-
Page 117: Menu Principal
MENU PRINCIPAL ● L’appareil contient différents menus de réglages. Une fois que la programmation initiale est faite, les valeurs sont mémorisées jusqu’au moment où vous les changez. Ainsi l’appareil fonctionne toujours sous les même conditions. ● Le réglages restent en mémoire même si l’appareil est mis en standby. Procédure commune pour les réglages initials - Poussez MENU pour afficher le menu principal - Utilisez les boutons de navigation GAUCHE/DROITE pour sélectionner les sous-menus... - Page 118 1.2 Syntonisation manuelle - Poussez UP/DOWN pour sélectionner cet item et poussez OK pour y entrer. - Utilisez les boutons GAUCHE/DROITE pour faire le réglage. 1.3 Liste des émetteurs (Program edit) - Poussez UP/DOWN pour sélectionner cet item et poussez OK pour y entrer. - Poussez le bouton ROUGE pour affacer l’émetteur.
- Page 119 2.1 Mode image Options : utilisateur, dynamique, standard, doux. REMARQUE : le contraste, la luminosité, la couleur, la teinte et la netteté peuvent uniquement être réglés quand vous avez choisi « utilisateur ». 2.2 Contraste La valeur peut être réglée entre 0-100. 2.3 Luminosité...
- Page 120 3.1 Mode son Options : standard, musique, film, sports, utilisateur REMARQUE : les graves et aigües peuvent être réglés quand vous avez chois « utilisateur ». 3.2 Aigües La valeur peut être réglée entre 0-100. 3.3 Graves La valeur peut être réglée entre 0-100. 3.4 Balance Pour régler la balance entre les haut-parleurs gauche et droite entre -50 à...
-
Page 121: Av Et Autres Modes
5. OPTIONS 5.1 Langue OSD Pour choisir la langue du OSD. 5.2 Langue télétexte Pour choisir la langue du télétexte. 5.3 Format écran Options : auto, 4 :3, 16 :9, Zoom1, Zzom2, PAL+ REMARQUE : pas disponible quand il n’y a pas de signal. 5.4 Ecran bleu Pour mettre la fonction écran bleu en ou hors fonction. -
Page 122: Mode Pc
MODE PC - Mettez en fonction le TV et le PC. - Connectez le PC au TV par un câble VGA. - Poussez le bouton TV/AV pour sélectionner mode PC. - Poussez le bouton MENU pour entrer dans le menu principal et utilisez les boutons de navigation GAUCHE/DROITE pour sélectionner ECRAN. -
Page 123: Entretien
ENTRETIEN ● Vérifiez que l’appareil a été mis en standby et que la prise courant secteur à été retirée avant de nettoyer l’appareil. ● Utilisez un chiffon doux et sec. ● Si la surface est très sale, utilisez un chiffon trempé dans une mélange eau-savon et repassez par après avec un chiffon doux. -
Page 124: Installation Du Pied
INSTALLATION DU PIED Votre TV est livré avec un pied séparé. Avant d’utiliser le TV montez le pied en suivant les instructions ci-dessous.. Étape 1 Posez la TV à plat, écran tourné vers le bas, sur un tissu doux ou coussin, pour éviter de l'endommager. -
Page 125: Specifications
SPECIFICATIONS Ecran 18.5 pouces LED Résolution 1366×768 Dimensions pixels 0.1(H)×0.3(V)mm Luminance 200 cd/m2 Contraste 1000:1 Format écran 16:9 Temps de réponse 9 ms Angle de vue 176(H)/176(V) Ecran visible 409.8(H)×230.4(V)mm Durée de vie 30.000 heures Film: AVI, MP4, TS, MPG, MKV/MOV, DAT, VOB, RM/RMVB FORMAT DE LECTURE MULTIMEDIA USB1... -
Page 126: En Cas De Problemes
EN CAS DE PROBLEMES Consultez la liste ci-dessous en cas de problèmes : Problème (GENERAL) Solution Pas de puissance Vérifiez que l’adaptateur est bien connecté Pas d’image Vérifiez que tous les appareils sont bien connectés ● Vérifiez que tous les appareils sont bien connectés ●... -
Page 127: Code Regional
GENERAL TROUBLESHOOTING ● Il n’est pas possible de choisir d’autre langues quand le D’autres langues disque ne contient qu’une seule langue. parlées ou langues pour ● Avec certains disques il n’est pas possible de choisir la sous-titre ne peuvent langue avec les boutons LANGUAGE ou SUBTITLE . Essayez pas être sélectionnées de trouver les langues dans le menu DVD.
Need help?
Do you have a question about the 19LED2615DW and is the answer not in the manual?
Questions and answers