Panasonic NN-ST25JB Operating Instructions Manual
Hide thumbs
Also See for NN-ST25JB:
- Operating instructions manual (52 pages) ,
- Operating instructions manual (84 pages)

Related Manuals for Panasonic NN-ST25JB


Summary of Contents for Panasonic NN-ST25JB
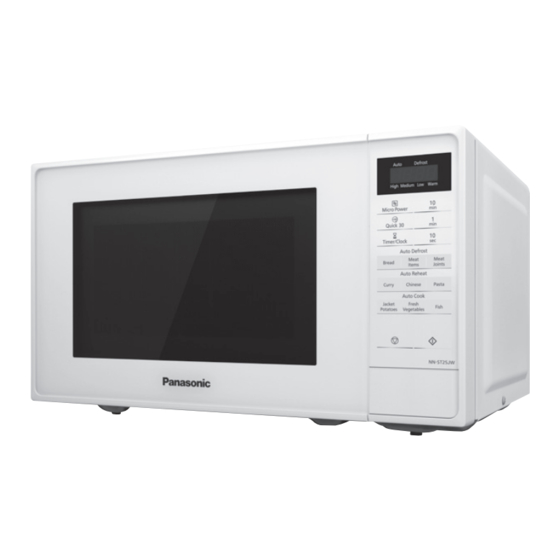
- Page 1 Operating Instructions Microwave Oven Household Use Only NN-ST25JW Model No. NN-ST25JB NN-ST25JM NN-ST25JW...
- Page 2 We are glad you have chosen to purchase a PANASONIC microwave oven. Before operating this oven, please read these instructions carefully and completely, and keep them for further reference. If you have never used a microwave oven before, you will realise that a microwave oven uses a totally different method of converting energy into heat.
-
Page 3: Table Of Contents
Specifications ............... 44 Panasonic Warranty (Australia) ........46 Panasonic Warranty (New Zealand) ......48 Thank you for purchasing a Panasonic appliance. Important Safety Instructions: Before operating this oven, please read these instructions and precautions carefully and keep for future reference. -
Page 4: Important Safety Instructions
(including 3. WHEN YOUR OVEN children) with reduced physical, REQUIRES SERVICING, call sensory or mental capabilities, your local Panasonic engineer or lack of experience and (Customer Support). It is knowledge unless they have hazardous for anyone other... - Page 5 9. The appliance shall not be WE CERTIFY THAT THIS operated WITHOUT FOOD IN MICROWAVE OVEN HAS BEEN THE OVEN. INSPECTED AND COMPLIES Operation in this manner may WITH THE REQUIREMENTS OF damage the appliance. REGULATION 3, 10. If smoke or a fire occurs in the SUBCLAUSE(2), OF THE oven, press Stop/Reset, and MICROWAVE OVENS...
- Page 6 Important safety instructions 3. For proper operation, ensure a 10. When it becomes necessary to sufficient air circulation for the replace the oven light, please oven. consult your dealer. Counter-top use: Accessories Allow 15 cm of space on the top The oven comes equipped with a of the oven, 10 cm at the back variety of accessories.
- Page 7 Foods low in moisture Important Take care when heating foods low If the recommended cooking time in moisture, e.g. bread items, is exceeded, the food will be chocolate, popcorn, biscuits and spoiled and in extreme pastries. These can easily burn, circumstances could catch fire dry out or catch on fire if cooked and possibly damage the interior...
- Page 8 Important safety instructions Lids Liquids Always remove the lids of jars and Microwave heating of beverages containers and takeaway food can result in delayed eruptive containers before you microwave boiling, therefore care should be the food. If the lid remains, then taken when handling the container.
-
Page 9: General Guidelines
General guidelines SPACING CLEANING As microwaves work on food particles, keep your oven clean at all times. Stubborn spots of food can be removed by using a microwave spray cleaner, sprayed onto a soft cloth. Always wipe the oven dry after cleaning. - Page 10 General guidelines MOISTURE CONTENT ARRANGING Many fresh foods e.g. vegetables and Individual foods e.g. chicken portions fruit, vary in their moisture content or chops, should be placed on a dish throughout the season. For this reason so that the thicker parts are towards cooking time may have to be adjusted.
-
Page 11: Containers To Use
Containers to use Choosing the correct container is a very important factor in deciding the success or failure of your cooking. OVEN GLASS Glass that is heat resistant e.g. Pyrex , is ideal, and can be ® used. Do not use glass which may crack due to the heat from the food. - Page 12 Containers to use PLASTIC Many plastic containers are designed for microwave use. Only use containers if they are designed for microwave use. Do not use Melamine as it will scorch. Do not use plastic for cooking foods high in sugar or fat or foods that require long cooking time e.g.
-
Page 13: Parts Of Your Oven
Parts of your oven 1. Door release button 2. Oven window Press to open the door. Opening 3. Air vents the door during cooking will stop 4. Microwave feed guide the cooking process without (Do not remove.) cancelling the programme. It is 5. -
Page 14: Control Panel
Control panel 1 Display window 2 Micro Power pad 3 Quick 30 pad 4 Timer / Clock pad 5 Time pads 6 Auto Defrost pads 7 Auto Reheat pads 8 Auto Cook pads 9 Stop / Reset pad: Before Cooking: One press clears your instructions. -
Page 15: Setting The Clock
Setting the clock When the oven is plugged in for the first time, “88.88” appears in display. Example: To set 11:25am Press 11 times. Press 5 times. (to set hours) (to set 1 minute) Press twice. (to set 10 minutes) Press Timer/Clock Enter time of day. -
Page 16: Microwave Cooking And Defrosting
Microwave cooking and defrosting The glass tray must always be in position when using the oven. Press Micro Power Set the cooking time. Press Start. to select the desired Your oven can be The time power level. programmed for up to counts down 99 minutes 50 seconds in in the display. -
Page 17: Multi-Stage Cooking
Multi-stage cooking This feature allows you to programme up to 3 stages of cooking continuously. Example: To continually set High power for 2 minutes, Medium power for 3 minutes and Low power for 2 minutes. Press twice. Press Micro Set the cooking time. Power once to select High power. -
Page 18: Quick 30 Feature
Quick 30 feature This feature allows you to set cooking time in 30 seconds increments up to 5 minutes at High power. Press Quick 30 until Press Start. the desired cooking The time counts time appears in the down in the display. -
Page 19: Using The Timer
Using the timer This feature operates as a KITCHEN TIMER or allows you to programme the STANDING TIME/DELAY START. Kitchen timer Example: To count 5 minutes. Press 5 times. Press Timer/ Set the desired time. Press Start. Clock. (up to 99 minutes 50 seconds) The time counts down without the oven operating. - Page 20 Using the timer Delay start Example: To start cooking at Medium power for 3 minutes after 5 minutes of standing time. Press 5 times. Press Timer/ Set the desired delay time. Clock. (up to 99 minutes 50 seconds) Press 3 times. Press Micro Power Set the desired cooking Press Start.
-
Page 21: Auto Programmes
Auto programmes With this feature you can defrost/cook food according to the weight. Select the category and set the weight of the food. The weight is programmed in grams. The oven determines MICROWAVE power level, and then cooking time automatically. Do not include the weight of any added water or the container weight. - Page 22 Auto programmes Programme Instructions Weight: 600-1600 g Accessories: Whole chickens and meat joints will require shielding during defrosting especially if it is a particularly fatty piece. This is to prevent food starting to cook on the outside edges. Protect wings, breast and fat with smooth pieces of (Whole Chickens, aluminium foil secured with cocktail sticks.
-
Page 23: Auto Reheat/Auto Cook
Auto reheat/auto cook Press a desired Auto Reheat/ Press Start. Auto Cook pad several times The time counts until the appropriate weight down in the appears. display. „ Notes 1. Only use the accessories as indicated below. 2. Large pieces of fish/meat in a thin sauce, may require longer cooking. 3. - Page 24 Auto programmes Auto Cook Programme Instructions Weight: 200-1000 g Accessories: For cooking jacket potatoes. Choose medium sized potatoes 200-250 g (7-9 oz). Wash and dry and prick with a fork several times. Arrange around the edge of glass tray. Press Jacket Potatoes several times until the appropriate weight appears, and press Start.
-
Page 25: Defrosting Charts
Defrosting charts The time given below is a guideline only. Always check the progress of the food by opening the oven door and then re-starting. For larger quantities adjust the time accordingly. Food should not be covered during defrosting. [Microwave power level: Defrost (270 W)] Defrosting Standing Meat... -
Page 26: Reheating Charts
Reheating charts The time given in the charts below is a guideline only, and will vary depending on STARTING temperature, dish size etc. Weight/ Power Cooking Time Food Instructions Quantity Level (approx.) BREAD – Precooked – Fresh – N.B. Breads reheated by Microwave will have a soft base. - Page 27 Weight/ Power Cooking Time Food Instructions Quantity Level (approx.) PASTRY PRODUCTS – PRECOOKED – N.B. Pastries reheated by microwave will have a soft base. Chicken Pie 600 g High ⁄ mins. Cornish Pasty 227 g (1) High ⁄ mins. Place on microwave safe Quiche 400 g (1) High...
-
Page 28: Cooking Charts
Reheating charts Weight/ Power Cooking Time Food Instructions Quantity Level (approx.) PURCHASED CONVENIENCE FOODS – FROZEN N.B. Transfer food from foil container to a similar sized microwave safe dish. Plastic dishes designed for microwave and conventional ovens may be used with care. High ⁄... - Page 29 Weight/ Power Cooking Time Food Instructions Quantity Level (approx.) BEEF – Joints from raw – Caution: Hot fat! Remove dish with care. Place on upturned saucer in microwave safe dish or rack per 450 g Medium Medium 7-12 mins. on glass tray. Cover and turn (1 lb) halfway.
- Page 30 Cooking charts Weight/ Power Cooking Time Food Instructions Quantity Level (approx.) FRUIT – Peel, slice, chop into even sized pieces. Place in shallow microwave safe dish. Apples, Rhubarb, Only half fill dish. Cover. Stir 450 g High ⁄ -8 mins. stewed halfway.
- Page 31 Weight/ Power Cooking Time Food Instructions Quantity Level (approx.) RICE – Place in a large microwave safe bowl. 3 litre (6 pint) ⁄ ⁄ Basmati 250 g Use 600 ml (1 pt) to 800 ml mins. ⁄ pt) boiling water. Cover ⁄...
-
Page 32: Recipes
Recipes Soup and Snacks Cream of Mushroom Soup Serves 4 Dish: large bowl Ingredients 25 g (1 oz) butter 1. Place the butter and chopped onion in a 1 small onion, chopped large bowl. Cover and cook on High power 600 ml (1 pt) hot chicken stock for 3 mins or until soft. - Page 33 Lentil Biryani Serves 2 Dish: large casserole Ingredients 50 g (2 oz) green lentils 1. Soak the lentils in cold water for 1 hour then 10 ml (2 tsp) oil, 1 small onion, drain. sliced 2. Place the oil and onion in a large bowl. 3 ml ( ⁄...
- Page 34 Recipes Chicken Casserole Serves 4 Dish: 3 litre (6 pt) casserole Ingredients 25 g (1 oz) butter 1. Place vegetables and butter in dish. Cover 2 medium onions, sliced and cook on High power for 4-6 mins. or 2 sticks celery, trimmed and until soft.
- Page 35 Savoury Mince Serves 2 Dish: 1.5 litre (3 pt) casserole dish Ingredients 1 small onion, diced 1. Place onion, garlic and oil in casserole, 1 clove garlic, crushed cover and cook on High power for 2-3 mins. 5 ml (1 tsp) oil or until soft.
- Page 36 Recipes Fish Arranging Liquid Noise Fresh fish should always Thin fillets of fish i.e. During cooking, popping plaice, should be rolled up be sprinkled with 30 ml sounds may be heard. prior to cooking to avoid (2 tbsp) of water, lemon This is due to moisture overcooking on the thinner juice or white wine.
- Page 37 Family Fish Pie Serves 4 Dish: large casserole Ingredients 450 g (1 lb) smoked haddock 1. Arrange fish in a shallow dish. Add lemon 30 ml (2 tbsp) lemon juice juice, cover and cook on High power for 15 ml (1 tbsp) oil 3-4 mins.
- Page 38 Recipes Vegetable Curry Serves 2 Dish: 3 litre (6 pt) casserole Ingredients 1 medium aubergine, diced 1. Sprinkle the aubergine liberally with salt in a salt, 15 ml (1 tbsp) oil colander. Stand for 30 mins. to remove bitter 1 clove of garlic, chopped juices.
- Page 39 Desserts / Cakes Steamed Suet Sponge Pudding Serves 4 Dish: 1 litre (2 pt) pudding basin Ingredients 150 g (5 oz) self-raising flour 1. In a mixing bowl, sift together the flour and pinch of salt salt. Stir in the sugar and suet. 50 g (2 oz) caster sugar 2.
- Page 40 Recipes Date Puddings and Butterscotch Sauce Serves 6 Dish: 3 pint pudding basin Ingredients 200 g (7 oz) fresh dates, stoned 1. Pour 175 ml (6 fl. oz) boiling water over the and finely chopped chopped dates and set aside to cool. 175 g (6 oz) self-raising flour 2.
- Page 41 Boston Brownies Ingredients Dish: 20 cm (8) dish lined with greaseproof 100 g (4 oz) plain chocolate 1. Place chocolate and butter in a bowl and 100 g (4 oz) butter cook on High power for 1-2 mins. or until 100 g (4 oz) soft dark brown chocolate has melted.
- Page 42 Recipes Soft Fruit Jam Makes approx. 1 ⁄ lbs jam Dish: large bowl Ingredients 450 g (1 lb) soft fruit, washed 1. Place all ingredients in a large bowl and stir. 450 g (1 lb) caster sugar Cook on High power for 5 mins. (10-15 mins. 30 ml (2 tbsp) lemon juice if using frozen fruit), stirring frequently.
-
Page 43: Cooking And Reheating Guidelines
Cooking and reheating guidelines Most foods reheat very quickly in your oven by HIGH power. Meals can be brought back to serving temperature in just minutes. Always check food is piping hot and return to oven if necessary. As a general rule, always cover wet foods, e.g. soups, casseroles and plated meals. Do not cover dry foods e.g. -
Page 44: Questions And Answers
Questions and answers Q: Why won’t my oven turn on? Q: Can I use a conventional oven A: When the oven does not turn on, thermometer in the oven? check the following: A: The metal in some thermometers 1. Is the oven plugged in securely? may cause arcing in your oven and Remove the plug from the outlet, should not be used in a microwave... -
Page 45: Care Of Your Oven
Care of your oven 1. The oven should be unplugged 7. It is occasionally necessary to before cleaning. remove the glass tray for cleaning. Wash the tray in warm soapy water 2. Clean the inside of the oven, door or in a dishwasher. seals and door seal areas regularly. -
Page 46: Specifications
Specifications Power Source 230-240 V ~ 50 Hz Power Consumption 5.6 A 1250 W Output 800 W (IEC-60705) Outside Dimensions 443 (W) × 330 (D) × 258 (H) mm Oven Cavity Dimensions 306 (W) × 308 (D) × 214 (H) mm Overall Cavity Volume 20 L Glass Tray Diameter... -
Page 48: Panasonic Warranty (Australia)
1. Subject to the conditions of this warranty Panasonic or it’s Authorised Service Centre will perform necessary service on the product without charge for parts or labour, if in the opinion of Panasonic, the product is found to be faulty within the warranty period. For Line Communications products (i.e. Cordless Phones, etc) the genuine battery(s) has a 3 month warranty. - Page 49 Panasonic Customer Care Centre. If the failure in the product is not a major failure then Panasonic may choose to repair or replace the product and will do so in a reasonable period of time from receiving notice from you.
-
Page 50: Panasonic Warranty (New Zealand)
1. Subject to the conditions of this warranty Panasonic or it’s Authorised Service Centre will perform necessary service on the product without charge for parts or labour, if in the opinion of Panasonic, the product is found to be faulty within the warranty period. For Line Communications products (i.e. Cordless Phones, etc) the genuine battery(s) has a 3 month warranty. - Page 51 5. To claim warranty service, when required, you should: • Telephone Panasonic’s Customer Care Centre on 09 272 0178 or visit our website referred to below and use the Service Centre Locator for the name/ address of the nearest Authorised Service Centre.
- Page 52 Panasonic Corporation Website: http://www.panasonic.com F0518-0 © Panasonic Corporation 2018 Printed in China...
Need help?
Do you have a question about the NN-ST25JB and is the answer not in the manual?
Questions and answers