Table of Contents
Advertisement
Quick Links
Advertisement
Table of Contents

Related Manuals for AT&T Z812


Summary of Contents for AT&T Z812
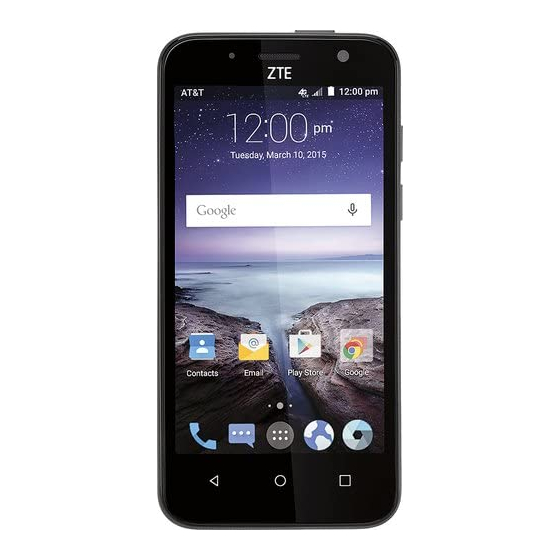
- Page 1 User Guide AT&T Z812 Contents...
- Page 2 Devices purchased for use on AT&T’s system are designed for use exclusively on AT&T’s system. You agree that you won’t make any modifications to the Equipment or programming to enable the Equipment to operate on any other system. A voice plan is required on all voice-capable devices, unless specifically noted otherwise in the terms governing your agreement.
- Page 3 Bluetooth microSDHC™ is a trademark of SanDisk. The word mark and ® Bluetooth logos are registered trademarks owned by SIG, Inc. Manufactured under license from Dolby Laboratories. Dolby and the double-D symbol are trademarks of Dolby Laboratories. Copyright © 2015 ZTE CORPORATION.
-
Page 4: Table Of Contents
Contents Contents ....................4 Phone Setup ..................15 Switching Your Phone On/Off ............17 Getting Around ................18 Get to Know Your Phone ............... 20 Key Functions ................22 Status and Notification icons ............26 Phone Calls.................... 29 How to Make Calls ................ 29 How to Receive Calls .............. - Page 5 Adjusting Your Call Settings ............33 Contacts ....................37 Importing and Exporting Contacts ..........37 Creating a Contact ................ 39 Adding a Contact to Favorites ............39 Searching for a Contact ..............39 Creating a New Group ..............40 Entering Text ..................41 Google Keyboard ................
- Page 6 Message Box ................. 45 Sending a Message ............... 45 Changing Message Settings ............46 Email ..................... 49 Creating an Email Account ............49 Receiving Email ................50 Composing and Sending an Email ..........50 Replying to or Forwarding an Email ..........51 Deleting an Email Account ............
- Page 7 Turning on Wi-Fi ................53 Connecting to a Wi-Fi Network ............. 53 Checking the Wi-Fi Network Status ..........54 Browsing the Internet ................55 Opening a Web Page ..............55 Browsing Options ................55 Opening Another Browser Window ..........56 Using Bookmarks ................
- Page 8 Entertainment ..................60 Taking Pictures with Your Camera ..........60 Adjusting Camera Settings ............61 Sharing a Picture ................61 Shooting Video with Your Camcorder ........... 63 Adjusting Your Video Settings ............63 Sharing a Video ................65 Playing Your Videos ............... 65 Adding Music to Your Phone ............
- Page 9 Applications ..................73 Clock ....................73 Calculator ..................73 Downloads ..................73 File Manager ................. 74 Mi-Moment ................... 74 Task Manager ................74 Stopwatch and Countdown ............... 75 World Time ..................75 Twitter ................... 75 Voice Dialer ................... 76 Google Applications ................77 Contents...
- Page 10 Google Search and Google Now ........... 77 Gmail ..................... 79 Google Play ................... 81 Using Google Calendar ..............82 Google Music ................82 Google+ ..................83 Maps ..................... 83 Hangouts ..................83 Voice Search .................. 84 YouTube ..................84 Phone Settings ..................85 Airplane Mode ..................
- Page 11 Wi-Fi ....................85 Bluetooth ..................85 Mobile Networks Settings ............85 Sound and Notifications Settings ..........86 Display Settings ................86 Setting Date and Time ..............87 Language Settings ................. 87 Data Usage ..................87 Mobile Hotspot Settings ............... 88 VPN ....................
- Page 12 Bluetooth Tethering ..............89 Home .................... 89 Managing Your Device Memory ........... 90 Power Manager ................90 Managing Applications ..............90 Connect to PC ................91 Call settings ................... 92 Location ..................92 Security Settings ................93 Backup and Reset ................96 Accounts ..................
- Page 13 For Your Safety ................... 101 General Safety ................101 FCC Regulations ................103 RF Exposure Information (SAR) ........... 104 Hearing Aid Compatibility (HAC) Regulations for ....... 106 Mobile Phones ................106 CTIA ..................... 110 Distraction .................. 111 Product Handling ................ 112 Electrical Safety................
- Page 14 Explosive Environments .............. 119 Specifications ..................120 Warranty ..................... 121 LIMITED WARRANTY ..............123 How to Get Warranty Service ............. 125 Other Warranty Programs ............125 Note ....................126 Phone Setup...
-
Page 15: Phone Setup
Phone Setup Installing the micro-SIM Card Power off your phone before installing or replacing the micro-SIM card. ①Remove the back cover as shown. ②Insert the micro-SIM card into the card slot with the cut corner oriented as shown. ③ Insert the microSDHC™(sold separately) with the gold-colored contacts facing down. - Page 16 Charging the Battery Note: For best performance, charge the battery fully prior to using the phone for the first time. ①Insert the charger’s connector into the charging port. Be sure to insert the connector in the correct orientation. Do not force the connector into the port. ②Plug the charger into a standard AC wall outlet.
-
Page 17: Switching Your Phone On/Off
Switching Your Phone On/Off Make sure the micro-SIM card is in your phone and the battery is charged. • Press and hold the Power Key to turn on your phone. • To turn it off, press and hold the Power Key to open the options menu. Tap Power off >... -
Page 18: Getting Around
Switching to Sleep Mode To save battery power, Sleep Mode suspends your phone in a low-power- consumption state while the display is off. Your phone also goes into Sleep Mode by itself when the display is automatically turned off after a certain period of time, which you can set by tapping >... - Page 19 performing. ①Tap the buttons, icons, or applications to select items or to open applications. Keep your finger on an item to see the available options. ②Swipe the screen to scroll up, down, left, or right. ③Drag and drop to move particular items across the screen. ④Pinch with two fingers or double-tap the screen to zoom in/out on a web page or an image.
-
Page 20: Get To Know Your Phone
Get to Know Your Phone Front camera Headset jack Earpiece Indicator Touchscreen Micro USB charging port Recent apps key Back key Home key Phone Setup... - Page 21 Power key Back camera Flash Volume up key Volume down key Back cover Speaker Phone Setup...
-
Page 22: Key Functions
Key Functions Function Press and hold to turn phone on/off, set to Airplane Power key mode, or to restart the phone. Press to switch your phone to Sleep Mode. Press to wake up your phone. Press and hold for 10 seconds to restart the phone. ... - Page 23 Home Screens You can customize your home screens. Set your own wallpaper, add the widgets or application shortcuts you need, or remove them as you like. Status and notification bar Widget Folder Favorite shortcuts Phone Setup...
- Page 24 Navigating Your Home Screens Your phone comes with three home screens, giving you more space to add more items. Simply swipe your finger to the left or right to see each home screen. Choosing Your Wallpaper ① Press and hold a blank part of the home screen and tap Wallpapers . ②...
- Page 25 Removing Items from Your Home Screen ①Tap and hold the item you want to delete until appears on the screen. ②Drag the item to and release your finger. Creating a Folder ①On a home screen, tap and hold an app icon and drag it to ②You can add more apps to the folder by dragging icons to the folder.
-
Page 26: Status And Notification Icons
Status and Notification icons Your phone will tell you exactly what’s going on by showing you simple icons. Here’s what they mean. Indicators and Icons Indicator What it means Indicator What it means No signal GPRS connected EDGE connected Signal strength Mobile data in use 4G connected Vibrate mode... - Page 27 Indicator What it means Indicator What it means Upcoming event New SMS/MMS New email Call on hold New Wi-Fi network detected New Gmail message Problem with SMS/ Downloading data MMS delivery Sending data Missed call Updates available Call in progress connected Song is playing Phone Setup...
- Page 28 Using the Notifications Panel The Notifications panel provides quick access to alerts including new messages, emails, and software updates. To open the Notifications panel, tap the top of the home screen and swipe down with your finger. Swipe left or right to clear individual ...
-
Page 29: Phone Calls
Phone Calls How to Make Calls There are many ways to make a call with your phone, and they’re all easy to do. Calling from the Dialer ①From the home screen, tap Spell the name or phone number of a ②... - Page 30 Calling from Your Contacts ①From the home screen, tap ②Swipe your finger to scroll the contacts list and tap next to the contact you want to call. Tips: at the top of the screen and You can search for a contact by typing ...
-
Page 31: How To Receive Calls
③Tap the number. ④Tap Call. How to Receive Calls Answering a Call Slide down to answer the call. Rejecting a Call Slide up to reject the call. Slide up to send a text message to the caller. Choose the default message or send a custom one. - Page 32 Muting a Call During a call, you can mute your microphone so that the person you are speaking to cannot hear you, but you can still hear them. Tap Mute to turn your microphone off. To turn your microphone back on, tap Mute again.
-
Page 33: Adjusting Your Call Settings
Swapping Calls To switch between callers, tap More > Swap. Merging Calls To merge two calls and create a conference call, tap More > Merge calls. Note: The maximum number of callers on a call varies by carrier. Ending a Call to finish a call. - Page 34 Dialpad tones Check this option to enable the phone dial pad sound. Also vibrate for calls Check this option to enable vibration when the phone is ringing. Quick responses Edit the text message that you can send to the caller while rejecting his/her call. Vibrate pattern Select the vibration pattern for incoming calls.
- Page 35 Choose a TTY mode after connecting the TTY device to the phone’s headset port. TTY mode A TTY device can allow people who have hearing or speech disabilities to communicate by telephone. Turn on/off hearing aid compatibility. When you turn on the hearing aid Hearing aids compatibility and use a hearing aid with a Telecoil to answer the phone, it will help...
- Page 36 Forward your incoming calls to a different number. You can choose when Call forwarding to forward: Always forward, Forward when busy, Forward when unanswered, or Forward when unreachable. Caller ID: Choose whether people you call can see your number. Additional settings Call waiting: See new incoming calls while you’re on another call.
-
Page 37: Contacts
Contacts You can add contacts on your phone and synchronize them with the contacts in your Google account or other accounts that support contact syncing. To see your contacts, tap > Contacts on the home screen. From there, you can tap the tabs on the top to quickly switch to FAVORITES or GROUPS. - Page 38 ⑤Tap to select the contacts you need and then touch Import Contacts From the microSDHC Card ①From the Contacts screen, tap > Import/Export. ②Tap Import from storage. ③Select an account in which to save the contacts. ④Select the vCard file(s) in the microSDHC card and touch OK Export Contacts to the micro-SIM Card ①From the Contacts screen, tap >...
-
Page 39: Creating A Contact
Creating a Contact ①From the Contacts screen, tap to add a new contact. ②Tap AT&T Address Book Contact to choose where to save the contact. ③Enter the contact name, phone numbers, email addresses, postal addresses, and other information. to save the contact. ④Tap Adding a Contact to Favorites ①From the Contacts screen, tap the contact you want to add to FAVORITES. -
Page 40: Creating A New Group
Creating a New Group ①From the Contacts screen, tap GROUPS. ②Tap ③ If you have added contact accounts other than the phone, tap to choose an account for the new group. ④Enter the group name. ⑤Tap Add member and select the contacts you wish to be the group members. -
Page 41: Entering Text
Entering Text When you tap a field that needs text or numbers, a keyboard automatically appears on the screen. Google Keyboard The Google keyboard provides a layout similar to a desktop computer keyboard. Turn the phone sideways and the keyboard will change from portrait to landscape. - Page 42 Tap the alphabetic keys to enter letters. Tap and hold the keys to enter associated accented letters or numbers. For example, to enter è, tap and hold and the available accented letters and number 3 appear. Then slide your finger to choose è. to use uppercase or lowercase letters.
-
Page 43: Google Voice Typing
to use Google’s networked voice input. Tap and hold and then release it to change the input language or the Google keyboard settings. Google Voice Typing Google Voice typing uses the Google voice recognition service to convert speech to text. - Page 44 In the Keyboard & input methods section, you can set the default input method and choose the settings for input methods. Entering Text...
-
Page 45: Messaging
Messaging Your SMS (text message) and MMS (multimedia message) are combined into one menu under Message Box Instead of an inbox and outbox your phone organizes all messages you sent and received into one box, where messages exchanged with the same number are grouped into one message thread on the Messaging screen. -
Page 46: Changing Message Settings
④Tap the Type message field and enter your message. to insert a smile, contact, or Quick Text. If you are sending an MMS, tap to attach a file to the message. to send your message. ⑤Tap Note: Add an attachment to a text message and it will be converted into an MMS automatically. - Page 47 messages allowed in a single thread. Text (SMS) message settings: Manage SIM card messages: Manage the messages stored on your micro-SIM card. Service Center: Enables you to view and edit the service center number. Multimedia (MMS) message settings: Auto-retrieve: Automatically download multimedia messages.
- Page 48 Signature settings: Edit signature: Edit your signature, which can be added automatically to outgoing messages. Add signature: Add the signature to all outgoing messages. WAP push switch settings: Enable wap push receiving: Allow your phone to receive WAP push. ...
-
Page 49: Email
Email With the Email application, you can access your email from various providers, including Yahoo! and Gmail. ® Creating an Email Account ①From the home screen, tap > Email. ② Tap the email server you wish to use. ③Enter your email address and password. ④Tap Next to let the phone retrieve the network parameters automatically. -
Page 50: Receiving Email
Receiving Email When you are in an email account, slide down to download recent emails. You can adjust how often your account downloads new email by tapping > Settings > name of the account > Inbox check frequency. Tap an option to select it. -
Page 51: Replying To Or Forwarding An Email
Replying to or Forwarding an Email ①From your inbox, open the email you want to reply to or forward to reply to or forward the email. You can also tap ②Tap reply to all recipients of the email. ③Enter the contents/recipients of your email. ④Tap Send. -
Page 52: Connecting To The Internet
Connecting to the Internet Your phone’s impressive networking capabilities allow you to access the Internet or your corporate network with ease. You can use default connection settings to connect to the web via your mobile network ( GSM/UMTS/LTE ) or Wi-Fi. The GSM/UMTS/LTE connection can be enabled/disabled manually. -
Page 53: Turning On Wi-Fi
③Tap each item to enter the information you receive from your service provider. ④ Tap > Save to complete. Tip: To set the APN to default settings, tap > Reset to default. Turning on Wi-Fi Wi-Fi provides wireless Internet access over distances of up to 300 feet (90 meters). -
Page 54: Checking The Wi-Fi Network Status
Checking the Wi-Fi Network Status You can check the Wi-Fi network by looking at the icon in the status bar. Or, tap the network the phone is currently connected to on the Wi-Fi screen. You can then check the network status from the pop-up window. Connecting to the Internet... -
Page 55: Browsing The Internet
Browsing the Internet Your phone has two options for Internet access. Use the Browser or Google Chrome to view web pages and search for information. From the home screen, tap Opening a Web Page • Tap the address bar, enter the website you want to browse, and tap Go. •... -
Page 56: Opening Another Browser Window
• Refresh the page: Tap • Send the page URL to friends: Tap > and select how you want to send the URL. • Follow a link: Tap a link on the web page to open it. Opening Another Browser Window You can have multiple windows open in the browser. -
Page 57: Changing Browser Settings
Changing Browser Settings Tap > Settings from a browser window to change browser settings. Using Google Chrome Use Google Chrome to browse the Internet. Chrome on your AT&T Z812 can sync bookmarks, browsing history, and opened tabs from your Google account. - Page 58 ②Read the terms of service and tap ACCEPT & CONTINUE. ③You can choose ADD AN ACCOUNT to sign in to Chrome to sync it with your open tabs, bookmarks, and other settings on all your devices. If you choose NO THANKS you can sign in later via the Settings menu. ④To enter a URL, tap the web address bar, enter an address.
-
Page 59: Bluetooth
Bluetooth Bluetooth is a short-range wireless communication technology. Phones or Bluetooth other devices with capabilities can exchange information Bluetooth wirelessly within a distance of about 32 feet (10 meters). The devices must be paired before the communication is performed. Using Bluetooth Bluetooth ①Before you begin, place the device in pairing mode. -
Page 60: Entertainment
Pairing is successfully completed when the other device accepts the connection or the same passkey is entered. Note: Bluetooth passkey may be fixed for certain devices, such as headsets or hands-free car kits. You can try entering 0000 or 1234 (the most common passkeys), or refer to the documents for that device. -
Page 61: Adjusting Camera Settings
Adjusting Camera Settings Before taking a photo, you can tap > CAMERA to open the following camera settings. Full screen Turn full screen on or off. Shutter tone Set the shutter tone. Geo-tagging Select whether to store the GPS location in captured pictures. - Page 62 ②Scroll through options to send via text messaging or email, Google+, and more. Opening Your Gallery Gallery helps you view pictures and play videos. You can also do some basic editing of your pictures, set them as wallpaper or contact photos, or share with friends.
-
Page 63: Shooting Video With Your Camcorder
Tap to rotate the picture. Tap to delete the picture. Browse the album contents in a slideshow, edit, set the picture as contact photo or wallpaper, share, or view the details. Shooting Video with Your Camcorder ①From the home screen, tap ②Zoom in or out by pressing the Volume up/down key. - Page 64 Choose the video quality as 720×480, 640×480, or Video Quality MMS Video. Set the lapse time for recording video. Time Lapse Lock the focus when recording video. Focus lock when recording Geo-tagging Select whether to store the GPS location in your recorder video files.
-
Page 65: Sharing A Video
Sharing a Video ①After recording a video, tap the thumbnail in the corner of the screen and then tap ②Scroll through options to send via text messaging or Gmail, Picasa, and more. Playing Your Videos From the home screen, tap >... - Page 66 Pause. Enable video pop. Tap to lock the screen. Tap to save the frame as a separate photo. Entertainment...
-
Page 67: Adding Music To Your Phone
Adding Music to Your Phone You can add music to your phone’s internal storage or to a removable see Phone Setup – Inserting a microSDHC Card microSDHC card ( Note: Steps may vary depending on your operating system. ①Connect your phone to your computer with a USB cable. ②Tap Media device (MTP). -
Page 68: Playing Your Music
Playing Your Music You can play the audio files stored in your phone’s microSDHC card in Music. ①From the home screen, tap > Music to access the music player. ②Select All Songs / Playlists / Favorites / Artists /Albums / Folders to find the songs you want to play. - Page 69 Tap to toggle repeat mode. Tap to turn on or off shuffle mode. Add the song to your Favorites. Tap to share the song. Get more options. Entertainment...
- Page 70 Creating Playlists Playlists help you organize your music files. next to the song in the music library. ①Tap ②Tap Add to. ③Tap New playlist+. ④Type the playlist name and tap SAVE. Managing Playlists ①Tap the Playlists tab in the music library to see your playlists. next to a playlist.
- Page 71 Setting a Song as Ringtone next to the song in the music library. ①Tap ②Tap Set as ringtone. ③Tap Phone Ringtone or Notification Ringtone. Entertainment...
-
Page 72: Making Memorable Memos
Making Memorable Memos Sound Recorder enables you to record your voice memos. ①From the home screen, tap > Sound Recorder. to start recording or tap > OK to cancel recording. You ②Tap can touch to pause and to continue during the recording. to stop recording. -
Page 73: Applications
Applications Clock ①From the home screen, tap > Clock. ②Tap a default alarm to configure it or tap to create a new alarm. ③Set up the alarm options, such as time, repeat, alarm sound and label. ④Tap SAVE to save and exit. next to an alarm to turn on the alarm. -
Page 74: File Manager
Touch a file to open it with the appropriate applications. Touch and hold a file, or check the box in front of it, to delete or share it. File Manager From the home screen, tap > File Manager. The folders are organized by category, phone storage and SD card. -
Page 75: Stopwatch And Countdown
• Tap the APPS tab to manage all the apps on your phone. • Tap the RESOURCES tab to view the real-time system resources information. Tip: If your phone is running slow, close applications you are not using by tapping and swiping left or right on applications you wish to close. -
Page 76: Voice Dialer
account. to compose a tweet. ②Tap Voice Dialer From the home screen, tap > Voice Dialer and speak a command. Applications... -
Page 77: Google Applications
Google Applications Signing in to your Google account lets you synchronize Gmail, Calendar, and Contacts between your phone and the web. If you don’t have an account, you can easily create one. ①Tap a Google application that needs a Google account, such as Gmail or Google+. - Page 78 appointment on your calendar and what the traffic is like to get to it. Performing a Search > Google. You can type in search terms to From the home screen, tap begin a voice search. You will see results for your search. To search images, places, and more, tap an option on the bar at the bottom of the screen.
-
Page 79: Gmail
Gmail Gmail is a web-based email service that’s configured when you sign in to your Google account. Depending on your synchronization settings, the Gmail on your phone can be automatically synchronized with your Gmail account on the web. Creating and Sending an Email Through Gmail ①From the home screen, tap >... - Page 80 ②Choose to add an existing account or create a new one and follow on- screen instructions to finish account setup. Accessing Account Settings ①From your Gmail inbox, tap > Settings. ②Tap an account name, or tap General settings to change settings for all accounts.
-
Page 81: Google Play
Google Play Google Play gives you access to thousands of free and paid apps, games, books and magazines, music, and movies. From the home screen, tap Navigating Google Play From Play Store, you will have multiple ways to search for apps, games and more. -
Page 82: Using Google Calendar
purchases. ②Tap the option you want to use and enter the Google password and tap OK. Using Google Calendar From the home screen, tap Calendar to use Google Calendar, Google’s time management application. You can use the calendar to schedule appointments, including meetings and other events. -
Page 83: Google
this app. From the home screen, tap > Play Music to access Google Music. The app searches your online library and your phone for music and playlists before displaying your combined music library, organized by GENRES, ARTISTS, ALBUMS, and SONGS. You can tap >... -
Page 84: Voice Search
Voice Search Find what you’re looking for by speaking your search terms into your phone. YouTube View videos and share your own with your friends, family, and the world. Google Applications... -
Page 85: Phone Settings
Phone Settings Airplane Mode From the home screen, tap > Settings. Slide next to Airplane mode to turn on airplane mode. All the phone’s radios that transmit voice or data are turned off. Wi-Fi From the home screen, tap > Settings. Slide next to Wi-Fi to turn Wi- Fi on or off and configure your Wi-Fi connections. -
Page 86: Sound And Notifications Settings
disable data service, allow data services when roaming, or set access point names for data access. Note: Data roaming may incur significant roaming charges. Sound and Notifications Settings From the home screen, tap > Settings > Sound & notifications to adjust volumes, set up ringtone and notification sound, and select system sounds. -
Page 87: Setting Date And Time
sleeping. Font size: Set the font size of the text on the screen. Navigation key light duration: Set the backlight duration of the navigation key. Setting Date and Time ①From the home screen, tap > Settings > Date & time. ②Uncheck the Automatic date &... -
Page 88: Mobile Hotspot Settings
next to Cellular data to turn on or off mobile data. ②Slide You can check how much data has been used during the time cycle you set, set a mobile data warning, see what apps have been using mobile data, or restrict background data for individual apps. -
Page 89: Vpn
From the home screen, tap > Settings > More > VPN to set up and connect to virtual private networks. Default SMS App From the home screen, tap > Settings > More > Default SMS app to choose the preferred application for sending and receiving SMS. USB Tethering From the home screen, tap >... -
Page 90: Managing Your Device Memory
Managing Your Device Memory From the home screen, tap > Settings > Storage. You can view the space information of the microSDHC card as well as the phone storage. • Unmount/Mount SD card: You can unmount the microSDHC card to safely remove it, or mount the card. -
Page 91: Connect To Pc
Note: Not all applications can be moved or uninstalled. From the home screen, tap > Settings > Security and slide next to Unknown sources if you want to install applications from sources other than Google Play Store. Note: Installing applications from unknown sources may compromise your phone and personal data. -
Page 92: Call Settings
connection type for your phone. Call settings From the home screen, tap > Settings > Call settings to Configure phone call related options, such as ringtone and voicemail. Location Activate location services to determine your location. To use location-related applications, such as finding your location on Google Maps, you must have location services turned on on your phone. -
Page 93: Security Settings
Device only: Use GPS to pinpoint your location. Accelerated location: Slide the switch to use Qualcomm® lZat™ hard ware accelerated location. Security Settings Protect your phone and micro-SIM card from unauthorized use. Protecting Your Phone with a Screen Unlock Pattern Creating your screen unlock pattern ①From the home screen, tap >... - Page 94 ②Swipe up and draw the pattern you set to unlock the screen. If you make a mistake, your phone will ask you to try again. Cannot Recall Your Screen Unlock Pattern? You have up to five attempts to unlock your phone. If you still cannot recall the screen unlock pattern, tap Forgot pattern? and enter your Google account user name and password to reset the screen unlock pattern.
- Page 95 ②Swipe up and enter the PIN or password you set. ③Tap Cannot Recall Your PIN or Password? You have up to five attempts to unlock your phone. If you still cannot recall the PIN or password, you will need to either contact your carrier for the PUK (PIN Unlock Key) code for the device or return it for service.
-
Page 96: Backup And Reset
②Tap Install from SD card to install certificates from your microSDHC card. Deleting Secure Credentials ①From the home screen, tap > Settings > Security. ②Tap Clear credentials > OK to clear credentials. Backup and Reset Reset your phone to factory default settings. All your personal data from the phone’s internal storage will be erased, including your Google account, system and app data and settings, and downloaded apps. - Page 97 erase the data on the memory card during the process WARNING! All your personal information and downloaded applications on your phone will be erased after resetting the phone.
-
Page 98: Accounts
Accounts Manage your accounts and synchronization. Touch Accounts to sign in to or create accounts on your phone. Touch an account type to see that type of accounts you have added and adjust the accounts settings. Managing Other Settings Accessibility From the home screen, tap >... - Page 99 Power button ends call: When enabled, you can press the Power Key to end phone calls without turning the screen off. Auto-rotate screen: Change the orientation of some onscreen content based on the position of the device. Speak passwords: Check this box to enable the speak passwords function. Accessibility shortcut: Enable this option to get spoken feedback when you tapping the screen or pressing the key.
- Page 100 AT&T Software Update You can check for software updates. About Phone From the home screen, tap > Settings > About phone to check system updates, phone status, view legal information and software version. Airplane Mode...
-
Page 101: For Your Safety
For Your Safety General Safety Don’t make or receive handheld Don’t use at gas stations. calls while driving. And never text while driving. Keep your phone at least half an inch (15 mm) away from your ear Your phone may produce a or body while making calls. - Page 102 Don’t rely on your phone for emergency communications. For Your Safety...
-
Page 103: Fcc Regulations
FCC Regulations This mobile phone complies with part 15 of the FCC Rules. Operation is subject to the following two conditions: (1) This device may not cause harmful interference, and (2) this device must accept any interference received, including interference that may cause undesired operation. This mobile phone has been tested and found to comply with the limits for a Class B digital device, pursuant to Part 15 of the FCC Rules. -
Page 104: Rf Exposure Information (Sar)
Increase the separation between the equipment and receiver. Connect the equipment into an outlet on a circuit different from that to which the receiver is connected. Consult the dealer or an experienced radio/TV technician for help. Caution: Changes or modifications not expressly approved by the party responsible for compliance could void the user‘s authority to operate the equipment. - Page 105 SAR information on this model phone is on file with the FCC and can be found under the Display Grant section of www.fcc.gov/oet/ea/fccid after searching on FCC ID: SRQ-Z812. For this device, the highest reported SAR value for usage against the head is For Your Safety...
-
Page 106: Hearing Aid Compatibility (Hac) Regulations For
W/kg, for usage near the body is W/kg. 0.77 1.35 While there may be differences between the SAR levels of various phones and at various positions, they all meet the government requirements. SAR compliance for body-worn operation is based on a separation distance of 10 mm between the unit and the human body. - Page 107 cochlear implants, digital wireless phones sometimes do because of electromagnetic energy emitted by the phone’s antenna, backlight, or other components. Your phone is compliant with FCC HAC regulations (ANSI C63.19- 2011). While some wireless phones are used near some hearing devices (hearing aids and cochlear implants), users may detect a buzzing, humming, or whining noise.
- Page 108 the wireless technologies that it uses. However, there may be some newer wireless technologies used in this phone that have not been tested yet for use with hearing aids. It is important to try the different features of this phone thoroughly and in different locations, using your hearing aid or cochlear implant, to determine if you hear any interfering noise.
- Page 109 information about FCC Hearing Aid Compatibility, please go to http://www.fcc.gov/cgb/dro . For Your Safety...
-
Page 110: Ctia
CTIA a) Do not disassemble or open crush, bend or deform, puncture or shred. b) Do not modify or remanufacture, attempt to insert foreign objects into the battery, immerse or expose to water or other liquids, expose to fire, explosion or other hazard. c) Only use the battery for the system for which it is specified. -
Page 111: Distraction
h) Battery usage by children should be supervised. i ) Avoid dropping the phone or battery. If the phone or battery is dropped, especially on a hard surface, and the user suspects damage, take it to a service center for inspection. j ) Improper battery use may result in a fire, explosion or other hazard. -
Page 112: Product Handling
Operating Machinery Full attention must be given to operating the machinery in order to reduce the risk of an accident. Product Handling General Statement on Handling and Use You alone are responsible for how you use your phone and any consequences of its use. - Page 113 • Do not use harsh chemicals, cleaning solvents, or aerosols to clean the device or its accessories. • Do not paint your phone or its accessories. • Do not attempt to disassemble your phone or its accessories. Only authorized personnel can do so. •...
- Page 114 To avoid the risk of demagnetization, do not allow electronic devices or magnetic media close to your phone for a long time. Electrostatic Discharge (ESD) Do not touch the micro-SIM card’s metal connectors. Antenna Do not touch the antenna unnecessarily. Normal Use Position When placing or receiving a phone call, hold your phone to your ear, with the bottom toward your mouth.
- Page 115 when playing games or watching video. If you have experienced seizures or blackouts or have a family history of such occurrences, please consult a physician. Repetitive Strain Injuries To minimize the risk of Repetitive Strain Injury (RSI) when texting or playing games with your phone: •...
-
Page 116: Electrical Safety
hearing. Turn down the volume before using headphones, stereo Bluetooth headsets or other audio devices. Phone Heating Your phone may become warm during charging and during normal use. Electrical Safety Accessories Use only approved accessories. Do not connect with incompatible products or accessories. Take care not to touch or allow metal objects, such as coins or key rings, to contact or short-circuit in the battery terminals. -
Page 117: Interference
or subjected to a severe fall, do not use it until you have taken it to be checked at an authorized service center. Interference General Statement on Interference Care must be taken when using the phone in close proximity to personal medical devices, such as pacemakers and hearing aids. - Page 118 manufacturer to discuss alternatives. Medical Devices Please consult your doctor and the device manufacturer to determine if operation of your phone may interfere with the operation of your medical device. Hospitals Switch off your wireless device when requested to do so in hospitals, clinics, or health care facilities.
-
Page 119: Explosive Environments
some vehicle manufacturers forbid the use of mobile phones in their vehicles unless a hands-free kit with an external antenna is included in the installation. Explosive Environments Gas Stations and Explosive Atmospheres In locations with potentially explosive atmospheres, obey all posted signs to turn off wireless devices such as your phone or other radio equipment. -
Page 120: Specifications
Specifications Handset specifications are shown in the following table. Handset standards GSM/UMTS/LTE support Dimensions (L x W x H) 135*66*10 mm Weight 134 g Video capture 2592 * 1944 pixels Removable memory card Up to 32 GB microSDHC card Android Display 480x854 TFT Multi touch Captive... -
Page 121: Warranty
Charge time XX hours WAP XX WAP browser version Warranty ZTE offers you a limited warranty that the enclosed subscriber unit and its enclosed accessories will be free from defects in material and workmanship for a period that expires one year from the date of sale of the Product to you, provided that you are the original end user purchaser of the Product and provided that your purchase was made from a supplier authorized by the Seller. - Page 122 is also available for assistance. 3. This warranty only applies if the product has been used in accordance with the manufacturer’s instructions under normal use and with reasonable care. 4. What this warranty does not cover: a) Defects or damages resulting from the misuse of this product. b) Defects or damages from abnormal use, abnormal conditions, improper storage, exposure to moisture, dampness or corrosive environments, unauthorized modifications, unauthorized repair,...
-
Page 123: Limited Warranty
to sole judgment of ZTE. LIMITED WARRANTY TO THE EXTENT PERMITTED BY APPLICABLE LAW, THIS LIMITED WARRANTY IS YOUR SOLE AND EXCLUSIVE REMEDY AGAINST ZTE AND ZTE’S SOLE AND EXCLUSIVE LIABILITY IN RESPECT OF DEFECTS IN PRODUCT. HOWEVER, THIS LIMITED WARRANTY SHALL NOT EXCLUDE NOR LIMIT ANY OF YOUR LEGAL (STATUTORY ) RIGHTS UNDER THE APPLICABLE NATIONAL LAWS. - Page 124 PERSONAL INJURY CAUSED BY DEFECT OF PRODUCT IN MATERIAL, DESIGN AND WORKMANSHIP. Warranty...
-
Page 125: How To Get Warranty Service
How to Get Warranty Service To obtain warranty service, please call (877) 817-1759. Please have the following information available when you send the phone in for repair: • A valid Proof of Purchase • Return address • Daytime phone number or fax number •... -
Page 126: Note
Note Note...
Need help?
Do you have a question about the Z812 and is the answer not in the manual?
Questions and answers