Table of Contents
Advertisement
For USA assistance. please call:1-800-211-PANA(7262) or send e-mail to:consumerproducts@panasonic.com
For Canadian assistance. please call:1-800-561-5505 or visit us at www.panasonic.ca
Before use, please read these instructions completely.
SD Multi AV Device
Operating Instructions
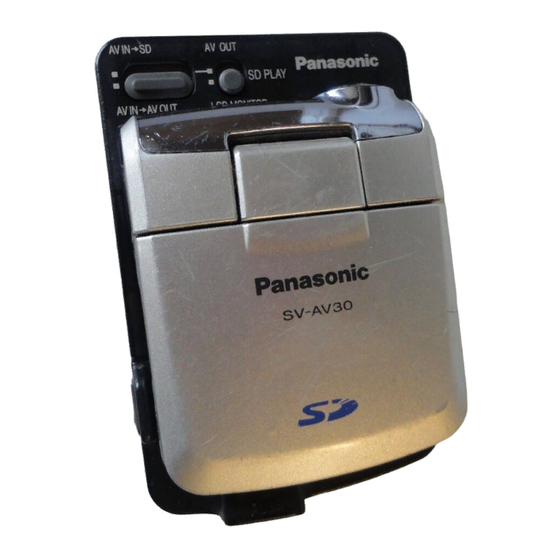
Model No. SV-AV30U
R
VQT0C31-2
Advertisement
Table of Contents

Related Manuals for Panasonic SV-AV30


Summary of Contents for Panasonic SV-AV30
-
Page 1: Operating Instructions
For USA assistance. please call:1-800-211-PANA(7262) or send e-mail to:consumerproducts@panasonic.com For Canadian assistance. please call:1-800-561-5505 or visit us at www.panasonic.ca Before use, please read these instructions completely. SD Multi AV Device Operating Instructions Model No. SV-AV30U VQT0C31-2... -
Page 2: End User License Agreement
Before opening the CD-ROM package, please read the following. End User License Agreement You (“Licensee”) are granted a license for the Software defined in this End User License Agreement (“Agreement”) on condition that you agree to the terms and conditions of this Agreement. If Licensee does not agree to the terms and conditions of this Agreement, promptly return the Software to Matsushita Electric Industrial Co., Ltd. -
Page 3: Table Of Contents
Contents End User License Agreement ... 2 Information for Your Safety ... 4 Introduction ... 7 Preparation Standard Accessories ... 8 Optional Accessory... 8 Controls and Components ... 9 Power Supply... 10 Inserting a Memory Card ... 11 Using the LCD Monitor ... 12 Using the Remote Controller/ Earphones ... -
Page 4: Information For Your Safety
...73 Dear Customer, We would like to take this opportunity to thank you for purchasing this Panasonic SD Multi AV Device. Please read these Operating Instructions carefully and keep them handy for future reference. - Page 5 ≥Injury or material damage resulting from any kind of use that is not in accordance with the operating Instructions are the sole responsibility of the user. Extremely high precision technology is employed to produce the LCD Monitor screen featuring a total of approximately 200,000 pixels.
- Page 6 Any changes or modifications not expressly approved by the party responsible for compliance could void the user’s authority to operate this equipment. Panasonic SV-AV30U Matsushita Electric Corporation of America One Panasonic Way, Secaucus, NJ 07094 Panasonic Consumer Electronics Company 1-800-211-PANA(7262)
-
Page 7: Introduction
Introduction This SD Multi AV Device can record MPEG4 moving pictures, still picture and voice data. Additionally, it can play back a high quality music file of the MPEG2- AAC and MP3 format (Records files with the supplied SD- Jukebox Ver.3.0). And using the viewer software, SD-MovieStage Ver.2.0 (supplied accessory), the MPEG4 moving picture data can be edited on the personal computer. -
Page 8: Preparation
Preparation Standard Accessories AC Adaptor (VSK0626) (l 10) ≥Supplies power to the SD Multi AV Device. CAUTION: This unit will operate on 110/120/220/ 240 V AC. An AC plug adaptor may be required for voltages other than 120 V AC. Please contact either a local or foreign electrical parts distributor for assistance in selecting an alternate AC plug. -
Page 9: Controls And Components
Controls and Components LCD Monitor (l 12) Mode Button [MODE] (l 13) Recording Start/Stop Button (l 20, 22, 24) Menu Button [MENU] (l 14) Multi-function Button Operating/Select Function [:/;/9/ /1 SET] (l 14, 21, 23, 25, 26) Horizontal Stripes Reduction [ Double zoom [2k] (l 20, 22) Backlight Compensation [ White Balance setting [1] (l 28) -
Page 10: Power Supply
Power Supply ª Using AC Adaptor Connect the AC Adaptor to AC Main socket. Connect the DC Input Lead to the [DC IN 4.8V] socket on the SD Multi AV Device. THE SOCKET OUTLET SHALL BE INSTALLED NEAR THE EQUIPMENT AND SHALL BE EASILY ACCESSIBLE ª... -
Page 11: Inserting A Memory Card
CAUTION Danger of explosion if battery is incorrectly replaced. Replace only with the same or equivalent type recommended by the manufacturer. Dispose of used batteries according to the manufacturer’s instructions. Inserting a Memory Card An SD Memory Card can be used for this SD Multi AV Device. -
Page 12: Using The Lcd Monitor
Using the LCD Monitor Record and play the video image while viewing the LCD Monitor. Put your finger on the groove the LCD Monitor. Adjust the LCD Monitor angle according to the desired recording/playing angle. ≥The LCD Monitor can rotate up to the angles illustrated. -
Page 13: Turning The Power On/Selecting Operation Modes
Turning the Power On/ Selecting Operation Modes Select a desired mode on the mode selection screen. Set the Power/Mode Switch to [PLAY] or [REC]. ≥The SD Multi AV Device is turned on. Set to [REC] to select Record Mode. Set to [PLAY] to select Play Mode. Press the [MODE] Button to select a Operation Mode. -
Page 14: Using The Menu Screen
Using the Menu Screen Allows the functions usable in the selected mode to be set from the menu. Select a desired mode. ( Press the [MENU] Button. ≥The menu in the selected mode is displayed. Press the UP/DOWN side of the Multi- function Button to select a desired item. -
Page 15: List Of Menus
List of Menus The figures of the Menus are for explanation purposes only, and they are different from the actual Menus. ª REC MODE Still Picture Record Menu Picture quality [QUALITY] (l 20) Flash setting [FLASH] (l 20) Beep sound [BEEP SOUND] When it is set to [ON], beeps for confirmation or alarm. -
Page 16: Play Mode
ª PLAY MODE Still Picture Playback Menu Beep sound setting [BEEP SOUND] (l 15) Card editing [CARD EDITING] 1 Display setup [DISPLAY SETUP] (l 15) P.Slide show [P.SLIDE SHOW] (l 32) Return to the previous screen [RETURN] MPEG4 Moving Picture Playback Menu Playback size [SCREEN] (l 23) MPEG4 repeat [REPEAT] (l 23) Beep sound [BEEP SOUND] (l 15) -
Page 17: Setting Date And Time
Setting Date and Time At the time of purchase of the SD Multi AV Device, the date and time are not set ([PRESS MENU TO SET CLOCK] is displayed). First, set the date and time, then use the SD Multi AV Device. Set the Power/Mode Switch to [REC]. -
Page 18: Setting The Power Supply Frequency
Setting the Power Supply Frequency Set the power supply frequency before using the SD Multi AV Device. The power supply frequency is different depending on the country or region. Adjustment of the frequency will help reduce the appearance of horizontal stripes consisting of light and dark patterns under fluorescent lighting. -
Page 19: Adjusting Brightness And Color
Adjusting Brightness and Color Level on the LCD Monitor LCD Brightness [BRIGHTNESS] It adjusts the brightness of the image on the LCD screen. LCD Color Level [COLOR] It adjusts the color saturation of the image on the LCD screen. Set the Power/Mode Switch to [REC] and set the operation mode to [PICTURE] or [MPEG4]. -
Page 20: Basic Functions
Basic Functions Recording Still Pictures Records still pictures. Set the Power/Mode Switch to [REC] and set the operation mode to [PICTURE]. Press the [MENU] Button. Set [QUALITY] to desired picture quality. ≥Select one of [FINE], [NORMAL], or [ECONOMY]. To use the flash, Set [FLASH] to [ON] or [AUTO]. -
Page 21: Playing Back Still Pictures
Playing back Still Pictures Plays back still pictures recorded on the Memory Card. Set the Power/Mode Switch to [PLAY] and set the operation mode to [PICTURE]. ≥Still picture files recorded on the Memory Card are displayed in the index picture screen. Press the UP/DOWN/LEFT/RIGHT side of the Multi-function Button to select a desired file. -
Page 22: Recording Moving Pictures (Mpeg4)
Recording Moving Pictures (MPEG4) You can record moving pictures on the Memory Card. Set the Power/Mode Switch to [REC] and set the operation mode to [MPEG4]. Press the [MENU] Button. Set the [MPEG4 MODE] to desired picture quality. ≥Select one of [SUPER FINE], [FINE], [NORMAL], or [ECONOMY]. -
Page 23: Playing Back Moving Pictures (Mpeg4)
Playing Back Moving Pictures (MPEG4) Plays back moving pictures recorded on the Memory Card. Set the Power/Mode Switch to [PLAY] and set the operation mode to [MPEG4]. ≥Moving picture files recorded on the Memory Card are displayed in the index picture screen. Press the UP/DOWN/LEFT/RIGHT side of the Multi-function Button to select a desired file. -
Page 24: Recording Voice (Voice Recording Function)
Recording Voice (Voice Recording Function) You can record voice data on the Memory Card. Set the Power/Mode Switch to [REC] and set the operation mode to [VOICE]. Press the Recording Start/Stop Button. ≥Recording starts. Speak into the built-in microphone this SD Multi AV Device. ≥While recording voice, press the Recording Start/Stop Button to stop recording. -
Page 25: Hearing The Voice Recorded (Voice Playback)
Hearing the Voice Recorded (Voice Playback) Plays back the voice files recorded by the SD Multi AV Device. Set the Power/Mode Switch to [PLAY] and set the operation mode to [VOICE]. ≥Voice files recorded on the Memory Card are displayed in the form of a list. Press the UP/DOWN side of the Multi- function Button to select a desired file. -
Page 26: Listening To Music (Music Playback)
Listening to Music (Music Playback) You can play MPEG-2 AAC and MP3 data. Music files must be written on the SD Memory Card using the SD-Jukebox Ver.3.0 (supplied accessory) special software program in order for the SD Multi AV Device to play music. -
Page 27: Adjusting The Volume
ª Selecting a Playlist Playlists set using the SD-Jukebox Ver.3.0 can be played back. Select a desired playlist in [SELECT PLAYLIST] of the menu. 1 ª Selecting a desired Sound Quality Music quality can be selected with the supplied Remote Controller. (Use earphones, or the audio cannot be heard.) Press the [EQ] button on the Remote Controller. -
Page 28: Advanced Functions
Advanced Functions Backlight Compensation Function This prevents a recording subject from being recorded too dark in backlight. (Backlight is the light that shines from behind a recording subject.) Set the Power/Mode Switch to [REC] and set the operation mode to [PICTURE] or [MPEG4]. -
Page 29: Erasing The Files Recorded On A Memory Card
Erasing the Files Recorded on a Memory Card Using SD Multi AV Device, you can erase files recorded on the Memory Card. After files are erased, it cannot be restored. Play back the file to be erased or let it pause. -
Page 30: Protecting Files (File Protection)
Protecting files (File Protection) Precious files recorded on the Memory Card can be locked to prevent accidental erasure. Play back the file to be locked or let it pause. ( 21, 23, 25) Press the [MENU] Button. ≥The editing menu screen appears. Press the UP/DOWN side of the Multi- function Button until [FILE PROTECTION] is displayed. -
Page 31: Writing Printing Data On A Memory Card (Dpof Setting)
Writing Printing Data on a Memory Card (DPOF Setting) DPOF Setting Printing data (DPOF Setting), such as the number of images to be printed, can be written to the Memory Card. Play back a still picture to be DPOF-set. Press the [MENU] Button. ≥The editing menu screen appears. -
Page 32: Playing Back Still Pictures One By One (P.slide Show)
Playing back still pictures one by one (P.Slide Show) Plays back still pictures based on the Slide show data set by SD-MovieStage Ver.2.0 (supplied). Set the Power/Mode Switch to [PLAY] and set the operation mode to [PICTURE]. Press the [MENU] Button. Select the [P.SLIDE SHOW] and press the [1 SET] Button. -
Page 33: Formatting The Memory Card
Formatting the Memory Card If a Memory Card becomes unreadable by the SD Multi AV Device, formatting it may make it reusable. Formatting erases all the data recorded on the Memory Card. Set the Power/Mode Switch to [REC]. Press the [MENU] Button. Select [INITIAL SETUP] and press the [1 SET] Button. -
Page 34: Using The Av Cradle
Using the AV Cradle Fitting on the AV Cradle eases charging. The AV Cradle allows the Device to be connected to the external device, such as a TV in order for the pictures on this Device to be viewed on the TV. -
Page 35: Fitting On The Av Cradle
Fitting on the AV Cradle While pressing the [PUSH1] Buttons, extend the AV Cradle. Place the SD Multi AV Device on the AV Cradle. ≥The grooves 1 of the SD Multi AV Device fit in the leading protrusions 2. ≥Place the SD Multi AV Device on the AV Cradle so that the mating connectors 3 are in alignment. -
Page 36: Playing Back On An External Device
Playing Back on an external device By connecting the SD Multi AV Device in AV Cradle with an external device, the recorded scenes can be played back on an external device such as a TV or Audio device. AV OUT AV IN Put the SD Multi AV Device in the AV Cradle. -
Page 37: Useful Connection (Av Cradle Always Connected)
Useful Connection (AV Cradle always connected) If your external device has just one output socket, you can connect the SD Multi AV Device as follows. ª Sample 1 Details of the connection To view or listen to pictures or sounds recorded on a Card by an external device, refer to Page 36. -
Page 38: Recording Pictures Supplied From An External Device
Recording pictures supplied from an external device DC IN 4.8V Put the SD Multi AV Device in the AV Cradle. (l 35) Connect the [AV IN] socket of the AV Cradle to the AV Output Sockets of the external device Cable Set the AV Input Control Switch to [AV IN... -
Page 39: Using Auto Recording Function
Using Auto Recording Function When the input signal is detected, the recording starts automatically. Connect the SD Multi AV Device with the external device. (l 38) ≥Always use the AC adaptor. This function does not work with the battery alone. Set up the external device such as timer setting. -
Page 40: On A Personal Computer
On a Personal Computer About the supplied software ª About the supplied software The SD Multi AV Device comes with SD-Jukebox Ver.3.0, SD-MovieStage Ver.2.0, and a USB driver to allow the SD Multi AV Device to be used on a personal computer. By using these software packages, you can record high-quality music which can be played back in the [MUSIC] mode of the SD Multi AV Device (SD-Jukebox Ver.3.0), arrange the pictures on a Memory Card, and cut and edit moving pictures (SD-MovieStage Ver.2.0). -
Page 41: Usb Driver
≥A USB hub or USB card used for connection does not guarantee a normal operation. Use the attached USB cable for direct connection to the personal computer. ≥Before installing (or uninstalling), quit all other applications. If the launcher for installation is not activated automatically when the CD-ROM is inserted in the personal computer’s CD-ROM drive, double-click the CD-ROM icon in [My Computer]. -
Page 42: Sd-Moviestage
SD-MovieStage ª Features of SD-MovieStage Ver.2.0 ≥MPEG4 moving pictures (ASF-format files) and still pictures (JPEG pictures) recorded on the SD Multi AV Device are displayed in thumbnail form and can be easily played back on a personal computer. ≥MPEG4 moving pictures (ASF-format files) can be cut-edited. ≥Pictures recorded on other DV devices can be converted into those for the SD Multi AV Device. -
Page 43: Sd-Jukebox
SD-Jukebox ª Features of SD-Jukebox Ver.3.0 ≥Records high quality music onto an SD Memory Card that can be played back on the SD Multi AV Device. ≥Allows Playlists to be created containing your favorite tracks. (If a Playlist is selected, only the tracks in the Playlist are played back.) ≥Allows a still picture to be associated with the music data. -
Page 44: Installing Usb Driver
Installing USB Driver When the USB driver is installed, the SD Multi AV Device will be recognized by the personal computer. Do not connect the USB cable until the USB driver has been installed. ≥Please read [Read before you install] before installing the USB Driver. -
Page 45: Installing Sd-Jukebox Ver.3.0
Installing SD-Jukebox Ver.3.0 Insert the supplied CD-ROM into the personal computer’s CD-ROM drive. ≥The launcher for the installation is activated automatically. Click [SD-Jukebox Ver.3.0]. ≥When [Welcome] screen appears, click [Next]. ≥If the confirmation whether you have the right to administrate the personal computer is displayed, click [OK] and continue with installation. -
Page 46: Connecting With The Pc
Multi AV Device is disabled.) ≥The [Removable disk] icon appears in [My Computer]. Starting the Software ª Starting the SD-MovieStage Ver.2.0 [Start]>> [All programs (programs)]>> [Panasonic]>> [SD-MovieStage]>> [SD- MovieStage] ª Starting the SD-Jukebox Ver.3.0 [Start]>> [All programs (program)]>> [Panasonic]>> [SD-JukeboxV3]>> [SD- JukeboxV3] . -
Page 47: Disconnecting The Usb Cable Safely
Disconnecting the USB Cable safely If you use Windows XP/2000, remove the USB Cable using the following method. If you use Windows Me/98SE, check that the Card Access Lamp is out, then remove the USB Cable. (Keep the SD Multi AV Device turned on.) Double click the ≥Hardware disconnect dialog box appears. -
Page 48: Constructing A Folder When The Memory Card Is Used With A Pc
Constructing a Folder when the Memory Card is used with a PC ≥When the Memory Card with data recorded by the SD Multi AV Device is inserted into a personal computer, folders will be displayed as in the figure. ≥Use the SD-MovieStage Ver.2.0 for operating files in the Memory Card. -
Page 49: Charge The Built-In Battery For Maintaining The Date Information
Others Charge the built-in battery for maintaining the date information This built-in battery is used for the memory of date and time. If [PRESS MENU TO SET CLOCK] is displayed when the power is on, the built-in battery may be exhausted. Charge using the following procedure: Take the battery out and plug in the AC adaptor. -
Page 50: Indications
Indications Operation Mode :Still picture mode PICTURE Moving picture mode Audio mode VOICE Music mode MUSIC Status Indications Recording Mode Record (l 20, 22, 24) Playback Mode Playback (l 21, 23, 25, 26) Pause (l 23, 25, 26) 5/6: Cue Playback/Review Playback (l 23, 25, 26) (10 times speed with 106 / 5 and 60... - Page 51 10 Indication of recordable time and recordable number of images R 0: Number of remaining recordable still pictures (Lights in red when it reaches zero.) R 0h00m: Remaining recordable time for MPEG4 moving pictures or audio (VOICE) (Lights up in red when it reaches 0h00m.) 11 Sound quality indication (music files) Pressing the [EQ] button on the remote...
-
Page 52: Notes & Precautions
Notes & Precautions ª Cautions for Use When you use your SD Multi AV Device on a rainy or snowy day or on a beach, make sure that no water or moisture enters the SD Multi AV Device. ≥Water may cause the SD Multi AV Device or Memory Card to malfunction. - Page 53 After use, be sure to take the Memory Card out and detach the Battery from the SD Multi AV Device or pull out the AC Main Lead from AC Main socket. If the Battery is used in an extremely cold environment, the Battery may only operate for approx.
- Page 54 Be Sure to Detach the Battery after Use Be sure to detach the Battery from the SD Multi AV Device. (If it is left attached to the SD Multi AV Device, a minute amount of current is consumed even when the SD Multi AV Device power is off.) If the Battery is left attached to the SD Multi AV Device for a long time, over discharge takes place.
-
Page 55: Notes And Hints
Flashing approx. every 0.5 seconds: ≥The SD Multi AV Device, battery or AC adaptor may be defective. Contact your nearest Panasonic dealer. Flashing approx. every 6 seconds: ≥The ambient temperature or that of the battery itself is too high or too low. - Page 56 ≥Electrical noise, static electricity or failure of the SD Multi AV Device or the Memory Card may damage the Memory Card or erase the data stored on the Memory Card. It is recommended to save important data onto a personal computer. ≥Some cards may pop out when they are removed.
- Page 57 ≥Irrespective of the setting, the horizontal stripes may appear in the following cases. -When using the SD Multi AV Device to record pictures under a lighting instrument such as a high-frequency fluorescent lamp: -When using the SD Multi AV Device to record a lighting instrument such as a fluorescent lamp: ≥It is not possible to use Backlight...
- Page 58 [SUPER FINE], [FINE] or [NORMAL] mode may not be played on other Panasonic digital video cameras. The message [PUSH THE RESET SWITCH] may be displayed on some Panasonic digital video cameras in such a case.
- Page 59 ª Hearing the Voice Recorded (Voice Playback) (l 25) ≥The screen shows a simple black background. ≥Fast forward (or fast backward) will be reset to normal playback at the beginning of the next file. ª Listening to Music (Music Playback) (l 26) ≥Only the MPEG2-AAC and MP3 data recorded using SD-Jukebox Ver.3.0 (supplied accessory) are applicable to...
- Page 60 ≥The White Balance may not be adjusted in dark places. ≥Adjustment of White Balance is effective under the following conditions. -When recording under reddish lighting (halogen light bulb, incandescent light bulb, etc.). -When recording a picture of mono-tone color. -When recording under multiple light sources.
- Page 61 ª Playing back still pictures one by one (P.Slide Show) (l 32) ≥Playback time may take longer than usual depending on the picture. ≥If the P. Slide show data is not recorded on the Memory Card, the display reverts to the index picture screen.
-
Page 62: Using Auto Recording Function
ª Recording pictures supplied from an external device (l 38) ≥Pictures containing the copy-protect signal (copy guard) cannot be recorded. ≥The power is automatically turned off in approx. 10 minutes after the SD Multi AV Device stops. Turn the power ON again. ≥VOICE from an external device cannot be recorded. - Page 63 ≥If the personal computer switches to the suspend mode when the SD Multi AV Device is connected to it, the personal computer may not recognize the SD Multi AV Device when it reverts to normal mode. In this case, restart the personal computer.
-
Page 64: Before Requesting Service
Before Requesting Service Power The SD Multi AV Device power cannot be turned on. 1-1: Is the power source connected correctly? 1-2: Is the Battery fully charged? Charge it with the AC Adaptor. The SD Multi AV Device power shuts off automatically. - Page 65 Either the SD Multi AV Device or the Memory Card may be damaged. Please consult your Panasonic dealer. Playing back or recording do not function and the screen has frozen. Set the Power/Mode Switch to [OFF] and then set it back to [REC] or [PLAY] after a while (approx.1 minute).
- Page 66 When the USB cable is removed when Windows Me is used, Device removal warning appears. If the USB cable is connected without installing the USB Driver (supplied) when you use Windows Me, the warning message will appear as soon as the USB cable is pulled out. Install the USB Driver, and the warning message will not appear.
-
Page 67: Specifications
Specifications SD Multi AV Device (Panasonic SV-AV30U) Power Source: Power Consumption: Image Sensor: Lens: Monitor: Microphone: Standard Illumination: Minimum Required Illumination: Recording Media: Image Compression: Video Compression: Voice Compression: Music Expansion: Dimensions: Weight: Operating Temperature: Operating Humidity: AC Adaptor (Panasonic VSK0626) -
Page 68: Limited Warranty (For U.s.a. Only)
Carry-In or Mail-In Service For Carry-In or Mail-In Service in the United States call 1-800-211-PANA (1-800-211- 7262). For assistance in Puerto Rico call Panasonic Sales Company (787)-750-4300 or fax (787)-768-2910. Panasonic Sales Company, Division of Matsushita Electric of Puerto Rico, Inc. - Page 69 Limited Warranty Limits And Exclusions This warranty ONLY COVERS failures due to defects in materials or workmanship, and DOES NOT COVER normal wear and tear or cosmetic damage. The warranty ALSO DOES NOT COVER damages which occurred in shipment, or failures which are caused by products not supplied by the warrantor, or failures which result from accidents, misuse, abuse, neglect, mishandling, misapplication, alteration, faulty installation, set-up adjustments, misadjustment of consumer controls, improper maintenance, power line...
-
Page 70: Customer Services Directory (For U.s.a. Only)
Customer’s in Puerto Rico, please ship or carry in to location below (“Service in Puerto Rico”). Matsushita Electric of Puerto Rico, Inc. Panasonic Sales Company/ Factory Servicenter: Ave. 65 de Infantería, Km. 9.5 San Gabriel Industrial Park, Carolina, Puerto Rico 00985 Monday-Friday 9am-9pm Saturday-Sunday 9am-7pm, EST. -
Page 71: Spanish Quick Use Guide/Guía Española Para El Uso Rápido
Spanish Quick Use Guide/Guía española para el Alimentación eléctrica ª Utilización Adaptador CA Conectar el adaptador CA a la toma de corriente principal CA. Conectar el cable de entrada del DC [DC IN 4.8V] a la toma de corriente del dispositivo AV Múltiple SD. -
Page 72: Inserción De La Tarjeta De Memoria
memoria En este dispositivo AV Múltiple SD, sólo se puede utilizar una tarjeta de memoria SD. Sujetar la tarjeta de memoria colocando el ángulo cortado etiqueta en la parte delantera e insertarla totalmente en el compartimento de la tarjeta de memoria horizontalmente. -
Page 73: Grabación De Imágenes Estáticas/Imágenes Dinámicas/La Voz
≥Modo grabación de imágenes dinámicas (formato MPEG4) ≥Modo reproducción de imágenes dinámicas (formato MPEG4) ≥Modo grabación del sonido (formato VOICE) ≥Modo reproducción del sonido (formato VOICE) ≥Modo reproducción de la música (formato MPEG2- AAC/MP3) Grabación de imágenes estáticas/imágenes dinámicas/la voz Poner el botón de encendido/selector modo en [REC]. - Page 74 Panasonic Consumer Electronics Company, Division of Matsushita Electric Corporation of America One Panasonic Way, Secaucus, NJ 07094 Panasonic Sales Company ("PSC") Division of Matsushita Electric of Puerto Rico, Inc. Ave. 65 de Infantería, Km. 9.5, San Gabriel Industrial Park, Carolina, Puerto Rico 00985 Panasonic Canada Inc.
Need help?
Do you have a question about the SV-AV30 and is the answer not in the manual?
Questions and answers