Table of Contents
Advertisement
Quick Links
CAUTION:
This equipment has been tested and found to comply with the limits for a Class B digital device, pursuant to Part 15
of the FCC Rules.
These limits are designed to provide reasonable protection against harmful interference in a residential installation.
This equipment generates, uses and can radiate radio frequency energy and, if not installed and used in accordance
with the instructions, may cause harmful interference to radio communications. However, there is no guarantee that
interference will not occur in a particular installation. If this equipment does cause harmful interference to radio or
television reception, which can be determined by turning the equipment off and on, the user is encouraged to try to
correct the interference by one or more of the following measures:
≥Reorient or relocate the receiving antenna.
≥Increase the separation between the equipment and receiver.
≥Connect the equipment into an outlet on a circuit different from that to which the receiver is connected.
≥Consult the dealer or an experienced radio/TV technician for help.
Any unauthorized changes or modifications to this equipment would void the user's authority to operate this device.
This device complies with Part 15 of the FCC Rules. Operation is subject to the following two conditions: (1) This
device may not cause harmful interference, and (2) this device must accept any interference received, including
interference that may cause undesired operation.
Responsible Party: Matsushita Electric Corporation of America
One Panasonic Way Secaucus, NJ, 07094 USA
Telephone No.: 1-800-211-7262
Panasonic Consumer Electronics Company, Division of Matsushita Electric Corporation of America
One Panasonic Way Secaucus, New Jersey 07094
http://www.panasonic.com
Panasonic Sales Company, Division of Matsushita Electric of Puerto Rico, Inc. ("PSC")
Ave. 65 de Infantería, Km. 9.5 San Gabriel Industrial Park, Carolina, Puerto Rico 00985
c 2000 Matsushita Electric Industrial Co., Ltd.
Printed in Japan
Follow these steps to save from an SD Memory Card to
your computer.
1.Connect the USB Reader/Writer to your personal
computer.
2.Install the SD Voice Editor software from the CD-ROM.
Read the operating instructions for SD Voice Editor for
details.
Before connecting, operating or adjusting this product, please
read these instructions completely. Please keep this manual
for future reference.
P
p
RQT5626-P F1200KB0
Operating Instructions
RR-XR320
Model No.
≥SD logo is a trademark.
≥Portions of this product are protected under copyright law and
are provided under license by ARIS/SOLANA/4C.
IC Recorder
This manual was printed
with soy based ink.
RQT5626-P
Advertisement
Table of Contents

Related Manuals for Panasonic RR-XR320


Summary of Contents for Panasonic RR-XR320
- Page 1 One Panasonic Way Secaucus, New Jersey 07094 http://www.panasonic.com Panasonic Sales Company, Division of Matsushita Electric of Puerto Rico, Inc. (“PSC”) Ave. 65 de Infantería, Km. 9.5 San Gabriel Industrial Park, Carolina, Puerto Rico 00985 c 2000 Matsushita Electric Industrial Co., Ltd.
-
Page 2: Table Of Contents
Specifications ......39 Servicenter list ......40 Panasonic Audio Products Limited Warranty . . . 42... -
Page 3: Listening Caution
≥Ensure the battery cover is completely closed to avoid malfunction. The display goes out if the cover is open. ≥If rechargeable batteries are to be used, rechargeable batteries manufactured by Panasonic are recommended. ªIf the cover comes loose Insert the cover’s hinges into the slots in the battery compartment. -
Page 4: Hold Function
Inserting the batteries Hold function This prevents accidental operation causing the The battery indicator batteries to run down. The indicator is shown during operation. (Flashes) Full Replace the batteries when the indicator starts flashing. When switched on ‘‘HOLD’’ appears for a few Note seconds and then the display ≥The unit indicates the batteries are low even... -
Page 5: Inserting Sd Memory Cards
Cards, but you must format them before use. into place and close the cover. Selecting modes Use this operation to enter the various setting modes. Panasonic’’ Press [MODE]. You can now select a mode. 1 Within 10 seconds Push [SELECT, ENTER] up or down so the mode flashes. -
Page 6: Recording
Recording Files are kept in folders. The unit creates Preparation four folders when a new card is used and Select the recording quality (‘page 11) you can create another five for a maximum of nine (‘page 21). Each folder can hold Press [FOLDER] to select a up to 99 files. - Page 7 Recording ªChecking the remaining recording time Press [MODE] while recording. Press again to return to the R e m a i n i n g previous display. recording time The above display is shown automatically when the remaining recording time becomes very short. Press [MODE] to show the recording time in this case.
-
Page 8: Play
Play To play a recording you just made, start Preparation from step 2. When play of a file finishes, Select the folder containing the file you want to play. play stops and the next file number is displayed. Push [SELECT, ENTER] up or down to select the file. -
Page 9: The Operation Tone
Play ªChecking the remaining play time Press [MODE] during play. Press again to return to There are three play speeds. The speed is factory set to the previous display. normal. Remaining play time ªScanning the files: Intro-scan This plays the first five seconds of all the files in a folder in order. -
Page 10: Deleting Files
Deleting files You can delete individual files or all files at Preparation once. You cannot restore files that you Select the folder containing the file(s) you want to delete. have deleted. Important Do not open the battery or card covers or remove the card during the deleting process. -
Page 11: Formatting Cards
Formatting cards Formatting is not necessary under normal ªTo cancel partway through circumstances. If the unit appears to be having Press [STOP] before step 4. trouble reading the card, try reinserting the card and the batteries. Use this unit to reformat the card if this For your reference is ineffective. -
Page 12: Dividing Files
Adding and deleting folders Deleting folders Preparation Select the folder you want to delete. While pressing [ERASE], press and hold [FOLDER] for two seconds. The folder number flashes. Press and hold [ERASE] for two seconds. The folder is deleted. ªTo cancel partway through Press [STOP] before step 2. -
Page 13: Moving Files
Moving files You can move files to other folders to keep Preparation Select the file you want to move (‘page 14). related files together. Press [SELECT, ENTER] to play the file. 1To select P u s h up or down Press [FOLDER]. - Page 14 Titling folders and files Titling folders and files Enter titles of up to 32 characters. Write Press [MODE]. over the current title. You can now select a mode. 1 Within 10 seconds Push [SELECT, ENTER] up or 1To select down so “EDIT TITLE”flashes. 2 Within 10 seconds P u s h up or...
-
Page 15: Using The Timers
Titling folders and files ªDeleting characters Entering characters First display “EXIT EDIT” (‘page 27, step 6). Use the following procedures while the 1 Push [SELECT, ENTER] up or down to select the folder or file entering display is shown (the character you want to correct. - Page 16 Using the timers Record timer 1 Within 10 seconds Push [SELECT, ENTER] up or down to set the start time. 2 Within 10 seconds Press [SELECT, ENTER]. Use the same steps to set the finish time “TIMER REC SET” is displayed. The start and finish times are displayed, then the normal display is restored.
-
Page 17: Product Service
Using the timers Product service Do not attempt to remove the cover(s) or repair the unit Timer settings yourself. Refer servicing to qualified personnel only. ªTo cancel the timer In step 3 of the above two timer setting ∫Product information procedures, select “OFF”... -
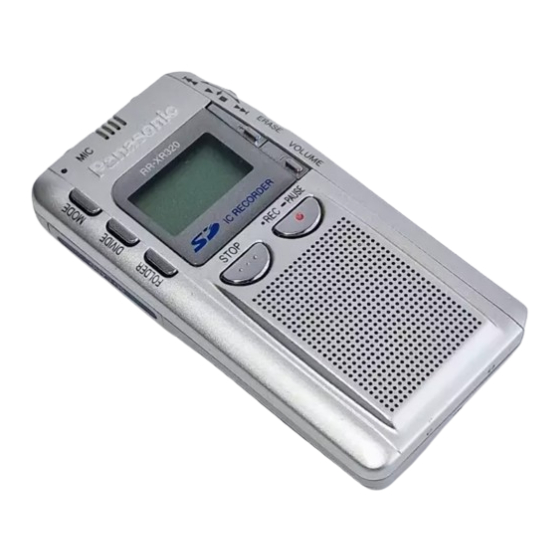
Page 18: Control Guide
Control guide 1 Card window 2 SD Memory Card cover 3 Clip 4 Play speed switch [PLAYBACK SPEED] 5 Battery cover 6 Hand strap hole 7 Microphone jack [MIC (PLUG IN POWER)] 78 9 : 8 Built-in microphone [MIC] 9 Earphone jack [#] : Display screen ;... -
Page 19: Displays
Before requesting service, make the below checks. If you are in doubt about some of the check Close the cover. points, or if the remedies indicated in the chart do not solve the problem, contact the Panasonic Insert a card. -
Page 20: Specifications
Battery life: — [When used at 25oC (77oF), on a flat, stable surface] Batteries Playback Recording Panasonic About 6 hours About 11 hours alkaline batteries ≥The battery life may be less depending on the operating conditions. Note Specifications are subject to change without notice. -
Page 21: Servicenter List
Web Site. Accessory Purchases:::::: 1-800-332-5368 (Customer Orders Only) Panasonic Services Company 20421 84th Avenue South, Kent, WA 98032 (6 am to 5 pm Monday-Friday; 6 am to 10:30 am Saturday; PST) (Visa, MasterCard, Discover Card, American Express, Check) Factory Servicenters Locations... - Page 22 PASC authorized Servicenter. Carry-in or mail-in service in Puerto warranty lasts, so the above exclusions or limitations may not apply to you. Rico can be obtained during the warranty period by calling the Panasonic Sales Company telephone number listed in the Servicenter Directory.
Need help?
Do you have a question about the RR-XR320 and is the answer not in the manual?
Questions and answers