Advertisement
Quick Links
DECLARATION OF CONFORMITY
This product is marked
– Low voltage no. 2006/95/CE.
– Electromagnetic compatibility no. 2004/108/CE, 92/31 EEC and 93/68 EEC.
This declaration will become void in case of misuse and/or non observance though partial of manufacturer's installation
and/or operating instructions.
OPERATING LIMITS
L
Cooling Maximum conditions
Outdoor temperature :
Room temperature :
L
Cooling Minimum conditions
Outdoor temperature :
Room temperature :
L
Heating Maximum conditions
Outdoor temperature :
Room temperature :
L
Heating Minimum conditions
Outdoor temperature :
Room temperature :
F-GAS Regulation (EC) No. 842/2006
Do not vent R410A into atmosphere: R410A is a
fluorinated greenhouse gas, covered by Kyoto Protocol,
with a Global Warming Potential (GWP) = 1975.
Tools required for installation (not supplied)
1.Standard screwdriver
2.Phillips head screwdriver
3.Knife or wire stripper
4.Tape measure
5.Level
6.Sabre saw or key hole saw
7.Hacksaw
8. Core bits ø 8
INSTALLATION INSTRUCTIONS
as it satisfies Directives:
43°C D.B.
32°C D.B. / 23°C W.B.
–15°C D.B.
10°C D.B. / 6°C W.B.
24°C D.B. / 18°C W.B.
27°C D.B.
–15°C D.B.
5°C D.B.
19.Hammer
10.Drill
11. Tube cutter
12.Tube flaring tool
13.Torque wrench
14.Adjustable wrench
15.Reamer (for reburring)
16.Hex. key
37.4255.069.00
- Split system air conditioner -
Model Combinations
Combine indoor and outdoor units only as listed below.
MONO SPLIT
Indoor Units
K2FAFIA0R5I--
MONO SPLIT
K2FAFIB0R5I-- x 1
MULTI SPLIT
K2FAFIA0R5I--
FOR "MULTI SPLIT"
COMBINATIONS SEE
INSTALLATION
K2FAFIB0R5I--
INSTRUCTIONS OF
OUTDOOR UNITS
Power Supply:
220 - 240 V ~ 50 Hz
05/2012
Outdoor Units
GR9FI40R5I--
GR9FI30R5I--
(WITH ADAPTER)
GR9FI50R5I--
GR9FI50R5I--
GR9FI65R5I--
GR9FI80R5I--
EG
I
F
D
E
Advertisement

Related Manuals for Technibel K2FAFIA0R5I Series


Summary of Contents for Technibel K2FAFIA0R5I Series
- Page 1 INSTALLATION INSTRUCTIONS - Split system air conditioner - DECLARATION OF CONFORMITY This product is marked as it satisfies Directives: – Low voltage no. 2006/95/CE. – Electromagnetic compatibility no. 2004/108/CE, 92/31 EEC and 93/68 EEC. This declaration will become void in case of misuse and/or non observance though partial of manufacturer's installation and/or operating instructions.
-
Page 2: Special Precautions
IMPORTANT! • Ground the unit following local electrical codes. • The Yellow/Green wire cannot be used for any connection Please read before installation different from the ground connection. • Connect all wiring tightly. Loose wiring may cause This air conditioning system meets strict safety and operating overheating at connection points and a possible fire standards. - Page 3 Installation site selection - Indoor unit • Select a sufficiently strong location to support the weight AVOID of the unit. • Direct sunlight. • Select a location where tubing and drain hose have the • Nearby heat sources that may affect unit performance. shortest run to the outside.
-
Page 5: Dichiarazione Di Conformità
ISTRUZIONI DI INSTALLAZIONE - Condizionatore d’aria Split System - DICHIARAZIONE DI CONFORMITÀ Questo prodotto è marcato in quanto conforme alle Direttive: – Bassa Tensione n. 2006/95/CE . – Compatibilità Elettromagnetica n. 2004/108/CE, 92/31 CEE e 93/68 CEE. Questa dichiarazione sarà nulla nel caso di impiego diverso da quello dichiarato dal Fabbricante e/o di mancata osservanza, anche solo parziale, delle istruzioni d'installazione e/o d'uso. - Page 6 IMPORTANTE! • Eseguire la messa a terra dell’unità secondo le norme elettriche locali. Leggere prima di iniziare l’installazione • Il conduttore giallo/verde non può essere utilizzato per collegamenti diversi dalla messa a terra. Questo sistema di condizionamento deve seguire rigidi •...
- Page 7 Scelta del luogo di installazione unità interna resistente da sostenere il peso dell’unità. EVITARE • Scegliere una posizione in modo che la distanza tra le • L’esposizione diretta al sole. due unità sia la minore possibile. • La vicinanza a fonti di calore che possono danneggiare •...
-
Page 9: Notice D'installation
NOTICE D’INSTALLATION - Climatiseur split - DECLARATION DE CONFORMITE Ce produit est marqué puisque il est conforme aux Directives: – Basse Tension n. 2006/95/CE. – Compatibilité Electromagnétique n. 2004/108/CE, 92/31 CEE et 93/68 CEE. Cette déclaration sera nulle en cas d'une utilisation différente de celle déclarée par le Constructeur et/ou de la non- observation, même si partielle des instructions d'installation et/ou d’utilisation. - Page 10 IMPORTANT! • Effectuez la mise à la terre de l'appareil en respectant les réglementations électriques locales. Veuillez lire ce qui suit avant de commencer • Le câble jaune/vert ne peut en aucun cas être utilisé pour Ce système de conditionnement de l'air répond à des toute autre connexion que celle de la mise à...
- Page 11 Choix de l'emplacement d'installation - Appareil intérieur RECHERCHEZ • Un emplacement approprié à partir duquel l'ensemble de la EVITEZ pièce peut être climatisé de manière uniforme. • L'exposition directe au soleil. • Un emplacement suffisamment solide pour supporter le poids •...
- Page 13 INSTALLATIONSANLEITUNGEN - Zweirohrsystem-Klimaanlage - KONFORMITÄTSERKLÄRUNG Dieses Produkt ist mit -Zeichen gekennzeichnet, weil es den folgenden Richtlinien entspricht: – Niederspannungsrichtilinie 2006/95/CE . – Elektromagnetische Verträglichkeit 2004/108/CE, 92/31 EWG und 93/68 EWG. Bei falschem Einsatz des Gerätes und/oder Nichtbeachtung auch nur von Teilen der Bedienungsanleitung und der Installatinsanweisungen wird diese Erklärung ungültig.
-
Page 14: Bitte Beachten
WICHTIG! Tod verursachen. • Erden Sie das Gerät gemäß den örtlich zutreffenden Bitte vor Arbeitsbeginn lesen Vorschriften. Diese Klimaanlage entspricht strengen Sicherheits- und • Das Gelbe/Grüne Kabel ist für die ausschließliche Betriebsnormen. Verwendung als Erdleitung. • Verbinden Sie Kabel fest miteinander. Lockere Für den Installateur oder Bediener dieser Anlage ist es Verbindungen können... - Page 15 Wahl des Installationsortes - Innenraumgerät • Wählen Sie eine Stelle, an der der Boden das Gewicht des VERMEIDEN SIE Gerätes tragen kann. • Direkte Sonneneinstrahlung. • Wählen Sie eine Stelle, von der aus die Rohre und der • Wärmequellen in der Nähe des Gerätes, die dessen Wasserablaufschlauch den kürzesten Weg nach darußen Leistungsfähigkeit beeinflussen könnten.
-
Page 17: Instrucciones De Instalacion
INSTRUCCIONES DE INSTALACION - Acondicionador de aire Split System - DECLARACION DE CONFORMIDAD Este Producto está marcado porque responde a las Directivas: – Baja Tensión n° 2006/95/CE. – Compatibilidad Electromagnetica n° 2004/108/CE, 92/31 CEE y 93/68 CEE. Esta declaración no tendrá efecto en sólo caso de que se haga un uso diferente al declarado por el Fabricante, y/o por el no respeto, incluso parcial, de las intrucciones de instalación y/o de uso. -
Page 18: Precauciones Especiales
¡IMPORTANTE! • Realizar la puesta a tierra de la unidad siguiendo las normas eléctricas locales. Leer antes de empezar la instalación • El conductor amarillo/verde no se puede utilizar para conexiones que no sean la de tierra. Este sistema de acondicionamiento cumple medidas rígidas •... - Page 19 Dónde instalar la unidad interior • Elegir una posición adecuada desde la que se llegue a todos los rincones. EVITAR • Controlar que el lugar de apoyo es lo suficientemente • La exposición directa al sol. resistente como para soportar el peso de la unidad. •...
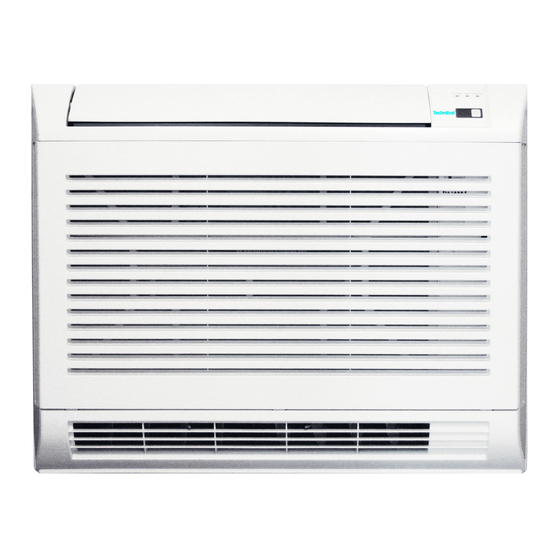
- Page 20 CA10: INDOOR UNIT • UNITÀ INTERNA • UNITE INTERIEURE • INNENEINHEIT • UNIDAD INTERIOR Minimum operation and maintenance area. Area minima di esercizio e manutenzione. Surface minimum de fonctionnement et d’entretien. Raumbedarf des Gerätes . Area mínima de funcionamiento y manutención. 2000 max 400 Remove the fixing bracket from the rear part of the unit.
- Page 21 Before installing the unit it is necessary to remove the front panel: - Open the air intake grille and remove it (detach the safety string). - Remove the front panel by loosening the 4 fixing screws. Prima di installare l’unità è necessario rimuovere il pannello frontale: - Aprire la griglia di aspirazione e rimuoverla (staccare la funicella di sicurezza).
- Page 22 Wall installation. Place the bracket to the wall and fix the central screw, level it and mark the other holes to drill as shown in the figure (2 holes are optional); fix completely the bracket. Hang the unit to the bracket, mark the holes to drill for the fixing of the unit. Installazione a parete.
- Page 23 Make the holes for the fixing of the unit. Running power electric cable (with a ground wire) between the two units (see the table of wire section). Check if the quantity and the rawl plugs type supplied are the proper ones for fixing the unit on the wall.
- Page 24 Remove the electrical box cover to operate on the terminal strip. Rimuovere il coperchio scatola componenti elettrici per accedere alla morsettiera. Enlever le capot de la boîte des composants électriques. Die Abdeckplatte des Klammbrettes entfernen. Quitar la tapa de la caja de los componentes eléctricos para acceder a la regleta de bornes.
- Page 25 Colocar el cable eléctrico y concitarlo al tablero de bornes (véase esquema de conexiones). Bloquear el cable a la abrazadera de la brida. ADVERTÊNCIA Controlar que los bornes de los cables estér bien sujetos en el tablero de bornes. De otro modo, podrían recalentarlo o provocar problemas en el funcionamiento del acondicionador con riesgo le incendio.
- Page 26 OUTDOOR UNIT • UNITÀ ESTERNA • UNITE EXTERIEUR • AUßENEINHEIT • UNIDAD EXTERIOR ONLY GR9FI40 - GR9FI30 MONO SPLIT Minimum operation and maintenance area Area minima di esercizio e manutenzione. Surface minimum de fonctionnement d’entretien. Raumbedarf des Gerätes. Area mínima de funcionamiento y manutención. Provide a solid base for outdoor unit raised from the ground level.
- Page 27 Use insulated copper tube. Cut approximate 30-50 cm longer than actual min. 8 mm min. 8 mm distance between units. Utilizzare del tubo in rame isolato. Tagliare con lunghezza maggiorata di 30-50 cm oltre la distanza tra le unità. Utiliser de tube en cuivre isolé. Couper à une longueur de 30-50 cm en plus de la distance entre les unités.
- Page 28 Tighten connections using a spanner and a torque wrench; apply specified torque (see table). Stringere le connessioni utilizzando una chiave fissa e una chiave dinamometrica; attenersi alla tabella dei valori del momento torcente. Serrer les connexions à l'aide d'une clé fixe et d'une clé dynamométrique; respercter les couples de serrage.
- Page 29 Remove caps from service valves of both tubes. Then start vacuum pump and let it run for the time indicated in the table (vacuum 10 mm Hg abs.). Rimuovere i cappucci delle valvole di entrambi i tubi. Quindi avviare la High pressure pompa del vuoto per un tempo consigliato come da tabella (vuoto di 10 mm Hg assoluti).
- Page 30 Turn the service valves stem in counterclockwise to fully open the valves. At this point vacuum pump flexible hose can be disconnected. Replace bonnet and flare nut, tighten them to 200 kg/cm with a torque wrench. Aprire completamente le valvole di servizio (senso antiorario). A questo punto scollegare il flessibile della pompa del vuoto.
- Page 31 The service port on the wide tube service valve uses a Schrader core valve to access the refrigerant system. Therefore, be sure to use a hose connector which has a push-pin inside. La valvola di servizio del rubinetto dell'unità esterna da utilizzare per il vuoto del sistema, il ripristino carica refrigerante e la misurazione della pressione di esercizio è...
- Page 32 SYSTEM WIRING DIAGRAM • COLLEGAMENTI ELETTRICI DEL SISTEMA • BRANCHEMENTS ELECTRIQUES DU SYSTEME • ELEKTRISCHE ANSCHLÜSSE DES SYSTEMS • CONEXIONES ELECTRICAS DEL SISTEMA ONLY GR9FI40 MONO SPLIT...
- Page 33 ONLY GR9FI30 MONO SPLIT WARNING: TURN THE POWER OFF (INDOOR AND OUTDOOR UNIT) BEFORE SERVICING THE SYSTEM. LENGTH, SIZE WIRES AND DELAYED FUSE • LUNGHEZZA, SEZIONE CAVI E FUSIBILI RITARDATI • LONGUEUR, SECTION CABLES ET FUSIBLES RETARDES • KABEL-LÄNGE UND QUERSCHNITT UND TRÄGE SICHERUNGEN •...
- Page 34 Power supply wire A / Connecting wire C (with ground conductor): Multipolar electric wire; size and length of the suggested electric wire are showed on table “electrical data”. The wires have not to be lighter than Mod. H07RN-F (according to CEI 20-19 CENELEC HD22). Make sure the length of the conductors between the fixing point and the terminals allows the straining of the conductors L, N before that of the grounding.
- Page 35 REMOTE CONTROL UNIT INSTALLATION • POSIZIONE DI INSTALLAZIONE TELECOMANDO • EMPLACEMENT DE LA COMMANDE A DISTANCE • POSITION DER FERNBEDIENUNG • POSICION DE INSTALACION DEL MANDO A DISTANCIA REMOTE CONTROL UNIT INSTALLATION To ensure that the air conditioner operates correctly, DO NOT install the remote control unit in the following places: •...
- Page 36 WALL-MOUNTED POSITION • Momentarily place the remote control unit in the desired mounting position. • Verify that the remote control unit can operate from this position. • Fix the support at the wall with two screws and hang the remote control unit. POSIZIONE A PARETE •...
- Page 37 SYSTEM POWER SETTING - IMPOSTAZIONE POTENZA DEL SISTEMA - REGLAGE PUISSANCE DU SISTEME EINSTELLUNG DER KRAFT DES SYSTEMS - REGULACION DE LA FUERZA DEL SISTEMA This unit belongs to the iSeries Full DC Inverter, a technology developed by Argo that is able to program a lot of operation parameters directly on the unit, simply through a selection on the remote control during installation: “big room or little room".
- Page 38 Diese Einheit gehört zu iSeries Full DC Inverter, eine von Argo entwickelte Technologie, daß viele Betriebsweise der Elektronik, während der Installation, sofort in der Einheit, mit der Fernbedienung einstellen kann: “großes Zimmer oder kleines Zimmer”. Folglich arbeitet die Einheit auf geeigneter Weise gemäß...
- Page 39 CURRENT LIMITATION IN CASE OF POWER SUPPLY WITH PHOTOVOLTAIC PANELS - LIMITAZIONE DI CORRENTE PER APPLICAZIONI CON ALIMENTAZIONE DA PANNELLI FOTOVOLTAICI - LIMITATION DE COURANT POUR ALIMENTATION AVEC PANNEAUX PHOTOVOLTAIQUES - STROMBEGRENZUNG FÜR VERSORGUNG MIT PHOTOVOLTAIK- MODULE - LÍMITE DE CORRIENTE PARA ALIMENTACIÓN CON PANELES FOTOVOLTAICOS Outdoor units AEI1G40 have the possibility to operate optimally when they are supplied only by photovoltaic systems.
- Page 40 Die Ausseneinheiten AEI1G40 konnen optimal funktionieren, wenn sie nur von Photovoltaik-Anlagen versorgt werden. Um diese Funktion zu aktivieren, mussen Sie die Fernbedienung, wie folgt, einstellen: Filter: ON Night Mode / High Power Mode: OFF Betriebsweise: AUTO Flap: AUTO Eingegebene Temperatur: 21°C Jetzt, drucken Sie gleichzeitig die Taste “FAN”...
- Page 41 DEFAULT SETTING RESET - RESET IMPOSTAZIONI DI DEFAULT - REMISE A ZERO DES REGLAGES DE DEFAUT - ZURÜCKSETZEN AUF STANDARDEINSTELLUNGEN - RESTABLECER LA CONFIGURACIÓN PREDETERMINADA To operate the unit again with the default setting it is necessary to set the remote control as follows: Filter: ON Night Mode / High Power Mode: OFF Operation mode: AUTO...
- Page 42 Para restablecer las configuraciones predeterminadas de la unidad interior, ustedes tienen que regular el mando a distancia de la manera siguiente: Filter: ON Night Mode / High Power Mode: OFF Modo de funcionamiento: AUTO Flap: AUTO Temperatura seleccionada: 10°C Ahora, presionar simultáneamente los pulsadores del mando a distancia “FAN” y “I FEEL” durante mas de 5 segundos y soltarlos dirigiendo el mando a distancia hacia la unidad interior.
- Page 43 PUMP DOWN Das bedeutet: das Kühlmittel in die Außeneinheit ohne Pump down means collecting all refrigerant gas in the Gas-Verlust zurückzugewinnen. Man benutzt es, wenn system back into the outdoor unit without losing gas. das Klimagerät in eine neue Position gestellt werden Pump down is used when the unit is to be moved of muß...
- Page 44 Remove the valve manifold. At that time, PUMP DOWN has been completed and all refrigerant gas will have been collected in the outdoor unit. Rimuovere il gruppo manometrico. A questo punto l'operazione di PUMP DOWN è completa poiché tutto il gas refrigerante è raccolto nell'unità esterna.
Need help?
Do you have a question about the K2FAFIA0R5I Series and is the answer not in the manual?
Questions and answers