
Related Manuals for Handlink Technologies WG-500P M


Summary of Contents for Handlink Technologies WG-500P M
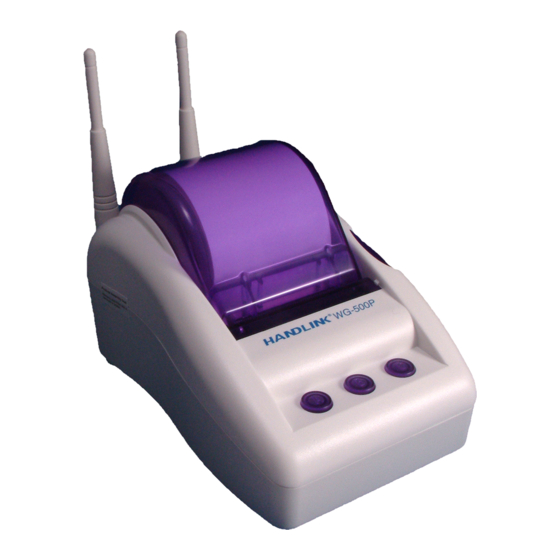
- Page 1 WG‐ ‐500P & WG‐5 500P M Hotsp pot in a Printer r WG-5 500P P & W -500 0P M otspot in a Printer er M 0 ...
- Page 2 WG‐500P & WG‐500P M Hotspot in a Printer Copyright Notice Copyright © 2013‐2022 Handlink Technologies Inc. All rights reserved. No part of this document may be copied, reproduced, or transmitted by any means, for any purpose without prior written permission. Protected by TW patent 223184, JPN patent 3099924, USA patent US8,010,421 B2, EU patent EP1404056BI, China patent ZL03204640.5. Disclaimer We shall not be liable for technical or editorial errors or omissions contained herein; nor for incidental or consequential damages resulting from furnishing this material, or the performance or use of this product. We reserve the right to change the product ...
-
Page 3: Table Of Contents
WG‐500P & WG‐500P M Hotspot in a Printer Contents 1 Introduction ...................... 4 1‐1 Package Contents ................... 5 1‐2 Features .................... 5 1‐3 Precautions .................... 6 1‐4 Outlook .................... 6 1‐4‐1 Printing a test page ................ 9 1‐4‐2 How to load paper rolls .............. 9 1‐5 Technical Specifications ............... 1 0 1‐5‐1 Hardware Specifications .............. ... - Page 4 WG‐500P & WG‐500P M Hotspot in a Printer 3‐3 System Status .................. 9 6 3‐3‐1 System .................. 9 7 3‐3‐2 Account List .................. 9 8 3‐3‐3 Account Log .................. 9 9 3‐3‐4 Current User ................ 1 00 3‐3‐5 DHCP Clients ................ 1 01 3‐3‐6 Session List ................. 1 01 3‐4 System Tools .................. ...
-
Page 5: Introduction
WG‐500P & WG‐500P M Hotspot in a Printer 1 Introduction The WG‐500P is a compact intelligent gateway. It provides Plug’ Play Internet access, advanced security and network management. The WG‐500P is designed for service providers, system integrator or hotspot venue operator without backend‐RADIUS‐Server to have integrated solution for rapid deployment, which can start hotspot service quickly and easily and enhance service performance. The WG‐500P is an ideal solution for hotel lobbies, coffee bars, airport lounges, conference facilities and other sites that commonly host business travelers, and offers instant high‐speed Internet connections. With its IP Plug and Play technology, ... -
Page 6: Package Contents
WG‐500P & WG‐500P M Hotspot in a Printer 11 Package Contents Please inspect your package. The following items should be included: WG‐500P One WG‐500P One Thermal papers (50 meter) One Power Adapter One Ethernet Cable (1.5 meter) One Quick Installation Guide Two Detachable Antenna One Product CD One Wi‐Fi Label If any of the above items are damaged or missing, please contact your dealer immediately. 12 Features Wireless data rates up to 300 Mbps Supports up to 30 simultaneous Users IP Plug and Play (iPnP) Comprehensive security 64/128‐bit WEP encryption WPA encryption WPA2 Encryption IP/URL filtering Intelligent Management Built‐in AAA (Authentication/Accounting/Authorization) and Billing mechanism ... -
Page 7: Precautions
WG‐ ‐500P & WG‐5 500P M Hotsp pot in a Printer r 13 Precau utions Never r remove or r open the c cover. You m may suffer serious inju ury if you to ouch these parts. Never r install the system in th he wet loca ations. Use on nly the orig inal fitting A AC power a dapter othe erwise ther re is a dange er of severe e electrical s shock. Avoid exposing th he WG‐500P P to direct s sunlight or a another hea at source. ... - Page 8 WG‐500P & WG‐500P M Hotspot in a Printer Figure 1‐4‐2 Front Panel Figure 1‐4‐3 Rear Panel Paper roll housing Printer Cover Tear Bar, for paper cutting Button A Button B Button C Push Button, for printer cover opening Reset Button DC power supply connector 10. RJ45 port 11. Micro USB connector 12.
- Page 9 WG‐500P & WG‐500P M Hotspot in a Printer UPLINK LED: Off: A port has not established any network connection. Yellow light: A port has established a valid 10/100 Mbps network connection. Yellow Blinking: 10/100 Mbps traffic is traversing the port. Reset Button: The WG‐500P has a reset button at the rear panel of the device. Use this function to reset the system back to factory defaults. Power Jack: Used to connect the external power supply with the WG‐500P. 8 ...
-
Page 10: How To Load Paper Rolls
WG‐500P & WG‐500P M Hotspot in a Printer 141 Printing a test page After you have installed your printer, you should print a test page to make sure the printer is functioning properly. To do this act as follows: 1. Turn the printer off. 2. Hold down the button A for approximately five seconds, and then turn the printer on. 3. The printer will print a test page. 142 How to load paper rolls Please follow the steps to correctly load paper rolls. Figure 1‐4‐4 Paper rolls loading 9 ... -
Page 11: Technical Specifications
WG‐500P & WG‐500P M Hotspot in a Printer 15 Technical Specifications 151 Hardware Specifications Network Specification IEEE802.3 10BaseT Ethernet IEEE802.3u 100BaseTX Fast Ethernet IEEE802.11b/g/n Wireless LAN ANSI/IEEE 802.3 NWay auto‐negotiation Wi‐Fi Compatible Connectors One WAN Port (10BaseT/100BaseTX Auto cross‐over) One Micro USB connector Encryption WEP (Wired Equivalent Privacy) 64/128‐bit RC4 WPA (Wi‐Fi Protected Access) WPA2 (Wi‐Fi Protected Access) External Antenna Type Dual detachable diversity antenna with reverse SMA LED Indicators One POWER LED One WAN 10/100M Link/Activity LED One Wireless Link/Activity LED One System LED Power Requirement External Power Adapter Input: 100‐240 VAC, 50/60 Hz Output: 12V, 1.5A Environment Conditions Operating Temperature: 0 to 50°C 10 ... -
Page 12: Software Specifications
WG‐500P & WG‐500P M Hotspot in a Printer Storage Temperature: ‐10 to 60°C Operating Humidity: 20~80% non‐condensing Storage Humidity: 20% to 90% non‐condensing Certifications FCC part 15 Class B, CE , C‐Tick , VCCI Dimension Size: 109×155×90 (W×D×H )mm Weight: About 340g (Net) Printer Tray Push button: push to open printer cover Tear bar: cuts receipt paper Button A: flashing when printer cover is opened Paper roll housing: put paper roll here Paper Roll and Printing Paper width: 58 (+0/‐1)mm Paper length: 50M (max.) Paper thickness: 65 um Paper roll outside diameter: 63 (+2/‐2) mm Paper roll inside diameter: 12 (+0.5/‐0) mm Paper Detection: Photo interrupter Printing width: 48 mm Printing Method: Direct thermal Printing Speed: 25.4 mm/ sec Dot resolution (dots/ mm): 8 (203 dpi) Thermal head service life: 1 pulses or 50Km 152 Software Specifications Networking IEEE802.3 10BaseT Ethernet IEEE802.3u 100BaseTX Fast Ethernet IEEE802.11b Wireless LAN IEEE802.11g Wireless LAN IEEE802.11n Wireless LAN 11 ... - Page 13 WG‐500P & WG‐500P M Hotspot in a Printer Supports 30 Simultaneous Users IP Plug and Play (iPnP) HTTP Proxy Support WEP64/128bit WPA-PSK (TKIP) WPA2-PSK(AES) WPA/WPA2 Mix mode SMTP Server Redirection DHCP Server(RFC 2131) DHCP Relay(RFC 1542) Static IP WAN Client DHCP WAN Client PPPoE WAN Client(RFC 2516) PPTP WAN Client NAT(RFC 1631) IP Routing NTP (Network Time Protocol) Support Local Account: 256 Max Session Number: up to 16384 Marketing Cooperation Advertisement URL link Walled garden Customizable log‐on and log‐off pages Portal Page User Accounting and Authentication Built‐in Authentication Web‐based Authentication RADIUS AAA Support (RFC 2865, 2866) Secondary RADIUS User Authentication and Accounting ...
- Page 14 WG‐500P & WG‐500P M Hotspot in a Printer SSL Administration VPN Pass through (IPSec/PPTP) Customize SSL Certificate Pass Through IP/MAC/URL Address Restricted Destination Filtering IP/URL VPN (IPSec/PPTP) Pass through PPTP VPN Client WEP WPA WPA2 WPA/WPA2 Mix mode Management Web‐based Management Tool Firmware Upgrade via HTTP/TFTP Wizard setup for step‐by‐step Configuration Backup/Restore/Factory Default Setting Remote Authorized Management Real‐time Session List Syslog (System/Subscriber/LAN device) E‐mail logs SNMP v1/v2 (MIB II, Private MIB) System Information Table Status Report (Daily/Monthly/System/Network) SSL certificate upload 13 ...
-
Page 15: Installation
WG‐500P & WG‐500P M Hotspot in a Printer 2 Installation 21 Connecting the Antennas The WG‐500P provides two antenna connectors on the rear of the unit. 22 Installation Requirements Before installing the WG‐500P, make sure your network meets the following requirements. System Requirements The WG‐500P requires one of the following types of software: Windows 98 Second Edition/NT/2000/XP/Vista Red Hat Linux 7.3 or later version MAC OS X 10.2.4 or later version Any TCP/IP‐enabled systems like Mac OS and UNIX (TCP/IP protocol installed) Standard phone line for xDSL modem Or Coaxial cable for Cable modem Web Browser Software (Microsoft I.E 5.0 or later version or Netscape Navigator 5.0 or later version) ... - Page 16 WG‐500P & WG‐500P M Hotspot in a Printer Dynamic IP Dynamic IP Setting Fixed IP Your fixed IP address for the WG‐500P Your subnet mask for the WG‐500P Your default gateway IP address Your DNS IP address PPPoE Your user name and password from your ISP PPTP PPTP Server IP Address from your ISP PPTP Local IP address from your ISP. PPTP Local IP subnet mask from your ISP. Your user name from your ISP Your password from your ISP Your PC Requirements The Static IP settings for the PC Your PC’s fixed IP address Your PC’s subnet mask Your PC’s default gateway IP address Your PC’s primary DNS IP address Note: 1. The gateway’s default IP address setting is “10.59.1.1”. 2. The gateway’s default subnet mask setting is “255.255.255.0”. The Dynamic IP settings for the PC We recommend that you leave your IP settings as automatically assigned. By default, the WG‐500P is a DHCP server, and it will give your PC the necessary IP settings. 15 ...
-
Page 17: Getting Start
WG‐500P & WG‐500P M Hotspot in a Printer 23 Getting Start WG‐500P Connection 1. Connect the DC power adapter to the WG‐500P and plug it into a power socket. 2. Connect WG‐500P and xDSL modem with an Ethernet Cable. Figure 2‐3‐1 WG‐500P Connection 16 ... - Page 18 WG‐500P & WG‐500P M Hotspot in a Printer Configure TCP/IP of your computer For Windows user, 1. Click Start > Control Panel, click Switch to Classic View and double click on Network Connections. 2. Right click on the Local Area Connection and click Properties. 3. Double click Internet Protocol (TCP/IP). 4. Choose Obtain an IP address automatically. 5. Click OK to close the Internet Protocol (TCP/IP) Properties and click OK again to close the Local Area Connection. Figure 2‐3‐2 TCP/IP Setting 17 ...
-
Page 19: Configuring The
WG‐500P & WG‐500P M Hotspot in a Printer 3 Configuring the WG500P 31 Setting Wizard Step 1: The ESSID’s name by default is related to the last 4 numbers of WLAN MAC. If the WLAN MAC is “00‐90‐0E‐00‐12‐34”, the default is “Handlink‐1234_1”. Please search ESSID “Handlink ‐1234_1” and connect it. Step 2: Start your browser, and then enter the factory default IP address 10.59.1.1 in your browser’s location box. Press Enter. Figure 3‐1‐1 Web Browser Location Field (Factory Default) Step 3: The WG‐500P configuration tools menu will appear. In the Username and Password field, type the factory default user name admin and password admin and click Login. If you are first time setting the system, the wizard setup screen will appear. You will be guided, step‐by‐step, through a basic setup procedure. ... - Page 20 WG‐ ‐500P & WG‐5 5 00P M Hotsp p ot in a Printer r Figure 3‐1 1‐3 Wizard Set tup Screen Figure 3‐ ‐1‐4 System Q Quick View 19 ...
- Page 21 WG‐500P & WG‐500P M Hotspot in a Printer Step 4: Internet Connection Setting Select the appropriate Internet connection type to connect to your ISP. Figure 3‐1‐5 Internet Connection Setting Screen DHCP Client The device can work as a DHCP client. This allows the device to obtain the IP address and other TCP/IP settings from your ISP. If your xDSL/Cable comes with this feature, please enable Use DHCP Client. Figure 3‐1‐6 Internet Connection Setting Screen Static IP Setting If Static IP Setting is selected, then this screen will appear. Enter the IP address information provided by your ISP. 20 ...
- Page 22 WG‐500P & WG‐500P M Hotspot in a Printer Figure 3‐1‐7 Internet Connection Setting Screen—Static IP Setting Item Default Description 0.0.0.0 IP Address Enter the IP address provided by your ISP. 0.0.0.0 Subnet Mask Enter the subnet mask for the IP address. 0.0.0.0 Gateway IP Address Enter the Gateway IP Address provided by your ISP.
- Page 23 WG‐500P & WG‐500P M Hotspot in a Printer PPPoE (Point‐to‐Point Protocol over Ethernet) If “PPPoE” is selected, then this screen will appear. Enter the username, password and other major fields. Figure 3‐1‐8 Internet Connection Setting Screen—PPPoE Setting Item Default Description Username Empty Enter the user name provided by your ISP. The user name can consist of up ...
- Page 24 WG‐500P & WG‐500P M Hotspot in a Printer alive. The Max Idle Time maximum value is 65535 minutes. Keep alive and Redial Period This option keeps your PPPoE enabled Internet access connected Keep alive Disable indefinitely, even when it sits idle. The Redial Period maximum value is 65535 ...
- Page 25 WG‐500P & WG‐500P M Hotspot in a Printer TCP MSS Setting 1452 MSS (Maximum Segment Size) specifies maximum segment size. Service Name Empty Enter the service name provided by your ISP. The service name can consist of up to 64 alphanumeric characters and is case sensitive. ...
- Page 26 WG‐500P & WG‐500P M Hotspot in a Printer Step 5: Wireless Setting This page allows you to choose Country, Channel ID and 802.11 Mode for wireless connection. Figure 3‐1‐10 Wireless Setting Screen Item Default Description Country ETSI Enter the Country for wireless connection. Channel Enter the channel ID for wireless connection. 802.11 Mode 802.
- Page 27 WG‐500P & WG‐500P M Hotspot in a Printer Step 6: Authentication Setting This page allows you to choose whether the users need to be authenticated before the Internet access. If users need the account and password to get access of Wi‐Fi, please choose Yes. Figure 3‐1‐11 Authentication Service Setting Screen 26 ...
- Page 28 WG‐500P & WG‐500P M Hotspot in a Printer Step 7: Billing Profile Setting This page allows you to set your service and price plan. If you would like to provide “FREE” Wi‐Fi for users, please activate“No Billing Mode", and the price and the tax won’t be showed on the ticket. You can set 3 billing profiles. Figure 3‐1‐12 Billing Profile Setting Item Default Description Service and Price Plan Time to Finish Choose your service and price plan. No Billing Mode Disabled If you would like to provide FREE Wi-Fi for users, please activate “No Billing Mode", and the price and the tax won’t be showed on...
- Page 29 WG‐500P & WG‐500P M Hotspot in a Printer Step 8: Accounting Setting Following the Billing Profile Setting, the page allows to set the billing profiles for each button of the printer. Figure 3‐1‐13 Accounting Setting Item Default Description Printout Numbers of copies to print The numbers of the same printed tickets. You can reserve the copies. Customize printout ticket You can customize the printout text for the ticket. If you want to know more, please refer to 3-2-5-4 Customization / Account Printout.
- Page 30 WG‐500P & WG‐500P M Hotspot in a Printer Step 9: Firmware Upgrade Notice Setting If you would like to receive the information about firmware upgrade, please activate it and leave your email. Figure 3‐1‐14 Firmware Upgrade Notice Setting 29 ...
- Page 31 WG‐500P & WG‐500P M Hotspot in a Printer Step 10: System Setting System Setting: The WG‐500P allows to change the administrator’s Username and Password, and system time setting. Figure 3‐1‐15 System Setting Screen Item Default Description Username admin Enter the user name. The user name can consist of up to 80 alphanumeric characters and is case sensitive. Password admin Enter the user password.
- Page 32 WG‐500P & WG‐500P M Hotspot in a Printer HH:MM:SS NTP Setting Click Update button to correct the system date and time. Secure Administrator This function allows remote user to management the device. You can IP Address specify one or any IP addresses for remote control the system. Click FINISH button to save the settings then the system will restart. ...
-
Page 33: Advanced Setup
WG‐500P & WG‐500P M Hotspot in a Printer 32 Advanced Setup The Advanced Setting enables you to configure advanced settings related to accessing the Internet, including, AUTHENTICATION AUTHENTICATION RADIUS BILLING BILLING ACCOUNTING CREDIT CARD MANAGEMENT SYSLOG SESSION TRACE BANDWIDTH SNMP SECURITY PASS THROUGH FILTERING SECURE REMOTE SYSTEM ... - Page 34 WG‐500P & WG‐500P M Hotspot in a Printer 321 AUTHENTICATION 3‐2‐1‐1 Authentication Figure 3‐2‐2 Authentication Item Default Description Authentication Type Built-in Option: No Authentication, Built-in Authentication or Authentication User Agreement. No Authentication Subscriber can direct access the Internet without enter username and password. Built-in Authentication WG-500P provides “Built-in Authentication”...
- Page 35 WG‐500P & WG‐500P M Hotspot in a Printer Internet crime investigation. If you would like to activate PIR function, please refer to Chapter 5 Personal ID Recognition. The default is Disable. User Agreement Subscriber must accept the service usage agreement before they can access the Internet. Redirect Login Page URL Empty The input format can be http://www.yahoo.com.
-
Page 36: Radius
WG‐500P & WG‐500P M Hotspot in a Printer 3‐2‐1‐2 RADIUS Figure 3‐2‐4 Authentication Setting Screen Item Default Description RADIUS Authentication Disable Disable (RADIUS Disable) Subscriber can direct access the Internet without entering username and password. Enable (RADIUS Authentication) WG-500P provides “RADIUS Authentication” for service provider to build up an Internet service with RADIUS server. - Page 37 WG‐500P & WG‐500P M Hotspot in a Printer match with the RADIUS server setting. The allowed numbers are from 0 to 65535. Share Secret Key Empty The share secret key, the key number also has to match with the Server setting. Up to 64 characters are allowed. ...
-
Page 38: Billing
WG‐500P & WG‐500P M Hotspot in a Printer 322 BILLING 3‐2‐2‐1 Billing The function is used to setup a billing profile. A billing profile is a description of how you want to charge your customer. Figure 3‐2‐5 Billing Setting Screen Item Default Description Enable Credit Card Service Disable Enables or disables the credit card service. Before you enable credit card service, make sure that your credit service is configured to work and the currency is American dollars. - Page 39 WG‐500P & WG‐500P M Hotspot in a Printer system can keep and accumulate every single usage time until the pre-defined usage time run out. Idle Time Out 5 Min(s) The idle time out valid range is 1-1440. If the idle time out is set as 5 minutes, it means if the account doesn’t send packet in 5 minutes, the account will logout automatically.
- Page 40 WG‐500P & WG‐500P M Hotspot in a Printer Figure 3‐2‐6 Accumulation and Time to Finish Figure 3‐2‐7 Pre‐paid Procedure Diagram 39 ...
-
Page 41: Accounting
WG‐500P & WG‐500P M Hotspot in a Printer 3‐2‐2‐2 Accounting This function allow service provider to generate the subscriber accounts. Figure 3‐2‐8 Accounting Setting Screen Item Default Description Expiration Un-used account will be deleted 24 hours Enter the number of hours/minutes/days. The field maximum after ~hours automatically value is 30 hours/minutes/days. Accumulation account will be 3 months Enter the number and select time unit from list box. - Page 42 WG‐500P & WG‐500P M Hotspot in a Printer Figure 3‐2‐9 Account Process Diagram Can be topped up by subscriber=Enable Item Default Description Button A~C Define each button’s billing profile. Select one billing profile by clicking in the list box. Use ~ for Discount Button A, Disable Select one button (A~C) by clicking in the list box to assign Price Plan based on the base charge and select enable to active the discount “Button Presses”...
- Page 43 WG‐500P & WG‐500P M Hotspot in a Printer Figure 3‐2‐10 Account Generator Printer (Time to Finish) Figure 3‐2‐11 Account Generator Printer (Accumulation) 42 ...
- Page 44 WG‐500P & WG‐500P M Hotspot in a Printer Example: If press 7 times Discount Price Plan based on “Button Presses” is disabled. Figure 3‐2‐12 Example 1 Amount: 7 x $2.00= $14.00 Figure 3‐2‐13 Account Printout 43 ...
- Page 45 WG‐500P & WG‐500P M Hotspot in a Printer Discount Price Plan based on “Button Presses” is enabled. The Charge by level is disabled. Figure 3‐2‐14 Example 2 Amount: 7 x $ 1 = $ 7.00 Below is an example of the account printout. Figure 3‐2‐15 Account Printout 44 ...
- Page 46 WG‐500P & WG‐500P M Hotspot in a Printer Discount Price Plan based on “Button Presses” is enabled. Charge by level is enabled. Figure 3‐2‐16 Example 3 Amount: 2 x $2.00 + 4 x$ 1.50+1x$1= $11.00 Below is an example of the account printout. Figure 3‐2‐17 Account Printout Discount Price Plan based on “Button Presses” 45 ...
- Page 47 WG‐500P & WG‐500P M Hotspot in a Printer Figure 3‐2‐18 Discount Price Plan Setting Screen Item Default Description Charge by levels Enable Enables or disables the charge by levels function. 1‐10 Level This field displays the level number of charge rate. Conditions When>= The discount condition...
-
Page 48: Credit Card
WG‐500P & WG‐500P M Hotspot in a Printer 3‐2‐2‐3 Credit Card WG‐500P provides three credit card services (Authorize.net, iValidate.net, Secure Pay, Paypal and WorldPay) that allow service provider to authorize, process, and manage credit transactions directly from Internet. Figure 3‐2‐19 Credit Card Setting Screen 47 ... - Page 49 WG‐500P & WG‐500P M Hotspot in a Printer Item Default Description Authorize.net Version This field displays the merchant version. Merchant ID Empty Enter your Merchant ID. This is a Merchant Identification Number that you’re received from your Merchant Provider. The maximum character of the Merchant ID is 50.
- Page 50 WG‐500P & WG‐500P M Hotspot in a Printer Item Default Description merchant/processcc.a Secure Pay Merchant ID Empty Enter your Merchant ID. This is a Merchant Identification Number that you’re received from your Merchant Provider. The maximum character of the Merchant ID is 7. ...
- Page 51 WG‐500P & WG‐500P M Hotspot in a Printer Item Default Description Credit Card icons to be Click on check box to display credit card icon on the login page. displayed on the login page Click Apply button to save the new settings and the success dialog box appears. Click on Back to return to Accounting setting screen. Note: Please leave the Administrator's Email address in Advanced/Syslog/Email portion. ...
-
Page 52: Management
WG‐500P & WG‐500P M Hotspot in a Printer 323 MANAGEMENT 3‐2‐3‐1 Syslog The function allows the device to transmit event messages to your syslog server or your email address for monitoring and troubleshooting. Syslog Setting Figure 3‐2‐20 Syslog Setting Screen Item Default Description Send to Syslog Server Disable Enables or disables the syslog server function. Syslog on LAN Server IP Address Empty Enter syslog server’s IP address. - Page 53 WG‐500P & WG‐500P M Hotspot in a Printer Item Default Description Syslog on WAN Server 1 IP Address Empty Enter IP address of first syslog server. Server 2 IP Address Empty Enter IP address of second syslog server. ...
- Page 54 WG‐500P & WG‐500P M Hotspot in a Printer Log Categories Figure 3‐2‐21 Log Settings Screen Item Default Description System Device Information Every 10 minute(s) The range is 5~60 minutes. The log included system information would be sent according to specified interval time. Format: PRODUCT=WG-500P:VER=2.00.00;LOGNAME=DVI; DATE=07Mar26;TIME=11:30:00; 53 ...
- Page 55 WG‐500P & WG‐500P M Hotspot in a Printer Item Default Description WANMAC=09-00-0e-00-00-01;LANMAC=09-00-0e-00-00-02; WLANMAC=09-00-0e-00-00-03; IP_ADDRESS=210.66.37.21; SYS_UP_TIME=14D23H34M21S;WANTXOK=99999; WANRXOK=99999;WANTXERROR=99999;WANRXERROR=99999; LANTXOK=99999;LANRXOK=99999;LANTXERROR=99999; LANRXERROR=99999;WIRELESSTXOK=99999;WIRELESSRXOK=99 999; WIRELESSTXERROR=99999;WIRELESSRXERROR=99999; WAN_QUALITY=5; System Up Notice When system If device have been rebooted or restarted, the log would be rebooted or restarted sent. Format: PRODUCT=WG-500P;VER=2.00.00;LOGNAME=SUN; DATE=07Mar26;TIME=15:23:32; WANMAC=09-00-0e-00-00-01;LANMAC=09-00-0e-00-00-02;...
- Page 56 WG‐500P & WG‐500P M Hotspot in a Printer Item Default Description PRODUCT=WG-500P;VER=2.00.00;LOGNAME=FUN; DATE=07Mar26;TIME=15:23:32; WANMAC=09-00-0e-00-00-01;LANMAC=09-00-0e-00-00-02; WLANMAC=09-00-0e-00-00-03; IP_ADDRESS=210.66.37.21; MESSAGE=Success;OLD_FRIMWARE=v1.00.01; NEW_FIRMWARE=v1.00.02 Message = Success | Fail Wireless Association Every 10 minute(s) The range is range 5~60 minutes. A log including wireless users Information information will be sent according to specified interval time. Format: PRODUCT=WG-500P;VER=2.00.00;LOGNAME=WAI;...
- Page 57 WG‐500P & WG‐500P M Hotspot in a Printer Item Default Description USER_TYPE=Dynamic; USED_TIME=24:00:00;TIME_LEFT=24:00:00 User Type = Dynamic / Radius User Logout When user A log including users information will be sent when user logged-out logged –out Format: PRODUCT=WG-500P;VER=2.00.00;LOGNAME=ULO;DATE=07Mar26; TIME=15:23:32;WANMAC=09-00-0e-00-00-01; LANMAC=09-00-0e-00-00-02; WLANMAC=09-00-0e-00-00-03; IP_ADDRESS=210.66.37.21;USER_NAME=asdfg12;USER_IP=10.59.1. USER_MAC=02-34-3e-01-00;INTERFACE=Ethernet; USER_TYPE=Dynamic;RXDATA=1234; TXDATA=1234; USED_TIME=24:00:00;LOGOUT_TYPE=Time_Up;TIME_LEFT=24:00:0 User Type = Dynamic / Super / User Agreement / Radius / No-Auth Current User List...
- Page 58 WG‐500P & WG‐500P M Hotspot in a Printer Item Default Description Account Information When an account is A log will be sent when an account is created created Format: PRODUCT=WG-500P;VER=2.00.00;LOGNAME=ACI;DATE=07Mar26; TIME=15:23:32;WANMAC=09-00-0e-00-00-01; LANMAC=09-00-0e-00-00-02; WLANMAC=09-00-0e-00-00-03; IP_ADDRESS=210.66.37.21;USER_NAME=asdfg12; ACCOUNT_TYPE=TimetoFinish; ACCOUNT_SERIAL=000002; ACCOUNT_PRICE= USD20.00; ACCOUNT_USAGE_TIME=10:59:59; BILLING_INDEX=1;BILLING_UNIT=2; Account Type = TimeToFinish / Accumulation / PostPaid Account Price = Currencyxx.xx Currency = AUD | CHF | EUR | GBP | JPY | RIY | USD Billing Amount...
-
Page 59: Session Trace
WG‐500P & WG‐500P M Hotspot in a Printer 3‐2‐3‐2 Session Trace Session Trace is an intelligent function to help service provider to trace every user’s access behavior. When “session trace” is enable , the system will collect information such like destination IP, destination port, source IP, source MAC, source port by every user and send the collected information in text format file to specified TFTP server or Email Server. Figure 3‐2‐22 Session Trace Setting Screen Item Default Description TFTP Server... - Page 60 WG‐500P & WG‐500P M Hotspot in a Printer Item Default Description IP Address or Domain Name Empty Enter the SMTP server IP address or domain name. The maximum allowed characters length is 50. SMTP Port Empty The SMTP port allowed range is 25 or 2500 to 2599. ...
-
Page 61: Bandwidth
WG‐500P & WG‐500P M Hotspot in a Printer 3‐2‐3‐3 Bandwidth The function enables administrator to limit bandwidth usage on a per user basis (MAC address). That prevents users from consuming a disproportionately large amount of bandwidth so every user gets a fair share of the available bandwidth. Figure 3‐2‐23 Bandwidth Setting Screen Item Default Description Bandwidth Disable Enables or disables Bandwidth Management. -
Page 62: Snmp
WG‐500P & WG‐500P M Hotspot in a Printer 3‐2‐3‐4 SNMP The SNMP Agent Configuration screen enables you to access to your device via Simple Network Management Protocol. If you are not familiar with SNMP, please consult your Network Administrator or consult SNMP reference material. You must first enable SNMP on the SNMP Agent Configuration screen. Figure 3‐2‐24 SNMP Setting Screen Item Default Description ... -
Page 63: Security
WG‐500P & WG‐500P M Hotspot in a Printer 324 SECURITY 3‐2‐4‐1 Pass Through This function allow administrator to set some special devices pass through the WG‐500P system. Because some network devices might be constructed under the WG‐500P. However these devices needn’t be checked and authorized. The WG‐500P provides a pass through list and the administrator can control which devices can be pass through with authentication. Figure 3‐2‐25 Pass through Setting Screen Item Default Description ... - Page 64 WG‐500P & WG‐500P M Hotspot in a Printer Item Default Description Please add go.redirectingat.com for certain QR code apps. Start / End IP Address Empty Enter the start / end IP address of you wants pass through. Subscriber IP/MAC Address or LAN Device Pass Through ...
-
Page 65: Filtering
WG‐500P & WG‐500P M Hotspot in a Printer 3‐2‐4‐2 Filtering Filtering allows the system administrator to have a list of restricted destinations, which is useful to block specified Internet websites or Intranet areas. Figure 3‐2‐26 Filtering Setting Screen Item Default Description Filtering Disable Enables or disables filtering function. HTTP Message to display The Web Site is Enter the http message. - Page 66 WG‐500P & WG‐500P M Hotspot in a Printer Item Default Description Active Disable Click on check box, active or inactive the filtering address. ‐ Address List Display the filtering address(s). Delete Disable Select the check boxes and click ‘Delete’ to delete the filtering address(s).
-
Page 67: Secure Remote
WG‐500P & WG‐500P M Hotspot in a Printer 3‐2‐4‐3 Secure Remote This feature allows you to create a secure connection to a remote site or back end system with VPN PPTP Client. If “Secure Remote” is enabled, the RADIUS packet/ syslog will be transferred to this secure connection. Figure 3‐2‐27 Secure Remote Setting Screen Item Default Description Auto-connect at Start-up Disable Enable the check box to automatically establish the PPTP (Always connect) connection. -
Page 68: System
WG‐500P & WG‐500P M Hotspot in a Printer 325 SYSTEM 3‐2‐5‐1 System Define the WG‐500P System configuration. Figure 3‐2‐28 System Setting Screen 67 ... - Page 69 WG‐500P & WG‐500P M Hotspot in a Printer Item Default Description System/Host Name Empty The system name can consist of up to alphanumeric characters. Domain Name Empty The Domain name can consist of up to alphanumeric characters. Location Information Empty Enter your location information.
- Page 70 WG‐500P & WG‐500P M Hotspot in a Printer Item Default Description network. Multicast Pass Through Disable This function allows for multiple transmissions to specific recipients at same time. Allow remote user to ping Enable This function allows remote user to ping the WG-500P the device through Internet.
-
Page 71: Wan/Lan
WG‐500P & WG‐500P M Hotspot in a Printer 3‐2‐5‐2 WAN/LAN Figure 3‐2‐29 WAN/LAN Setting Screen 70 ... - Page 72 WG‐500P & WG‐500P M Hotspot in a Printer Item Default Description IP Address 10.59.1.1 The internal LAN IP address of your WG-500P. Subnet Mask 255.255.255.0 Enter the subnet mask for the IP address. WAN MAC Address ...
- Page 73 WG‐500P & WG‐500P M Hotspot in a Printer Item Default Description Redial Period 30 Seconds indefinitely, even when it sits idle. The Redial Period maximum value is 65535 seconds. 72 ...
-
Page 74: Server
WG‐500P & WG‐500P M Hotspot in a Printer 3‐2‐5‐3 Server Server Figure 3‐2‐30 Server Setting Screen Item Default Description Web Server HTTP Port Enter the HTTP port number. The HTTP port allowed range is 80 or 8010 to 8060. For access the WG-500P system under NAT, please tab the “http://HTTP Port IP Address: Port Number”. - Page 75 WG‐500P & WG‐500P M Hotspot in a Printer Item Default Description DHCP Server—Enable DHCP server function. DHCP Relay To route DHCP through an external server, the administrator needs to enable the DHCP relay and assign a valid DHCP server IP address. ...
- Page 76 WG‐500P & WG‐500P M Hotspot in a Printer Static DHCP This function allows subscriber to assign IP address on the LAN to specific individual computers based on their MAC Address. Figure 3‐2‐31 Server Setting Screen Item Default Description IP Address Empty Enter the IP address that subscriber want to assign to the computer on LAN with the MAC address the subscriber will also specify. ...
-
Page 77: Customization
WG‐500P & WG‐500P M Hotspot in a Printer 3‐2‐5‐4 Customization Login Page The WG‐500P provides three different login page formats, including standard, redirect, advanced and frame format. Figure 3‐2‐32 Customization Setting Screen 76 ... - Page 78 WG‐500P & WG‐500P M Hotspot in a Printer Item Default Description Standard For some service providers, they may hope to have a customize subscriber’s login page to the users. This function helps them to realize the ideal. The page elements are including login page title, background color, subtitle etc. ...
- Page 79 WG‐500P & WG‐500P M Hotspot in a Printer Item Default Description page. Copy and paste the following HTML Code into your home page to produce redirect subscriber login page. Figure 3‐2‐34 Preview Redirect Login Page Code Advanced This function allow user to design login page of WG-500P. ...
- Page 80 WG‐500P & WG‐500P M Hotspot in a Printer Item Default Description Comments Empty Allow the administrator to input the text comments such like “Please Contact to our Customer Service Center, EXT 141”. The maximum character of the comment is Frame If “Frame” is selected the subscriber login page will be separate into Top Frame and Bottom Frame.
- Page 81 WG‐500P & WG‐500P M Hotspot in a Printer Logo This function allows service provider to upload the customer’s logo image file which can be shown on the standard login page. Figure 3‐2‐36 Logo Setting Screen Item Default Description File Path Empty Enter the file pathname of the logo file in the File Path field. Click Apply button to save the logo file to system. Click Delete button to delete the logo file. 80 ...
- Page 82 WG‐500P & WG‐500P M Hotspot in a Printer Information Window This function allow service provider can decide whether they want an “Information Window” pop‐up on subscriber PC when authenticate successful or not and specified text of information window. Subscriber can type “http://1.1.1.1/info” to open the information window again or enter “http://1.1.1.1/logout” to logout immediately if accumulation billing selected. Main message Figure 3‐2‐37 Example‐Login Page Screen Window Name Main message Message Description Time count label Warning/Alarm message Notice Message Figure 3‐2‐38 Information Window 81 ...
- Page 83 WG‐500P & WG‐500P M Hotspot in a Printer Billing Type=Time to Finish Can be topped up by subscriber=Enable Figure 3‐2‐39 Information Window Billing Type=Accumulation Can be topped up by subscriber=Disable Figure 3‐2‐40 Information Window Billing Type=Accumulation Can be topped up by subscriber=Enable Figure 3‐2‐41 Information Window 82 ...
- Page 84 WG‐500P & WG‐500P M Hotspot in a Printer Account Printout This function allow service provider to specified text of account printout. Figure 3‐2‐42 Account Printout Customization Setting Screen Note: If you don’t print out QR code on the ticket, please disable “QR Code”. 83 ...
- Page 85 WG‐500P & WG‐500P M Hotspot in a Printer Credit Card Figure 3‐2‐43 Credit Customization Setting Screen 84 ...
- Page 86 WG‐500P & WG‐500P M Hotspot in a Printer Item Description Standard Login Page This function allow service provider to customize the additional credit card message for the standard login page. This function allow service provider to customize the additional credit card message Service Selection Page for the standard login page.
- Page 87 WG‐500P & WG‐500P M Hotspot in a Printer User Agreement Page This function allow user to design user agreement page of Internet Subscriber Server. Figure 3‐2‐44 User Agreement Page Setting Screen 86 ...
-
Page 88: Portal Page
WG‐500P & WG‐500P M Hotspot in a Printer 3‐2‐5‐5 Portal Page This feature allows redirecting subscriber’s browser to a specified portal page after successful login. Figure 3‐2‐45 Portal Page Setting Screen Item Default Description URL Link Empty Enter the URL Link page. The input format can be “http://www.yahoo.com”. The maximum character of the URL Link is 200. Click Apply button, the success dialog box appears. Click on Back to return to Portal ... -
Page 89: Advertisement
WG‐500P & WG‐500P M Hotspot in a Printer 3‐2‐5‐6 Advertisement The system allow service provider to input 5 URL links for advertisement link purpose. Figure 3‐2‐46 Advertisement URL Link Setting Screen Item Default Description Frequency One Time Only One Time Only—One Time Only means to send the advertisement link once after the subscriber Login. -
Page 90: Walled Garden
WG‐500P & WG‐500P M Hotspot in a Printer 3‐2‐5‐7 Walled Garden We prepare ten URL links that allows subscriber to access the specific Web pages even they didn’t have a username or password. It’s free trying and can use for advertisement. Figure 3‐2‐47 Walled Garden Setting Screen Item Description ... -
Page 91: Ddns
WG‐500P & WG‐500P M Hotspot in a Printer 3‐2‐5‐8 DDNS The DDNS service (Dynamic Domain Name Service), an IP Registry provides a public central database where information such as email addresses, host names, IP addresses etc. can be stored and retrieved. This solves the problems if your DNS server uses an IP associated with dynamic IP addresses. When the ISP assigns the WG‐500P a new IP, the WG‐500P must inform the DDNS server the change of this IP ... - Page 92 WG‐500P & WG‐500P M Hotspot in a Printer Item Default Description Force to update every~day(s) when 1 day Enter a number in the field to set the force update WAN IP address keeps no change interval (in days). 01~03 The index number of a DDNS account. ...
-
Page 93: Wireless
WG‐500P & WG‐500P M Hotspot in a Printer 3‐2‐5‐9 Wireless Figure 3‐2‐49 Wireless Setting Screen Item Default Description General Settings Country ETSI Enter the Country for wireless connection. Channel Select the channel ID for wireless connection. 802.11 Mode 802. 11n + 802.11g + Enter the 802.11 Mode for wireless connection. - Page 94 WG‐500P & WG‐500P M Hotspot in a Printer Item Default Description Figure 3‐2‐50 ESSID Setting Screen General Settings ESSID status Active (ESSID1) ESSID1 is active, and others are inactive by default. ESSID name The ESSID’s name by default is related to the last 4 numbers of WLAN MAC. If the WLAN MAC is“00-90-0E-00-12-34", the default is“Handlink-1234_1".
- Page 95 WG‐500P & WG‐500P M Hotspot in a Printer Item Default Description name. The maximum allowed characters length is 15. Authentication Port 1812 Enter the authentication port number. The allowed numbers are from 0 to 65535. Share Secret Key Empty Enter the RADIUS secret key ...
-
Page 96: Usb
WG‐500P & WG‐500P M Hotspot in a Printer 3‐2‐5‐10 USB The WG‐500P plugged in a USB to Ethernet adapter can expand the WG‐500P Wi‐Fi signal range. The administrator can connect WG‐500P USB port to another AP/router Ethernet port with a USB 2.0 to RJ45 Ethernet network adapter. After the activation, the administrator can change the ESSID. Figure 3‐2‐51 USB Setting Screen 95 ... -
Page 97: System Status
WG‐ ‐500P & WG‐5 500P M Hotsp pot in a Printer r 33 System m Status Disp play WG‐50 00P system b basic status s, including, , System Account Lis st Account Lo og Current Use er DHCP Clien nts Session List t Figure 3‐3‐1 System Statu s Item Screen n 96 ... - Page 98 WG‐500P & WG‐500P M Hotspot in a Printer 331 System The System Information Menu displays current system basic information including the service connection message, host name, LAN, WAN, DHCP Configuration, DNS, E‐mail Redirection, SSL Certificate, network traffic Information and the system firmware version number. Figure 3‐3‐2 System Status Screen 97 ...
-
Page 99: Account List
WG‐500P & WG‐500P M Hotspot in a Printer 332 Account List You can display a list of all the account information on this device. This table includes the username, password, usage time, time created, login time, expiration time and status. Figure 3‐3‐3 Account List Click refresh button to update the account list page. Click the column button (S/N, Status, Username, ….,etc.) to sort the column in ascending/descending order. Select the check boxes and click Delete to delete the accounts. Click Delete ALL button to delete all accounts in account list. Note: This page will refresh automatically every 5 minutes. 98 ... -
Page 100: Account Log
WG‐500P & WG‐500P M Hotspot in a Printer 333 Account Log The account log shows the accounts’ log information. Figure 3‐3‐4 Account Log Click Export to export the account logs to a text file format. (export.log) Click Clear Log button to remove all account log entries. Click refresh button to update the account log page. Click the column button (S/N, Username, Time Created, …,etc.) to sort the column in ascending/descending order. 99 ... -
Page 101: Current User
WG‐500P & WG‐500P M Hotspot in a Printer 334 Current User Display the current logged‐in subscribers’ status. It allow service provider to disconnect any subscribers. Figure 3‐3‐5 Current User List Click refresh button to update the current user list page. Click the column button (Interface, Type, Username, IP Address, …, etc.) to sort the column in ascending/descending order. Select the check boxes and click ‘Delete’ to delete accounts. Click Delete ALL to delete all accounts in current user list. 100 ... - Page 102 WG‐500P & WG‐500P M Hotspot in a Printer 335 DHCP Clients The DHCP client table shows the current DHCP users on the LAN. Figure 3‐3‐6 Current User Screen 336 Session List The remote site administrator could monitor the real time usage status of WG‐500P via this page. Figure 3‐3‐7 Session List Screen 101 ...
-
Page 103: System Tools
WG‐ ‐500P & WG‐5 500P M Hotsp pot in a Printer r 34 System m Tools This s allows ser rvice provid der or admi inistrator to o process F Firmware up p grade, cha a nge pass sword and backup or r restore conf figuration. Configurat tion Firmware Boot Code Controller Board Firm mware ... - Page 104 WG‐500P & WG‐500P M Hotspot in a Printer 341 Configuration Use the Configuration item to save, restore or reset configuration parameters of the WG‐500P. Figure 3‐4‐2 Configuration Setting Screen Item Default Description Backup Click it to save the system configuration to your computer. (export.cfg) Remote TFTP Server IP Empty Enter the IP address of TFTP Server. Address ...
- Page 105 WG‐500P & WG‐500P M Hotspot in a Printer 342 Firmware Upgrade The Firmware Upgrade menu loads updated firmware to be permanent in flash ROM. The download file should be a binary file from factory; otherwise the agent will not accept it. After downloading the new firmware, the agent will automatically restart it. Manual Firmware Upgrade Figure 3‐4‐3 Manual Firmware Upgrade Setting Screen Item Default Description This allow administrator to upgrade the firmware via HTTP. Local PC File Path Empty Enter the file name and location in the Local PC File Path field. ...
- Page 106 WG‐500P & WG‐500P M Hotspot in a Printer Scheduled Firmware Upgrade Scheduled Firmware Upgrade is a program that enables an automatic upgrade to the latest firmware version through the TFTP server. Figure 3‐4‐4 Scheduled Firmware Upgrade Setting Screen Item Default Description Disable/Enable Disables or enables the scheduled firmware upgrade function. TFTP Server IP Empty Enter the IP address of TFTP Server. File Synchronization Empty Enter the file name and location in the File ...
- Page 107 WG‐500P & WG‐500P M Hotspot in a Printer Firmware Upgrade Notice Setting If you would like to receive the information about firmware upgrade, please activate it and leave your email. You should enable “Agree that Handlink will be able to contact me if there is new firmware version release.” before filling in the email address. Item Default Description Email ...
- Page 108 WG‐500P & WG‐500P M Hotspot in a Printer 343 Boot Code Figure 3‐4‐6 Boot Code Upgrade Setting Screen 344 Controller Board Firmware Figure 3‐4‐7 Controller Board Firmware Upgrade Setting Screen 107 ...
- Page 109 WG‐500P & WG‐500P M Hotspot in a Printer 345 System Account Use the System Account screen to change the system accounts. Figure 3‐4‐8 System Account Setting Screen 108 ...
- Page 110 WG‐500P & WG‐500P M Hotspot in a Printer Item Description Username The username can consist of up to 20 alphanumeric characters and is sensitive. Password The password can consist of up to 20 alphanumeric characters and is sensitive. Confirm The password for confirmation ...
- Page 111 WG‐500P & WG‐500P M Hotspot in a Printer Web‐Based Accounting Manager Step 1: Start your Web browser and enter the factory default IP address 10.59.1.1 in your browser’s location box. Press Enter. Figure 3‐4‐11 Web Browser Location Field (Factory Default) Step 2: The WG‐500P configuration main menu will appear. Enter account as the Username and account as the password and click Login. Figure 3‐4‐12 Web‐Based Accounting Manager Login Screen Supervisor Account Step 1: Start your Web browser and enter the factory default IP address 10.59.1.1 in your browser’s location box. Press Enter. Figure 3‐4‐13 Web Browser Location Field (Factory Default) 110 ...
- Page 112 WG‐500P & WG‐500P M Hotspot in a Printer Step 2: The WG‐500P configuration main menu will appear. Enter supervisor as the Username and supervisor as the password and click Login. Figure 3‐4‐14 Supervisor Account Login Screen Step 3: After a valid user name and password have been provided, the WG‐500P configuration homepage will appear. “WIZARD SETUP” and “ADVANCED SETUP” are disabled. 111 ...
- Page 113 WG‐500P & WG‐500P M Hotspot in a Printer Super Subscriber Account Start your Web Browser; a subscriber login page will appear. Enter super as the Username and super as the password and click Enter, you can use Internet now. Figure 3‐4‐15 Subscriber Login Page 346 SSL Certificate The function allows you to download the registered CA certificate into the WG‐500P. Figure 3‐4‐16 SSL Certificate Download Setting Screen Note: The password field must the same as the CA’s registered password. 112 ...
- Page 114 WG‐500P & WG‐500P M Hotspot in a Printer 347 Ping Command The Ping function can check the WG‐500P networking connective or not. Figure 3‐4‐17 Ping Command Screen Item Description IP or URL Enter the IP address or the URL link. 348 Restart If your WG‐500P is not operating correctly, you can choose this option to display the restart WG‐500P screen. Clicking the apply button restart the WG‐500P, with all of your settings remaining intact. Figure 3‐4‐18 Restart Screen 349 Logout If you would like to leave the configuration page, please click apply to exit. Figure 3‐4‐19 Logout Screen 113 ...
- Page 115 WG‐500P & WG‐500P M Hotspot in a Printer 4 QR Code Service 41 QR code setting Please find Advance setting > Customization > Account Printout > QR code. If you don’t print out the QR Code on the ticket, please disable it and click Apply button. Step 1 Step 2: Enable QR Code Step 3: Click Apply Figure 4‐1‐1 QR Coding Setting Screen 114 ...
-
Page 116: Additional Information For Qr Code Use
WG‐500P & WG‐500P M Hotspot in a Printer 42 Additional information for QR code use If you will activate QR code service for Apple iOS 6 device and later, 1. Please find Advance setting > Security > Pass Through. 2. Choose “Enable”. 3. Add www.apple.com into PASS THROUGH list in WG‐500P because iOS6 device and later is required. 4. Click Add to List button. 5. Choose Active on the Pass Through List. For certain QR code Apps, please add go.redirectingat.com, 54.225.129.12 and 23.23.152.51 (for APP ScanLife) and follow the above steps. Step 1 Step 2: Choose Enable Step 3: Add “www.appale.com” Step 4: Click Add to List Step 5: Choose Active Figure 4‐2‐1 Pass Through Setting Screen ... -
Page 117: Use Qr Code To Access The Internet
WG‐500P & WG‐500P M Hotspot in a Printer 43 Use QR code to access the Internet Please follow the steps to access the Internet for clients. 1. Print out the Ticket. You can find the ESSID and WPA/WPA2 printed on the ticket. Figure 4‐3‐1 QR Coding Ticket 2. Connect to the ESSID(ex: Handlink_WG‐500P ), input WPA/WPA2 password(ex: 1234567890). Verify to connect the correct ESSID Input the WPA/WPA2 password Figure 4‐3‐2 Password Input Screen 116 ... - Page 118 WG‐500P & WG‐500P M Hotspot in a Printer 3. Open up QR code APP and Scan. Scan QR code Figure 4‐3‐3 Scan 1 Screen 4. Some Apps may require user to click "Go to URL". Click “Go to URL” Figure 4‐3‐4 Scan 2 Screen 117 ...
- Page 119 WG‐500P & WG‐500P M Hotspot in a Printer 5. Client can use the Internet now. Figure 4‐3‐5 Scan Finish Screen 118 ...
-
Page 120: Personal Id Recognition
WG‐500P & WG‐500P M Hotspot in a Printer 5 Personal ID Recognition Some countries or areas would ask users to show their personal identification when accessing Wi‐Fi service according to laws for the cybercrime investigation. WG‐500P provides the function Personal Identification Recognition. The default is disabled. Subscribers need to activate it by the following steps. 119 ... -
Page 121: Personal Id Recognition Setting
WG‐500P & WG‐500P M Hotspot in a Printer 51 Personal ID Recognition Setting Step1. Active the function: Go to Advanced Setup ‐> Authentication ‐> Authentication. Enable the Personal ID Recognition Mode. Please refer to Chapter 3‐2‐1‐1 Authentication. Figure 5‐1‐1 System Setting 120 ... - Page 122 WG‐500P & WG‐500P M Hotspot in a Printer Step2. The FIRST billing profile you activate is the Personal ID Recognition selection. There is ONLY ONE billing profile in the Personal ID Recognition mode. Please refer to Chapter 3‐2‐2‐1 Billing to modify your first billing profile. Figure 5‐1‐2 Billing Setting Screen Step 3: Start your browser, and then enter the factory default IP address 10.59.1.1 in your browser’s location box. Press Enter. Figure 5‐1‐3 Web Browser Location Field (Factory Default) 121 ...
- Page 123 WG‐500P & WG‐500P M Hotspot in a Printer Step 4: The WG‐500P configuration tools menu will appear. In the Username and Password field, type the factory default user name “account” and password “account” and click Login. Figure 5‐1‐4 Configuration Tools Menu Step 5: ONLY account manager can operate PIR and printout the ticket. There are 3 types for the account manager to choose, including Driver License NO., Passport No. and Identify card No. Fill in numbers and click “+” or “‐” for usage time. Click the Print button to printout the ticket. Click View Account List to see all accounts which are printed out. Figure 5‐1‐5 PIR 122 ...
- Page 124 WG‐500P & WG‐500P M Hotspot in a Printer Figure 5‐1‐6 PIR Ticket Step 6: Click Logout and then click the Apply button to finish it. Figure 5‐1‐7 Logout 123 ...
-
Page 125: Mikrotik Compatible Account Printer
WG‐500P & WG‐500P M Hotspot in a Printer 6 MikroTik Compatible Account Printer Handlink WG‐500P M can be a pure printer to support MikroTik Router OS. If you have purchased any MikroTik Router OS gateway, you can connect WG‐500P M to print out the dynamic account and password for Internet access. There are 2 types used to access the Internet : one is Ethernet to MikroTik RouterOS: WG‐500P M can be used as a pure wireless access point; another is Wireless to MikroTik RouterOS: WG‐500P M can be used as a Wireless client. ... -
Page 126: Wg-500P M Software Specifications
WG‐500P & WG‐500P M Hotspot in a Printer 61 WG500P M Software Specifications Networking IEEE802.3 10BaseT Ethernet IEEE802.3u 100BaseTX Fast Ethernet Static IP WAN Client Wireless IEEE802.11n/b/g Client User Authentication Web‐based Login Page Authentication 125 ... -
Page 127: Getting Start
WG‐500P & WG‐500P M Hotspot in a Printer 62 Getting start If you have a WG‐500P, you would like to upgrade to WG‐500P M first. (If not, please direcly go to Step 1.) 1. Please find System tool ‐ Firmware ‐ Manual firmware upgrade, upload the WG‐500P M firmware, and wait for the device rebooting. 2. After WG‐500P M reboots, you should use a pin to push the reset button to perform a hardware‐reset for resetting the configuration. ... - Page 128 WG‐500P & WG‐500P M Hotspot in a Printer Figure 6‐2‐2 Configuration Tools Menu Step 4: In this mode, WG‐500P M can be used as Wireless AP for Internet access. Please find Interface setting ‐ Ethernet to MikroTik RouterOS ‐ Uplink setting. It’s recommended to set up static IP address on WG‐500P M for MikroTik RouterOS setting. Here we take the default LAN address of MikroTik RouterOS 192.168.88.0/ 24 as example. Set up a static IP address 192.168.88.251 for WG‐500P M. ...
- Page 129 WG‐500P & WG‐500P M Hotspot in a Printer Step 5: In this mode, WG‐500P M acts as a wireless client. Another AP for a wireless connection is essential. Connect WG‐500P to the LAN network of MikroTik RouterOS. Wireless to MikroTik RouterOS is needed to use Management IP (169.254.1.250) to configure. Please refer to Step1~3. Please find Interface setting ‐ Wireless to MikroTik RouterOS. Click AP SCAN button in search of SSID. Figure 6‐2‐5 Interface Setting Screen Please select one of all SSIDs. Figure 6‐2‐6 AP Scan Screen Click Apply button to save the new settings. It will fill up ESSID and MAC address automatically. 128 ...
- Page 130 WG‐500P & WG‐500P M Hotspot in a Printer Here it’s also recommended to use a static IP address. Set up a static IP address 192.168.88.251 for WG‐500P M. After applying the setup, WG‐500P M should connect to LAN network of RouterOS wirelessly. Figure 6‐2‐7 Wireless to MijroTik RouterOS Screen Step 6: Bypassed setting in MikroTik RouterOS In order to use WG‐500P M, you have to set WG‐500P M as a bypassed device first, so that WG‐500P can connect to MikroTik RouterOS without authentication. Find IP/ hotspot / IP binding in MikroTik RouterOS. Enter the IP address of WG‐500P M(for instance,192.168.88.251 here). Set Type as bypassed. Figure 6‐2‐8 MikroTik RouterOS Setting Note: Please refer to http://wiki.MikroTik.com/wiki/Hotspot for more infomation. 129 ...
- Page 131 WG‐500P & WG‐500P M Hotspot in a Printer Step 7: Browse web interface by its IP address (http://192.168.88.251 for example) Please find Account Generator ‐ MikroTik RouterOS setting. Entering RouterOS IP address(for instance, 192.168.88.1), API port (8728 by default), and Username/Password. Figure 6‐2‐9 MikroTik RouterOS Setting Screen 130 ...
- Page 132 WG‐500P & WG‐500P M Hotspot in a Printer Step 8: Setup in MikroTik RouterOS Regarding API, it may be required to enable API service. Please find IP/Service in MikroTik RouterOS, and enable it. Figure 6‐2‐10 MikroTik RouterOS Setting Screen Note: Please refer to http://wiki.MikroTik.com/wiki/Manual:IP/Services for more information. After the Apply, please find System Status. MikroTik RouterOS Connection should show OK, if the connection is successfully established. Figure 6‐2‐11 System View Screen ...
- Page 133 WG‐500P & WG‐500P M Hotspot in a Printer Step 9: Binding User Manager Profiles on the buttons. Check Account Generator ‐ Three‐button printer. The Profiles should show up after queried from MikroTik User Manager. Figure 6‐2‐12 Three Button Printer Screen The queried data will be corresponding to what you set in MikroTik User Manager ‐ Profile in MikroTik RouterOS. Figure 6‐2‐13 MikeoTik RouterOS Setting Screen Step 10: Please find Account Generator ‐ Account Printout. You can customize the text on the ticket. And then try to printout the ticket. Note: These steps assume that you already have proper profiles in MikroTik User Manager. ...
-
Page 134: Interface Setting
WG‐500P & WG‐500P M Hotspot in a Printer 63 Interface Setting WG‐500P M provides two types to connect MikroTik Router OS gateway: “Ethernet to MikroTik RouterOS” and “Wireless to MikroTik RouterOS”. You can choose one of the both. 1. MikroTik RouterOS Setting 2. Account Generator 3. Account Printer Figure 6‐3‐1 Account Generator Item 133 ... -
Page 135: Ethernet To Mikrotik Routeros
WG‐500P & WG‐500P M Hotspot in a Printer 631 Ethernet to MikroTik RouterOS Select the appropriate Internet connection type to connect to your ISP. 6‐3‐1‐1 Uplink IP Setting DHCP Client The device can work as a DHCP client. This allows the device to obtain the IP address and other TCP/IP settings from your ISP. If your xDSL/Cable comes with this feature, please enable Use DHCP Client. Static IP Setting If Static IP Setting is selected, then this screen will appear. Enter the IP address information provided by your ISP. Figure 6‐3‐2 Ethernet to MikroTik RouterOS – Uplink IP Setting Screen Item Default Description IP Address Enter the IP address. Subnet Mask Enter the subnet mask for the IP address. ... -
Page 136: Wireless Ap Mode Setting
WG‐500P & WG‐500P M Hotspot in a Printer 6‐3‐1‐2 Wireless AP Mode Setting This function allows you to set up wireless AP mode. Figure 6‐3‐3 Ethernet to MikroTik RouterOS – Wireless AP Mode Setting Screen Item Default Description General Settings Wireless Connection Enable Enable or Disable Wireless connection Channel Select the channel ID for wireless connection. 802.11 Mode 802. 11n + 802.11g + Enter the 802.11 Mode for wireless connection. - Page 137 A low RTS Threshold setting can be useful in areas where many client devices are associating with the WG-500P M, or in areas where the clients are far apart and can detect only the WG-500P M and not each other.
-
Page 138: Wireless To Mikrotik Routeros
WG‐500P & WG‐500P M Hotspot in a Printer 632 Wireless to MikroTik RouterOS If you choose “Wireless to MikroTik RouterOS” mode, the WG‐500P M will work as an AP client. You can click “AP scan” in search of Wi‐Fi signal. Figure 6‐3‐4 Wireless to MikroTik RouterOS Screen 137 ... - Page 139 WG‐500P & WG‐500P M Hotspot in a Printer Item Default Description ESSID name Handlink The ESSID is the unique name that is shared among all points in a wireless network. It is case sensitive and must not exceed 32 characters. If you are not aware of the ESSID name, click “AP SCAN”...
- Page 140 WG‐500P & WG‐500P M Hotspot in a Printer DHCP Client. If Static IP Setting is selected, then this screen will appear. Enter Static IP Setting the IP address information. IP Address Enter the IP address. Subnet Mask Enter the subnet mask for the IP address. Gateway IP Address Enter the Gateway IP Address. Empty ...
-
Page 141: Account Generator
WG‐500P & WG‐500P M Hotspot in a Printer 64 Account Generator This allows the service provider or administrator to set up the account printer. 1. MikroTik RouterOS Setting 2. Account Generator 3. Account Printer Figure 6‐4‐1 Account Generator Screen 140 ... - Page 142 WG‐500P & WG‐500P M Hotspot in a Printer 641 MikroTik RouterOS Setting This allows you to set up MikroTik RouterOS device. Figure 6‐4‐2 MikroTik RouterOS Setting Screen Item Default Description IP Address 192.168.88.1 Enter the IP address of the MikroTik RouterOS device. 8728 API Port Enter the API port of the MikroTik RouterOS device MIKROTIK Device Login Information ...
- Page 143 WG‐500P & WG‐500P M Hotspot in a Printer 642 Account Generator You should set up those billing profiles for the account generator. WG‐500P M provides 3 buttons for each billing profile. You can click the button to print out the ticket for ONLY one time. Figure 6‐4‐3 Account Generator Screen Item Default Description Three‐ Button Printer Button A~C Define each button’s billing profile. Select one billing profile by clicking in the list box.
- Page 144 You can choose one format of the two. The maximum allowed characters length is 75. Subtitle WG-500P M Enter the subtitle name of subscriber account printer page. You can choose one format of the two. The maximum allowed characters length is 80.
- Page 145 WG‐500P & WG‐500P M Hotspot in a Printer Item Default Description Username Username: Enter the text of the “username” printed out on the ticket. The maximum allowed characters length is 24. Password Password: Enter the text of the “password” printed out on the ticket. The maximum allowed characters length is 24.
-
Page 146: System Status
WG‐500P & WG‐500P M Hotspot in a Printer 65 System Status The System Status displays current system basic information including the Mikrotik RouterOS connection, Firmware Version, Controller Board Firmware, LAN MAC Address, WLAN MAC Address, IP Address, Subnet Mask, Channel, ESSID, and WLAN Mode. You can click “refresh” button to renew the system. Figure 6‐5‐1 System View Screen 145 ... -
Page 147: System Tools
WG‐500P & WG‐500P M Hotspot in a Printer 66 System Tools This allows service provider or administrator to process Firmware upgrade, change password and backup or restore configuration. 1. System Account 2. Ping Command 3. Firmware Upgrade 4. Reset 5. Restart 6. Logout Figure 6‐6‐1 System Tools Item 146 ... - Page 148 WG‐500P & WG‐500P M Hotspot in a Printer 661 System Account Use the System Account screen to change the system accounts. Figure 6‐6‐2 System Account Setting Screen Item Description Username The username can consist of up to 20 alphanumeric characters and is sensitive. Password The password can consist of up to 20 alphanumeric characters and is sensitive. ...
- Page 149 WG‐500P & WG‐500P M Hotspot in a Printer 663 Firmware Upgrade The Firmware Upgrade menu loads updated firmware to be permanent in flash ROM. The download file should be a binary file from factory; otherwise the agent will not accept it. After downloading the new firmware, the agent will automatically restart it. Normal Code Firmware Figure 6‐6‐4 Normal Code Firmware Upgrade Setting Screen Item Default Description Local PC File Path Empty Enter the file name and location in the Local PC File Path field. Remote TFTP Server IP Address Empty Enter the IP address of TFTP Server.
- Page 150 WG‐500P & WG‐500P M Hotspot in a Printer Controller Board Firmware Figure 6‐6‐5 Controller Board Firmware Upgrade Setting Screen Item Default Description Local PC File Path Empty Enter the file name and location in the Local PC File Path field. Note: 1. Before downloading the new firmware, users must save the configuration file for restore configuration parameters of the device. 2. Do not turn the power off during the upgrade process. This will damage the unit. 149 ...
- Page 151 WG‐500P & WG‐500P M Hotspot in a Printer 664 Reset Reset the system setting back to factory defaults. Figure 6‐6‐6 Reset Screen Click Apply button to reset the system. 665 Restart If your WG‐500P M is not operating correctly, you can choose this option to display the restart WG‐500P M screen. Clicking the apply button restart the WG‐500P M, with all of your settings remaining intact. Figure 6‐6‐7 Restart Screen Click Apply button to restart the system. 666 Logout If you would like to leave the configuration page, please click Apply to exit. Figure 6‐6‐8 Logout Screen 150 ...
-
Page 152: Appendix A Signal Connection Arrangements
WG‐500P & WG‐500P M Hotspot in a Printer Appendix A Signal Connection Arrangements RJ‐45 Ethernet Port The WG‐500P RJ‐45 Ethernet port can connect to any networking devices that use a standard LAN interface, such as a Hub/Switch Hub or Router. Use unshielded twisted‐pair (UTP) or shield twisted‐pair (STP) cable to connect the networking device to the RJ‐45 Ethernet port. Depending on the type of connection, 10Mbps or 100Mbps, use the following Ethernet cable, as prescribed. ... -
Page 153: Appendix B Regulations/Emi Compliance
WG‐500P & WG‐500P M Hotspot in a Printer Appendix B Regulations/EMI Compliance FCC Regulatory Statement Part 15‐Class B compliant device This device complies with Part 15 of the FCC Rules. Operation is subject to the following conditions: 1. This device may not cause harmful interference, and 2. This device must accept any interference received, including that which may cause undesired operation. This equipment has been test and found to comply with the limits for a computing device, pursuant to Part 15 of the FCC Rules. These limits are designed to provide reasonable protection against harmful interference when the equipment is operated ... - Page 154 WG‐500P & WG‐500P M Hotspot in a Printer FCC RF Radiation Exposure Statement 1. This Transmitter must not be co‐located or operating in conjunction with any other antenna or transmitter. 2. This equipment complies with FCC RF radiation exposure limits set forth for an uncontrolled environment. This equipment should be installed and operated with a minimum distance of 20 centimeters between the radiator and your body. ...
-
Page 155: Limited Warranty
WG‐500P & WG‐500P M Hotspot in a Printer LIMITED WARRANTY WG‐500P What the warranty covers: We warrant its products to be free from defects in material and workmanship during the warranty period. If a product proves to be defective in material or workmanship during the warranty period, we will at its sole option repair or replace the product with a like product with a like product. Replacement product or parts may include remanufactured or refurbished parts or components. How long the warranty is effective: The WG‐500P is warranted for one year for all parts and one year for all labor from the date of the first consumer purchase. Who the warranty protects: This warranty is valid only for the first consumer purchaser. What the warranty does not cover: Any product, on which the serial number has been defaced, modified or removed. Damage, deterioration or malfunction resulting from: Accident, misuse, neglect, fire, water, lightning, or other acts of nature, unauthorized product modification, or failure to follow instructions supplied with the product. Repair or attempted repair by anyone not authorized by us. Any damage of the product due to shipment. Removal or installation of the product. ... - Page 156 WG‐500P & WG‐500P M Hotspot in a Printer Exclusion of damages: Our LIABILITY IS LIMITED TO THE COST OF REPAIR OR REPLACEMENT OF THE PRODUCT. We SHALL NOT BE LIABLE FOR: DAMAGE TO OTHER PROPERTY CAUSED BY ANY DEFECTS IN THE PRODUCT, DAMAGES BASED UPON INCONVENCE, LOSS OF USE OF THE PRODUCT, LOSS OF TIME, LOSS OF PROFITS, LOSS OF BUSINESS OPPORTUNITY, LOSS OF GOODWILL, INTERFERENCE WITH BUSINESS RELATIONSHIPS, OR OTHER COMMERCIAL LOSS, EVEN IF ADVISED OF THE POSSIBLITY OF SUCH DAMAGES. ANY OTHER DAMAGES, WHETHER INCIDENTAL, CONSEQUENTIAL OR OTHERWISE. ANY CLAIM AGAINST THE CUSOMER BY ANY OTHER PARTY. 155 ...
Need help?
Do you have a question about the WG-500P M and is the answer not in the manual?
Questions and answers