Table of Contents
Advertisement
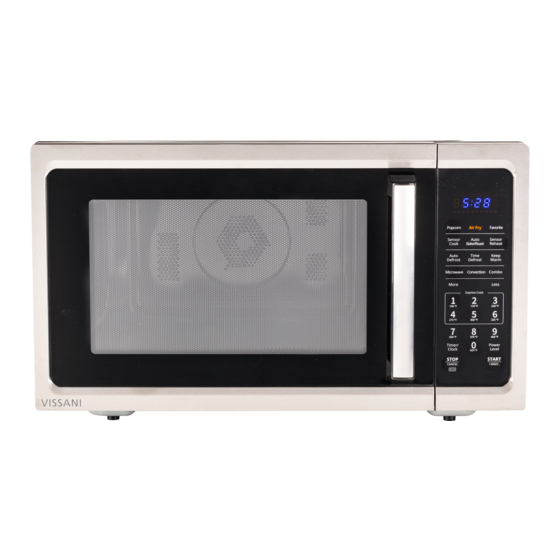
EC042A2KJ
USE AND CARE GUIDE
Microwave Oven
Questions, problems, missing parts? Before returning to the store,
call Vissani Customer Service
Monday - Friday 8 a.m. to 8 p.m., Saturday 8 a.m. to 6 p.m.
1-855-847-7264
HOMEDEPOT.COM
THANK YOU
We appreciate the trust and confidence you have placed in Vissani through the purchase of this refrigerator. We strive to continually create
quality products designed to enhance your home. Visit us online to see our full line of products available for your home improvement needs.
Thank you for choosing Vissani!
Advertisement
Table of Contents

Related Manuals for Vissani EC042A2KJ


Summary of Contents for Vissani EC042A2KJ
- Page 1 THANK YOU We appreciate the trust and confidence you have placed in Vissani through the purchase of this refrigerator. We strive to continually create quality products designed to enhance your home. Visit us online to see our full line of products available for your home improvement needs.
-
Page 2: Table Of Contents
TABLE OF CONTENTS SAFETY INFORMATION ..........................EN-2 ........EN-4 PRECAUTIONS TO AVOID POSSIBLE EXPOSURE TO EXCESSIVE MICROWAVE ENERG GROUNDING INSTRUCTIONS ...........................EN-5 RADIO INTERFERENCE ...........................EN-6 MATERIALS YOU CAN USE IN MICROWAVE OVEN ................... EN-7 MATERIALS TO BE AVOIDED IN MICROWAVE OVEN ..................EN-7 WARRANTY .............. -
Page 3: Safety Information
SAFETY INFORMATION When using electrical appliances basic safety precautions should be followed, including the following: WARNING - To reduce the risk of burns, electric shock, fire, injury to persons or exposure to excessive microwave energy: 1. Read all instructions before using the appliance. 2. - Page 4 16. To reduce the risk of fire in the oven cavity: 1) Do not overcook food. Carefully attend appliance when paper, plastic, or other combustible materials are placed inside the oven to facilitate cooking. 2) Remove wire twist-ties from paper or plastic before placing bag in oven.
-
Page 5: Precautions To Avoid Possible Exposure To Excessive Microwave Energ
(2) HINGES AND LATCHES (broken or loosened) (3) DOOR SEALS AND SEALING SURFACE (d) The oven should not be adjusted or repaired by anyone except properly qualified service personnel. Model: EC042A2KJ Rated Voltage: 120V~ 60Hz Rated Input Power(Microwave): 1500W Rated Output Power(Microwave):... -
Page 6: Grounding Instructions
GROUNDING INSTRUCTIONS This appliance must be grounded. In the event of an electrical short circuit, grounding reduces the risk of electric shock by providing an escape wire for the electric current. This appliance is equipped with a cord having a grounding wire with a grounding plug. -
Page 7: Radio Interference
RADIO INTERFERENCE 1. Operation of the microwave oven may cause interference to your radio, T V or similar equipment. 2. When there is interference, it may be reduced or eliminated by taking th e following measures: 1) Clean door and sealing surface of the oven 2) Reorient the receiving antenna of radio or television. -
Page 8: Materials You Can Use In Microwave Oven
MATERIALS YOU CAN USE IN MICROWAVE OVEN Utensils Remarks Follow manufacturer* instructions. The bottom of browning dish must be at Browning dish least 3/16 inch (5mm) above the turntable. Incorrect usage may cause the turntable to break. Microwave-safe only. Follow manufacturer's instructions. Do not use cracked Dinnerware or chipped dishes. -
Page 9: Warranty
• Costs of service calls that are a result of items listed under NORMAL RESPONSIBILITIES OF THE CONSUMER** VISSANI replacement parts shall be used and will be warranted only for the period remaining on the original warranty. NORMAL RESPONSIBILITIES OF THE CONSUMER**... -
Page 10: Part Names
PART NAMES Remove the oven and all materials from the carton and oven cavity. Your oven comes with the following accessories: Glass tray Turntable ring assembly 1 Instruction Manual Part Description Control panel Turntable shaft Turntable ring assembly Glass tray Observation window Door assembly interlock system... - Page 11 Remove all packing material and accessories. Examine the oven for any damage such as dents or broken door. Do not install if oven is damaged. Cabinet: Remove any protective film found on the microwave oven cabinet surface. Do not remove the light brown Mica cover that is attached to the oven cavity to protect the magnetron.
- Page 12 2. Plug your oven into a standard household outlet. Be sure the voltage and the frequency is the same as the voltage and the frequency on the rating label. Note: Do not install oven over a range cooktop or other heat-producing appli- ance.
- Page 13 CONTROL PANEL CONTROL PANEL AND FEATURES STOP/Cancel START/+30Sec. EN-12...
-
Page 14: Manual Cooking
MANUAL COOKING 1.POWER LEVELS Ten power levels are available. Prior to cooking, press Power Level and "PL10" will display. Then press number pads to select a different power level. Please refer to page 14 "MICROWAVE COOK" for detailed power level setting. Level Power 100%... -
Page 15: Microwave Cook
Note: 1.The Kitchen Timer setting is different from the Clock setting; it is simply a timer. 2. . During the Kitchen Timer function, no cooking function can be set into operatio 3.Kitchen Timer amount cannot be increased by pressing START/+30Sec. 4.Pressing STOP/Cancel will cancel the Timer countdown. -
Page 16: Combination Function (Convection + Microwave
d. Press number pads to enter the cooking time. The maximum cooking time is 99 minutes, 99 seconds. "F" will disappear. e. Press START/+30Sec. to start cooking. The remaining cook time will display. "Conv." will flash. Note: 1. . If no preheat needed, skip step c above 2. -
Page 17: One Touch Start
Note: 1. . Warm Hold function can be entered after cooking. The oven will beep twice to denote entering Warm Hold function. 2. . Warm Hold function can be used after Microwave cook, Convection cook, Combination cook, Defrost cook and Multi-stage cooking. 3. -
Page 18: Auto Defrost Function
10.Auto Defrost Function a. Press Auto Defrost, "dEF1", "Cook" and "DEF." ,"Auto" will appear in the display. b. Press Auto Defrost more times or press More / Less pad to choose the defrost food type, "dEF1" through "dEF4". See table below. LED display dEF1 dEF2... -
Page 19: Sensor Cook
AUTO BAKE&ROAST CHART: Food Display Weight/Portion Recommended grill Frozen Pizza Ab-1 10 oz Higher grill rack Muffins Ab-2 6 each Lower grill rack Biscuit/DinnerRoll/Bread Stick Ab-3 7 oz Higher grill rack Frozen French Fries Ab-4 4-10 oz Higher grill rack Beef Ar-1 2.0-4.0 Lbs... -
Page 20: Sensor Reheat
13. SENSOR REHEAT a. Press Sensor Reheat , "Sr-1", "SENS." and "Auto","Cook" will display. b. Press Sensor Reheat more times or press number pads 1 through 3 to choose the type of food. c. Press START/+30Sec. to start cooking. "Sr-", "SENS." and "Auto" will flash. Once the item has been sensed, the remaining cooking time will display. -
Page 21: Favorite Function
15. FAVORITE FUNCTION a. Press Favorite to program and choose up to three cooking procedures.Each procedure will be indicated by 1, 2 or 3 in the display. b. Press Favorite until your desired procedure number appears in the display. Press START/+30Sec. to begin it. A maximum of two cooking stages can be set for each procedure. -
Page 22: Turn On/Off The Buzzer Sound
Note: If you do not want to save a particular multi-stage program as a procedure, do not press Favorite as the first step. Press START/+30Sec. after programming both stages. 17. TURN ON/OFF THE BUZZER SOUND It is default that the buzzer sounds is open.In waiting state, long pressing on number 8 for 3 seconds, it sounds a long beep, turns off the sound. -
Page 23: Cooking End Reminder Function
20. COOKING END REMINDER FUNCTION The oven will beep five times to alert the user that cooking time has ended. "End" will display. The time of day will display by opening the door or pressing STOP/Cancel pad. 21. OTHER SPECI CATIONS a. -
Page 24: Maintenance
MAINTENANCE Troubleshooting Check your problem by using the chart below and try the solutions for each problem. If the microwave oven still does not work properly, contact the nearest authorized service center. TROUBLE POSSIBLE CAUSE POSSIBLE REMEDY a. Electrical cord for oven is not plugged in. a.
Need help?
Do you have a question about the EC042A2KJ and is the answer not in the manual?
Questions and answers
Additional information on the air fryer functionality i.e. what parts grills or pans do you use with the air fryer function
The Vissani EC042A2KJ uses a grill rack and grill tray for its convection (bake and roast) functions, which are related to air fryer-style cooking. The grill rack must be placed on the glass tray, and the grill tray must be placed on the grill rack. The grill tray cannot be used in microwave mode.
This answer is automatically generated