
Subscribe to Our Youtube Channel
Related Manuals for HIKVISION DS-2TD4166T-9


Summary of Contents for HIKVISION DS-2TD4166T-9
- Page 1 Thermal Bi-spectrum Network Speed Dome Quick Start Guide COPYRIGHT © 2018 Hangzhou Hikvision Digital Technology Co., Ltd.
- Page 2 ALL RIGHTS RESERVED. Any and all information, including, among others, wordings, pictures, graphs are the properties of Hangzhou Hikvision Digital Technology Co., Ltd. or its subsidiaries (hereinafter referred to be “Hikvision”). This user manual (hereinafter referred to be “the Manual”) cannot be reproduced, changed, translated, or distributed, partially or wholly, by any means, without the prior written permission of Hikvision.
- Page 3 Thermal Network Speed dome·Quick Start Guide IN CONNECTION WITH THE USE OF THIS PRODUCT, EVEN IF HIKVISION HAS BEEN ADVISED OF THE POSSIBILITY OF SUCH DAMAGES. REGARDING TO THE PRODUCT WITH INTERNET ACCESS, THE USE OF PRODUCT SHALL BE WHOLLY AT YOUR OWN RISKS. HIKVISION SHALL NOT...
- Page 4 Thermal Network Speed dome·Quick Start Guide 2012/19/EU (WEEE directive): Products marked with this symbol cannot be disposed of as unsorted municipal waste in the European Union. For proper recycling, return this product to your local supplier upon the purchase of equivalent new equipment, or dispose of it at designated collection points.
- Page 5 Thermal Network Speed dome·Quick Start Guide The installer and user are responsible for password and security configuration and its settings. Both internal and external grounds should be connected properly. (The cross section area of the grounding wire must be no less than 4 mm2, and no less than that of the phase connector).
-
Page 6: Table Of Contents
Thermal Network Speed dome·Quick Start Guide Table of Contents 1 Preparation ....................1 2 Appearance Description ................3 2.1 Speed dome Appearance ..................3 2.2 Cable Descriptions ....................4 2.3 Alarm In/Out Connections ..................5 3 Installing the Speed dome ................. 6 3.1 Monitoring Distance Range.................. -
Page 7: Preparation
Thermal Network Speed dome·Quick Start Guide 1 Preparation Basic Requirement All the electronic operation should be strictly compliance with the electrical safety regulations, fire prevention regulations and other related regulations in your local region. Check the package contents and make sure that the device in the package is ... - Page 8 Thermal Network Speed dome·Quick Start Guide Note: The user should be responsible for any damage caused when transporting with unoriginal package.
-
Page 9: Appearance Description
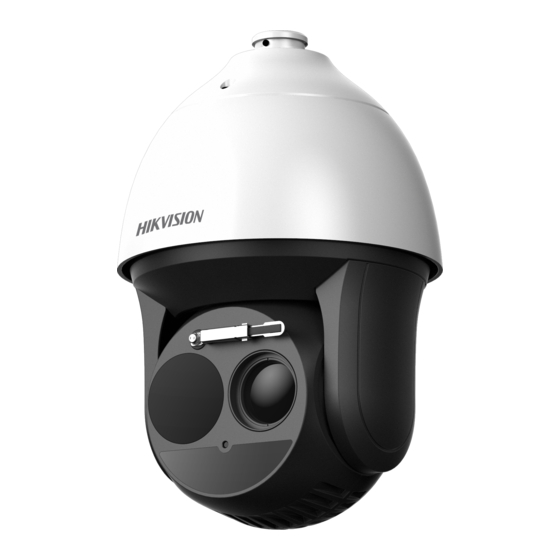
Thermal Network Speed dome·Quick Start Guide 2 Appearance Description There are two kinds of thermal network speed domes: Type I speed dome, and Type II speed dome. The appearance description of two cameras are shown below. 2.1 Speed dome Appearance Refer to the following figures for Type I thermal speed dome overview and dimensions. -
Page 10: Cable Descriptions
Thermal Network Speed dome·Quick Start Guide Table 2-1 Descriptions of Cable Interface Description Network Cable Video Cable Alarm Out Audio Cable Alarm In RS-485 Power Cable SD Card Slot 2.2 Cable Descriptions The cable interfaces of speed dome are shown in Figure 2-2. The cables of RS-485, power supply, alarm inputs, alarm outputs, etc. -
Page 11: Alarm In/Out Connections
Thermal Network Speed dome·Quick Start Guide 2.3 Alarm In/Out Connections This section is only for the speed dome with alarm in/out functions. The speed dome can be connected with alarm inputs (0~5VDC) and alarm outputs. Refer to the following diagrams for alarm output: JQC- 3FG GND OUT Relay... -
Page 12: Installing The Speed Dome
Thermal Network Speed dome·Quick Start Guide 3 Installing the Speed dome Before you start: 1. Check the package contents and make sure that the device in the package is in good condition and all the assembly parts are included. 2. Please turn off the power of the speed dome before connecting the cables. ... -
Page 13: Monitoring Distance Range
Thermal Network Speed dome·Quick Start Guide 3.1 Monitoring Distance Range Electric lens is adopted for the thermal channel of speed dome. It supports auto-focus function and remote focus function. For different lens focal length, the monitoring range is shown in the table below: Table 3-1 Monitoring Range (Pixel Interval: 17um) Lens Focal Length/mm MRAD... -
Page 14: Wiring
Thermal Network Speed dome·Quick Start Guide Lens Focal Length/mm Identification Range (Vehicle)/m Identification Range (Human)/m This table is for reference only, and the actual detection range may vary according to different camera settings, mounting condition, monitor and so When the weather is fine and the atmospheric visibility is normal, the ... - Page 15 Thermal Network Speed dome·Quick Start Guide Water-proof of Cable Terminal Purpose: The terminals may be rusted after a long time exposed. It is recommended to do water proof treatment to cable terminals. Steps: 1. Use the terminal box for wiring. 2.
- Page 16 Thermal Network Speed dome·Quick Start Guide Components Lock Nut Network Cable from Router/Switch Steps: 1. Feed the plugless network cable ⑦ through the lock nut ⑥, waterproof rubber gasket ⑤ (rubber gasket inset ridge must face waterproof endcap), and the water-proof endcap ④ in order. 2.
-
Page 17: Installing Memory Card
Thermal Network Speed dome·Quick Start Guide 3.3 Installing Memory Card Steps: 1. Remove the protective sticker as shown in Figure 3-4. Figure 3-4 Remove Protective Sticker 2. Remove the cover on the back of the speed dome. Insert the SD card to the SD card slot and install the cover back. - Page 18 Thermal Network Speed dome·Quick Start Guide Figure 3-6 Bracket and Accessories 2). Drill four Φ12 expansion screw holed on the wall and insert the delivered screws into the holes. Figure 3-7 Drill Screw Holes 3). Secure the wall mounting bracket with 4 hex nuts and washers. Figure 3-8 Secure the Bracket 2.
- Page 19 Thermal Network Speed dome·Quick Start Guide Figure 3-10 Buckle the Handle 2). Hook the two ends of the safety rope to the back box of the speed dome and the bracket respectively. 3). Hitch the speed dome onto the head cover with the hook on the back box. Hook Back Box Figure 3-11 Hang the Speed Dome...
- Page 20 Thermal Network Speed dome·Quick Start Guide Figure 3-12 Route the Cables 4. Connect the corresponding cables. 5. Align the back box of the speed dome with the head cover. Use an L-wrench to tighten the lock screws to secure the speed dome and the bracket. Lock Screw Figure 3-13 Secure the Speed dome The bracket in Figure 2-10 is the recommended bracket for this series of...
-
Page 21: Finishing Installing
Thermal Network Speed dome·Quick Start Guide Figure 3-14 Pendent Adapter 3.5 Finishing Installing Connect the corresponding cables and turn the power on; the system will do the self-test automatically. Make sure the live view image and the PTZ control work normally and then finish the installation. -
Page 22: Setting The System Over The Lan
Thermal Network Speed dome·Quick Start Guide 4 Setting the System over the LAN You shall acknowledge that the use of the product with Internet access might be under network security risks. For avoidance of any network attacks and information leakage, please strengthen your own protection. If the product does not work properly, please contact with your dealer or the nearest service center. -
Page 23: Activation Via Web Browser
Thermal Network Speed dome·Quick Start Guide 4.2.1 Activation via Web Browser Steps: 1. Power on the system, and connect the system to the network. 2. Input the IP address into the address bar of the web browser, and click Enter to enter the activation interface. -
Page 24: Modifying The Ip Address
Thermal Network Speed dome·Quick Start Guide Select inactive device. Input and confirm password. Figure 4-3 SADP Interface 3. Create a password and input the password in the password field, and confirm the password. STRONG PASSWORD RECOMMENDED– We highly recommend you create a strong password of your own choosing (using a minimum of 8 characters, including upper case letters, lower case letters, numbers, and special characters) in order to increase the security of your product. - Page 25 Thermal Network Speed dome·Quick Start Guide Please refer to section 3.2 to activate the system if it is inactive. 3. Change the device IP address to the same subnet with your computer by either modifying the IP address manually or checking the checkbox of Enable DHCP.
-
Page 26: Operating Via Web Browser
Thermal Network Speed dome·Quick Start Guide 5 Operating via Web browser 5.1 Accessing the System System Requirement: Operating System: Microsoft Windows XP SP1 and above version / Vista / Win7 / Server 2003 / Server 2008 32bits CPU: Intel Pentium IV 3.0 GHz or higher RAM: 1G or higher Display: 1024×... -
Page 27: Live View Page
Thermal Network Speed dome·Quick Start Guide Figure 5-1 Login Interface 5. Install the plug-in before viewing the live video and managing the network speed dome. Please follow the installation prompts to install the plug-in. You may have to close the web browser to finish the installation of the plug-in. - Page 28 Thermal Network Speed dome·Quick Start Guide Menu Bar PTZ Control Show or hide PTZ control panel Live View Window Live View Parameters Toolbar Preset/ Patrol/ Pattern Figure 5-3 Live View Page Menu Bar: Click each tab to enter Live View, Playback, Picture, and Configuration page respectively.
-
Page 29: Appendix
Thermal Network Speed dome·Quick Start Guide 6 Appendix 6.1 Common Material Emissivity Reference Material Emissivity Human Skin 0.98 0.91 Cement Concrete 0.95 Ceramics 0.92 Rubber 0.95 Paint 0.93 Wood 0.85 Asphalt 0.96 Brick 0.95 Sand 0.90 Soil 0.92 Cotton 0.98 Cardboard 0.90 White Paper... -
Page 30: Frequently Asked Questions (Faq)
Thermal Network Speed dome·Quick Start Guide 6.2 Frequently Asked Questions (FAQ) 6.2.1 Device Running Error Question: The device fails to start up or reboots repeatedly. The device constantly powers off unexpectedly when you pan/tilt the device or call preset. ... - Page 31 Thermal Network Speed dome·Quick Start Guide Answer: Examine if the IE plug-in is well installed. Change the Website Blocker settings if necessary. For cross-domain routing, enable the UPnP of device, or set manual mapping to port No. 80, 8000, or 554. ...
- Page 32 UD10171B...
Need help?
Do you have a question about the DS-2TD4166T-9 and is the answer not in the manual?
Questions and answers