Table of Contents
Advertisement
Quick Links
IM410-C
®
IDEALARC
R3R 375-I, 500-I AND 600-I
January, 2005
9535
For use with machine Code Numbers above:
Safety Depends on You
Lincoln arc welding and cutting
equipment is designed and built
with safety in mind. However,
your overall safety can be
increased by proper installation
... and thoughtful operation on
your part. DO NOT INSTALL,
OPERATE OR REPAIR THIS
EQUIPMENT WITHOUT READ-
ING THIS MANUAL AND THE
SAFETY PRECAUTIONS CON-
TAINED THROUGHOUT. And,
most importantly, think before you
act and be careful.
OPERATOR'S MANUAL
Copyright © 2005 Lincoln Global Inc.
• World's Leader in Welding and Cutting Products •
• Sales and Service through Subsidiaries and Distributors Worldwide •
Cleveland, Ohio 44117-1199 U.S.A. TEL: 216.481.8100 FAX: 216.486.1751 WEB SITE: www.lincolnelectric.com
Advertisement
Table of Contents
Troubleshooting

Related Manuals for Lincoln Electric 9535


Summary of Contents for Lincoln Electric 9535
- Page 1 IM410-C ® IDEALARC R3R 375-I, 500-I AND 600-I January, 2005 9535 For use with machine Code Numbers above: Safety Depends on You Lincoln arc welding and cutting equipment is designed and built with safety in mind. However, your overall safety can be increased by proper installation ...
- Page 2 Miami, Florida 33135 or CSA Standard W117.2-1974. A Free copy of “Arc Welding Safety” booklet E205 is available from the Lincoln Electric Company, 22801 St. Clair Avenue, Cleveland, Ohio 44117-1199. BE SURE THAT ALL INSTALLATION, OPERATION, MAINTENANCE AND REPAIR PROCEDURES ARE PERFORMED ONLY BY QUALIFIED INDIVIDUALS.
- Page 3 SAFETY ARC RAYS can burn. ELECTRIC SHOCK can kill. 3.a. The electrode and work (or ground) circuits 4.a. Use a shield with the proper filter and cover are electrically “hot” when the welder is on. plates to protect your eyes from sparks and Do not touch these “hot”...
- Page 4 SAFETY WELDING SPARKS can CYLINDER may explode cause fire or explosion. if damaged. 6.a. Remove fire hazards from the welding area. 7.a. Use only compressed cylinders If this is not possible, cover them to prevent containing the correct shielding gas for the the welding sparks from starting a fire.
- Page 5 SAFETY 6. Eloigner les matériaux inflammables ou les recouvrir afin de PRÉCAUTIONS DE SÛRETÉ prévenir tout risque d’incendie dû aux étincelles. Pour votre propre protection lire et observer toutes les instructions 7. Quand on ne soude pas, poser la pince à une endroit isolé de et les précautions de sûreté...
- Page 6 The code number is especially important when identifying the correct replacement parts. On-Line Product Registration - Register your machine with Lincoln Electric either via fax or over the Internet. • For faxing: Complete the form on the back of the warranty statement included in the literature packet accompanying this machine and fax the form per the instructions printed on it.
-
Page 7: Table Of Contents
TABLE OF CONTENTS Page Installation ............Section A Input Power Connection . -
Page 8: Installation
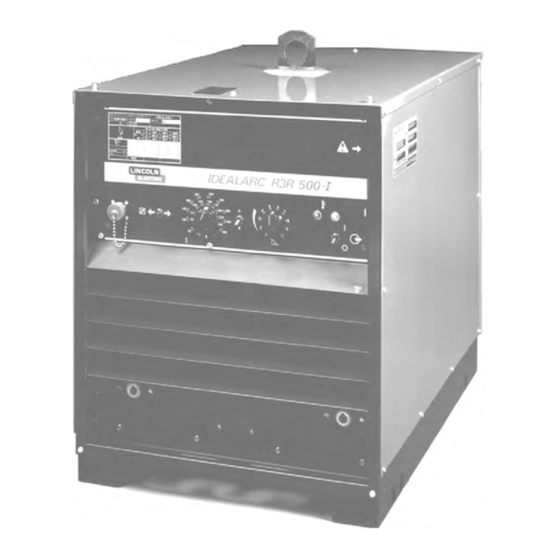
INSTALLATION INSTALLATION Remove the rear access panel. Connect the three phase input power to the three line terminals on the input contactor, and the earth ground lead to the WARNING ground stud marked with the symbol. Install the reconnect panel for the proper input voltage per the FALLING EQUIPMENT can cause diagram pasted inside the access panel cover. - Page 9 OPERATION OPERATION OUTPUT CONTROL WARNING The “current control” dial (labeled “I”) on the front of the machine indicates the output current. ELECTRIC SHOCK can kill. On the R3R 375-I, there is only one dial. On the R3R • Do not touch electrically live parts 500-I, and 600-I, there are two dials.
- Page 10 OPERATION B. ARC FORCE CONTROL DIAL G. RATING PLATE Arc Force Three Phase Power Increase/Decrease of Transformer Arc Force C. OUTPUT CURRENT CONTROL DIAL Rectifier Output Current D. OUTPUT CURRENT CONTROL RANGE SWITCH Rectified DC (R3R 500-I and R3R 600-I only) Output Output Current Control Dial Range A...
-
Page 11: Accessories
ACCESSORIES OPTIONAL EQUIPMENT switch in the “B” range position, the Pocket Amptrol provides total control of the welder’s output. K857 – REMOTE CURRENT CONTROL b. Turn the welder power switch on. The K857 consists of a control box with 8.5 m (28 ft) of c. -
Page 12: Maintenance
MAINTENANCE WARNING ELECTRIC SHOCK can kill. • Have an electrician install and ser- vice this equipment. • Turn the input power off at the fuse box before working on equipment. • Do not touch electrically hot parts. ROUTINE MAINTENANCE 1. The fan motor has sealed bearings which require no service. -
Page 13: Troubleshooting
HOW TO USE TROUBLESHOOTING GUIDE WARNING Service and Repair should only be performed by Lincoln Electric Factory Trained Personnel. Unauthorized repairs performed on this equipment may result in danger to the technician and machine operator and will invalidate your factory warranty. For your safety and to avoid Electrical Shock, please observe all safety notes and precautions detailed throughout this manual. - Page 14 TROUBLESHOOTING Observe all Safety Guidelines detailed througout this manual PROBLEMS RECOMMENDED POSSIBLE CAUSE (SYMPTOMS) COURSE OF ACTION FUNCTION PROBLEMS A. Input contactor chatters. 1.Faulty input contactor. 1.Repair or replace. 2.Low line voltage. 2.Check with Power Company. B. Machine input contactor does not 1.Supply line fuse blown.
- Page 15 TROUBLESHOOTING Observe all Safety Guidelines detailed througout this manual PROBLEMS RECOMMENDED POSSIBLE CAUSE (SYMPTOMS) COURSE OF ACTION FUNCTION PROBLEMS C. Machine input contactor closes 1. Electrode or work lead loose or 1. Repair connections. but has no or low output. Open broken.
- Page 16 TROUBLESHOOTING Observe all Safety Guidelines detailed througout this manual PROBLEMS RECOMMENDED POSSIBLE CAUSE (SYMPTOMS) COURSE OF ACTION FUNCTION PROBLEMS E. Machine does not have 1. Input fuse blown. Machine is 1. Replace fuse or repair input line. maximum output (67 to 71 volts). single phased.
- Page 17 TROUBLESHOOTING Observe all Safety Guidelines detailed througout this manual PROBLEMS RECOMMENDED POSSIBLE CAUSE (SYMPTOMS) COURSE OF ACTION FUNCTION PROBLEMS H. Machine trips off when under no 1. Power bridge rectifier may have 1. Refer to Power Hybrid, load or makes excessive noise a shorted diode or SCR.
- Page 18 TROUBLESHOOTING Observe all Safety Guidelines detailed througout this manual PROBLEMS RECOMMENDED POSSIBLE CAUSE (SYMPTOMS) COURSE OF ACTION FUNCTION PROBLEMS L. Optional remote current control 1. Current control switch in the 1. Place switch in “remote” ( not functioning. See wrong position. position.
- Page 19 TROUBLESHOOTING CONTROL CIRCUIT TROUBLESHOOTING CHART IDEALARC R3R 375-I, 500-I AND 600-I...
-
Page 20: Troubleshooting Procedures
TROUBLESHOOTING TROUBLESHOOTING C. CONNECTING THE REMOTE CONTROL TO THE MACHINE PROCEDURES Extreme caution must be observed when installing A. PROCEDURE FOR REPLACING PC or extending the wiring of a remote control. BOARDS Improper connection of this unit can Lead to failure of the current control rheostat or the control circuit. - Page 21 TROUBLESHOOTING (high resistance value). This indicates that the 5. If either step (3) or step (4) fails, replace the capacitor in the snubber circuit is taking a switch. charge. I. REMOTE CONTROL CHECK 3. If the needle stays to the right, the capacitor is shorted and the assembly is defective.
- Page 22 E-10 E-10 TROUBLESHOOTING DIAGRAM 1 DIAGRAM 2 2. POWER DIODE TEST K. POWER SILICON CONTROLLED REC- TIFIER TEST a. Establish the polarity of the ohmmeter leads and set to X10 scale. The SCR must be mounted in the heat sink when making this test.
-
Page 23: Wiring Diagrams
WIRING DIAGRAMS IDEALARC R3R-400, 500-I, 500 & 600-I WIRING DIAGRAM PRIMARY CONNECTIONS 4-7, 5-8 AND 6-9 PRIMARY CONNECTIONS RECONNECT PANEL SHOWN TO SUPPLY LINES TO SUPPLY LINES TO SUPPLY LINES ARE MADE AT THE MAIN TRANSFORMER 4-7, 5-8 AND 6-9 CONNECTED FOR 220V TO GROUND TO GROUND... - Page 24 WIRING DIAGRAMS NOTE: This diagram is for reference only. It may not be accurate for all machines covered by this manual. The specific diagram for a particular code is pasted inside the machine on one of the enclosure panels. IDEALARC R3R 375-I, 500-I AND 600-I...
- Page 25 WIRING DIAGRAMS R3R 375-I, 500-I and 600-I K817 or K817R (K841 not shown) Part No. Type M12244-7 32.00 15.39 3092 1.44 30.02±.11 33.07±.06 M12244-7 7-7-78 IDEALARC R3R 375-I, 500-I AND 600-I...
- Page 26 NOTES IDEALARC R3R 375-I, 500-I AND 600-I...
- Page 27 NOTES IDEALARC R3R 375-I, 500-I AND 600-I...
- Page 28 NOTES IDEALARC R3R 375-I, 500-I AND 600-I...
- Page 29 NOTES IDEALARC R3R 375-I, 500-I AND 600-I...
- Page 30 Do not touch electrically live parts or Keep flammable materials away. Wear eye, ear and body protection. WARNING electrode with skin or wet clothing. Insulate yourself from work and ground. Spanish No toque las partes o los electrodos Mantenga el material combustible Protéjase los ojos, los oídos y el AVISO DE bajo carga con la piel o ropa moja-...
- Page 31 Keep your head out of fumes. Turn power off before servicing. Do not operate with panel open or Use ventilation or exhaust to guards off. WARNING remove fumes from breathing zone. Spanish Los humos fuera de la zona de res- Desconectar el cable de ali- No operar con panel abierto o AVISO DE...
- Page 32 • World's Leader in Welding and Cutting Products • • Sales and Service through Subsidiaries and Distributors Worldwide • Cleveland, Ohio 44117-1199 U.S.A. TEL: 216.481.8100 FAX: 216.486.1751 WEB SITE: www.lincolnelectric.com...
Need help?
Do you have a question about the 9535 and is the answer not in the manual?
Questions and answers