Table of Contents
Advertisement
Quick Links
C
ONTENTS
......................................................... 3
....................................................................... 3
........................................................ 4
............................................. 5
.............................................. 7
.................................................................... 8
........................................................ 9
.............................................................. 10
................................................................... 11
...................................................... 12
.................................................................. 12
............................................................... 15
........................................... 15
.......................................................... 17
...................................................... 18
.................................................................. 18
................................................................... 18
............................................................................ 19
.............................................................................. 19
....................................................... 20
-
...................................................................... 20
-
......................................... 21
........................................................ 22
........................................................ 23
..................................................................... 23
........................................................................ 24
................................................................ 25
.................................................................. 25
1
Advertisement
Table of Contents

Related Manuals for Micromax Bolt D200


Summary of Contents for Micromax Bolt D200
-
Page 1: Table Of Contents
ONTENTS ............3 NDROID DVANTAGE ............... 3 IRST ............4 NDERSTAND HONE ..........5 NSERT EMORY ..........7 URNING HONE ..............8 ANDSET ............9 HARGING THE ATTERY .............. 10 OOGLE CCOUNT ..............11 CREEN ............12 PPLICATION AUNCHER ..............12 OTIFICATIONS ............... - Page 2 ................. 26 ULTIMEDIA ................26 AMERA ................26 ALLERY ..............27 USIC LAYER FM R ................ 28 ADIO ..............29 IDEO LAYER ........29 ETTINGS ETWORKS PPLICATIONS ..........30 ONNECT TO THE NTERNET & P ..........30 ETHERING ORTABILITY ........... 31 LUETOOTH EVICES ............
-
Page 3: The Android Advantage
The Android Advantage Micromax D200 comes with KitKat 4.4.2 that offers optimized system performance resulting in a faster, simpler and smoother Android experience. At the Google Play Store, you can download from millions of apps, games, movies, and books. D200 also has the best of Google built-in, including your favorite apps like Google Search, Maps, Drive, and YouTube. -
Page 4: Understand Your Phone
Understand Your Phone... -
Page 5: Insert Sim And Memory Card
Insert SIM and Memory Card Switch off your phone, remove the rear cover and battery as shown:... - Page 6 Insert SIM card and Memory card correctly in the card slot(s), as shown: Place back the battery and rear cover.
-
Page 7: Turning Your Phone On/Off
Please keep the SIM Card out of the reach of children. Be careful when inserting or removing the SIM card, as it is vulnerable to damage due to scratching or bending. Use only compatible memory cards. Incompatible memory cards may damage the device and corrupt the data stored in the card. -
Page 8: Handset Keys
Handset Keys Keys Functions • Long press to switch on or switch off the phone. • Press once to turn off the screen or to wake up the screen. • Press for 2 seconds to view quick options to turn off, reboot, switch airplane... -
Page 9: Charging The Battery
Opens a menu with items that affect the • current screen or application. • If tapped when on the home screen, opens options to personalize the home screen. • On long tap, opens the most recently used applications. • Opens the Home screen. •... -
Page 10: Google Account
You can charge the device with a travel adapter or connecting the device to a PC via a USB cable. Google Account Your Google Account lets you take full advantage of applications and services offered by Google Play Store. Configure your Google account on this handset to get access to your Gmail, Google Play Store, Google Maps, and much more. -
Page 11: Home Screen
Network connection will be required for the Google account setup step to appear. However, you may configure your Google account at any later stage from → Add account → Google. Follow the → registration steps to successfully configure your mail account on the device. -
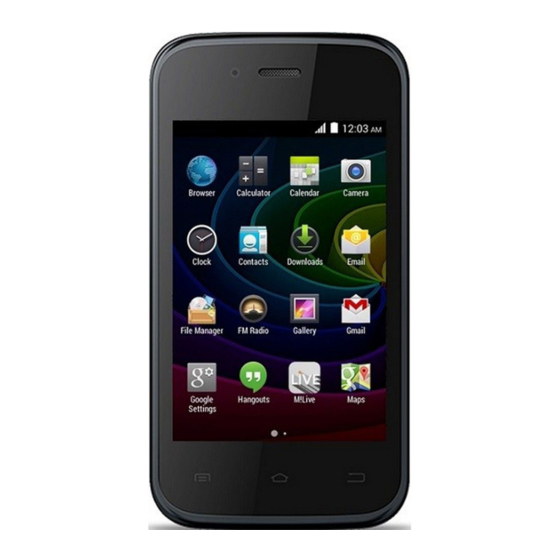
Page 12: Application Launcher
then tapping Widgets. Application Launcher Application launcher or Application menu is available in the middle of the bottom pane on the home screen. to view all installed applications. In the application menu, tap and hold any application to take it to the home screen;... - Page 13 when it appears in the device. Open Notification Panel Close Notification Panel...
- Page 14 Clear all notifications When you receive a notification, its icon appears in the status bar, along with a brief summary. You clear each notification separately by swiping it towards left or right. Open the Toolkit Toolkit gives you quick access to basic phone features such as Airplane Mode,...
-
Page 15: Gravity Sensor
Gravity Sensor Your phone has gravity sensor to detect its orientation and adjust the display (auto-rotate) based on the motion. To enable/disable the auto-rotate feature: Open the notification panel, tap , and then select • AUTO ROTATION. You can also enable/disable the auto-rotate feature from •... - Page 16 Hold and drag the lock icon towards the unlock icon. Face Unlock Look at your phone to unlock! Allows you to keep your face as screen unlocking password. Enter your PIN to unlock your phone! You may set a PIN as your screen unlocking password.
-
Page 17: Use Google Search
Password Enter your password to unlock! You may set your desired password as your screen unlocking password. Slide Slide unlock! Just wake up the screen and slide the lock icon towards the unlock icon to unlock your phone. You may set any desired locking technique from Security →... -
Page 18: Using The Touch Screen
sections in your handset. Google Search is available on the home screen and also in the application menu. Using the Touch Screen Tap and Hold Tap and hold an item to view the list of actions based on the selected item and condition. You can also move an item from the Apps screen to the home screen using this method. -
Page 19: Scroll
icon (appears when you tap and hold an item in the Home screen). Scroll Slide your finger on the screen upward or downward (without dragging an item) to scroll. Swipe Slide your finger in the desired direction. For example, swipe your finger left or right to view your next home screen. -
Page 20: Using Pinch To Zoom
Using Pinch to Zoom You can open any image or web page and then use your fingers to zoom-in or zoom-out using the pinch gesture. Double-tap Quickly tap twice on an image, webpage, map, etc. to zoom. example, double-tap section of a webpage in the browser to zoom in on that section. -
Page 21: Using The On-Screen Keyboard
Using the On-screen Keyboard Some applications display the keyboard by default. In others, tap a text field where you want to enter text to open the keyboard. Tap to QWERTY touch pad change the sentence Backspace to erase the entered text. Tap to switch to numerical... -
Page 22: Recent Applications
After typing, tap key to close the keyboard. Tap and hold the text field to open a menu and to cut/copy/paste text. Recent Applications Tap and hold key on the home screen to view the list of recent applications. You can easily remove items from the list to free some memory and make your phone work faster. -
Page 23: Calling And Messaging
Drag an item towards left or Tap and hold an item and right. then select Remove from list. Calling and Messaging Make a Call on the menu screen or the home screen. By default, the dialer will display a list of contacts on which calls have been... -
Page 24: Contacts
made very often and the contacts which have been marked as favorites. to view the dialer and tap to view the call history. Contacts Go to → Store, use, and synchronize contact details in your contact list. You can now create contact groups or mark contacts as favorites in your phonebook. -
Page 25: Airplane Mode
2. Select the account(s) with which contacts list is to be synchronized. You can auto-sync contacts by selecting the Auto-sync app data option. Your contacts synchronization will be complete in a few seconds. To synchronize contacts, you need to have Internet connectivity. -
Page 26: Multimedia
Enter the contact name (if it exists) or enter the phone number. You can also tap the icon to view and select contact(s) from the contact list. to send the message. Multimedia Camera Go to → Manage camera Swap flash light between front and back camera... -
Page 27: Music Player
Gallery. Tap an album to open and view its contents. You can share/copy/move/delete images and videos from the gallery. Music Player Go to → Open the playlist Turn on/off songs shuffle Turn on/off repeat songs Toggle Volume Play/Pause song Play Play next previously song in the... -
Page 28: Fm Radio
You can use a SD card to enhance the storage capacity for your multimedia files such as music, photos, emails, and so on. FM Radio Go to → You can listen to your favorite FM channels using the inbuilt FM receiver of your phone. -
Page 29: Video Player
Video Player Go to → Share via Share Video Change the Play/Pause video video screen Settings, Networks, and Applications Your phone can connect to various networks and devices, including Internet, Wi-Fi, GPRS, Bluetooth, devices, such as... -
Page 30: Connect To The Internet
headsets. You can also transfer files to/from your PC through the data cable. Connect to the Internet Go to → SIM Management → Data connection → and select the SIM on which data connection is to be enabled. You may also need to configure the access point name for the data connection to work. -
Page 31: Pair With Bluetooth Devices
Select the USB tethering option. Select your phone network as the network connection in your PC/laptop and get access to the Internet. Bluetooth Tethering Pair your phone with the Bluetooth enabled PC/laptop via Bluetooth pairing option. Select the Bluetooth tethering option in your phone. On the paired PC/laptop, select the Bluetooth device (your phone) and choose to connect to the internet. -
Page 32: Configuring E-Mail
If your phone stops scanning before you make the other device discoverable, tap SEARCH FOR DEVICES. Tap Micromax D200 at the top of the scanned device list to make your D200 visible on other devices. -
Page 33: Google Maps
Google Maps application may not be available in every street, country or region. Micromax does not guarantee the accuracy of any directional services. Play Store Your Android phone lets you access unlimited entertainment... -
Page 34: Safety Precautions
sources. You can download applications, games, movies, and books from the ever increasing Play Store. New items get added almost daily to the store to give users a never ending fun experience. To view and manage the list of all inbuilt, downloaded, and running applications, go to →... - Page 35 Always keep the phone and accessories out of reach of small children. Small parts such as the SIM card or micro SD card can be dismantled and swallowed by small children. Do not place the phone near electromagnetic data carriers such as credit/Debit cards.
-
Page 36: Taking Care Of Your Device
Flight is influenced by interference caused by the phone. It is not advised to switch on a phone during flight. Please repair the device at Micromax authorized service center only. Repairing the device by yourself invalidates the warranty rules. -
Page 37: Battery Recommendations
For more information on best practices for disposal of electronic and electrical waste, please visit to our web site: www.micromaxinfo.com/weee.php. Note: Micromax will not bear any responsibility for any incompliance with the above mentioned guidelines or improper usage of the mobile phone. Disclaimer The colors, specifications, functions and graphics shown/mentioned in •... -
Page 38: Copyright
Specifications are subject to change without prior notice. Micromax keeps the right to modify the content in this user guide without prior notice. Upon first use of your device, your device will send information • related to your mobile, IMEI numbers, location details and other software details through SMS* automatically.
Need help?
Do you have a question about the Bolt D200 and is the answer not in the manual?
Questions and answers