
Subscribe to Our Youtube Channel
Related Manuals for swaploader SL-214


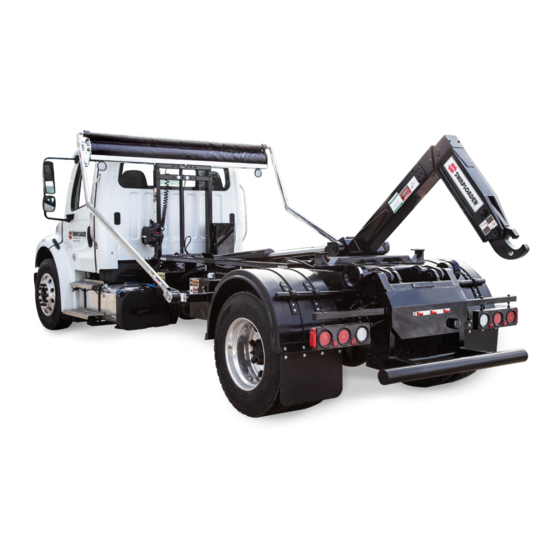
Summary of Contents for swaploader SL-214
- Page 1 “Hooked on Quality” MODEL SL-214 P A R T S A N D O P E R A T I O N M A N U A L HOIST SERIAL N U MB ER...
-
Page 3: Table Of Contents
Hydraulic Oil Specifications & Interchange Chart .................. 4-3 Hydraulic Filter Element Specification ....................4-3 Mast Lock (Pivot Lock) Inspection ......................4-4 Jib Lockout Valve Inspection & Adjustment Instructions ................ 4-5 Pressure Check Instructions ......................... 4-7 Outer Tube Clamp Assembly Inspection Instructions ................4-10 0.0.TOC.SL-214... - Page 4 Manual Controls, 3-Section ........................6-6 Air Controls, 3-Section .......................... 6-7 Hoist Installation Kit (EHV) ........................6-9 Tank Circuit (EHV) ..........................6-10 Tank Circuit, 3-Section ........................6-11 Pump Circuit (EHV) ..........................6-12 Hose Circuit (EHV) ..........................6-13 Hose Circuit, 3-Section (EHV) ......................6-14 0.0.TOC.SL-214...
-
Page 5: Introduction
Record your SwapLoader Hoist serial number in the appropriate space provided on the title page. Your SwapLoader dealer needs this information to give prompt, efficient service when ordering parts. It pays to rely on an authorized SwapLoader Distributor for your service needs. For the location of the Distributor nearest you, contact SwapLoader. -
Page 6: Warranty Statement
Warranty Registration Card must be returned within 15 days of Retail Sale of SwapLoader hoist to SwapLoader, Des Moines, Iowa. If unit has not been registered, then the warranty start date will revert to the original factory invoice date. Warranty Registration is the ultimate responsibility of the owner and may be accomplished by the completion and return of the product registration form included in the SwapLoader hoist manual. -
Page 7: Safety Suggestions
The container specifications must match the hoist specifications. Keep the containers and hoist in good working order. DO NOT use if repairs are needed. Perform periodic inspections and maintenance as required by the maintenance section of the operator’s manual. 1.0.INT.SL-214... -
Page 8: Decals
It is the responsibility of the owner and/or installer to insure that any additional safety devices required by state or local codes are installed on the SwapLoader Hoist and/or Truck Chassis. - Page 9 90P09 HYDRAULIC OIL SPECIFICATIONS 90P10 HYDRAULIC OIL FLAMMABLE 90P11 HOIST FALLING 90P12 LEVER CONTROL 90P13 SAFETY INSTRUCTIONS 90P14 SWAPLOADER - JIB 90P18 RELIEF VALVE 90P78 HIGH-PRESSURE FLUID 91P06 LUBRICATION POINTS 91P34 SL-214 90P91 ADJ. JIB OPERATION * Included with the Adjustable Jib option...
- Page 10 Section I: Introduction The following is a list of all the SwapLoader Safety Decals, and their part numbers. Please use when reordering replacement decals. 90P07 – OPERATIONS & SERVICE MANUAL 90P08 – HOIST-BODY SPECIFICATIONS 90P09 – HYDRAULIC OIL SPECIFICATIONS 90P10 – HYDRAULIC OIL FLAMMABLE 90P11 –...
- Page 11 Section I: Introduction 90P14 – SWAPLOADER - JIB 90P18 – RELIEF VALVE 90P78 – HIGH-PRESSURE FLUID 91P06 – LUBRICATION POINTS 91P34 – SL-214 90P91 – ADJUSTABLE JIB OPERATION 1.0.INT.SL-214...
-
Page 12: Serial Number Locations
Section I: Introduction Serial Number Locations on a SwapLoader Hoist Serial Number Tag is located at the front driver side of the hoist (gray arrow on first picture). The Serial Number is also stamped into the frame of the hoist on the top of the “inner rail”... -
Page 13: Installation
SwapLoader U.S.A., Ltd. immediately. GENERAL INSTALLATION PROCEDURE The installation of the SwapLoader on a truck chassis will generally follow these steps: 1. Install hoist assembly onto truck chassis. 2. Mount the hydraulic control valve or EHV system to the hoist and install the hydraulic plumbing from the control valve to the hydraulic cylinders. -
Page 14: Hoist Installation
RATING OF ANY OF THE INDIVIDUAL COMPONENTS OF THE COMPLETED CHASSIS (TIRES, AXLES, SUSPENSION, ETC.) 2. There are three types of mount brackets used on the Model SL-214 hoist as indicated in Fig. B and Pg. 5-7. They are the front brackets (Pt. No. 25H91), the mid brackets (Pt. No. - Page 15 E. You may need to modify the mount brackets or add shim plates to allow for variances in the width of the truck chassis as well as to allow for top rivets, stepped channels, etc. Figure C Figure E Figure D 2.0.INS.SL-214...
-
Page 16: Controls Installation - Manual
SwapLoader. Take proper care when routing the control cables, as a good cable path is essential for a proper operating system. Keep bends in the cable path to a minimum and be as generous as possible. - Page 17 / flange / sleeve assembly, make sure that the control head remains in the neutral position. 6. Tighten the .750-16 UNF jam nut against the sleeve and lock in position. 7. Bring flange into position on bolt assembly to valve housing. 2.0.INS.SL-214...
-
Page 18: Controls Installation - Air Shift (Option)
The air hose is provided in a bulk length, which you can cut to length as required for running the air lines. Take care in routing the air lines and avoid hot areas such as exhaust pipes, etc. 2.0.INS.SL-214... -
Page 19: Air Or Cable Control Installation W/ U-Lock (Option)
Mount Indicator Light Box in the truck cab where it will be clearly visible to the operator. Route Indicator Light and Harness (Pt. No. 40P60) from the truck cab to the U-Lock cylinder. Hardwire or plug in provided 12V adapter for indicator light. 2.0.INS.SL-214... -
Page 20: Ehv Installation (Option)
Section II: Installation EHV INSTALLATION (OPTION) 6. Review all directions and diagrams provided before starting the Electric over Hydraulic Valve Installation. Electric Over Hyd. Valve - SERVICE PARTS SL-214 PART ITEM DESCRIPTION 7. Mount the 22P58 EHV to the hoist’s... - Page 21 (included). The location should be such that the controls (Pt. No. 22P86) can be easily reached while operating the truck. 4. Hardwire or plug in provided 12V adapter for control box. 2.0.INS.SL-214...
-
Page 22: Ehv Installation W/ U-Lock (Option)
Section II: Installation EHV INSTALLATION w/ U-LOCK (OPTION) 1. Review all directions and diagrams provided before starting the Electric over Hydraulic Valve Installation. Electric Over Hyd. Valve - SERVICE PARTS SL-214 PART ITEM DESCRIPTION 2. Mount the 22P91 EHV to the hoist’s... - Page 23 (Pt. No. 22P95) can be easily reached while operating the truck. 4. Route indicator light harness from control box to the U- Lock Cylinder. 5. Hardwire or plug in provided adapter control box. 2-11 2.0.INS.SL-214...
-
Page 24: P.t.o. Selection
OPERATING CYCLE. HOW TO IDENTIFY WHAT PUMP IS NEEDED The SwapLoader factory supplied pump is a bushing style gear pump, because of the pressure requirements of the SwapLoader hooklift hoist. By design the bushing style pumps are single rotation (rotation specific). -
Page 25: Pump Installation
After the hose has been shortened, lubricate the insert threads of the fitting and the I.D. of the hose. Measure1-3/16” from the end of the hose and mark the hose for the socket depth. Screw hose into the socket (left-hand thread) to the depth marked on the hose. 2-13 2.0.INS.SL-214... -
Page 26: Hydraulic Tank Installation
Install the hydraulic return hose and the hose barb fitting between the filter and the control valve assembly as shown on Pg. 5-9. The hose length can be shortened if necessary. Secure the hose to the barb fittings with the hose clamps provided. Figure G 2-14 2.0.INS.SL-214... -
Page 27: Start Up Procedure
FAILURE TO FILL OUT AND SUBMIT PRODUCT REGISTRATION WITHIN 15 DAYS OF INSTALLATION MAY POSSIBLY VOID THE WARRANTY. CAUTION The SwapLoader hoist must be used with bodies or containers that properly fit the front hook and the rear hold-downs (see Subframe Critical Dimensions on Pgs. -
Page 28: Subframe Critical Dimensions
WELD HOOK GUARD TO BODY OR ADD STRUCTURAL SUPPORT AS NEEDED FOR THE APPLICATION. THIS DRAWING PROVIDES THE CRITICAL SUB-FRAME DIMENSIONS FOR COMPATABILITY WITH THE SWAPLOADER HOOK LIFT HOIST. IT IS THE SUB-FRAME SUPPLIER’S RESPONSIBILITY TO PROVIDE A SUB-FRAME OF SUFFICIENT CAPACITY WHICH PROPERLY SUPPORTS THE BODY/CONTAINER WHEN USED WITH THE HOOK LIFT HOIST. - Page 29 WELD HOOK GUARD TO BODY OR ADD STRUCTURAL SUPPORT AS NEEDED FOR THE APPLICATION. THIS DRAWING PROVIDES THE CRITICAL SUB-FRAME DIMENSIONS FOR COMPATABILITY WITH THE SWAPLOADER HOOK LIFT HOIST. IT IS THE SUB-FRAME SUPPLIER’S RESPONSIBILITY TO PROVIDE A SUB-FRAME OF SUFFICIENT CAPACITY WHICH PROPERLY SUPPORTS THE BODY/CONTAINER WHEN USED WITH THE HOOK LIFT HOIST.
- Page 30 This Page Intentionally Left Blank...
- Page 31 Section II: Installation - Accessories INSTALLATION INSTRUCTIONS – REAR BUMBER ASSEMBLY 1. Review all directions and diagrams provided before starting bumper installation. 2. Trim truck frame to indicated dimensions (see Fig. A). These dimensions will facilitate the mounting of the rear light assembly if it is also being mounted. 3.
- Page 32 Section II: Installation - Accessories BUMPER LOCATION CHART DIMENSION B (MAX) Figure B SL-105 SL-145 SL-180 SL-220 SL-2418 SL-330 SL-412 SL-406 SL-650 DIM. A SL-212 SL-222 SL-400 SL-518 SL-240 SL-520 24 5/8” 13 1/2" 15 3/4" 15 1/4" 17” 14 1/4" 14”...
- Page 33 Section II: Installation - Accessories INSTALLATION INSTRUCTIONS – REAR BUMBER ASSEMBLY w/ EXTENSIONS 1. Review all directions and diagrams provided before starting bumper installation. 2. Trim truck frame to indicated dimensions (see Fig. A). These dimensions will facilitate the mounting of the rear light assembly if it is also being mounted. 3.
- Page 34 Section II: Installation - Accessories BUMPER LOCATION CHART DIMENSION B (MAX) SL-105 SL-145 SL-180 SL-220 SL-2418 SL-330 SL-412 SL-406 SL-650 DIM. A SL-212 SL-222 SL-400 SL-518 SL-240 SL-520 24 5/8” 1 3/4" 22 1/2" 21 3/4" 25 1/4” 21 3/4" * 21 1/2”...
- Page 35 Section II: Installation - Accessories INSTALLATION INSTRUCTIONS – FOLDING BUMBER ASSEMBLY 1. Review all directions and diagrams provided before starting bumper installation. Typically, a folding bumper is needed when the rear of the container extends beyond the back of the truck such that the distance between the truck bumper and container rear exceeds 24”...
- Page 36 Section II: Installation - Accessories MATERIAL LIST FOR 51H44 5. Assemble the Bumper ITEM PART # DESCRIPTION WT-lb/ea. Assembly to the Front and 51H45 Slip Bracket Wdmt 9.71 Rear Brackets (see Fig. C). 51H46 Bumper Tube Wdmt 47.83 Refer to the Typical Bolted 62H84 Pivot Arm 24.79...
-
Page 37: Drop Down Bumper Assembly
Section II: Installation - Accessories INSTALLATION INSTRUCTIONS – DROP DOWN BUMPER ASSEMBLY 1. Review all directions and diagrams provided before starting bumper installation. Typically, a drop down bumper is needed when the rear of the container extends beyond the back of the truck such that the distance between the truck bumper and container rear exceeds 24”... - Page 38 Section II: Installation - Accessories MATERIAL LIST FOR 51H11 ITEM PART # DESCRIPTION WT-lb/ea. 51H12 Long Pivot Arm R.H 16.08 51H13 Long Pivot Arm L.H. 16.08 51H14 Short Pivot Arm R.H. 8.89 51H15 Short Pivot Arm L.H. 8.89 51H16 Bumper Tube 113.05 51H17 Mount Bracket...
-
Page 39: Cab Guard Assembly
Section II: Installation - Accessories INSTALLATION INSTRUCTIONS – CAB GUARD ASSEMBLY 1. Review all directions and diagrams provided before starting cab guard installation. 2. Position cab guard weldment (Pt. No. 50H95) on frame with sufficient clearance between cab and cab guard. 3. - Page 40 This Page Intentionally Left Blank...
-
Page 41: Container Variability System
Section II: Installation - Accessories INSTALLATION INSTRUCTIONS – CONTAINER VARIABILITY SYSTEM 1. Review all directions and diagrams provided before starting the CVS installation. 2. Attach the base plate bracket (Pt. No. 23H76) to the CVS sub-assembly (Pt. No. 12H01) with fasteners provided (see CVS Install Detail on Pg. 2-27). 3. - Page 42 Section II: Installation - Accessories 12. Remove both the hydraulic hose (Pt. No. 12P55) that connects from the upper bulkhead fitting inside the Main Frame to the jib lockout valve (Pt. No. 21P28) and the 90 degree hydraulic fitting (Pt. No. 11P23) installed into the top side of the jib lockout valve (see Pg. 2- 28).
- Page 43 Section II: Installation - Accessories 11H99 – CVS Assembly SL-145/212/214 PART ITEM DESCRIPTION lb/ea. lb/all Container Variability System 12H01 14.11 14.11 23H76 Base Plate Bracket, CVS 5.30 5.30 Washer, Lock - 3/8 Dia 00755 0.03 0.18 00P13 HHCS 3/8-16 UNC x 1-1/4 Gr8 0.10 0.60 Nut, Hex 3/8-16 UNC Gr8...
- Page 44 Section II: Installation - Accessories 90H84 – CVS CIRCUIT PART ITEM DESCRIPTION lb/ea. lb/all Adp Hyd 08MF/08MJ/08FJ 11P85 0.40 0.40 11P98 Hose Assy 28 08-10FJ/10FJ 1.40 1.40 Adp Hyd 20MP/16FP 12P20 0.30 0.30 12P69 Adp Hyd 10MJ/08MJ 90 0.30 1.20 Hose Assy 21 08-10FJ/08FJ90 12P87 1.26...
- Page 45 HOIST LENGTH MINIMUM 10’-0” 40” 95” 12” SL-145 SL-212 11’-0” 52” 95” 18” 12’-0” 49” 95” 12” SL-214 13’-0” 61” 95” 18” 14’-0” 74 1/2" 124 5/8” 12” SL-220 SL-222 16’-0” 98 1/2" 124 5/8” 18” 12’-0” 58 1/2” 112 5/8”...
- Page 46 This Page Intentionally Left Blank...
-
Page 47: Fender Assembly, Single Axle
Section II: Installation - Accessories INSTALLATION INSTRUCTIONS – FENDER ASSEMBLY, SINGLE AXLE 1. Review all directions and diagrams provided before starting fender installation. 2. Center fender above tire using block to maintain the proper height. Fender should be approximately 5” above tire to allow for suspension movement (see Fig. - Page 48 Section II: Installation - Accessories MATERIAL LIST FOR 10H93 OR 11H13 ITEM PART # DESCRIPTION WT-lb/ea. 10H74 Fender Bracket Wdmt. 8.05 21H37 Mounting Plate 1.09 21H42 Rubber Spacer 0.85 21H61 Fender Tube 1.26 00P34 3/8-16 UNC Locking Nut 0.02 00771 3/8 Dia.
- Page 49 Section II: Installation - Accessories INSTALLATION INSTRUCTIONS – LIGHT BAR ASSEMBLY 1. Review all directions and diagrams provided before starting rear light bar installation. 2. Trim truck frame to indicated dimensions (see Fig. A). This step may have already been performed if a bumper was previously installed.
-
Page 50: Light Bar Assembly
Section II: Installation - Accessories MATERIAL LIST FOR 51H68 ITEM PART # DESCRIPTION WT-lb/ea. 51H69 Stub Light Bar Weldment 8.54 63H08 Center Plate 27.33 00P44 3/8-16 x 1 1/2 HHCS 0.07 00P34 3/8-16 Locking Hex Nut 0.02 00771 Ø3/8 Flat Washer 0.01 01P18 5/8-11 x 3 HHCS... - Page 51 Section II: Installation - Accessories 2-39 2.8.INS.ACC.LEDLB...
- Page 52 This Page Intentionally Left Blank...
-
Page 53: Roller & Roller Mount Assembly
Section II: Installation - Accessories INSTALLATION INSTRUCTIONS – ROLLER & ROLLER MOUNT ASSEMBLY 1. Review all directions and diagrams provided before starting roller and roller mount installation. 2. Locate position for roller mount brackets (Pt. No. 32H03) between cross sills of the container. - Page 54 Section II: Installation - Accessories 4. Once the mount brackets are located on the container, weld the roller mount brackets in place (see Fig. A). 5. Install the roller (Pt. No. 10H12) between the brackets with the roller axle (Pt. No. 10H31) and the fasteners provided (see Fig.
-
Page 55: Toolbox
Section II: Installation - Accessories INSTALLATION INSTRUCTIONS – TOOLBOX 1. Review all directions and MATERIAL LIST FOR 10H92 OR 11H12 diagrams provided before ITEM PART # DESCRIPTION WT-lb/ea. starting toolbox installation. 10H88 18” Toolbox Bracket 11.34 22H71 Toolbox Rubber Spacer 2. - Page 56 This Page Intentionally Left Blank...
-
Page 57: Operation
WARNING: MAKE SURE WORK AREA IS CLEAR OF PEOPLE AND OBSTACLES PRIOR TO DUMPING OR UNLOADING CONTAINERS. SWAPLOADER STRONGLY RECOMMENDS THAT A BACKUP ALARM BE INSTALLED ON THE TRUCK CHASSIS. THE OPERATION OF THE HOOK HOIST IS THAT THE TRUCK IS BACKED UP TO THE BODY TO PICK IT UP AND SO THERE IS A POTENTIAL PINCH POINT BETWEEN THE BODY AND THE HOOK. - Page 58 STEP 2. EXTEND THE MAIN LIFT CYLINDERS (LEFT CONTROL BACKWARD). CAUTION: DO NOT RETRACT THE JIB WHILE DUMPING. RETRACTING THE JIB DURING DUMPING MAY UNLOCK THE MECHANICAL JIB LATCHES WHICH COULD ALLOW THE CONTAINER TO CRASH DOWN ONTO THE HOIST AND/OR ABRUPTLY UNLOAD. 3.0.OPE.SL-214...
-
Page 59: Placing A Container On The Ground
CONTAINER AND ROTATE JIB BACK INTO THE TRANSPORT POSITION. WARNING: 1. DON'T OVER SPEED THE PUMP 1,500 RPM MAXIMUM. 2. DON'T DUMP, MOUNT OR DISMOUNT BODIES ON UNEVEN GROUND. DON'T DRIVE WITH THE HOIST IN THE DUMP POSITION OR WITH THE HOOK TILTED BACK. 3.0.OPE.SL-214... - Page 60 STEP 1. WITH THE TELESCOPIC ARM IN THE TRANSPORT POSITION (AS SHOWN); REMOVE THE HITCH PIN FROM THE LOCK PIN. THEN PULL THE LOCK PIN LOOSE FROM THE JIB ARM. STEP 2. RETRACT THE JIB (RIGHT CONTROL LEVER BACKWARD). STEP 3. TILT THE TELESCOPIC ARM REARWARD (LEFT CONTROL LEVER BACKWARD). 3.0.OPE.SL-214...
- Page 61 REPLACE LOCK PIN AND SECURE WITH HITCH PIN. WARNING: DO NOT REMOVE LOCK PIN ON THE ADJUSTABLE JIB WHILE JIB IS IN THE 36” HOOK POSITION AND THE TELESCOPIC ARM IS TILTED REARWARD (AS SHOWN). POSSIBLE PROPERTY DAMAGE AND/OR PERSONAL INJURY MAY RESULT. 3.0.OPE.SL-214...
- Page 62 FROM THE LOCK PIN. THEN PULL THE LOCK PIN LOOSE FROM THE JIB ARM. STEP 2. TILT THE TELESCOPIC ARM TOWARD THE CAB (LEFT CONTROL LEVER FORWARD). STEP 3. EXTEND THE JIB TOWARD THE CAB (RIGHT CONTROL LEVER FORWARD). 3.0.OPE.SL-214...
- Page 63 LOCK PIN AND SECURE WITH HITCH PIN. WARNING: DO NOT REMOVE LOCK PIN ON THE ADJUSTABLE JIB WHILE JIB IS IN THE 54” HOOK POSITION AND THE TELESCOPIC ARM IN TRANSPORT POSITION (AS SHOWN). POSSIBLE PROPERTY DAMAGE AND/OR PERSONAL INJURY MAY RESULT. 3.0.OPE.SL-214...
- Page 64 This Page Intentionally Left Blank...
-
Page 65: Rear Roller Spacing Adjustment Instructions
41 5/8” outside width as ‘wide spacing’. HOIST STANDARD: All SwapLoader hooklift hoists are made so that the rear rollers can be spaced at either the wide spacing or narrow spacing depending on the subframe design (the only exception is the SL-105 which can only accommodate a ‘wide spacing’... - Page 66 Section III: Operation REAR ROLLER SPACING ADJUSTMENT INSTRUCTIONS (cont’d) NARROW TO WIDE ROLLER SPACING ADJUSTMENT: To change a hoist from the narrow roller spacing to a wide roller spacing follow these instructions: 1. Loosen and remove the retaining bolts, washers and roller retainer. 2.
-
Page 67: Maintenance
2. Change hydraulic oil, replace hydraulic filter element, and wash out YEARLY SERVICE suction strainer. 3. Check main relief valve setting. Refer to the pressure check instructions on Pgs. 4-7 & 4-9 of the Maintenance section (pressure should be 3,250 psi minimum). 4.0.MAI.SL-214... -
Page 68: Lubrication Diagram
Section IV: Maintenance LUBRICATION DIAGRAM LEGEND GW = Grease Weekly GM = Grease Monthly 4.0.MAI.SL-214... -
Page 69: Hydraulic Oil Specifications & Interchange Chart
Company Filter Part Number Filter Part Number Name Name Baldwin BT8443 Hydac 0085MA010P Behringer BSO92E10N25 SPE25-10 Donaldson P550255 Norman Fleetguard HF6511 F4E-040CCB Flow Ezy FEEE30-10L Purolator 20201 PFE40-10N Zinga* AE-10L * Brand of Element supplied from factory on hoist 4.0.MAI.SL-214... -
Page 70: Mast Lock (Pivot Lock) Inspection
Section IV: Maintenance MAST LOCK INSPECTION The SL-214 hook-lift hoist comes with a mast lock (safety latch) assembly that is located on the bottom side of the outer tube. When the jib is extended the mast lock then engages the cross bar on the pivot joint, making the jib, outer tube, and pivot joint into a continuous member for raising the container or body into a dump mode. -
Page 71: Jib Lockout Valve Inspection & Adjustment Instructions
Section IV: Maintenance JIB LOCKOUT VALVE INSPECTION & ADJUSTMENT INSTRUCTIONS All SwapLoader hook-lift hoists have a jib lockout valve to prevent accidental operation of the telescopic jib, while the hoist is up in a dump mode. If the jib lockout valve... - Page 72 Once the valve has been moved back into proper adjustment, then tighten up the mount bracket screws. SPECIFICATION PART NUMBER & SwapLoader Work Port Size Spool Type Pt. No. 21P28 3/4-16 ORB (SAE 8) 2-Way, 2-Position N.C. Please contact your SwapLoader Distributor or SwapLoader USA should you have any questions regarding this procedure. 4.0.MAI.SL-214...
-
Page 73: Pressure Check Instructions
2 to 3 foot in length (see illustration below). Should you not be able to source a hydraulic gauge locally, SwapLoader can provide one at a reasonable cost (Hyd. Pressure Gauge & Hose Assembly – Pt. No. 22P10). - Page 74 Section IV: Maintenance This 90° male #4 JIC hydraulic adapter is supplied by SwapLoader and should be installed in the hydraulic control valve at the time of the hoist installation (see the hoist parts & operations manual). 2. Remove the female JIC #4 cap from the male JIC #4 adapter and attach the pressure gauge to the hydraulic control valve (see illustration below).
- Page 75 Continue to push the lever forward until steps 5-6 are complete. 5. Check the gauge for the maximum developed system pressure. The SL-214 should have a reading of 3,250 PSI. 6. With the pressure check complete; release all functions.
-
Page 76: Outer Tube Clamp Assembly Inspection Instructions
INSPECTION The illustration below is a typical hoist clamp assembly for the SwapLoader SL-214 hoist model. For optimum performance out of your SwapLoader SL-214 hooklift the gap between the top of the jib horizontal tube and the top inside surface of the outer tube should be kept between 1/16”... -
Page 77: Ehv Manual Over-Ride Instructions
USED TO ASSIST IN PRESSING IN THE VALVE SPOOL BUTTON. CAUTION! NOTE 3: BE CAREFUL OF YOUR SURROUNDINGS AND PROPERLY WORKING PUMP & PTO IS REQUIRED TO ANY BODIES LOADED ON HOIST WHEN MOVE CYLINDERS. MANUALLY ACTUATING CYLINDERS! 4-11 4.0.MAI.SL-214... - Page 78 This Page Intentionally Left Blank...
-
Page 79: Main Frame Sub-Assembly
Section V: Parts 13H51 - BASE HOIST ASSEMBLY SL-214 DISC-LOCK WASHER TORQUE SPECS PART ITEM DESCRIPTION lb/ea. lb/all SAE GR 8 BOLT Fixed Jib Sub-Assembly 291.80 291.80 13H08 ASS’Y TORQUE SIZE 13H22 Body Lock Weldment 87.31 87.31 (FT-LBS) Tube Stop Weldment 3.02... - Page 80 Section V: Parts 13H52 – MAIN FRAME SUB-ASSEMBLY SL-214 DISC-LOCK WASHER PART TORQUE SPECS ITEM DESCRIPTION lb/ea. lb/all SAE GR 8 BOLT Main Frame Pin 12H29 5.50 11.00 ASS’Y TORQUE SIZE 13H55 Main Frame Weldment 553.36 553.36 (FT-LBS) Jib Lockout Mnt Wdmt, 5x4-1/4 42H11 2.39...
- Page 81 Section V: Parts 13H53 – PIVOT JOINT SUB-ASSEMBLY SL-214 DISC-LOCK WASHER TORQUE SPECS PART ITEM DESCRIPTION lb/ea. lb/all SAE GR 8 BOLT Pin, PJ/MF 2-1/4 x 9 12H27 11.15 22.30 ASS’Y TORQUE SIZE 13H23 Pin, PJ/OT 2-1/4 x 5-1/2 6.43 12.86...
- Page 82 Section V: Parts 13H54 – OUTER TUBE SUB-ASSEMBLY SL-214 DISC-LOCK WASHER TORQUE SPECS PART ITEM DESCRIPTION lb/ea. lb/all SAE GR 8 BOLT 10H08 Pin, Jib/Cyl 1 x 6-3/4 1.70 1.70 ASS’Y TORQUE SIZE Pivot Lock Sub-Assembly 13H06 19.15 19.15 (FT-LBS)
- Page 83 Section V: Parts 13H06 – PIVOT LOCK SUB-ASSEMBLY SL-214 DISC-LOCK WASHER TORQUE SPECS PART ITEM DESCRIPTION lb/ea. lb/all SAE GR 8 BOLT 13H24 Take Up Wdmt, 3/8-16UNCx4-1/2 0.21 0.42 ASS’Y TORQUE SIZE 25H76 Retainer, Lock Bar 0.58 0.58 (FT-LBS) 25H77 Spacer, Pivot Lock 1-1/8 0.10...
-
Page 84: Fixed Jib Sub-Assembly
Section V: Parts DISC-LOCK WASHER 13H08 – FIXED JIB SUB-ASSEMBLY SL-214 TORQUE SPECS PART ITEM DESCRIPTION lb/ea. lb/all SAE GR 8 BOLT 13H19 Fixed Jib Weldment 36" 310.44 310.44 ASS’Y TORQUE SIZE Wear Pad, 2-3/4x1/2x3-1/4 (FT-LBS) 23H54 0.19 0.19 24H67 Shim, Jib 2-3/4 x 14GA x3-1/4 0.20... -
Page 85: Hoist Installation Kit
13H59 – HOIST INSTALLATION KIT SL-214 DISC-LOCK WASHER TORQUE SPECS PART ITEM DESCRIPTION lb/ea. lb/all SAE GR 8 BOLT Parts & Op, SL-214 13H61 1.00 1.00 ASS’Y TORQUE SIZE 13H62 Decal Assembly, SL-214 0.74 0.74 (FT-LBS) Mount Bkt, 8 1/4 x 5 25H89 2.08... -
Page 86: Base Cylinder Circuit
Section V: Parts 90H92 – BASE CYLINDER CIRCUIT SL-214 PART ITEM DESCRIPTION lb/ea. lb/all 90H74 Nylon Hose Sleeve x 60" 0.25 0.25 Adp Hyd 08MJ/08MB 10P39 0.10 0.20 10P43 Adp Hyd 08MJ/08MJ BHD 0.30 0.60 Adp Hyd 08MJ/08MB 90 11P23 0.30... - Page 87 Section V: Parts 90H93 – TANK CIRCUIT SL-214 PART ITEM DESCRIPTION lb/ea. lb/all Adp Hyd 20MP/16MP 10P26 0.70 0.70 10P37 Adp Hyd 04MJ/04MP 90 0.30 0.30 Adp Hyd 04FJ Cap 10P38 0.10 0.10 10P44 Adp Hyd 08MJ/08FJ 90 0.30 0.90...
- Page 88 Section V: Parts 90H91 – PUMP CIRCUIT SL-214 PART ITEM DESCRIPTION lb/ea. lb/all 10P21 T-Bolt Clamp - 1-1/2 Dia 0.10 0.20 Adp Hyd 10MJ/12MB 45 10P32 0.30 0.30 10P35 Adp Hyd 10MJ/12MB 0.30 0.30 Hose Assy 106 08-10FJ/10FJ90 10P61 3.80 3.80...
-
Page 89: Manual Controls, 2-Section
Section V: Parts 90H72 – MANUAL CONTROLS, 2-SECTION SL-214 PART ITEM DESCRIPTION lb/ea. lb/all Valve Mount Bracket 10H51 8.20 8.20 20P08 Control Handle, Cable 2.80 5.60 Control Console, 2 Sect 20P09 4.10 4.10 20P10 Bonnet Kit, V20 0.50 1.00 Control Cable Assy, 84" Std 20P15 1.83... - Page 90 This Page Intentionally Left Blank...
-
Page 91: Options
VI: Options 13H07 – ADJUSTABLE JIB SUB-ASSEMBLY SL-214 DISC-LOCK WASHER TORQUE SPECS PART ITEM DESCRIPTION lb/ea. lb/all SAE GR 8 BOLT Pivot Pin 12H35 3.20 3.20 ASS’Y TORQUE SIZE 12H36 Lock Pin 3.00 3.00 (FT-LBS) 13H18 Adj. Jib Wdmt 36"/54"... - Page 92 VI: Options 91H47 – CYLINDER CIRCUIT, BL 214 SL-214 PART ITEM DESCRIPTION lb/ea. lb/all Body Lock Mount Shim 27H14 4.11 8.22 44H76 Body Lock Assy, Hyd 100 84.58 84.58 Nylon Hose Sleeve x 60" 90H74 0.25 0.25 00767 Washer, Lock - 5/8 Dia 0.04...
- Page 93 VI: Options 44H76 – U-LOCK ASSEMBLY SL-214 PART ITEM DESCRIPTION lb/ea. lb/all Prong, U-Lock 26H97 6.58 13.16 44H77 Universal Lock Wdmt 43.14 43.14 Linkage Wdmt 44H78 1.74 6.96 00837 Pin, Cotter 3/16 Dia x 2 0.02 0.04 00P55 Nut, Lock 5/8-11 UNC Gr8 0.08...
-
Page 94: Air Controls, 2-Section
VI: Options 91H16 – AIR CONTROLS, 2-SECTION SL-214 PART ITEM DESCRIPTION lb/ea. lb/all 10H51 Valve Mount Bracket 8.20 8.20 12P94 Air Line Kit 1.40 1.40 20P72 Control Handle, 2-Section Air 1.60 1.60 20P74 Air Pressure Protection Valve 0.60 0.60 Air Shift Kit, V20 20P95 1.40... - Page 95 FITTING AND TUBING SHOWN ARE PART OF THE 12P94 AIR LINE KIT WHICH CONTAINS FITTINGS FOR MULTIPLE HOIST/PLUMBING CONFIGURATIONS. NOT ALL FITTINGS MAY BE UTILIZED. THE 20P95 AIR SHIFT KITS ARE TO BE INSTALLED ON THE HYD. CONTROL VALVE BY THE HOIST INSTALLER. PREFERENCE INSTALLTION INSTRUCTIONS INCLUDED WITH THE AIR SHIFT KIT. 6.0.OPT.SL-214...
- Page 96 VI: Options 91H48 – MANUAL CONTROLS, 3-SECTION SL-214 PART ITEM DESCRIPTION lb/ea. lb/all Valve Mount Bkt, 3-Sect 13H76 11.47 11.47 20P08 Control Handle, Cable 2.80 8.40 Bonnet Kit, V20 20P10 0.50 1.50 20P15 Control Cable Assy, 84 STD 1.83 5.49...
- Page 97 VI: Options 91H49 – AIR CONTROLS, 3-SECTION SL-214 PART ITEM DESCRIPTION lb/ea. lb/all Valve Mount Bkt, 3-Sect 13H76 11.47 11.47 51H37 Air Ctrl Console, 3-Sect 4.90 4.90 Air Line Kit 12P94 1.40 1.40 20P73 Control Handle, 3 Sect Air 2.40 2.40...
- Page 98 FITTING AND TUBING SHOWN ARE PART OF THE 12P94 AIR LINE KIT WHICH CONTAINS FITTINGS FOR MULTIPLE HOIST/PLUMBING CONFIGURATIONS. NOT ALL FITTINGS MAY BE UTILIZED. THE 20P95 AIR SHIFT KITS ARE TO BE INSTALLED ON THE HYD. CONTROL VALVE BY THE HOIST INSTALLER. PREFERENCE INSTALLTION INSTRUCTIONS INCLUDED WITH THE AIR SHIFT KIT. 6.0.OPT.SL-214...
-
Page 99: Hoist Installation Kit (Ehv)
13H63 – HOIST INSTALLATION KIT (EHV) SL-214 DISC-LOCK WASHER TORQUE SPECS PART ITEM DESCRIPTION lb/ea. lb/all SAE GR 8 BOLT 13H61 Parts & Op, SL-214 1.00 1.00 ASS’Y TORQUE SIZE 13H62 Decal Assembly, SL-214 0.74 0.74 (FT-LBS) 25H89 Mount Bkt, 8 1/4 x 5 2.08... - Page 100 VI: Options 91H23 – TANK CIRCUIT (EHV) SL-214 PART ITEM DESCRIPTION lb/ea. lb/all Adp Hyd 20MP/16MP 10P26 0.70 0.70 11P20 Worm Gear Clamp (HSS16) 0.10 0.20 Adp Hyd 16MP/12FP 12P21 0.20 0.20 12P22 Adp Hyd 12HB/12MP 0.30 0.30 Hose 3/4 x 24 LP 12P29 0.88...
-
Page 101: Tank Circuit, 3-Section
VI: Options 91H44 – TANK CIRCUIT, 3-SECTION SL-214 PART ITEM DESCRIPTION lb/ea. lb/all Extension Screw 5/16-18 01P97 0.03 0.06 01P98 Adp Hyd 10MJ/12MB 45 0.30 0.30 Hose Assy 106 08-10FJ/10FJ90 10P26 3.80 3.80 10P37 Adp Hyd 16HB/16MB 0.40 0.40 Adp Hyd 10HB/10MP 10P38 0.30... - Page 102 VI: Options 91H22 – PUMP CIRCUIT (EHV) SL-214 PART ITEM DESCRIPTION lb/ea. lb/all T-Bolt Clamp - 1-1/2 Dia 10P21 0.10 0.20 10P32 Adp Hyd 10MJ/12MB 45 0.30 0.30 Hose Assy 106 08-10FJ/10FJ90 10P61 3.80 3.80 12P18 Adp Hyd 16HB/16MB 0.40 0.40...
- Page 103 VI: Options 91H27 – HOSE CIRCUIT, 2-SECTION (EHV) SL-214 PART ITEM DESCRIPTION lb/ea. lb/all 10P44 Adp Hyd 08MJ/08FJ 90 0.30 0.60 10P63 HHCS 5/16 x 1-3/4 0.03 0.06 10P64 Cover Plate. Clamp 1/2 0.10 0.20 10P65 Clamp Assy, Twin, 7/8"...
-
Page 104: Hose Circuit, 3-Section (Ehv)
VI: Options 91H40 – HOSE CIRCUIT, 3-SECTION (EHV) SL-214 PART ITEM DESCRIPTION lb/ea. lb/all 01P97 Extension Screw 5/16-18 0.03 0.03 01P98 Clamp, Ext. Plate 0.01 0.01 10P44 Adp Hyd 08MJ/08FJ90 0.30 1.20 10P63 HHCS 5/16 x 1-3/4 0.03 0.06 10P64 Cover Plate. - Page 106 1800 NE BROADWAY AVENUE DES MOINES, IA 50313 TOLL FREE: 888-767-8000...
Need help?
Do you have a question about the SL-214 and is the answer not in the manual?
Questions and answers