Table of Contents
Advertisement
Advertisement
Table of Contents

Related Manuals for Hydro-Force Nautilus MX3-500H


Summary of Contents for Hydro-Force Nautilus MX3-500H
- Page 1 MX3-500H Nautilus Operating Manual REVISED: 01-29-2015 LMANN14...
-
Page 2: Table Of Contents
Nautilus MX3-500H Operating Manual TABLE OF CONTENTS TOPIC PAGE # • Introduction • Technical Specifications • Optional Equipment SECTION 1: Operational Safety • Electrical Safety • Mechanical Safety SECTION 2: Operation Procedures • Vacuum Connections • Electrical Supply • Water Supply & Chemicals •... -
Page 3: Introduction
The Hydro-Force Nautilus MX3-500H is intended for commercial use only. This manual will provide users with the knowledge required to operate the Nautilus MX3-500H safely, to understand how to properly operate and maintain the machine, and to ensure that the equipment operates at its maximum performance level. -
Page 4: Technical Specifications
Technical Specifications MX3-500H High Pressure Extractor Height: 42-1/4” Length: 34-3/8” Width: 23-3/8” Weight: 144 lbs. Solution Tank Capacity: 12 gallon Recovery Tank Capacity: 12 gallon Solution Pump: Pump-Tec #207 pump with 1/2 HP Motor - 0-500 psi – 1.06 gpm Vacuum Motors: Two AMETEK Lamb 5.7”... -
Page 5: Optional Equipment
Additional / Optional Equipment Wand Glide – Delrin AW529D Wand Glide – Teflon AW529T 18” Bottom Velcro Strap for Wand Holder NM5841 Hy-Dry Deluxe Upholstery Tool: AW50D Gekko Handle Assembly: AR51A Gekko 4” Tool Head: AR51D SX-7 Tool Head: AR51G Gekko Hand Tool: AR53 1-1/2”... -
Page 6: Electrical Safety
Section Safety This machine is an electrical appliance. Care must be taken to reduce the risk of electrical shock. READ AND UNDERSTAND ALL INSTRUCTIONS BEFORE OPERATING THE MX3-500H. • To reduce the risk of property damage or injury, repairs to electrical systems should only be performed by experienced technicians. -
Page 7: Mechanical Safety
• Solvent-based or water-based solutions containing solvents may damage the pump, hoses, and other components. Do not assume chemical compatibility. Contact your distributor or Hydro-Force if you have questions regarding the compatibility of your chemicals with the machine. -
Page 8: Vacuum Connections
Section Vacuum Connections The MX3-500H has a unique vacuum system which allows you to connect your vacuums in either parallel or in series. Vacuum connections can be changed quickly, with only a screw driver. While there is debate on which vacuum alignment provides the best extraction, this much is true: •... -
Page 9: Electrical Supply
SET UP AND OPERATION 1. Electrical Cords: Two 25’ power cords are supplied with the Nautilus MX3-500H. The amperage required by each cord requires that the two cords be plugged into separate circuits: • Cord #1 (Left side) Powers vacuum #1, vacuum #2, cooling fan. -
Page 10: Water Supply & Chemicals
2A. Water Supply & Chemical Mixing– Manual Fill: • Pour up to 12 gallons of hot water into the solution tank at the front of the machine. The water temperature cannot exceed 130° ° ° ° F. • Measure and add the appropriate amount of the desired liquid chemical to the water in the solution tank. The amount of chemical will vary depending on the type of chemical used, the amount of water in the tank, and the material being cleaned;... - Page 11 Dilution 85 - 1 Chemical Feed Hose Metering Tip Kit (Hydro-Force Item# PDE001) contains 14 different colored metering tips, allowing dilution rates from 11:1 up to 427:1. Refer to the chart below to select the tip that meets the dilution rate for your chemical application.
- Page 12 Connect the other end of the hose to a water faucet, and then turn on the water. • Hot water can be used as long as the temperature does not exceed 130°F. • Faucet adapter kits (Hydro-Force item #AX21 & AX22) are available that allow connection to different types of faucets if needed.
-
Page 13: Solution Hose & Pump Priming
3. Priming the High-Pressure Pump: Once water is in the solution tank, the high pressure pump must be primed: • There is a priming hose included with the machine. Connect the priming hose to the solution outlet – female quick connect on the front of the machine. •... -
Page 14: Heater & Vacuum Hose
5. 1750W Heater Operation: To prevent damage to the heater, the heater must have water in it before it is turned ON. Fill solution tank, prime the pump and connect solution hoses before turning heater While the heater allows for maximum operating temperature of approximately 190ºF, the temperature of the cleaning water delivered to the tool is dependent on two factors: •... -
Page 15: Foam Downer
7. Optional Foam Downer: A key problem with portable extractors is that they have small tanks where foam dissipates slowly. If you have had issues with foam or are anticipating foaming problems, you will want to use a Foam Downer. Foam can be drawn into the vacuums before the vacuum shutoff closes. -
Page 16: Pump-Out System
8. Connection of Optional Pump-Out Hose: If your machine has the Optional Auto Pump-Out System you may want to connect the Pump-Out Hose. The pump-out hose is a 50’ section of 3/4” garden hose. (Use of smaller diameter hose may reduce flow.) •... -
Page 17: Pressure Adjustments
9. Pressure Adjustment: To make it easier to check and adjust the pressure, the pressure gauge and the pressure regulator are mounted on the control panel on the front of the machine. When the high-pressure solution pump is on and primed, pressure will show on the gauge. -
Page 18: Shutdown Procedures
Shutdown Procedures: • If using the optional auto-fill system, turn the water supply off before finishing each job. This will allow use of the water and chemical already in the tank, and will reduce the amount of excess water to be disposed of later. -
Page 19: Accessory Storage
Accessory Storage Options: The MX3-500H is designed to make it easier for the operator to transport the machine and the most common cleaning accessories. Bucket & Sprayer Storage The top of the MX3-500H is sized and recessed to hold a five gallon bucket or two one-gallon chemical bottles as well as two 2QT sprayers. -
Page 20: Troubleshooting
Section Troubleshooting Troubleshooting – Nautilus MX3-500H Problem Cause Solution Machine not Building circuit breaker tripped. Reset breakers or move cords to other outlets turning on - Faulty power cord Replace cord (AX33) No power Faulty switches or internal wiring Check wiring & test switches - Repair as needed *... - Page 21 Problem Cause Solution Dual Circuit Cords on the same circuit Move one cord to outlet on different circuit Indicator No voltage from one/ both outlets Check circuit breakers – Reset breakers or move cords Not Lighted Light Bad Replace Light Dual Circuit Indicator Bad Replace indicator If hot &...
- Page 22 Problem Cause Solution Tool won't Jets clogged Clean out or replace jets spray - low or Inline filter clogged Clean out or replace filter uneven spray Jets worn Replace jets Jets not aligned properly Re-align jets Tool valve faulty Repair or replace valve Quick connects or hoses restricted Clean out or replace quick connects and/or hoses Solution Tank...
-
Page 23: Solution Flow Path
MX3-500H Solution Flow Path Optional Auto Optional – Auto Fill Float Fill Inlet Quick Valve Assembly Connect Solution Tank Outlet Quick Connect Filter Chemical Jug Pump – AP52 Pressure Regulator 1750W Heater PT021 Denotes Denotes Water Denotes by-pass Denotes Chemical flow incoming water flow in high water flow from... -
Page 24: Wiring Diagrams
M1200 MX3-500H Wiring Diagram Wiring Diagram – Cord #1 PUMP OUT HEATER SOL PUMP VAC 2 VAC 1 10AMP BREAKER 12GA COOLING FAN CORD #1 12/3 Dual Circuit Indicator HEATER PUMP OUT SOLUTION VAC2 VAC1 1750W PUMP 1 CIRCUIT Machine Base... - Page 25 MX3-500H Wiring Diagram – Cord #2 PUMP OUT HEATER SOL PUMP VAC 2 VAC 1 10AMP BREAKER 12GA COOLING FAN CORD #2 12/3 Dual Circuit Indicator HEATER PUMP OUT SOLUTION VAC2 VAC1 1750W PUMP 1 CIRCUIT Machine Base...
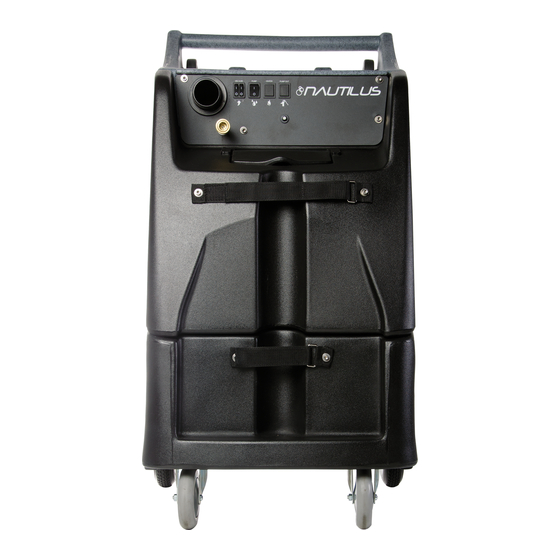
- Page 26 NAUTILUS MX3-500H SWITCH PANEL: (Shown with optional Pump-Out) Heater – Power from Cord #2. When the switch is turned to the ON position power is supplied to the 1750W heating element. Vacuum #1 – Power from Cord #1. When the switch is turned to the ON position power is supplied to the vacuum motor.
-
Page 27: Maintenance
Section Maintenance Proper maintenance is required to keep the MX3-500 H operating properly, prevent downtime and to extend the life of your equipment. This machine is an electrical appliance. Care must be taken to reduce the risk of electrical shock. Disconnect electrical power before performing any service or maintenance inside machine base or before testing or repairing switches or power cords. - Page 28 CLEAN CHEMICAL FEED FILTER & FOOT VALVE: (If so equipped) Part of the optional Auto Fill & Chemical Feed system, the Filter & Foot Valve is on the end of the chemical feed hose that is placed in the chemical jug as part of the chemical feed system. Regularly examine the filter and clean as needed.
- Page 29 CLEAN THE HYDRO-FILTER II: (If so equipped) When used with the MX3-500H, build-up of debris in the filter screen of the optional Hydro-Filter II will reduce the vacuum air flow and may cause a significant decrease in water recovery. A torn filter screen will allow debris past the filter and into the recovery tank.
- Page 30 CLEAN WASTE PUMP-OUT PUMP: (If so equipped) Build-up of fine silt inside the optional Waste Pump can clog the pump even if the pump is not used, so this maintenance procedure should be performed regardless of whether the Waste Pump has been used. •...
- Page 31 FLUSH SOLUTION TANK AND PUMP: (continued from previous page) • Disconnect the solution hose and tool. • Use the vacuum hose to vacuum the remaining acid solution out of the solution tank. • Pour two or three gallons of clean water into the solution tank. •...
- Page 32 FLUSH CHEMICAL SYSTEM: (If so equipped) Chemical build-up in the optional Auto Fill chemical system can prevent the system from drawing chemical. • Rinse the chemical system with fresh water (For heavy chemical build-up, a mild acid can be added to the rinse water.) •...
- Page 33 LUBRICATE REGULATOR PISTON SEAL To maintain consistent adequate pressure delivery to the cleaning tool, the piston seal of the MX3-500H pressure regulator must be lubricated regularly. Brass Knob 1. Release pressure from system before proceeding. 2. Remove Brass Knob from the regulator body. 3.
- Page 34 CLEAN RECOVERY TANK DRAIN Debris and sand accumulation in the drain valve can damage the valve or prevent it from closing completely. This will result in dirty water leaking from the valve. Use of the Hydro-Filter and regular cleaning of the recovery tank will help prevent this, but occasionally the drain valve will require cleaning or replacement.
- Page 35 Storage Prep and Freeze Protection Procedures: Your Nautilus MX3-500H must be protected from freezing. Freezing can cause serious damage to the pump, pump-out, auto-fill float valve, and any other component containing water. If the MX3-500H is transported or stored in freezing temperatures, the following procedures should be performed.
- Page 36 Section Parts Replacement parts available for repair of your MX3-500H. MX3-500H PUMP – AP52 PARTS ASSEMBLY KIT C – PT056 KIT A – PT054 KIT B – PT055...
-
Page 37: Pump
PUMPTEC #207 PUMP – AP52 ITEM DESCRIPTION PART NUMBER KIT A PLUNGER & SEALS PT054 KIT B VALVES & O-RINGS PT055 KIT C CAM & BEARING PT056 MANIFOLD PUMP HEAD STUFFING BOX CRANKCASE PLUNGER GUIDE HEAD BOLT MOUNT BOLT WASHER FLAT M6 STAINLESS STEEL PUMP COMPLETE - WITH MOTOR AP52 PUMP COMPLETE - WITHOUT MOTOR... -
Page 38: Auto-Fill
– M013 OPTIONAL AUTO-FILL ASSEMBLY NM5751 BR282A AH102B BR282A NM5751 BR286 NM5740 Float Valve Assembly See Parts Breakdown on Next Page BR286 BR138... - Page 39 OPTIONAL AUTO-FILL FLOAT VALVE ASSEMBLY NM5740...
- Page 40 Optional Pump-Out Pump AP37 PARTS ASSEMBLY...
-
Page 42: Parts Pictures
19 & 19A CONTROL PANEL 23 & 23A REAR VIEW - BASE & BASE SKIRT 55 & 56 55 & 56 41 & 41A HINGE SCREWS... - Page 43 14 & 14A 36 & 79 27 & 27A REAR VIEW – BASE, BASE SKIRT & RECOVERY TANK VACUUM PLUG ASSEMBLY...
- Page 44 3, 58 & 59 55 & 56 55 & 56 3, 58 & 59 TOP VIEW OF BASE...
- Page 45 VACUUM MOUNTS & CONNECTIONS 9, 54 & 64 9, 54 & 64 9, 54 & 64...
- Page 46 63 & 55 61 & 62 3 & 59 61 & 62 3 & 59 BOTTOM VIEW OF BASE 9 & 54 9 & 54 AP52 PUMP WITH MOTOR...
- Page 47 80 & 55 36 & 36A 9 & 41 BOTTOM VIEW SOLUTION TANK & BASE SKIRT...
- Page 48 BOTTOM VIEW SOLUTION TANK 9, 30 & 31 INSIDE SOLUTION TANK...
- Page 49 INSIDE RECOVERY TANK VACUUM SHUTOFF AND OPTIONAL PUMP-OUT FILTER REMOVED INSIDE RECOVERY TANK WITH OPTIONAL PUMP-OUT FILTER IN PLACE VACUUM SHUTOFF ASSEMBLY...
- Page 50 OPTIONAL - PUMP-OUT CONNECTIONS 97 & 9...
- Page 51 OPTIONAL PUMP-OUT PARTS FLOW...
- Page 52 HEATER PARTS 42, 42A & 98...
-
Page 53: Parts List
PART # DESCRIPTION PART # DESCRIPTION RECOVERY TANK QUICK CONNECT FEMALE ¼” NM5704 AH101B NM5702 SOLUTION TANK BR174 ADAPTER ¼” M-F PFA11 WASHER 5/16” FLAT SS NM5751 WASHER ½” FLAT SS (BEHIND CONTROL PANEL) NM5724 WHEEL 2-1/2” GRAY NM5751A WASHER ½” FLAT SS WITH NEOPRENE BACKING ACORN NUT CAP 5/16-18 CONTROL PANEL PLATE... - Page 54 KEY PART # DESCRIPTION PART # DESCRIPTION PHY094-034 NUT 10-24 NYLOCK SS BARB ½” X 3/8” MPT BR030 NM5748 AXLE REAR WHEELS – 22.5” NM5086 HOSE ½” ID CLEAR COIL AP52 500PSI PUMP WITH MOTOR PT065 205V PUMP WITHOUT MOTOR PT066 M58 1/2HP MOTOR ONLY BR020...
- Page 55 KEY PART # DESCRIPTION PART # DESCRIPTION NIPPLE ¾” X 2” PVC GROMMET 3/8” NM5744 NM4116 NM5093 HOSE ¾” ID CLEAR COIL NM5125 WASHER ½” FLAT ZINC PL PH09 HOSE CLAMP NM5725 GASKET VACUUM RISER PIPE AP37 PUMP-OUT PUMP NM5705C DECAL CSA WARNING PF20381-010 ELBOW 90 ¾”...
-
Page 56: Hose List
DESCRIPTION HOSE TYPE LENGTH NOTES VAC HOSE 2” VAC – NM5726 29” TANK END: REC TANK TO MANIFOLD SOLD PER FT 1 - NM5713 2 – NM5025 VAC END: HOSE CLAMP PA051 VAC HOSE 2” VAC – NM5726 9.5” VAC END: VAC 1 TO MANIFOLD SOLD PER FT HOSE CLAMP... -
Page 57: Warranty
Section Limited Warranty Your Nautilus MX3-500H is designed to give you years of reliable service. If a problem should arise use the troubleshooting section in the operation manual to diagnose and correct the problem if possible. If you are unable to determine the cause or solution to the problem contact your distributor or Hydro-Force for assistance.
Need help?
Do you have a question about the Nautilus MX3-500H and is the answer not in the manual?
Questions and answers