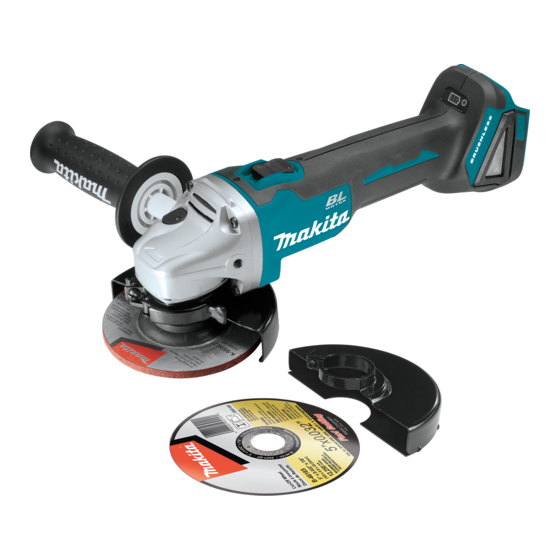
Makita XAG04 Instruction Manual
Cordless
Hide thumbs
Also See for XAG04:
- Instruction manual (16 pages) ,
- Instruction manual (32 pages) ,
- Instruction manual (15 pages)
Subscribe to Our Youtube Channel
Summary of Contents for Makita XAG04
- Page 1 INSTRUCTION MANUAL Cordless Angle Grinder XAG03 XAG04 015078 IMPORTANT: Read Before Using.
-
Page 2: Specifications
ENGLISH (Original instructions) SPECIFICATIONS Model XAG03 XAG04 Wheel diameter 115 mm (4-1/2") 125 mm (5") Max. wheel thickness 6 mm (1/4") 6 mm (1/4") Spindle thread 5/8" Rated speed (n) / No load speed (n 8,500 /min With battery cartridge BL1815N, BL1820 348 mm (13-3/4") - Page 3 13. Remove any adjusting key or wrench before Battery tool use and care turning the power tool on. A wrench or a key 24. Recharge only with the charger specified by left attached to a rotating part of the power tool the manufacturer.
- Page 4 The outside diameter and the thickness of 12. Do not run the power tool while carrying it at your accessory must be within the capacity your side. Accidental contact with the spinning rating of your power tool. Incorrectly sized accessory could snag your clothing, pulling the accessories cannot be adequately guarded or accessory into your body.
- Page 5 Safety Warnings Specific for Grinding and Abrasive d) Do not restart the cutting operation in the Cutting-Off Operations: workpiece. Let the wheel reach full speed and a) Use only wheel types that are recommended carefully re-enter the cut. The wheel may bind, for your power tool and the specific guard walk up or kickback if the power tool is restarted in designed for the selected wheel.
- Page 6 ENC007-8 22. Do not leave the tool running. Operate the tool only when hand-held. IMPORTANT SAFETY 23. Do not touch the workpiece immediately after INSTRUCTIONS operation; it may be extremely hot and could burn your skin. FOR BATTERY CARTRIDGE 24. Observe the instructions of the manufacturer for correct mounting and use of wheels.
-
Page 7: Functional Description
FUNCTIONAL DESCRIPTION 1. Slide switch CAUTION: Always be sure that the tool is switched off and the • battery cartridge is removed before adjusting or checking function on the tool. Installing or removing battery cartridge 015082 1. Button To start the tool, slide the slide switch toward the "I 2. - Page 8 Releasing protection lock Automatic speed change function When the protection system works repeatedly, the tool is locked and the battery indicator shows the following state. 1. Mode indicator Battery indicator Blinking Protection lock works 015200 In this situation, the tool does not start even if turning the tool 015142 off and on.
- Page 9 For tool with locking screw type wheel guard Installing or removing wheel guard (For depressed center wheel, multi disc / 1. Wheel guard abrasive cut-off wheel, diamond wheel) 2. Bearing box 3. Screw WARNING: When using depressed center grinding • wheel/Multi-disc, wire wheel brush, cut-off wheel or diamond wheel, the wheel guard must be fitted on the tool so that the closed side of the guard...
-
Page 10: Operation
Grinding and sanding operation Installing or removing abrasive disc (optional accessory) 1. Sanding lock nut 2. Abrasive disc 3. Rubber pad 015097 ALWAYS hold the tool firmly with one hand on housing 015092 and the other on the side handle. Turn the tool on and Mount the rubber pad onto the spindle. - Page 11 Operation with abrasive cut-off / diamond wheel (optional accessory) 1. Lock nut 2. Abrasive cut-off wheel/diamond wheel 3. Inner flange 4. Wheel guard for abrasive cut-off wheel/diamond wheel 010855 Remove the battery cartridge from the tool and place it upside down allowing easy access to spindle. Mount the inner flange and abrasive cut-off / diamond wheel onto the spindle.
-
Page 12: Maintenance
Continuing operation with a clogged dust cover may damage the tool. To maintain product SAFETY and RELIABILITY, repairs, any other maintenance or adjustment should be performed by Makita Authorized or Factory Service Centers, always using Makita replacement parts. 015094... -
Page 13: Optional Accessories
A diamond wheel and cut-off wheel are also available and should only be used with the appropriate optional guard for cutoff wheels. If you decide to use your Makita grinder with approved accessories which you purchase from your Makita distributor or factory service... - Page 14 115 mm (4-1/2") model 125 mm (5") model Grip 36 Wheel Guard (for grinding wheel) Inner flange 45 Inner flange 45 Depressed center wheel/Multi-disc Lock nut 5/8-45 Lock nut 5/8-45 Rubber pad 100 Rubber pad 115 Abrasive disc Sanding lock nut 5/8-48 Sanding lock nut 5/8-48 Wire wheel brush Wire cup brush...
- Page 15 COMPLETE tool, freight prepaid, to one of Makita’s Factory or Authorized Service Centers. If inspection shows the trouble is caused by defective workmanship or material, Makita will repair (or at our option, replace) without charge. This Warranty does not apply where:...
- Page 16 < USA only > WARNING Some dust created by power sanding, sawing, grinding, drilling, and other construction activities contains chemicals known to the State of California to cause cancer, birth defects or other reproductive harm. Some examples of these chemicals are: •...


Need help?
Do you have a question about the XAG04 and is the answer not in the manual?
Questions and answers