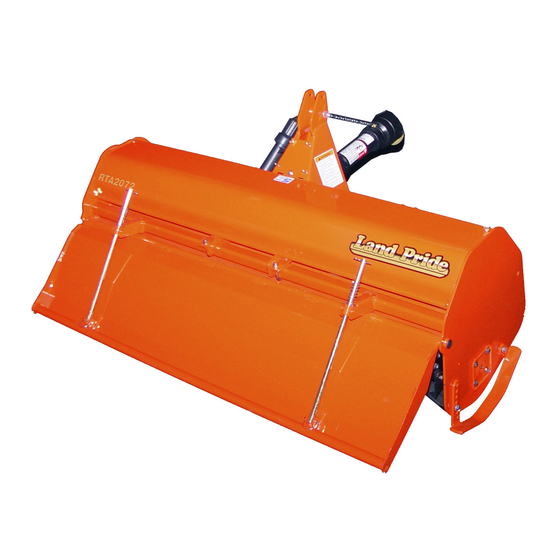
Land Pride RTA10 Series Operator's Manual
Hide thumbs Also See for RTA10 Series:

Advertisement

Quick Links

Rotary Tillers
RTA10 & RTA15 Series
RTA1042, RTA1050 & RTA1058
RTA1558, RTA1566 & RTA1574
Table of Contents
Read the Operator's Manual entirely. When you
!
see this symbol, the subsequent instructions and
warnings are serious - follow without exception.
Your life and the lives of others depend on it!
Cover photo may show optional equipment
not supplied with standard unit.
© Copyright 2013
311-252M
Operator's Manual
7/25/13
Printed
30043

Advertisement

Table of Contents
loading
Need help?

Need help?

Do you have a question about the RTA10 Series and is the answer not in the manual?

Questions and answers

Subscribe to Our Youtube Channel

Summary of Contents for Land Pride RTA10 Series

  • Page 1 Table of Contents Rotary Tillers RTA10 & RTA15 Series RTA1042, RTA1050 & RTA1058 RTA1558, RTA1566 & RTA1574 30043 311-252M Operator’s Manual Read the Operator’s Manual entirely. When you see this symbol, the subsequent instructions and warnings are serious - follow without exception. Your life and the lives of others depend on it! Cover photo may show optional equipment not supplied with standard unit.
  • Page 2 Land Pride assumes no responsibility for errors or omissions. Neither is any liability assumed for damages resulting from the use of the information contained herein. Land Pride reserves the right to revise and improve its products as it sees fit. This publication describes the state of this product at the time of its publication, and may not reflect the product in the future.
  • Page 3: Safety At All Times

    Parts Manual for this equipment. Download for Land Pride products. the appropriate App on your smart phone, Refer to Parts Manual open the App, point your phone on the QR QR Locator on this page for code, and take a picture.
  • Page 4 Table of Contents Important Safety Information These are common practices that may or may not be applicable to the products described in this manual. Use Safety Transport Use the following maximum speed - tow load weight ratios as Lights and Devices Machinery Safely a guideline: Slow moving tractors, self-...
  • Page 5 Table of Contents Important Safety Information These are common practices that may or may not be applicable to the products described in this manual. Avoid High Wear Prepare for Emergencies Pressure Fluids Hazard Protective Equipment Be prepared if a fire starts. Escaping fluid under pressure can Wear protective clothing and Keep a first aid kit and fire...
  • Page 6: Important Safety Information

    Spray soapy water on the surface where the label is to all damaged or missing labels. Order new labels from your be placed. nearest Land Pride dealer. To find your nearest dealer, Peel backing from label. Press firmly onto the surface. visit our dealer locator at www.landpride.com.
  • Page 7 Table of Contents Important Safety Information ROTATING DRIVELINE Model RTA10 22195 KEEP AWAY! 818-552C Rotating Driveline Hazard - Keep Away! Model RTA15 30043 Model RTA10 Model RTA15 30043 818-858C General Safety Instructions 7/25/13 RTA10 & RTA15 Series Rotary Tillers 311-252M...
  • Page 8 Table of Contents Important Safety Information Model RTA10 22195 818-543C Guard Missing - Do Not operate. Model RTA15 30053 818-540C Model RTA10 Shield missing - Do Not operate. Model RTA15 13042 ROTATING DRIVELINE KEEP AWAY! 818-552C Rotating Driveline Hazard - Keep Away! Model RTA10 Model RTA15...
  • Page 9: Using This Manual

    The RTA10 and RTA15 Series Rotary Tillers are correspondences with your Land Pride dealer. Refer to designed and built by Land Pride to till the soil for Figure 1 for location of your serial number plate. seedbed and planting preparation. They are adapted for 540rpm PTO, three-point hitch Category 1 mounting and are Quick-Hitch adaptable.
  • Page 10: Dealer Preparations

    RTA10 Series ..... . . 17-25 HP This unit is shipped almost completely assembled.
  • Page 11 Table of Contents Section 1: Assembly & Set-Up Hitch, Driveline Guard & Rear Chain 8. Insert lower hitch pin (#18) into clevis and secure with linch pin (#19). Refer to Figure 1-1 on page 9: 9. Repeat step 5 through 8 for the right-hand clevis. 1.
  • Page 12: Tractor Hook-Up

    Table of Contents Section 1: Assembly & Set-Up Tractor Hook-Up Refer to Figure 1-2: 1. Back tractor up to tiller until lower 3-Point lift arms are Refer to Figure 1-2: aligned with tiller hitch clevises. 2. Secure tractor’s 3-Point lower hitch arms to the lower DANGER hitch clevises using 7/8"...
  • Page 13: Driveline Installation

    Table of Contents Section 1: Assembly & Set-Up Driveline Installation Implement End Refer to Figure 1-3, Figure 1-4 and Figure 1-5: The tiller driveline is coupled to the tractor and implement shafts with either push pin couplers, pull collar couplers or a combination of both, and with either a shear bolt or slip clutch on one end for protection from shock loads.
  • Page 14: Check Driveline Collapsible Length

    Table of Contents Section 1: Assembly & Set-Up Refer to Figure 1-6: IMPORTANT: The tractor’s PTO shaft and tiller 1. Make sure driveline is installed properly before gearbox shaft must be aligned and level with each checking driveline collapsed length (Refer to other during installation of driveline.
  • Page 15: Check Driveline Maximum Length

    Table of Contents Section 1: Assembly & Set-Up 7. Remove all burrs and cuttings. Check Driveline Interference 8. Continue with “Check Driveline Maximum Length” 1. Start tractor and raise Rotary Tiller just enough to on page 13. remove support blocks from under tiller. Check Driveline Maximum Length 2.
  • Page 16: Operating Checklist

    Table of Contents Section 2: Operating Section 2: Operating Operating Checklist DANGER Hazard control and accident prevention are dependent upon the awareness, concern, prudence, and proper Keep yourself and all others away from rotating tines and training involved in the operation, transport, drive train.
  • Page 17: Section 2: Operating

    Table of Contents Section 2: Operating DANGER CAUTION Do not use tiller as a working platform. The tiller is not Make certain you are not working over any underground properly designed or guarded for this use. Using tiller as a wiring, pipes, or other obstructions.
  • Page 18: General Operating Notes

    Table of Contents Section 2: Operating Parking General Operating Notes The following steps should be done when preparing to store Before beginning to till the following inspection should be the tiller or unhitch it from the tractor. performed: 1. Check oil level in gearbox and chaincase. Refer to IMPORTANT: It is important to adjust the skid shoes “Lubrication”...
  • Page 19 Storage Directions on page 24. With a little practice and a few adjustments, you will soon be achieving the results you want with your Land Pride Rotary Tiller. See “Features and Benefits” Section 6 or “Specifications and Capacities” Section 5 for additional information and performance enhancing options.
  • Page 20: Section 3: Adjustments

    The three point and gearbox can be sideshifted to the left of tiller center for various working conditions. CAUTION Do exceed offsetting the RTA10 Series tiller 7" left or right of the gearbox input shaft. Exceeding 7" can break the driveline, CAUTION tractor PTO and tiller gearbox.
  • Page 21: Drive Chain Tension

    Table of Contents Section 3: Adjustments Drive Chain Tension Refer to Figure 3-4: IMPORTANT: Chain tightener nut has right-hand threads. Loosen nut by turning it counterclockwise. The tension on the drive chain can be easily adjusted by using the chain tightener stud. Should backlash occur, the following should be done.
  • Page 22: Skid Shoe Adjustment

    Table of Contents Section 3: Adjustments Skid Shoe Adjustment Refer to Figure 3-5: The skid shoes can be adjusted to the desired tilling depth by raising or lowering them as follows: NOTE: Tilling depth is the vertical distance from bottom of skid shoes to bottom of lowest tine. Be certain both skid shoes are adjusted the same.
  • Page 23: Tine Replacement

    Refer to Figure 4-2 below and Figure 4-3 on page 23 to determine which friction clutch your tiller has. Follow Replace worn, damaged, or illegible safety labels by run-In, disassembly, and assembly instructions for your obtaining new labels from your Land Pride dealer. specific clutch. Clutches With 4 Adjusting Nuts CAUTION...
  • Page 24: Plate Assembly

    Table of Contents Section 4: Maintenance & Lubrication Clutch Disassembly & Assembly 2-Plate Assembly If clutch run-in procedure indicates that one or more of the friction disks did not slip, then the clutch must be disassembled to separate the friction disks. IMPORTANT: Before proceeding, secure clutch Step 1 firmly in a clamping device to prevent injury.
  • Page 25: Shearbolt Protection

    Pressure flange (#7) IMPORTANT: Replace shear bolts with original c. 1st Friction Disc (#8) Land Pride equipment from your Land Pride Dealer. d. Hub with flange and pull collar (#2 & #3) See table below for correct shear bolt and nut part e.
  • Page 26 9. Repaint parts where paint is worn or scratched to prevent rust. Ask your dealer for Land Pride Aerosol touch-up paint. They are also available in touch-up bottles with brush, quarts, and gallon sizes by adding TU, QT, or GL to the end of the Aerosol part number.
  • Page 27: Driveline U-Joint

    Type of Lubrication: Shell Gadus S2 V220 00 flowable grease or equivalent Land Pride #821-086C (14 oz [0.41 L] cartridge) Quantity when empty: 20 oz (0.59 L) Quantity when low: Oil should reach bottom of level 30049 plug hole when in the liquid state.
  • Page 28: Bearing On Right End Of Rotor Shaft

    Table of Contents Section 4: Maintenance & Lubrication Bearing On Right End Of Rotor Shaft Type of Lubrication: Multi-Purpose Quantity = As Required 13043 22198 Screw dipstick fully in & then unscrew to check level. Oil level should be Hours between the two marks on dipstick.
  • Page 29: Section 5: Specifications & Capacities

    Overall Width 47 1/4" 55 1/4" 63 1/4" 3-Point Hitch Type Category l, Adjustable Lower Hitch Clevis with Plated Pins Fits Land Pride Quick-Hitch Offset Capabilities Yes, Cannot offset with Quick-Hitch Sideshift DimensionsCentered 16" - 26" 25" - 25" 29" - 29"...
  • Page 30 72 1/4" 80 1/4" Hitch Type Category l, Adjustable Lower Hitch Clevis with Plated Pins Fits Land Pride Quick Hitch Sideshift Capabilities Yes, Works with Land Pride Quick-Hitch Sideshift DimensionsCentered 29" - 29" 33" - 33" 37" - 37" Shifted Right 12"...
  • Page 31: Section 6: Features & Benefits

    29" - 29" Std. 22" - 36" Max. Right 36" - 22" Max. Left Fits Land Pride Quick-Hitch Allows for quick and easy one person hook-up. Does not offset with Quick-Hitch. Adjustable Parking stand Allows for easy hook-up and storage.
  • Page 32 33" - 33" Std.12" - 54" Max. Right39" - 27" Max. Left 74" Width 37" - 37" Std.16" - 58" Max. Right43" - 31" Max. Left Fits Land Pride Quick-Hitch Allows for quick and easy one person hook-up. Does not offset to the left with Quick-Hitch.
  • Page 33: Section 7: Troubleshooting

    Table of Contents Section 7: Troubleshooting Section 7: Troubleshooting Problem Cause Solution Machine makes intermittent Tines are loose. Tighten tines. clicking noise Gearbox has tooth damaged. Replace damaged gearbox. Roller chain is damaged. Replace damaged chain link. Driveline vibrates Universal joint is worn. Replace universal joint.
  • Page 34: Section 8: Torque Values Chart

    Table of Contents Section 8: Torque Values Chart Section 8: Torque Values Chart Torque Values Chart for Common Bolt Sizes Bolt Head Identification Bolt Head Identification 10.9 Bolt Size Bolt Size (Inches) (Metric) Class 5.8 Class 8.8 Class 10.9 Grade 2 Grade 5 Grade 8 in-tpi...
  • Page 35: Warranty

    This Warranty is limited to the repair or replacement of any defective part by Land Pride and the installation by the dealer of any such replacement part, and does not cover common wear items such as blades, belts, tines, etc. Land Pride reserves the right to inspect any equipment or parts which are claimed to have been defective in material or workmanship.
  • Page 36 Corporate Office: P.O. Box 5060 Salina, Kansas 67402-5060 USA www.landpride.com...

Table of Contents