Advertisement
Quick Links
Rotary Tillers
RTR12 & RTA12 Series (Serial No. 884764-)
RTR1242, RTR1250, RTR1258, RTR1266, & RTR1274
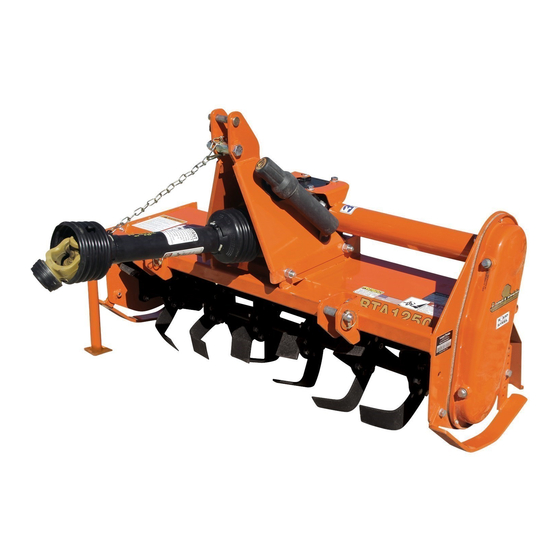
RTA1242, RTA1250, RTA1258, RTA1266, & RTA1274
30361A
Table of Contents
RTA12 Series Rotary Tillers
RTR12 Series Rotary Tillers
Operator's Manual
!
Read the Operator's Manual entirely. When you see this symbol,
the subsequent instructions and warnings are serious - follow
without exception. Your life and the lives of others depend on it!
Cover photo may show optional equipment
not supplied with standard unit.
30345A
311-785M
2/11/21
Printed
Advertisement

Related Manuals for Land Pride RTR12 Series


Summary of Contents for Land Pride RTR12 Series
- Page 1 Table of Contents Rotary Tillers RTR12 & RTA12 Series (Serial No. 884764-) RTR1242, RTR1250, RTR1258, RTR1266, & RTR1274 RTA1242, RTA1250, RTA1258, RTA1266, & RTA1274 RTR12 Series Rotary Tillers 30345A RTA12 Series Rotary Tillers 30361A 311-785M Operator’s Manual Read the Operator’s Manual entirely. When you see this symbol, the subsequent instructions and warnings are serious - follow without exception.
- Page 2 Land Pride assumes no responsibility for errors or omissions. Neither is any liability assumed for damages resulting from the use of the information contained herein. Land Pride reserves the right to revise and improve its products as it sees fit. This publication describes the state of this product at the time of its publication, and may not reflect the product in the future.
- Page 3 Parts Manual for this link you to available dealers equipment. Download the appropriate App for Land Pride products. on your camera phone, open the App, point Refer to Parts Manual your phone on the QR code and take a QR Locator on this page for picture.
- Page 4 Table of Contents Important Safety Information These are common practices that may or may not be applicable to the products described in this manual. Use Safety Transport Use the following maximum speed - tow load weight ratios as a Lights and Devices Machinery Safely guideline:...
- Page 5 Table of Contents Land Pride Important Safety Information These are common practices that may or may not be applicable to the products described in this manual. Avoid High Wear Prepare for Emergencies Pressure Fluids Hazard Protective Equipment Be prepared if a fire starts.
- Page 6 Spray soapy water on the surface where the label is to all damaged or missing labels. Order new labels from your be placed. nearest Land Pride dealer. To find your nearest dealer, Peel backing from label. Press firmly onto the surface. visit our dealer locator at www.landpride.com.
- Page 7 Table of Contents Land Pride Important Safety Information RTR12 Series 30346A 818-171C Rotating Tines Hazard! 2-places RTA12 Series 30362A 818-543C RTR & RTA Series Rotating Driveline Hazard - Keep Away! 30362A RTA1258 Shown (Applicable for both RTA & RTR Series) 2/11/21 RTR12 &...
- Page 8 Table of Contents Important Safety Information RTR12 Series 30346A 818-552C RTA12 Series 30361A Rotating Driveline Hazard - Keep Away! 3-places 30370 RTR12 & RTA12 Series (Serial No. 884764-) Rotary Tillers 311-785M 2/11/21...
- Page 9 Table of Contents Land Pride Important Safety Information 818-540C RTR & RTA Series 30370 Guard missing - Do Not operate. RTR12 Series 30346A 818-858C RTA12 Series 30361A General Safety Instructions 2-places 2/11/21 RTR12 & RTA12 Series (Serial No. 884764-) Rotary Tillers 311-785M...
- Page 10 The RTR12 and RTA12 Series Rotary Tillers are For quick reference and prompt service, record model designed and built by Land Pride to till soil for seedbed number and serial number in the spaces provided above and planting preparation with uses in both rural and non- and again on warranty page 33.
- Page 11 Table of Contents Land Pride Section 1: Assembly and Set-Up Section 1: Assembly and Set-Up Dealer Preparations Torque Requirements Check to make sure all nuts are tightened. Refer to “Torque Values Chart” on page 32 to determine correct CAUTION torque values for common bolts. See “Additional Torque To avoid bodily injury caused by accidental falling of tiller, Values”...
- Page 12 -16 x 1 1/2 bolts (#3), flat washers (#5), " " rotation tillers (RTR12 Series). See page 12 for standard lockwashers (#6), hex nuts (#4) and both front rotation tillers (RTA12 Series). deflector mounting bars (#2) from tiller frame. 2. Insert 3/8...
- Page 13 Table of Contents Land Pride Section 1: Assembly and Set-Up RTR 3-Point Hitch Assembly Refer to Figure 1-4: 8. Position clevises 26 7/8 apart from inside of clevis " Refer to Figure 1-3: plate to inside of clevis plate and centered off the...
- Page 14 The following are assembly instructions for standard 4. Tighten all hex nuts (#12 & #13) to the correct torque. rotation tillers (RTA12 Series). See page 10 for reverse rotation tillers (RTR12 Series). 5. Attach manual storage tube (#22) to hitch plate (#5) with 1/4...
- Page 15 Table of Contents Land Pride Section 1: Assembly and Set-Up 2. Secure tractor’s 3-Point lower hitch arms to the lower Refer to Figure 1-6: hitch clevises using 7/8" diameter hitch pins. Secure 9. Position clevises 26 7/8 apart from inside of clevis "...
- Page 16 Table of Contents Section 1: Assembly and Set-Up 4. Attach other end of driveline to tractor PTO shaft. DANGER 5. Move driveline yokes back and forth to ensure both ends are secured to the shafts. Reattach any yoke Do not engage tractor PTO while hooking-up and unhooking that is loose.
- Page 17 Table of Contents Land Pride Section 1: Assembly and Set-Up Shorten Driveline 3. Reattach driveline to tractor and gearbox shaft following “Driveline Installation” steps 1 to 7 on Refer to Figure 1-8 on page 14: page 14. Be sure to first check driveline collapsed length as 4.
- Page 18 Table of Contents Section 2: Operating Section 2: Operating Operating Checklist Safety Information Hazard control and accident prevention are dependent upon the awareness, concern, prudence, and proper DANGER training involved in the operation, transport, Do not engage tractor PTO while hooking-up and unhooking maintenance, and storage of the Rotary Tiller.
- Page 19 Table of Contents Land Pride Section 2: Operating DANGER WARNING Do not till across steep inclines exceeding 15 degrees. The Do not operate tiller with loose pins, bolts and nuts. Loose action of the tines being forced down into the ground can...
- Page 20 Table of Contents Section 2: Operating Transporting Parking Refer to Figure 2-1: The following steps should be taken when preparing to store the tiller or unhitch it from the tractor. CAUTION IMPORTANT: It is important to adjust skid shoes When traveling on public roads whether at night or during the down to stabilize the tiller when parked.
- Page 21 Storage Directions on page 24. With a little practice and a few adjustments, you will soon be achieving the results you want with your Land Pride Rotary Tiller. See “Features and Benefits” Section 6 or “Specifications and Capacities” Section 5 for additional information and performance enhancing options.
- Page 22 If not, decrease Adjust offset until clearance is obtained. To Suit Except for RTA1242, the RTA12 & RTR12 Series tillers Hold 26 7/8" can be shifted a maximum offset of 7 left or right of the "...
- Page 23 Table of Contents Land Pride Section 3: Adjustments Rear Deflector Refer to Figure 3-4: Rear deflector (#2) can be adjusted closer to the ground to produce a fine soil texture or raised to produce a coarse soil texture. Adjust rear deflector up or down by repositioning chain (#1) in slot “A”...
- Page 24 Figure 4-1 for the RTR12 Series or in Figure 4-2 for the RTA12 Series. Friction clutches should be “run-in” prior to initial operation and after long periods of inactivity to remove 3.
- Page 25 Table of Contents Land Pride Section 4: Maintenance and Lubrication Refer to Figure 4-3: Using a pencil or other marker scribe a line across the exposed edges of the clutch plates and friction disks. 2. Carefully loosen each of the 8 spring retainer nuts by exactly 2 revolutions.
- Page 26 4. Repaint parts where paint is worn or scratched to prevent rust. Ask your Land Pride dealer for aerosol touch-up paint. They are also available in touch-up bottles with brush, quarts, and gallon sizes by adding TU, QT, or GL to the end of the aerosol part number.
- Page 27 Table of Contents Land Pride Section 4: Maintenance and Lubrication Lubrication Points Lubrication Multi-purpose Multi-purpose Multi-purpose Intervals in hours at which spray lube grease lube oil lube lubrication is required Legend Hours Driveline U-Joint Type of Lubrication: Grease Quantity = 1-2 pumps...
- Page 28 Table of Contents Section 4: Maintenance and Lubrication Hours Bearing On Right End Of Rotor Shaft Type of Lubrication: Multi-Purpose Quantity = As Required 30356 30364A 30357A Fill Plug Fill Plug Required Chaincase IMPORTANT: Tiller should be level when checking oil level in chaincase.
- Page 29 Table of Contents Land Pride Section 5: Troubleshooting Section 5: Troubleshooting Problem Cause Solution Tines are loose. Tighten tines. Machine makes intermittent Gearbox has tooth damaged. Replace damaged gearbox. clicking noise Roller chain is damaged. Replace damaged chain link. Universal joint is worn.
- Page 30 Table of Contents Section 6: Specifications & Capacities Section 6: Specifications & Capacities RTR12 Series Rotary Tiller RTR1242 RTR1250 RTR1258 RTR1266 RTR1274 Model Recommended Tractor PTO HP 15 to 35 HP 20 to 40 HP 25 to 50 HP Weight 405 lbs.
- Page 31 55 3/8" 63 3/8" 71 3/8" 79 3/8" 3-Point Hitch Type Category l, Adjustable Lower Hitch Clevis with Plated Pins Fits Land Pride Quick Hitch Sideshift Capabilities Yes, Cannot offset with Quick-Hitch Sideshift Dimensions Centered 16" - 26" 25" - 25"...
- Page 32 Provides additional strength and easy one person hook-up. Offset Capabilities Allows tiller to work closer to objects such as fence lines, buildings and trees. Fits Land Pride Quick-Hitch Allows for quick and easy one person hook-up. (Offset cannot be used with Quick-Hitch.) Adjustable parking stand Allows for easy hook-up and storage.
- Page 33 Provides additional strength and easy one person hook-up. Offset Capabilities Allows tiller to work closer to objects such as fence lines, buildings and trees. Fits Land Pride Quick-Hitch Allows for quick and easy one person hook-up. Does not offset to the left with Quick-Hitch.
- Page 34 Table of Contents Section 8: Torque Values Chart Section 8: Torque Values Chart Torque Values Chart for Common Bolt Sizes Bolt Head Identification Bolt Head Identification 10.9 Bolt Size Bolt Size (inches) Grade 2 Grade 5 Grade 8 (Metric) Class 5.8 Class 8.8 Class 10.9 in-tpi...
- Page 35 This Warranty is limited to the repair or replacement of any defective part by Land Pride and the installation by the dealer of any such replacement part, and does not cover common wear items such as blades, belts, tines, etc. Land Pride reserves the right to inspect any equipment or parts which are claimed to have been defective in material or workmanship.
- Page 36 Corporate Office: P.O. Box 5060 Salina, Kansas 67402-5060 USA www.landpride.com...
Need help?
Do you have a question about the RTR12 Series and is the answer not in the manual?
Questions and answers